
Basement Finishing Step by Step A DIY Guide
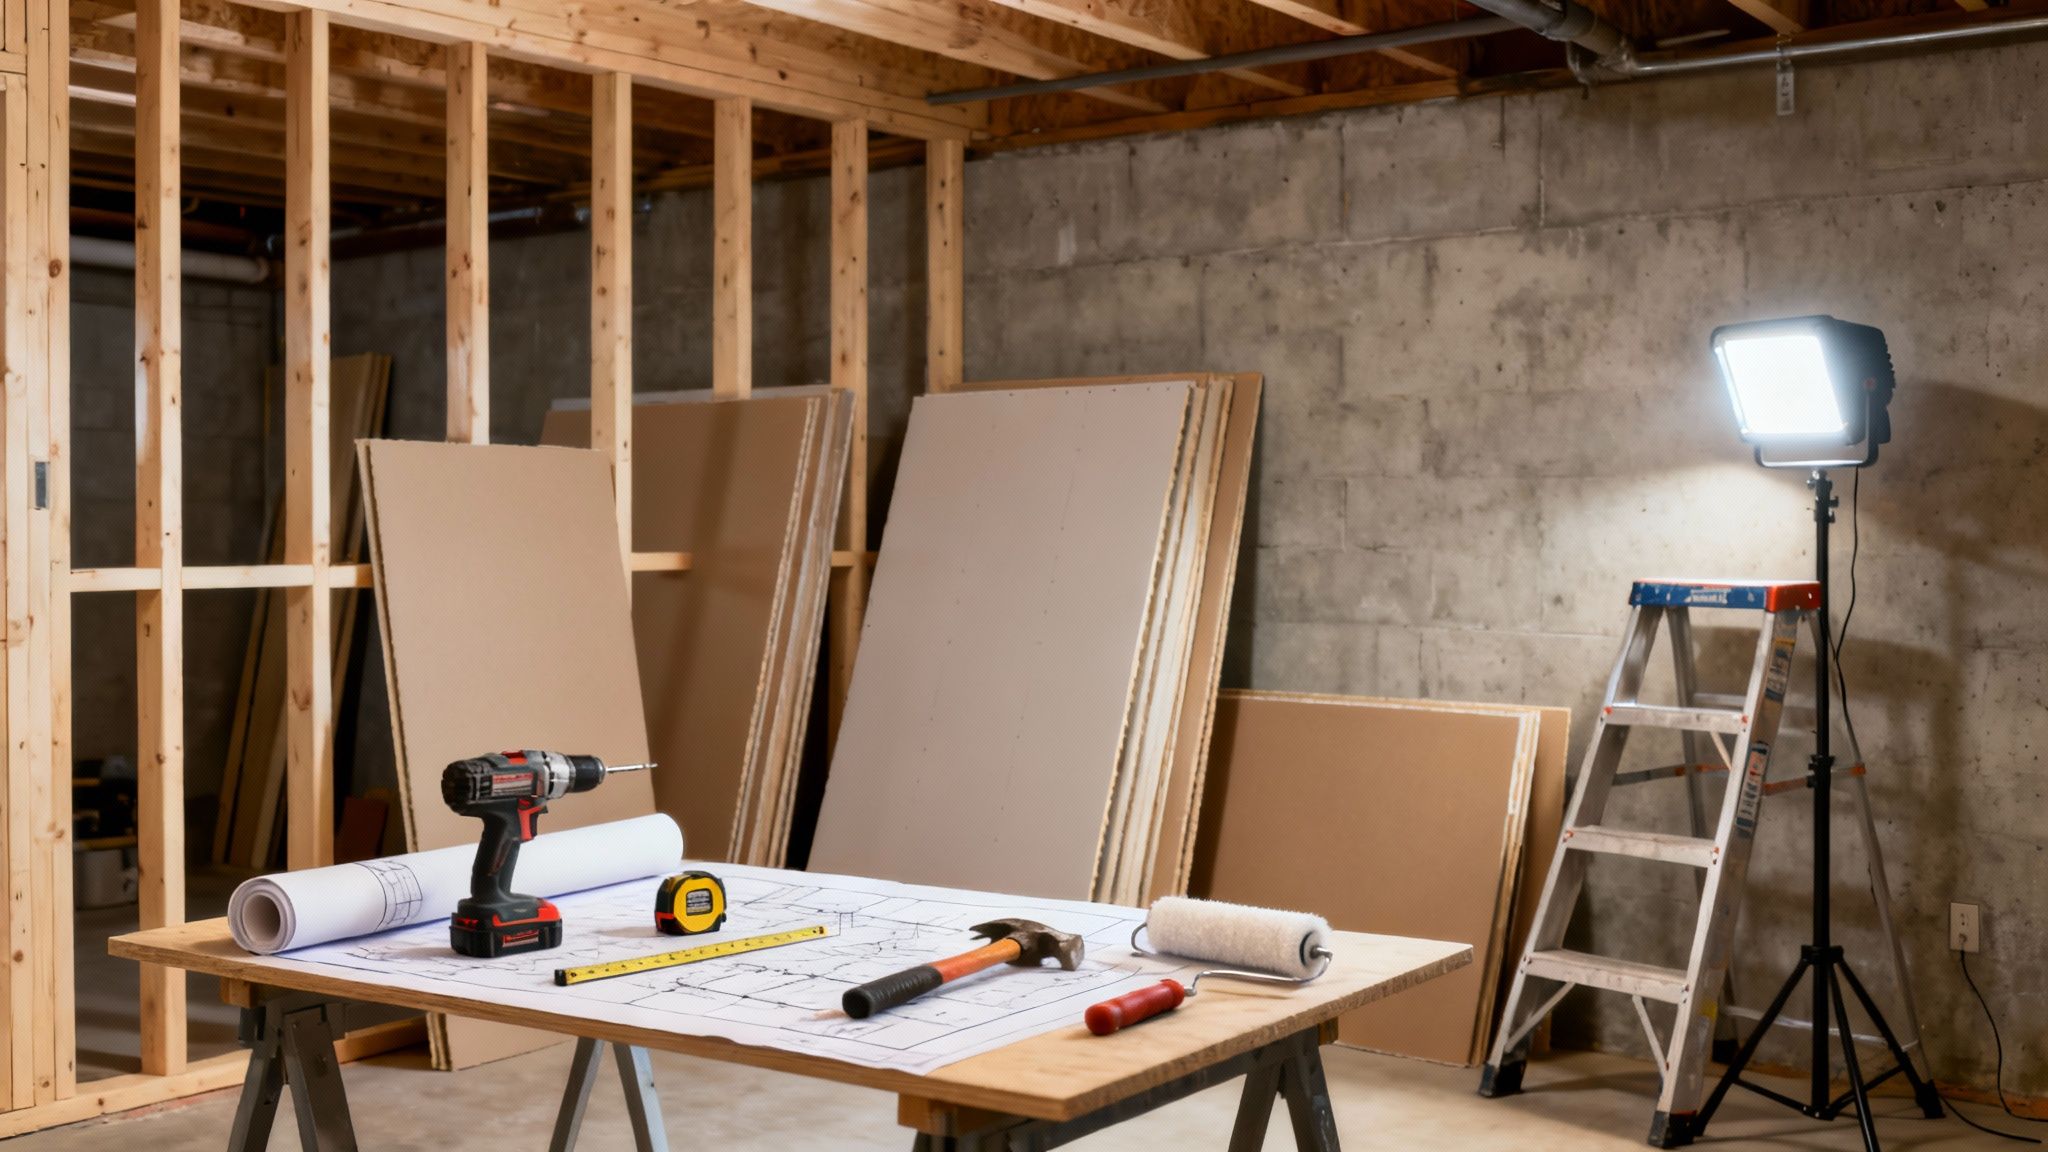
Finishing your basement is less like a single project and more like a series of smaller, crucial missions that all start with a rock-solid plan. The whole basement finishing step by step process hinges on getting the prep work right—testing, permitting, and smart design—before a single 2x4 is cut. This upfront work is what ensures your new space is safe, legal, and built to last.
Laying The Groundwork For A Flawless Finish
Every truly great basement remodel begins long before the first wall goes up. In my experience, this initial phase is the most critical because it forces you to tackle the unique challenges of building below ground. Skipping these checks is a recipe for disaster, often leading to costly rework, stubborn moisture problems, or even health hazards down the road.
Think of it like prepping a car for a new paint job. You wouldn't just spray over rust and dirt. In the same way, you can't just throw up drywall over potential water issues or unpermitted electrical work. The time you invest here pays for itself ten times over.
Testing For Moisture And Radon
Before you do anything else, you need to understand the environment you're working with. Basements are natural magnets for two invisible threats: moisture and radon gas.
- Moisture Testing: The first, non-negotiable step is checking for water. A classic DIY test works wonders: just tape a 2x2 foot square of plastic sheeting to your concrete walls and floor. Let it sit for a few days. If you see condensation under the plastic, moisture is wicking up through the concrete. If it's on top, you've got high humidity in the air. Either way, you have an issue to solve.
- Radon Testing: Radon is a sneaky, invisible gas that rises from the soil and can get trapped in basements. As a leading cause of lung cancer in non-smokers, it's not something to ignore. You can grab simple DIY test kits at any hardware store—they’re cheap, easy, and absolutely essential for ensuring your family is breathing healthy air.
A huge part of this prep work is making sure the space is completely waterproof. Getting familiar with what tanking in construction involves is a great starting point for protecting your investment from moisture. For more detailed methods, check out our guide on how to waterproof basement walls at https://buildnp.com/blogs/how-to-waterproof-basement-walls/.
This simple flow chart really nails the proper sequence: first, you test the space. Then, you get legal approval. Only then do you finalize the layout.
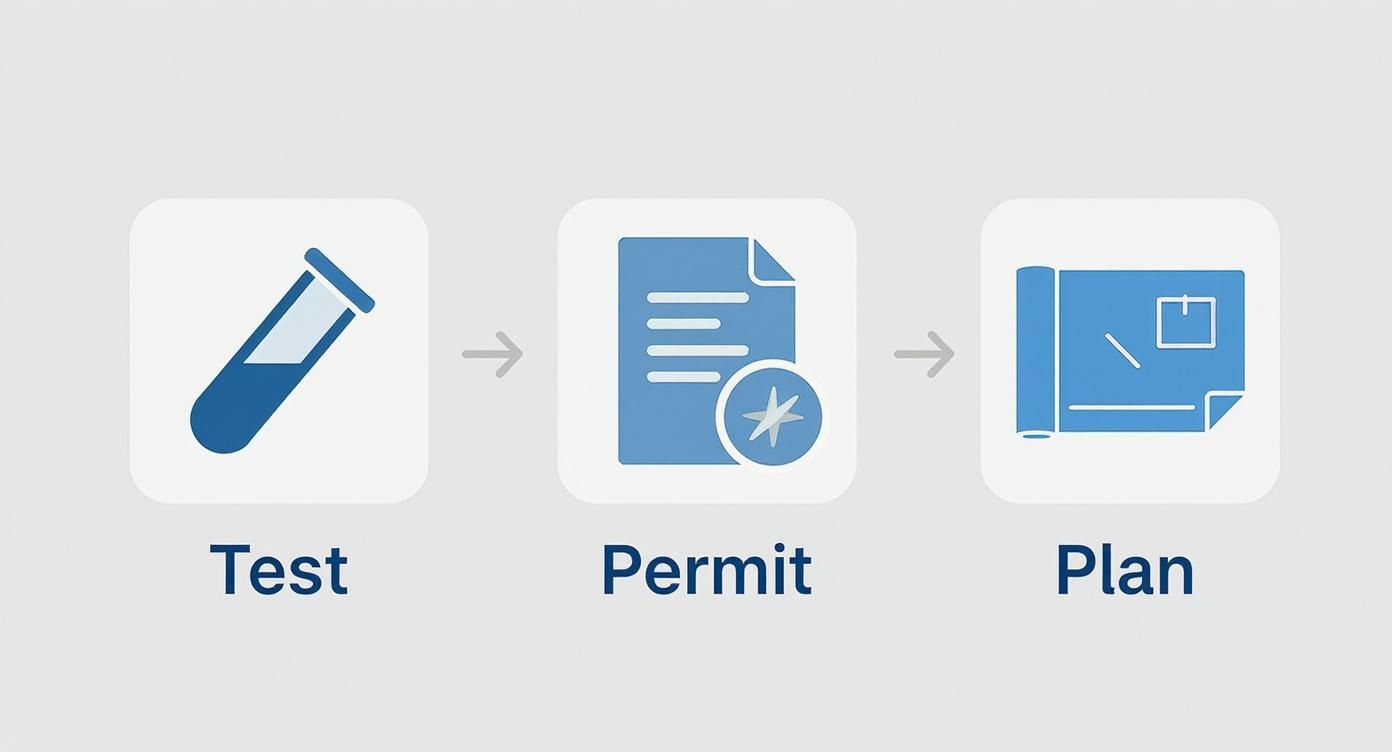
Stick to this order, and you won't waste money designing a space that fails an inspection or needs to be torn apart to fix a leak.
To help keep these crucial first steps organized, here’s a quick checklist of what needs to happen before construction begins.
Essential Basement Pre-Construction Checklist
This table breaks down the critical actions you need to take to set your project up for success. Following these steps helps avoid common pitfalls and ensures a smoother process from start to finish.
| Moisture Assessment | Perform the plastic sheet test and visually inspect for leaks or dampness after heavy rain. | Prevents mold, mildew, and structural damage to new framing and drywall. |
| Radon Testing | Use a DIY short-term or long-term radon test kit according to instructions. | Ensures the air quality is safe for a living space, protecting your family's health. |
| Permit Application | Contact your local building department (Orem/Provo) to get a permit application and requirements list. | Guarantees your project meets safety codes and avoids legal issues or fines later. |
| Layout Planning | Sketch a floor plan, marking existing plumbing, ductwork, and support columns. | Creates a functional and efficient design that works with the basement's existing structure. |
Completing each item on this list is your best defense against unexpected delays and budget overruns.
Navigating Permits And Local Codes
Once you've confirmed your basement is dry and the air is safe, it's time to tackle the paperwork. Here in the Orem and Provo area, you'll almost certainly need a building permit to finish your basement.
Don't think of this as just bureaucratic red tape—it's a critical safety net. Permits trigger inspections, ensuring that your project's electrical, plumbing, and framing work are all up to code. This not only protects your family but also safeguards your home's resale value. Trying to sell a home with unpermitted work is a nightmare you want to avoid.
Your local building department is a resource, not an adversary. Use them. They can tell you the specific requirements for things like egress window sizes, minimum ceiling heights, and ventilation—all deal-breakers in a basement.
Designing A Functional Floor Plan
With the technical hurdles cleared, the fun begins: designing your new space. Start by asking yourself what you truly need. A family rec room? A quiet home office? A guest suite with its own bathroom?
Start sketching out a floor plan, but be realistic. Pay close attention to the things you can’t move, like support columns, ductwork, and main plumbing lines. The best designs work with these elements, not against them. That awkward support column can become a handsome, wrapped post that anchors a wet bar or a set of built-in bookshelves.
You’re not alone in seeing this potential. Basement finishing is one of the hottest segments in home remodeling, growing globally at a staggering rate of 19.30% a year. The North American market alone was valued at $18.4 billion in 2025, proving just how many homeowners are unlocking the valuable real estate right under their feet.
Framing Walls and Running Mechanicals
This is where the magic really starts to happen. With your plans finalized, you get to see your basement transform from a concrete box into a space with actual rooms. Framing is the skeleton of your new living area, and getting it right makes every single step that follows—from drywall to trim—infinitely easier.
You’re literally building the foundation for your finished space. Strong, plumb walls are non-negotiable.
Laying Out and Building Your Walls
Your first job is to get your floor plan off the paper and onto the concrete. A chalk line is your best friend here. Snap lines to mark the exact footprint of every wall. This is your real-world blueprint, so take your time and double-check those measurements before you snap.
A critical detail for basement framing is the bottom plate, which is the piece of lumber that anchors the wall to the concrete floor. This piece must be pressure-treated wood. Basements can be damp, and concrete wicks moisture. Standard lumber will rot, but pressure-treated wood resists decay and protects the integrity of your entire wall structure.
Once you have your pressure-treated plate cut, secure it to the floor with concrete screws or a powder-actuated nailer. After that, you'll start building the rest of the wall frames, typically with studs spaced 16 inches on center. This spacing is the industry standard for a reason—it ensures that the edges of your 4x8 drywall sheets will always land squarely on a stud.
My Favorite Time-Saving Tip: Don't try to build your walls vertically. Assemble the entire frame—top plate, bottom plate, and all the studs—flat on the floor. It's much faster and easier to get everything square. Once it's nailed together, you can tilt the whole section up into place, brace it, and secure it to the joists above.
Working Around Basement Obstacles
Nearly every basement has its quirks: bulky ductwork, random support poles, or a web of plumbing pipes. Don't look at these as problems; think of them as built-in character.
- Ductwork: The go-to solution is to box it in with a framed soffit. This hides the exposed metal and gives you a clean, finished ceiling line.
- Support Columns: Instead of a skinny metal pole, frame a box around it. This creates a substantial, architectural pillar that you can wrap with drywall or a decorative finish.
- Pipes and Drains: You'll often have to frame your walls an inch or two away from the concrete foundation to leave room for plumbing. This is standard practice and ensures you have access if needed.
Framing around these elements is just part of the job. A little creative thinking here goes a long way in making the finished space feel intentional, not like a cluttered utility room.
Roughing In Electrical and Plumbing
With the skeleton of the walls up, it’s time to run the guts of the house: the electrical, plumbing, and HVAC. This is called the rough-in phase, and it’s done now while the wall cavities are wide open and easy to access.
This is your one chance to get the placement of every fixture right. Think through how you'll live in the space:
- Outlets: Where will the couch go? The TV? The computer desk? Add more outlets than you think you need. You'll be glad you did.
- Switches: Consider the flow of traffic. A three-way switch at the top and bottom of the stairs is a must.
- Plumbing: If a bathroom or wet bar is in the plans, now is when the supply and drain lines are run through the new framing. Adding a bathroom is a major project, so be sure to check out our detailed guide on how to add a bathroom in the basement for a deep dive into that process.
Knowing When to Call a Professional
I’m a big fan of DIY, and framing is a fantastic project for a handy homeowner. But when it comes to electrical and plumbing, my advice is simple: hire a pro. The risks of fire from bad wiring or water damage from a leaky pipe hidden in a wall are just too great.
Bringing in licensed tradespeople for the mechanical rough-in is non-negotiable for safety and for passing your inspections. An electrician will make sure your wiring is up to code and your circuits can handle the load. A plumber will ensure your drains flow correctly and your water lines won’t leak.
Investing in professionals at this stage gives you peace of mind, knowing that everything behind the drywall is safe, reliable, and done right.
Putting Up Insulation and Drywall
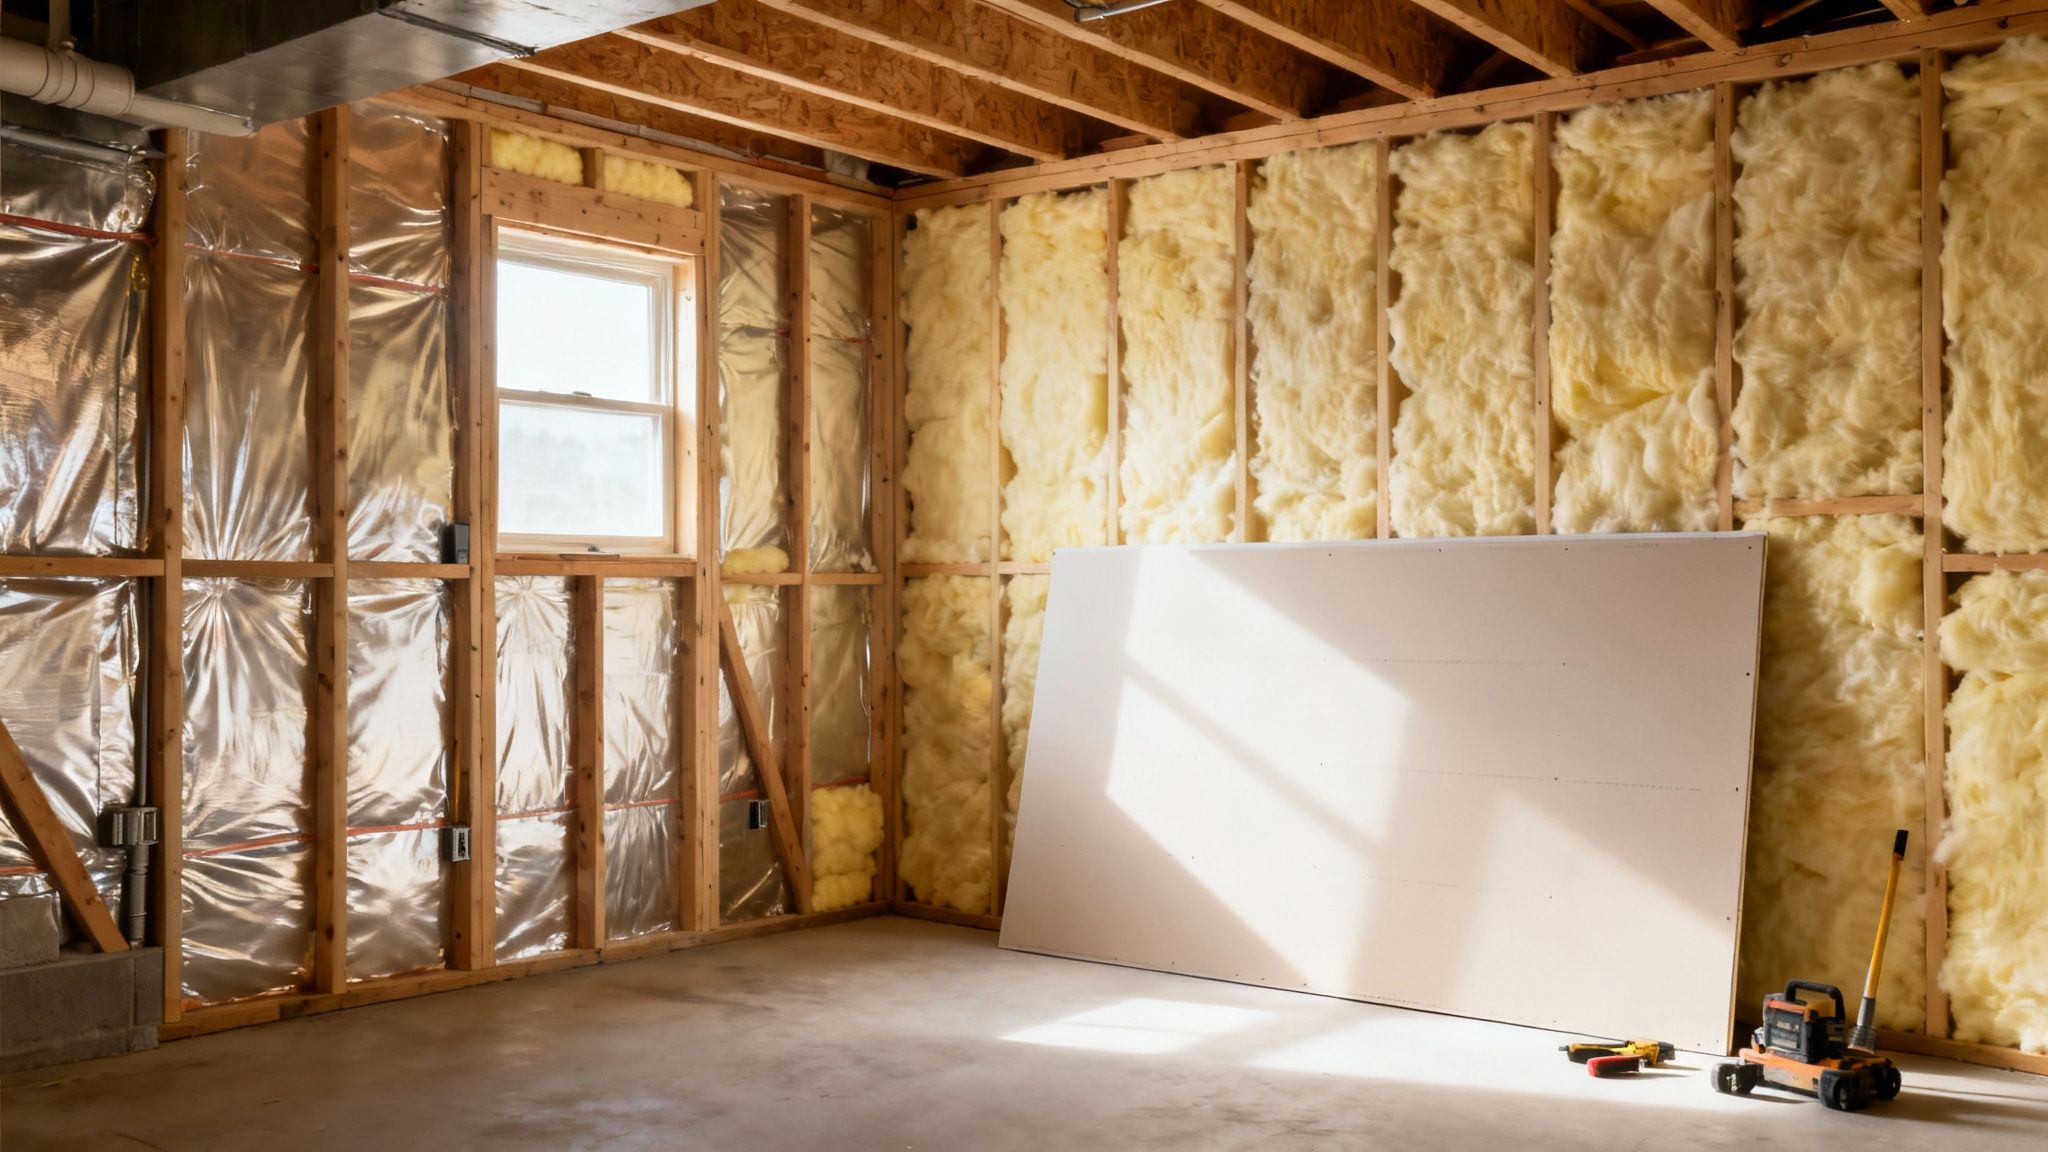
Now that your framing and mechanical systems are in place, you’ve got the skeleton of your new basement. The next move is to add the muscle and skin—insulation and drywall. This is the part of the project where those framed-out boxes finally start looking and feeling like real rooms.
Getting the insulation right is probably one of the most critical steps for any space below ground. It isn't just about keeping warm. It’s about managing moisture, stopping mold in its tracks, and creating an energy-efficient space that’s comfortable all year. A well-insulated basement is a usable basement. It’s as simple as that.
Choosing the Right Insulation for Your Walls
You’ve got a few solid options when it comes to insulating basement walls, and the best one for you will probably come down to your budget, local building codes, and how hands-on you want to be.
- Rigid Foam Board (XPS/EPS): This is my go-to for basement walls. It’s a breeze to cut, goes right up against the concrete, and even acts as a vapor barrier. That’s a huge win for keeping moisture out.
- Fiberglass Batts: This is the classic pink insulation most people picture. It’s affordable and fits perfectly between your wall studs. The catch? You'll need a separate vapor barrier, and it's useless if it gets damp.
- Spray Foam: It's the most expensive option and definitely a job for the pros, but spray foam creates an incredible air seal. It gets into every little gap, giving you a top-tier solution for both insulation and moisture control.
For most DIY projects, I usually recommend rigid foam board. You can glue it directly to the concrete foundation before you even frame the stud walls in front of it. This creates what’s called a "continuous thermal break," which stops the cold from seeping through the wood studs themselves. Don't forget your windows, either—they're notorious for heat loss. This helpful DIY guide to window insulation offers some great tips to tighten things up.
Hanging Drywall Like a Pro
With the insulation installed and inspected, it’s drywall time. This is where your basement transforms almost instantly. Hanging drywall is tough on the body, but the actual process is pretty straightforward if you take your time.
First things first: always use moisture-resistant drywall. You'll see it called "green board" or "purple board" at the hardware store. Using it for at least the bottom section of your walls is a cheap insurance policy against any future dampness.
When you're hanging the sheets, go horizontally. It’s the most efficient way and usually leaves you with fewer seams to finish. For the ceiling, do yourself a huge favor and rent a drywall lift. It's a game-changer and well worth the small cost. Use drywall screws to attach the sheets, sinking them just enough to create a little dimple without breaking the paper.
Here’s a piece of advice I've learned the hard way: be obsessed with your cuts. Getting a snug fit around outlets and windows will make the finishing work ten times easier and give you a much cleaner, professional result.
Mastering Taping and Mudding
Hanging the rock is just step one. The real art is in the finish work. Taping and mudding—the process of hiding the seams between sheets—is what gives you those perfectly smooth walls. Don’t rush this. A bad mudding job is impossible to hide, no matter how good your paint is.
The finishing process breaks down into a few key stages:
Tape Coat: Lay a thin layer of joint compound (mud) over a seam, press paper tape into it, and squeeze out the excess with your taping knife.
Fill Coat: Once the first coat is fully dry, go over the tape with a wider, feathered layer of mud.
Finish Coat: After the second coat dries, apply one last, even wider coat, feathering the edges until they disappear into the drywall.
Sanding: When everything is bone dry, a light pass with a fine-grit sanding sponge is all you need to get it perfectly smooth.
Wondering about the budget? It’s always good to have a clear picture of the typical cost of drywalling a basement before you start. This is where your patience and attention to detail really shine, setting the stage for a flawless paint job.
Bringing Your Space to Life with Finishes
Once the drywall is sanded and primed, you can finally see the light at the end of the tunnel. This is the moment your basement transforms from a construction zone into a legitimate part of your home. Everything you do from here on out—the flooring you choose, the paint on the walls, the trim that ties it all together—is about adding character and making the space your own.
Honestly, this is the most gratifying part of the whole process. It's where your vision starts to become a reality, and where a little extra attention to detail can make the difference between a decent DIY job and a truly professional-looking space.
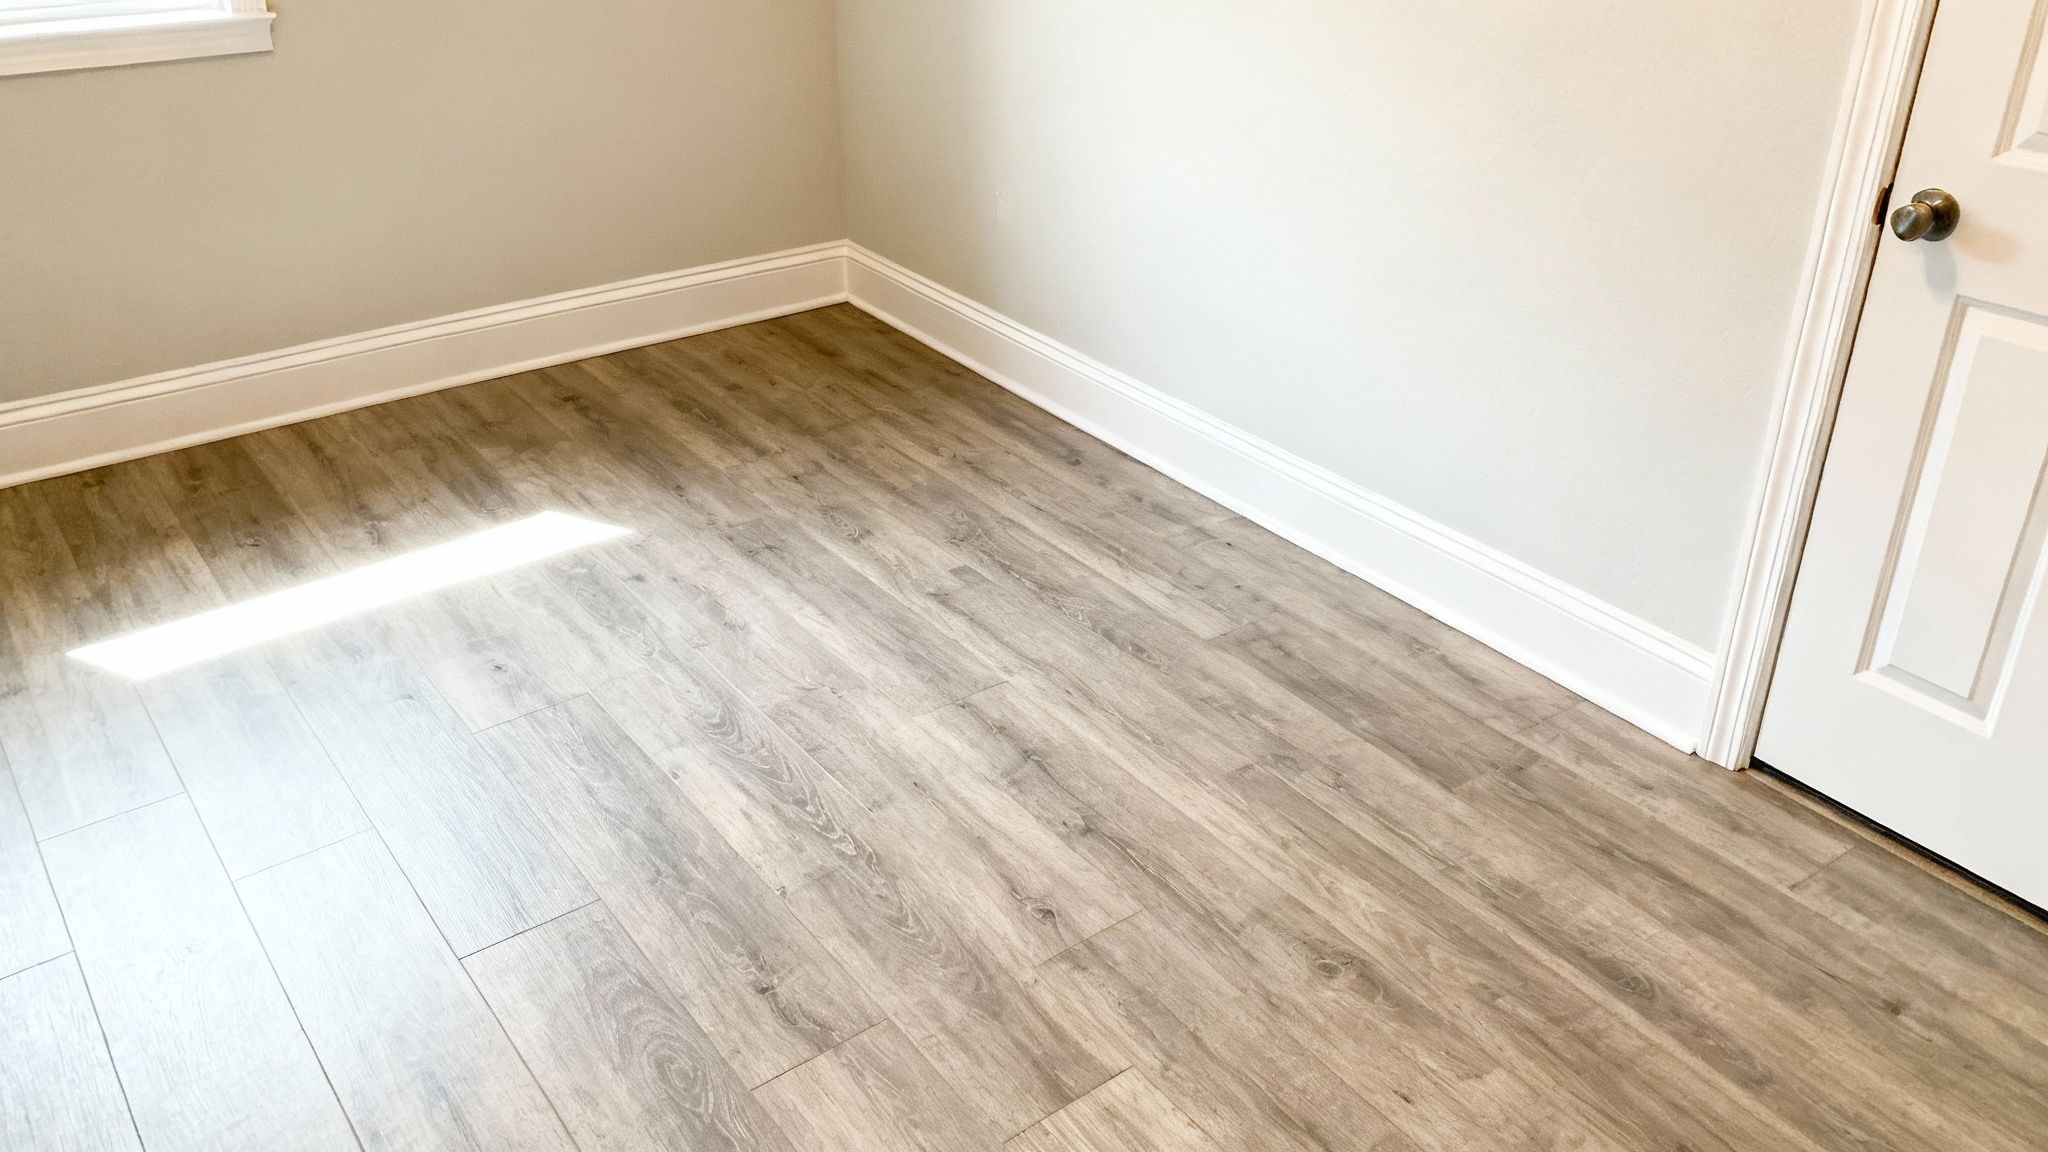
Choosing the Right Basement Flooring
The floor is the single largest surface down there, so you want to get this right. Basements are what we call "below-grade" environments, meaning they’re naturally more prone to dampness and temperature swings than the rest of the house. That simple fact immediately rules out a lot of flooring options.
Let's break down the top contenders that can actually handle basement conditions.
- Luxury Vinyl Plank (LVP): If there's a king of basement flooring, this is it. LVP is 100% waterproof (not just water-resistant), tough as nails against scratches, and looks shockingly like real wood these days. Plus, most of it is DIY-friendly with a simple click-lock system you can float right over the concrete.
- Engineered Hardwood: If you absolutely love the feel of real wood, engineered hardwood is a solid compromise. It’s built with a plywood core that handles humidity better than solid hardwood. Keep in mind, though, it’s only resistant to water—a serious leak will still cause damage.
- Carpet: You just can't beat the warmth and comfort of carpet, especially if you're building a cozy family room or a bedroom. The trick is to stick with synthetic fibers like nylon or polyester, which are less likely to get musty or grow mildew. And whatever you do, don't skimp on a high-quality, moisture-resistant pad underneath.
One piece of advice I always give: don't skip the underlayment. This thin layer does more than you'd think. It creates a thermal break from that cold concrete, adds a bit of cushion underfoot, and acts as another line of defense against moisture. It's a small cost for a huge improvement in comfort.
Before we move on, let's put these options side-by-side to make your decision a little easier.
Comparing Popular Basement Flooring Options
| Luxury Vinyl Plank (LVP) | Completely waterproof, highly durable, easy to install and clean. Wide variety of styles. | Can feel cold or hard underfoot without underlayment. Quality varies significantly by price. | All-purpose use: family rooms, home gyms, playrooms, and even basement kitchens or bathrooms. |
| Engineered Hardwood | Authentic wood look and feel. More stable than solid hardwood in humid areas. | Water-resistant, not waterproof. Susceptible to scratching and more expensive than LVP. | Drier basements where aesthetics are the top priority, like a high-end den or home office. |
| Carpet | Warm, soft, and comfortable. Excellent for sound absorption. | Can trap allergens and moisture, increasing mold risk if the basement is damp. Stains easily. | Bedrooms, home theaters, and family rooms where comfort and coziness are key. |
Ultimately, the best choice really comes down to how you plan to use the space and how prone your basement is to moisture.
Painting for Light and Space
Paint is your secret weapon. It’s the fastest, most affordable way to completely change the feel of the room. Since most basements are starved for natural light, your color choices are even more critical down here.
My rule of thumb is to stick with lighter, neutral colors—think off-whites, soft grays, or even a pale blue. These shades do a fantastic job of bouncing light around the room, making it feel bigger and brighter than it actually is. If you use dark, heavy colors on the main walls, you risk creating a cave-like atmosphere.
The sheen you choose is just as important as the color.
- Flat/Matte: Use this on the ceiling. It’s a master at hiding minor imperfections.
- Eggshell/Satin: This is your go-to for walls. It has just enough sheen to be easily wipeable without being distractingly shiny.
- Semi-Gloss: Save this for the tough stuff: your trim, baseboards, and doors. The durable, glossy finish holds up to scuffs and is a breeze to clean.
Installing Trim for a Polished Look
Trim is the finishing touch that really makes a room look complete. Baseboards and casings cover up the awkward gaps where your drywall meets the floor or door frames, giving every edge a crisp, intentional look. This is where patience and precision pay off.
Tackle the door and window casings first, then move on to the baseboards. An electric miter saw is practically a necessity for getting clean, accurate angles. For inside corners, learn to cut a coped joint—it creates a much tighter seam than a simple miter, especially if your walls aren't perfectly square (and they never are). A brad nailer will make your life a lot easier, leaving you with tiny nail holes that are simple to fill and paint over.
It’s this final push that really defines the project, and it’s a big reason why so many homeowners are taking on these remodels. Americans are projected to spend over $1.2 trillion on home renovations through 2025, and finishing a basement is right up there as one of the most popular projects. The good news is that with building material prices finally stabilizing at their lowest levels since before 2020, getting that polished, finished look is more achievable than ever. You can read more about these remodeling industry trends and see what it means for your own project.
8. Installing Doors, Lighting, and Final Details
You're on the home stretch now. This is the stage where a collection of building materials finally starts to look and feel like a real, livable part of your home. Getting the doors, lighting, and hardware just right is what separates a professionally finished basement from one that feels like a DIY project.
This isn't the time to rush. A little patience here goes a long way. Taking the extra time to hang a door perfectly or map out your lighting will pay off every single time you use the space.
Crafting a Layered Lighting Plan
Good lighting is everything in a basement. You're not just trying to make it bright; you're trying to create a mood and make the space feel open and inviting. The trick is to think in layers.
- Recessed Lights: These are your foundation. They provide great overall, general light without dropping down from what is often an already low ceiling. The key is proper spacing—you want to avoid creating unintentional "spotlights" or leaving dark corners.
- Sconces and Accent Lights: These are your secondary, or ambient, layer. Wall sconces can add a ton of character and soft light. Use them to flank a doorway or highlight a cool feature on a wall.
- Task Lighting: This is focused, direct light right where you need it for a specific job. Think about a pendant light hanging over a new wet bar, or some simple under-cabinet strips in a kitchenette or craft area.
Before you touch a single wire, kill the power at the breaker. No exceptions. Read the instructions that come with every fixture, switch, and outlet. If you feel even slightly unsure about what you're doing, this is the perfect time to call in a licensed electrician. It's a small price to pay for safety and peace of mind.
Hanging Interior Doors Correctly
There's nothing more frustrating than a door that sticks, won't latch, or swings shut on its own. A poorly hung door can make an otherwise perfect room feel cheap. The secret isn't strength; it's making sure the door frame is perfectly plumb, level, and square.
Get your pre-hung door into the rough opening and start working with shims (those little wood wedges). You'll want to use them in pairs—one from each side of the jamb—behind the hinges and the latch plate. Get your level out and focus on making the hinge-side jamb perfectly vertical. Once that's nailed in place, you can adjust the other side until the gap around the door is perfectly even.
Pro Tip: Don't just eyeball it. You're aiming for a consistent 1/8-inch gap between the door and the jamb on the top and sides. That's the professional standard, and it ensures the door will work smoothly for years to come.
Installing Hardware and Final Touches
Think of hardware and trim as the jewelry for the room—they're the small details that have a huge impact. Installing doorknobs, outlet covers, and cabinet pulls is the satisfying final step that pulls the whole look together. It’s pretty straightforward work, but be consistent. Use a template or a jig to make sure all your cabinet handles are perfectly aligned and at the same height.
These finishing touches are a big part of why basement remodels are booming. More and more families are looking for flexible, multigenerational living spaces. Plus, the National Association of Home Builders (NAHB) points out that over 80% of homes in the U.S. are now over 20 years old, which is driving a huge wave of renovation projects just like this. If you're interested in the market trends, you can find more insights on remodeling growth drivers on gminsights.com.
Answering Your Top Basement Finishing Questions
If you're thinking about finishing your basement, you've probably got a lot of questions swirling around. That's a good thing. Getting clear answers before you start knocking down walls or buying materials is the key to keeping your project on track, on budget, and free of nasty surprises.
Let's dive into the big questions that come up time and time again.
What's This Actually Going to Cost Me?
This is always the first question, and for good reason. The honest answer is that it really depends, but a solid rule of thumb for budgeting is somewhere between $30 and $60 per square foot.
So, for a pretty standard 1,000-square-foot space, you’re looking at a total investment of $30,000 to $60,000. If you're dreaming of a full bathroom that needs new plumbing, a slick wet bar, or custom cabinetry, you’ll naturally drift toward the higher end of that range.
Here's a piece of advice I give every homeowner: get at least three detailed quotes. But more importantly, bake a 10-15% contingency fund into your budget from the very beginning. Basements are notorious for hiding surprises, like an old foundation crack or an electrical panel that needs an upgrade. You’ll be glad you have that cushion.
Do I Really Need a Building Permit?
I get this one a lot. In almost every situation, the answer is a firm "yes." If your project involves putting up new walls, running a single new wire, or touching any plumbing, you need a permit. This is absolutely the case here in the Orem and Provo areas.
A permit isn't just bureaucratic red tape; it's your safety net. It means a licensed inspector will check the work at key milestones to make sure everything is up to code. Trying to fly under the radar can backfire, big time.
- Hefty Fines: The city can hit you with some serious penalties for unpermitted work.
- The "Tear-Out" Order: You could be forced to rip out brand-new drywall so an inspector can see the framing and wiring behind it.
- Trouble When You Sell: Unpermitted work is a huge red flag for home buyers and can derail a sale in a heartbeat.
What's the Single Most Important Thing for Moisture Control?
Moisture is the arch-nemesis of any finished basement. Before you even think about framing a single wall, your number one mission is to make that space bone dry.
Start outside. Make sure your gutters are clear and the ground is graded so water flows away from your house, not toward it. Inside, get meticulous about sealing every crack you can find in the concrete floor and walls. A coat of high-quality waterproofing sealant on the foundation walls is a great first move.
Behind the scenes, a well-installed vapor barrier is non-negotiable. And whenever you have the choice, opt for mold-resistant materials, especially for your insulation and drywall. Lastly, plan on running a good dehumidifier once everything is done—it's cheap insurance to keep the space healthy and dry for the long haul.
How Long Does a DIY Basement Finish Realistically Take?
If you're tackling this yourself, be prepared to dedicate your nights and weekends. For the average DIYer, a realistic timeline to finish a basement is about 8 to 12 weeks.
Of course, a few things can throw a wrench in that schedule. The speed of your local permit office and waiting for inspections can create delays. The complexity of your design is also a huge factor—a simple, open family room is a much quicker project than carving out multiple rooms and a bathroom.
My best tip for staying on schedule? Meticulous planning. Have all your materials for each phase of the project on-site before you start that phase. Nothing kills momentum faster than having your whole project grind to a halt while you wait for a lumber delivery.
Ready to transform your basement without the stress of managing every detail yourself? The experts at Northpoint Construction have the experience to guide you through every step of the basement finishing process, from initial design to the final coat of paint. We proudly serve homeowners in Orem, Provo, and the surrounding Utah communities. Contact us today for a consultation