
10 Smart Basement Remodel Ideas on a Budget for 2025
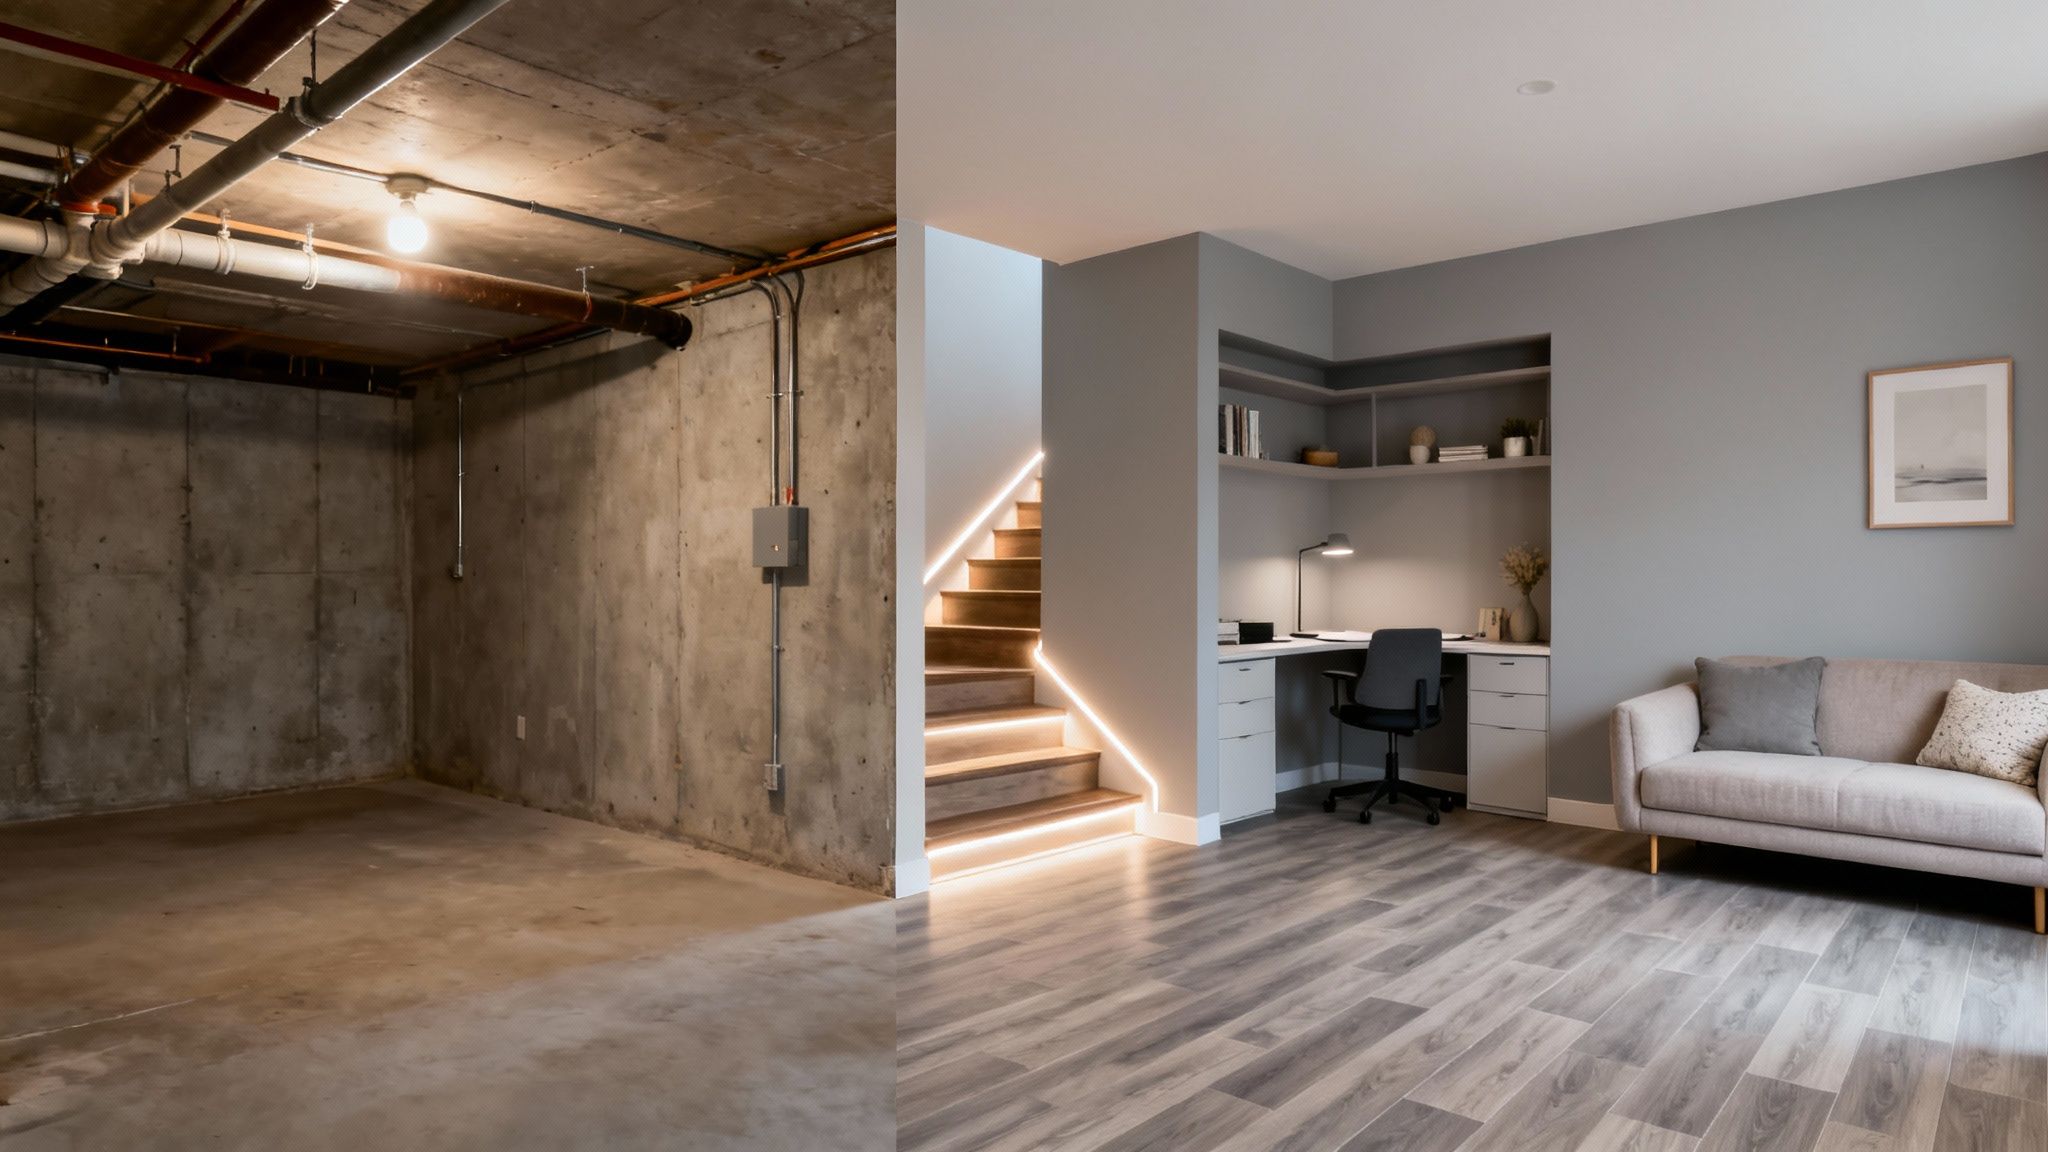
Your basement holds incredible untapped potential, often relegated to a dark, forgotten space for storage and neglected utilities. But what if you could transform it into a vibrant, functional part of your home—a cozy family room, a productive home office, or the ultimate entertainment zone—all without draining your savings? Finishing a basement is one of the most cost-effective ways to add significant living space and value to your property, but the prospect of a full-scale renovation can be intimidating. This guide is designed to show you exactly how to approach it smartly and affordably.
We're diving deep into 10 proven basement remodel ideas on a budget that deliver maximum impact for minimal investment. These aren't vague concepts; they are actionable strategies you can implement right away. We'll cover everything from simple cosmetic upgrades like a fresh coat of paint to more structural projects like installing affordable drywall and framing. You will learn how to tackle crucial foundational steps, such as DIY waterproofing, to protect your investment for years to come.
This listicle will help you prioritize projects, make smart material choices, and decide when a DIY approach is best versus when to call in a professional for tasks requiring specialized expertise. To truly transform your basement without overspending, exploring various budget-friendly flooring options is a great place to start, and we'll explore several excellent choices in detail. Forget the overwhelming price tags and complex plans; let's turn that underutilized square footage into your favorite room in the house with practical, budget-conscious solutions.
1. Fresh Paint and Epoxy Flooring
Never underestimate the power of a fresh coat of paint and a clean, sealed floor. For homeowners seeking high-impact basement remodel ideas on a budget, this combination offers one of the highest returns on investment. Instead of expensive framing and drywall, you can work with the existing structure, using paint to brighten the space and an epoxy coating to transform a drab concrete slab into a durable, attractive, and moisture-resistant surface. This approach immediately makes the basement feel cleaner, brighter, and more intentional without the cost of a full-scale renovation.

This method is ideal for creating a clean slate for a home gym, workshop, or storage area. The seamless, non-porous surface of epoxy is incredibly easy to clean and resists stains, chemicals, and abrasions far better than bare concrete. It also acts as a vapor barrier, helping to reduce the musty smells common in below-grade spaces.
Implementation and Tips
Proper preparation is the key to a professional-looking and long-lasting finish. Rushing the prep work is the most common mistake homeowners make.
- Surface Preparation is Crucial: Before applying any coating, the concrete floor must be meticulously cleaned, degreased, and etched. Any previous sealants or paints must be removed. This ensures the epoxy can bond directly and permanently with the concrete.
- Prime for Moisture: Use a high-quality, moisture-blocking primer on both the walls and the floor. For walls, choose a paint specifically formulated for masonry and high-humidity environments, like those offered by Sherwin-Williams.
- Apply Thin Coats: Whether painting walls or applying epoxy, work in thin, even coats. This prevents drips and runs and results in a stronger, more uniform finish. For epoxy, a squeegee and a spiked roller are essential tools to spread the material and release trapped air bubbles.
- Prioritize Ventilation: Both paint and epoxy fumes can be potent. Ensure the area is well-ventilated with open windows and fans during and after application to protect your health and aid in the curing process.
2. DIY Dropped Ceiling Installation
A dropped or suspended ceiling is a classic solution for a reason. It masterfully conceals unsightly pipes, ductwork, and wiring while providing a clean, finished look at a fraction of the cost of drywall. This makes it one of the most effective and accessible basement remodel ideas on a budget. The system consists of a lightweight metal grid suspended from the ceiling joists, into which you simply place affordable ceiling tiles. This approach creates a professional appearance while maintaining easy access to plumbing and electrical systems for future repairs or upgrades.
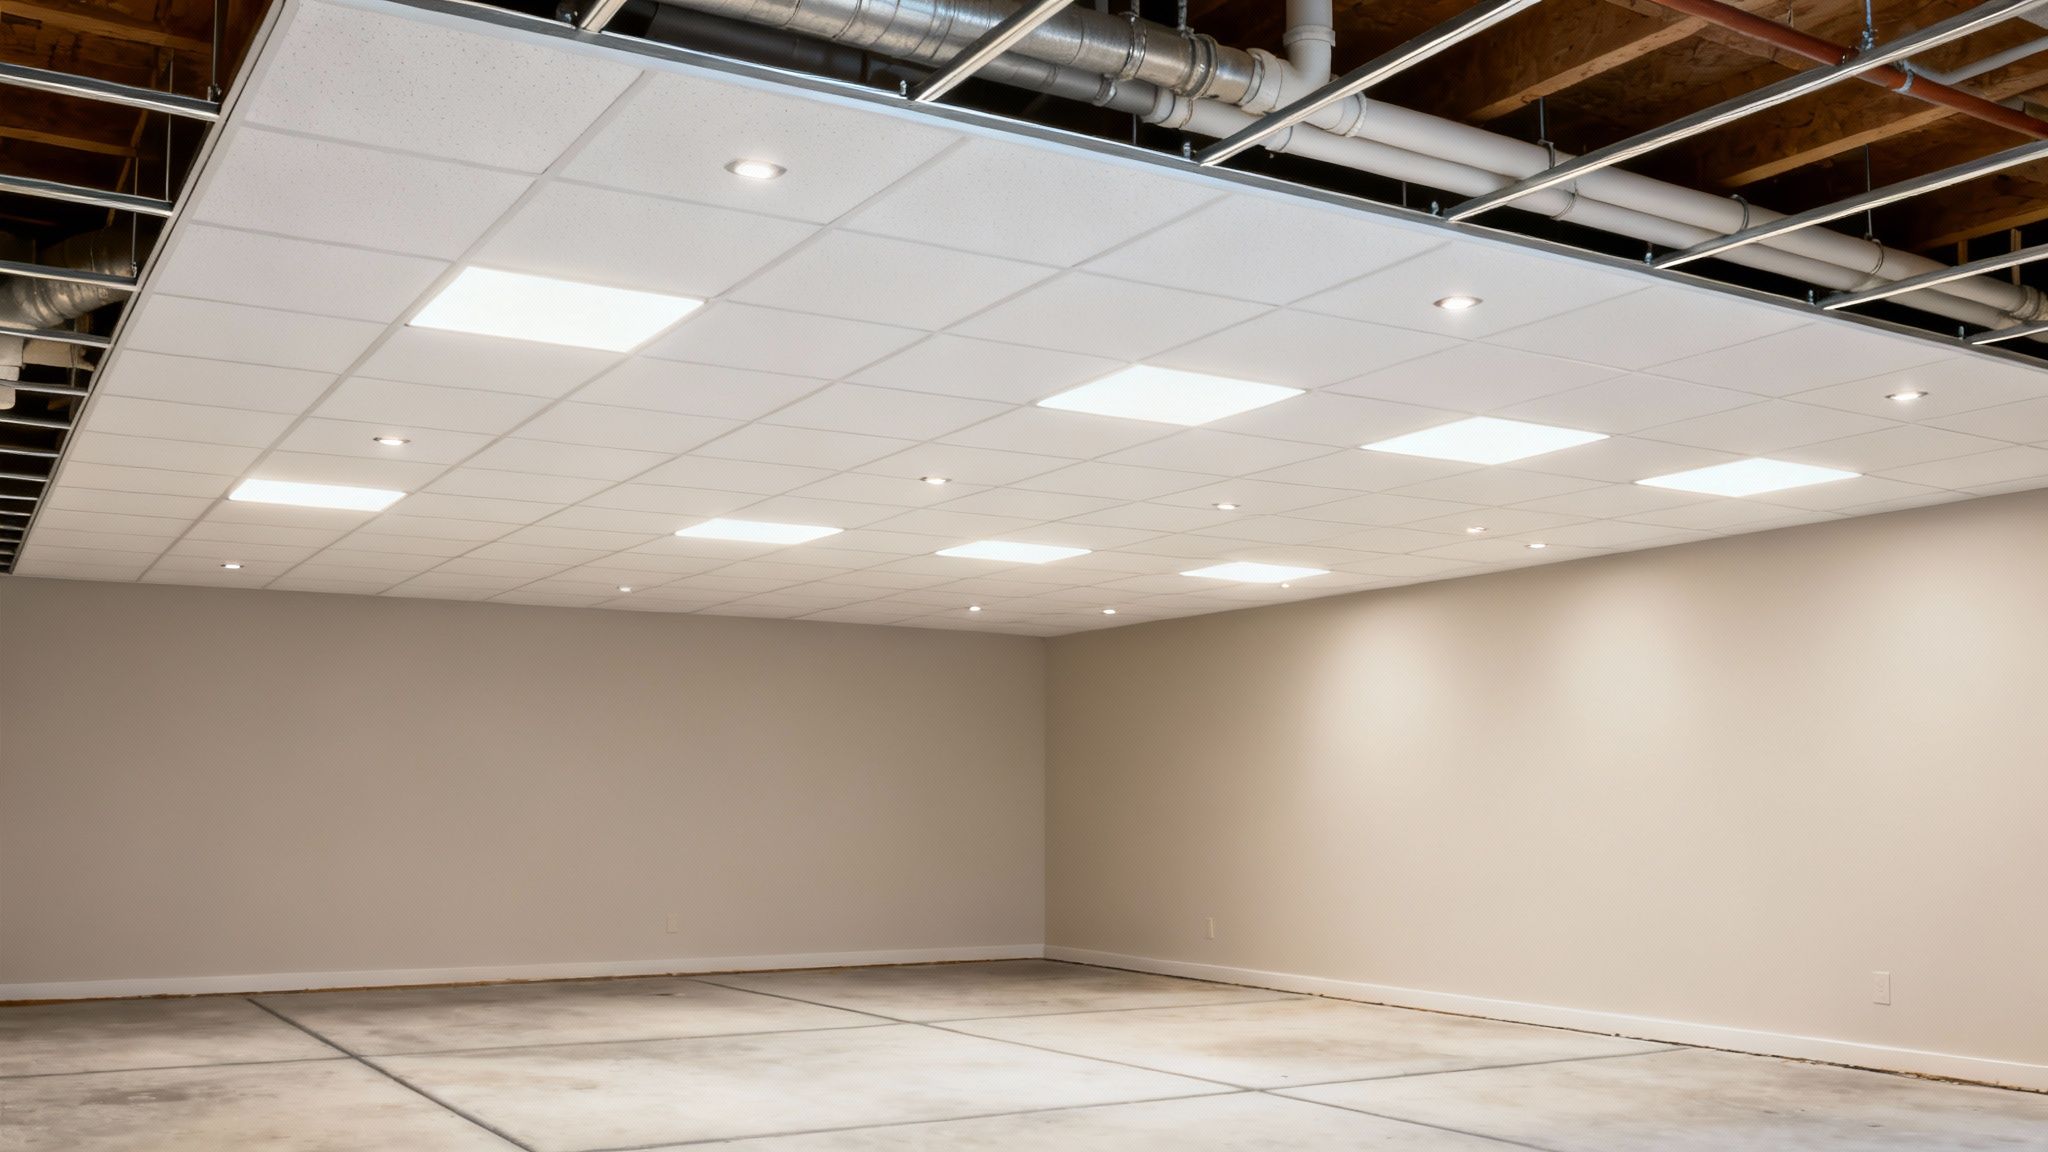
This method is perfect for transforming an unfinished basement into a functional game room, home office, or entertainment area. Modern drop ceiling tiles come in a vast array of styles, from simple acoustic panels to sophisticated, coffered designs, allowing you to customize the look without breaking the bank. Furthermore, many tiles offer acoustic properties that help dampen sound, which is a significant advantage for home theaters or music rooms. They are also relatively easy for a handy homeowner to install over a weekend.
Implementation and Tips
A successful dropped ceiling installation depends on precise measurements and a level grid. Taking the time to plan the layout correctly will prevent headaches and ensure a polished, professional result.
- Plan Your Grid Carefully: Before you begin, map out the grid on paper. Aim for a balanced layout that minimizes small, cut tiles along the edges of the room for a cleaner look.
- Choose the Right Tiles: For basements prone to dampness, select moisture- and mold-resistant tiles made from fiberglass or mineral fiber. These are specifically designed to withstand high-humidity environments.
- Ensure Level Installation: Use a laser level or a tightly stretched chalk line to establish a perfectly level line around the perimeter of the room for the wall angle molding. A level grid is non-negotiable for a professional finish.
- Meet Height Requirements: A dropped ceiling will lower the room's height, so it's crucial to plan accordingly. To understand the regulations in your area, you can learn more about basement ceiling height requirements on buildnp.com.
3. Reclaimed and Repurposed Materials
Embracing reclaimed and repurposed materials is a brilliant strategy for homeowners looking for unique basement remodel ideas on a budget. Instead of buying new, this approach involves sourcing salvaged wood, vintage doors, old windows, and unique fixtures from salvage yards, deconstruction sites, or online marketplaces. This not only dramatically cuts material costs but also infuses your basement with authentic character and a one-of-a-kind story that new materials simply cannot replicate.
This method is perfect for creating standout features that become the focal point of the room. A basement bar built from weathered barn wood, a feature wall made from salvaged bricks, or industrial shelving crafted from old pipes and lumber can define the entire space. This eco-friendly choice diverts usable materials from landfills and allows you to achieve a high-end, custom look for a fraction of the retail price. It’s an ideal way to add warmth, texture, and historical depth to your design.
Implementation and Tips
Success with reclaimed materials relies on patience, a keen eye, and a bit of flexibility in your design plans. The hunt is part of the fun, but knowing what to look for is essential.
- Source Smartly: Regularly visit local salvage yards like Habitat for Humanity ReStores and architectural deconstruction companies. Constantly check online sources like Facebook Marketplace and Craigslist for people getting rid of old building materials.
- Inspect Thoroughly: Before purchasing, carefully inspect all materials for structural integrity. Check wood for rot, pests, or excessive warping, and ensure doors and windows are not damaged beyond reasonable repair.
- Plan Around Your Finds: Unlike buying new, you can't always get the exact dimensions you need. Be prepared to adapt your project plans based on the amazing materials you discover. Let the finds inspire the design.
- Budget for Refinishing: Salvaged items often need some TLC. Factor in the cost and time for cleaning, sanding, stripping paint, or applying a new finish to bring your materials back to life and ensure they are safe for indoor use.
4. DIY Waterproofing and Moisture Control
Before any cosmetic updates begin, addressing moisture is the most critical and cost-effective step you can take. Neglecting water issues will ruin any investment you make, from flooring to furniture. For homeowners looking for impactful basement remodel ideas on a budget, proactive DIY waterproofing is not just a suggestion; it's a prerequisite. By sealing cracks, managing humidity, and ensuring proper drainage, you prevent costly mold remediation and structural damage down the line, safeguarding your renovation investment from the start.
This foundational work is ideal for any basement, regardless of its intended use. A dry, healthy environment is essential whether you're creating a home theater, a playroom, or simply a reliable storage area. Sealing walls with a quality waterproof paint like those from Sherwin-Williams can stop minor seepage and prevent efflorescence, the chalky white residue left by evaporating water. Combined with a properly sized dehumidifier, these steps transform a damp, musty space into a comfortable and usable part of your home.
Implementation and Tips
Success in DIY waterproofing comes from a layered approach that addresses water at every potential entry point. A single solution is rarely enough; you need a comprehensive strategy.
- Start Outside: Your first line of defense is ensuring gutters are clean and downspouts extend at least six feet away from your foundation. The ground around your home should also be graded to slope away from the house, preventing water from pooling against the walls.
- Seal Cracks and Gaps: Inspect interior foundation walls and the floor for any cracks. Fill them with hydraulic cement or an epoxy injection kit, both of which expand to create a watertight seal and stop active leaks.
- Apply a Waterproofing Sealer: Once the surface is clean, dry, and repaired, apply a high-quality interior waterproof sealant. Apply at least two thick coats, working the product into the concrete's pores with a brush or roller for maximum protection. For a deeper understanding of available options, you can explore the best waterproofing for basements on buildnp.com.
- Control Interior Humidity: Invest in a dehumidifier rated for your basement's square footage. Set it to maintain a relative humidity between 40-60% to inhibit mold growth and eliminate musty odors, protecting your new finishes.
5. Laminate Flooring Installation
Achieving the warm, inviting look of hardwood in a basement no longer requires a hefty budget or complex moisture mitigation systems. Modern laminate flooring offers a durable, attractive, and cost-effective alternative perfect for below-grade spaces. This solution provides the aesthetic appeal of wood at a fraction of the cost, and newer, water-resistant formulations are specifically designed to handle the higher humidity levels common in basements, making it a standout among basement remodel ideas on a budget.
This approach is excellent for transforming a basement into a family room, playroom, or home office where comfort and appearance are priorities. The click-lock installation system makes it a manageable DIY project for many homeowners, further reducing costs. With a wide variety of finishes available, from light oak to dark walnut, you can easily select a style that brightens the space and complements your desired decor.
Implementation and Tips
Proper installation is essential to ensure your laminate floor performs well and lasts for years. Following best practices will prevent common issues like buckling or moisture damage.
- Choose Water-Resistant Laminate: Not all laminate is created equal. Opt for products explicitly labeled as "water-resistant" or "waterproof," which are designed with a core material that resists swelling when exposed to moisture.
- Install a Vapor Barrier: Always lay a 6-mil polyethylene vapor barrier over the concrete subfloor before installing the underlayment and laminate planks. This is a critical step that prevents ground moisture from wicking up and compromising the flooring.
- Allow for Acclimation: Let the unopened boxes of laminate sit in the basement for at least 48 to 72 hours before installation. This allows the planks to adjust to the room's temperature and humidity, preventing future expansion or contraction issues.
- Leave an Expansion Gap: Use spacers to maintain a 1/4-inch to 3/8-inch gap between the flooring and the walls. This expansion gap is crucial, as it allows the floor to shift with changes in humidity without buckling. Baseboards will later conceal this gap. If you want a deeper dive, you can learn more about the best basement flooring options.
6. Budget-Friendly Lighting Solutions
Poor lighting is a classic basement problem, often characterized by a single, bare bulb that leaves the space feeling dim and uninviting. A strategic lighting upgrade is one of the most transformative basement remodel ideas on a budget, capable of making the room feel larger, safer, and more welcoming. By moving beyond a single overhead fixture and embracing a layered approach with energy-efficient LEDs, you can create ambiance and functionality without the high cost of a major electrical overhaul.
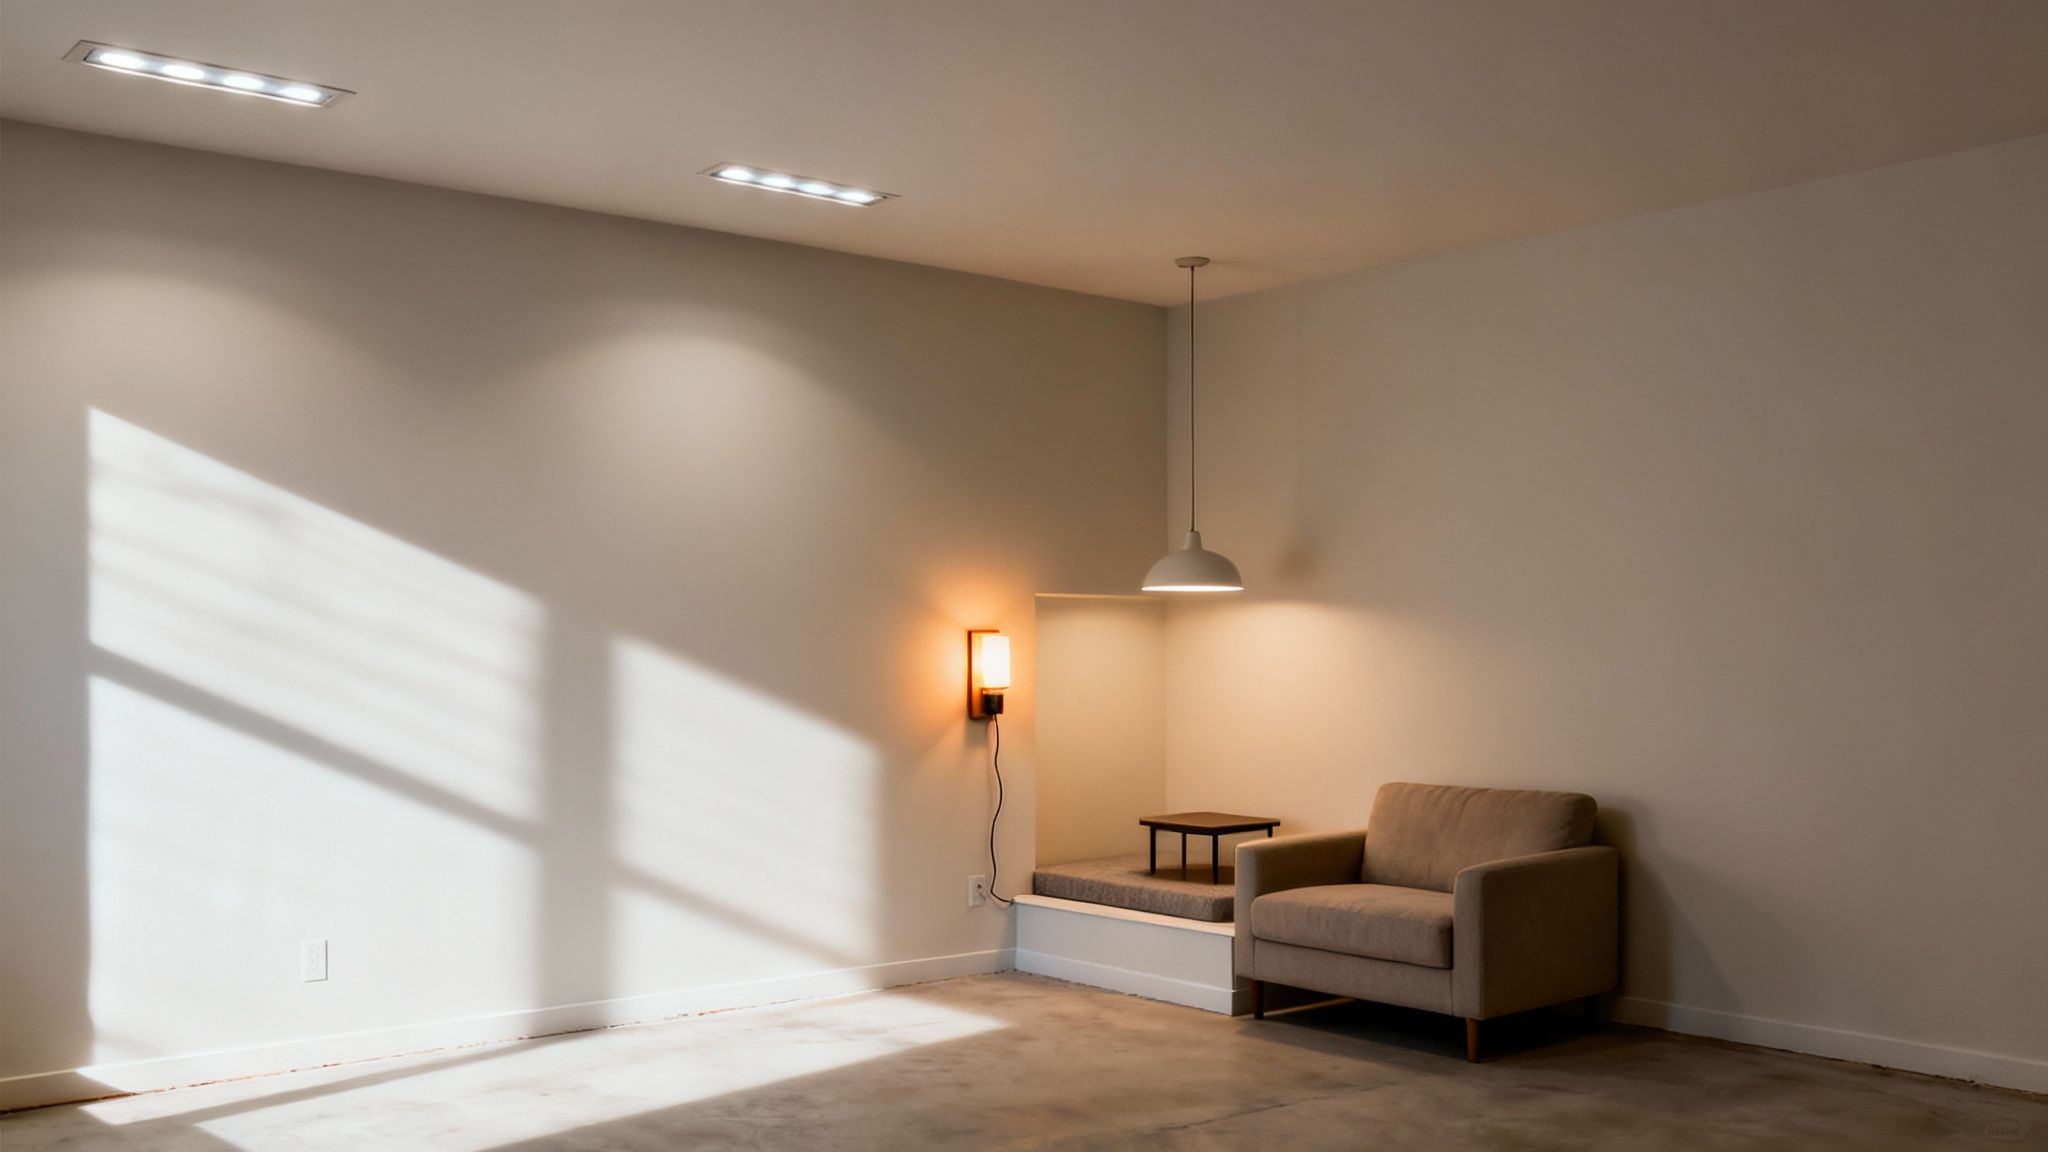
This approach is perfect for defining different zones in an open-concept basement. Bright task lighting can illuminate a home office or workshop area, while warm, ambient string lights or sconces can create a cozy entertainment nook. Modern, affordable fixtures from retailers like Home Depot and Wayfair, combined with the long-term savings of LED bulbs, make this a high-impact, low-cost project that dramatically improves the usability and feel of any below-grade space.
Implementation and Tips
A well-lit basement combines multiple types of light to serve different purposes. The goal is to eliminate dark corners and create a flexible, inviting atmosphere.
- Layer Your Lighting: Don't rely on one source. Combine ambient (overall illumination like recessed cans), task (focused light for activities, like a desk lamp), and accent (to highlight features, like a picture light) lighting for a complete and functional design.
- Embrace LED Technology: LEDs use significantly less energy and last much longer than incandescent bulbs, saving you money on utility bills and replacements. Many affordable LED flush-mount fixtures and recessed kits are designed for easy DIY installation.
- Install Dimmer Switches: Dimmers are an inexpensive addition that offers incredible flexibility. They allow you to adjust the brightness to suit any activity, from bright light for cleaning to a soft glow for movie night.
- Maximize Existing Light: Paint walls and ceilings in light, reflective colors like off-white, light gray, or pale beige. This simple trick amplifies the effect of both natural and artificial light, making the entire space feel brighter.
7. Affordable Drywall and Framing
For those ready to move beyond painted concrete, strategic framing and drywall installation is the quintessential step toward creating a truly finished living space. This approach transforms a raw, open basement into defined rooms with the look and feel of the rest of your home. By carefully planning the layout, you can add bedrooms, a home office, or an entertainment area, significantly increasing your property’s usable square footage and value. This is one of the most effective basement remodel ideas on a budget for creating functional, separate zones.
This method is perfect for homeowners who need to enclose mechanical systems like furnaces and water heaters for a cleaner aesthetic or create dedicated, private rooms. Building even a few strategic walls can separate a laundry area from a family room or partition off a storage section, making the entire basement more organized and livable. While more involved than painting, it provides the foundational structure for electrical wiring, insulation, and a polished final look.
Implementation and Tips
Thoughtful planning and material selection are critical to ensure your new walls are durable and resistant to common basement issues. Rushing this stage can lead to costly moisture problems or poor finishes.
- Choose the Right Materials: Opt for steel studs instead of wood to prevent potential rot, termite damage, and warping in a damp environment. When it comes to drywall, use moisture- and mold-resistant panels (often called "green board" or "purple board") for all basement walls.
- Install a Vapor Barrier: Before putting up the framing, install a proper vapor barrier against the concrete foundation walls. This is a non-negotiable step to prevent moisture from seeping into the wall cavity and causing mold.
- Plan Utilities First: Map out and install all electrical outlets, light switches, and any plumbing lines before the drywall goes up. Cutting into finished walls later is messy, difficult, and expensive. Remember to leave access panels for crucial shut-off valves and cleanouts.
- Finish Like a Pro: Apply drywall mud (compound) in several thin coats rather than one thick one. Sand lightly between each coat to achieve a perfectly smooth, professional-grade finish that’s ready for primer and paint.
8. Affordable Area Rugs and Floor Coverings
You don’t need to install expensive, permanent flooring to create a warm and inviting basement. For a truly versatile and budget-friendly solution, strategically placed area rugs can define spaces, add comfort, and conceal imperfections on a concrete slab. This approach offers incredible flexibility, allowing you to easily change the room's look and feel without the commitment or cost of traditional flooring like carpet, vinyl, or tile. It's a perfect example of a high-impact, low-cost basement remodel idea on a budget.
This method is ideal for creating distinct zones within an open-concept basement. A large, plush rug can anchor a seating area for a home theater, while a durable, low-pile rug can designate a play space for kids or a home gym corner. Because they aren't permanently installed, rugs can be easily lifted for cleaning or swapped out as your style evolves. This non-permanent solution is especially practical in basements prone to occasional dampness, where wall-to-wall carpeting could trap moisture and lead to mold.
Implementation and Tips
The key to using rugs effectively in a basement is choosing the right materials and ensuring proper care to prevent moisture-related issues.
- Choose the Right Material: Opt for rugs made from synthetic fibers like polypropylene, nylon, or polyester. These materials are inherently moisture-resistant, durable, and easier to clean than natural fibers like wool or jute, which can absorb humidity and develop mildew.
- Use a High-Quality Rug Pad: Always place a rug pad underneath. This not only prevents the rug from shifting and adds extra cushioning but also promotes airflow, which is crucial for discouraging moisture buildup between the rug and the concrete floor.
- Create Zones with Layers: Don't be afraid to layer smaller rugs over a larger, neutral one to add texture, color, and visual interest. This is a designer trick that works exceptionally well for defining smaller nooks within a larger basement room.
- Prioritize Regular Cleaning: Vacuum rugs frequently and consider taking them outdoors to air out periodically. Promptly clean any spills to prevent them from setting in or creating a damp spot that could attract mold.
9. DIY Built-In Storage and Shelving
One of the most effective basement remodel ideas on a budget involves tackling clutter with custom-built storage. Instead of purchasing expensive, heavy cabinetry, you can create highly functional and visually appealing storage systems using affordable materials like plywood, dimensional lumber, and pegboard. This DIY approach allows you to maximize every square inch of your basement, from awkward nooks under the stairs to expansive, empty walls, creating a space that is both organized and personalized.
This method is perfect for defining zones within an open basement, creating a dedicated workshop, organizing sports equipment, or building a craft area. A pegboard wall can transform a corner into an efficient tool station, while simple wall-mounted shelves can display collections or hold seasonal items. By building your own, you ensure the storage fits your specific needs and the unique dimensions of your space, something off-the-shelf units rarely achieve.
Implementation and Tips
Thoughtful planning and proper installation are essential for creating DIY storage that is both sturdy and stylish. A well-executed plan prevents wasted materials and ensures your shelves can handle their intended load.
- Secure to Masonry Correctly: Basement walls are often concrete or cinder block, requiring specialized fasteners. Use high-quality concrete anchors or sleeve anchors to ensure your shelves are securely mounted and can support significant weight.
- Plan Your Layout First: Before cutting any wood, measure your space and sketch out your design. Consider what you need to store and how much space each item requires. For budget-friendly, effective organization alongside your DIY built-in solutions, consider incorporating practical clear storage bins with lids.
- Vary Heights for Visual Appeal: Installing all shelves at the same height can look monotonous. Stagger shelf heights and depths to create a more dynamic, custom look that can accommodate items of various sizes.
- Add Integrated Lighting: Elevate your DIY shelves by installing inexpensive, battery-operated LED strip lights underneath. This not only highlights displayed items but also adds valuable task lighting for a workshop or craft area.
10. Simple Partition Walls and Room Dividers
Creating distinct functional zones is essential for a usable basement, but building permanent walls is expensive and time-consuming. Simple partition walls and room dividers offer a flexible and affordable alternative, allowing you to define spaces like a home office, play area, or guest nook without the commitment of traditional construction. This approach is one of the most effective basement remodel ideas on a budget for maximizing functionality in an open-concept lower level.
This strategy is perfect for homeowners who want to maintain an open feel while still creating separation. A well-placed fabric curtain can hide a workout area from the main family room, while a stylish sliding barn door can create a private, temporary bedroom when guests visit. These solutions are not only cost-effective but also reversible, making them ideal for changing needs or for renters who cannot make permanent structural alterations.
Implementation and Tips
The key to making dividers look intentional and stylish is choosing the right materials and ensuring a quality installation. A flimsy curtain or a poorly hung door can detract from the space rather than enhance it.
- Choose the Right Divider for the Job: Heavy, room-darkening curtains on a ceiling-mounted track are perfect for creating privacy for a sleeping area. For a more permanent but non-structural division, consider building a simple, partial-height partition wall or using large, open-backed shelving units like an IKEA KALLAX.
- Install Tracks Securely: For curtains or sliding doors, securely anchor the track system to ceiling joists. This prevents sagging and ensures smooth, reliable operation. Always use a level to guarantee the track is perfectly straight.
- Consider Aesthetics and Sound: Select fabrics and materials that complement your overall basement design. If noise reduction is a priority, look for thick, sound-dampening curtains or consider adding acoustic panels to the back of a bookshelf divider.
- Leverage Vertical Space: Use tall dividers, like floor-to-ceiling curtains or shelving, to draw the eye upward. This simple trick can make a low-ceilinged basement feel more spacious and airy.
10 Budget Basement Remodel Ideas Compared
| Fresh Paint and Epoxy Flooring | Low–Medium (DIY possible; prep critical) | Materials & epoxy kit, rollers, ventilation ($500–$1,500) | Brighter walls; durable, moisture-resistant floor | Quick cosmetic refresh; durable surfaces on concrete | Low cost, durable finish, DIY weekend project |
| DIY Dropped Ceiling Installation | Low (modular, DIY-friendly) | Grid, tiles, basic tools ($300–$800) | Concealed utilities, improved acoustics, lowered ceiling | Hiding pipes/wiring; finishing unfinished basements | Affordable, accessible, easy access to utilities |
| Reclaimed and Repurposed Materials | Medium–High (sourcing & fitting) | Time to source, refinishing supplies (variable $200–$1,200) | Unique, vintage character; cost-savings on materials | Rustic/industrial designs, feature walls, bars | Sustainable, unique aesthetic, potential cost reduction |
| DIY Waterproofing and Moisture Control | Low–Medium (many DIY options; complex issues need pros) | Sealants, dehumidifier, drainage parts ($200–$800) | Reduced moisture and mold risk; protects renovations | Pre-renovation prep; basements with humidity or leaks | Prevents costly damage; enables other projects |
| Laminate Flooring Installation | Low–Medium (click-lock; prep important) | Laminate planks, underlayment, moisture barrier ($800–$2,500) | Wood-look floor, durable surface, improved appearance | Playrooms, living areas without standing water | Cost-effective wood look, DIY-installable, variety of styles |
| Budget-Friendly Lighting Solutions | Very Low–Medium (plug-in to recessed installs) | LED fixtures, bulbs, basic wiring ($300–$800) | Brighter, layered, energy-efficient lighting | Dark basements, task areas, ambiance upgrades | Immediate visual impact, energy savings, flexible options |
| Affordable Drywall and Framing | Medium–High (framing, taping, finishing) | Studs, drywall, insulation, finishing tools ($500–$2,000 materials) | Finished rooms with insulation and sound control | Bedrooms, bathrooms, enclosed mechanical or laundry rooms | Professional look, customizable layouts, improved insulation |
| Affordable Area Rugs and Floor Coverings | Very Low (no installation) | Rugs, pads ($100–$600) | Defined zones, added warmth, hides concrete flaws | Rental-friendly updates, seating/game areas, temporary cover | Very affordable, easy to update, adds comfort |
| DIY Built-In Storage and Shelving | Low–Medium (anchoring & layout planning) | Shelving materials, anchors, fasteners ($200–$800) | Organized vertical storage; better functionality | Workshops, storage areas, under-stair solutions | Maximizes space, customizable, low cost |
| Simple Partition Walls and Room Dividers | Very Low–Low (curtains) to Medium (sliding doors) | Curtains/tracks or lightweight panels ($100–$600) | Flexible zones and visual separation without permanent build | Temporary privacy, multi-use open basements, renters | Non-permanent, quick to implement, cost-effective |
Bringing Your Budget-Friendly Basement Vision to Life
You've explored the possibilities, from the transformative power of a fresh coat of paint to the practical elegance of DIY built-in shelving. Transforming a damp, dark basement into a bright, functional living area doesn't have to drain your savings. The key to a successful and affordable remodel lies in strategic planning, smart material choices, and a clear understanding of which tasks you can confidently tackle yourself versus when to call in the experts.
By focusing on the high-impact strategies we've discussed, you can stretch every dollar and achieve a professional-looking finish. This journey is about making intelligent trade-offs: opting for an industrial-chic exposed ceiling saves on drywall costs, while choosing luxury vinyl plank flooring gives you the look of hardwood without the hefty price tag. Each of these basement remodel ideas on a budget is a tool in your arsenal, ready to be combined to create a space that perfectly suits your family’s needs and your financial reality.
Key Takeaways for Your Budget-Friendly Remodel
Before you start swinging a hammer or buying paint, let's distill the most crucial lessons from this guide. Mastering these principles will be the difference between a project that feels overwhelming and one that progresses smoothly toward a stunning conclusion.
- Prioritize the Foundation: The absolute most critical takeaway is this: a dry basement is a non-negotiable starting point. Before any cosmetic work begins, address any and all moisture issues. Applying a quality waterproof sealant and ensuring proper drainage is the best investment you can make in your remodel. Skipping this step will inevitably lead to costly repairs, ruined finishes, and potential health hazards down the line.
- Embrace Strategic DIY: You can save thousands of dollars by taking on projects like painting, installing laminate flooring, assembling simple partitions, or building basic shelving. These tasks have a high impact on the final look and feel of the space but have a relatively low learning curve. Be honest about your skill set and time commitment to avoid project burnout.
- Know Your Limits: While DIY is a budget's best friend, some jobs are best left to licensed professionals. Any significant electrical work, moving plumbing lines, altering structural supports, or tasks requiring complex permits demand expert handling. The cost of a professional ensures the job is done safely, correctly, and up to code, protecting your home's value and your family's well-being.
Your Actionable Next Steps
Feeling inspired? It's time to move from ideation to action. Here’s a simple, actionable plan to get started on your basement remodel journey today:
Assess and De-clutter: Begin with a thorough cleanout of your basement. This will not only create a blank canvas but also help you identify any hidden moisture problems or structural issues that need attention first.
Create a Detailed Budget: List every potential material and labor cost. Research prices for paint, flooring, lighting, and lumber. Always add a 10-15% contingency fund to your total budget to cover unexpected expenses.
Develop a Phased Plan: You don't have to do everything at once. Break the project down into manageable phases. Phase one might be waterproofing and framing, phase two could be electrical and drywall, and phase three could be flooring and painting. This makes the project feel less daunting and helps manage cash flow.
Ultimately, a well-executed basement remodel is more than just an aesthetic upgrade; it's a significant expansion of your home's usable square footage. It's creating that much-needed home office, a safe play area for the kids, or a cozy family den for movie nights. By applying these smart, budget-conscious strategies, you are not just finishing a basement, you are unlocking a new chapter of enjoyment and value in your home.
Ready to take the next step but need a professional hand to ensure it's done right? For homeowners in Orem, Provo, Lehi, and the surrounding Utah communities, Northpoint Construction specializes in turning budget-conscious basement visions into beautifully finished, fully compliant living spaces. Whether you need a full design-and-build service or expert help with critical stages like framing and electrical, our team is here to guide you. Contact Northpoint Construction today to discuss your project and get a quote.