
Your Guide to Basement Remodeling DIY
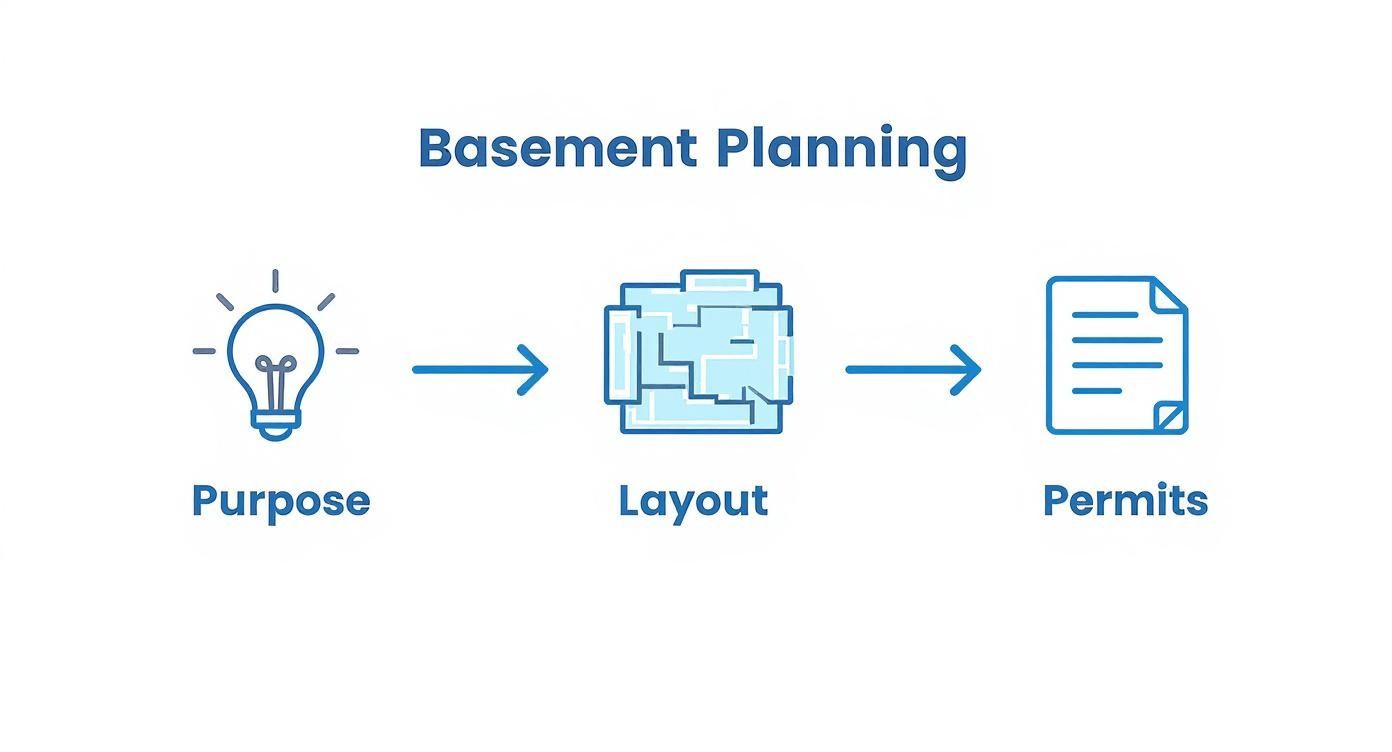
A successful basement remodel doesn't start with a sledgehammer. It starts with a solid plan. Long before you tear anything down, you need to get crystal clear on what you're building, why you're building it, and how you'll get it done right. Figuring out the space's purpose, sketching a smart layout, and getting a handle on local building codes are the real first steps.
Nail these foundational elements, and you're not just remodeling; you're making a smart investment in your home.
Laying The Groundwork For Your Remodel
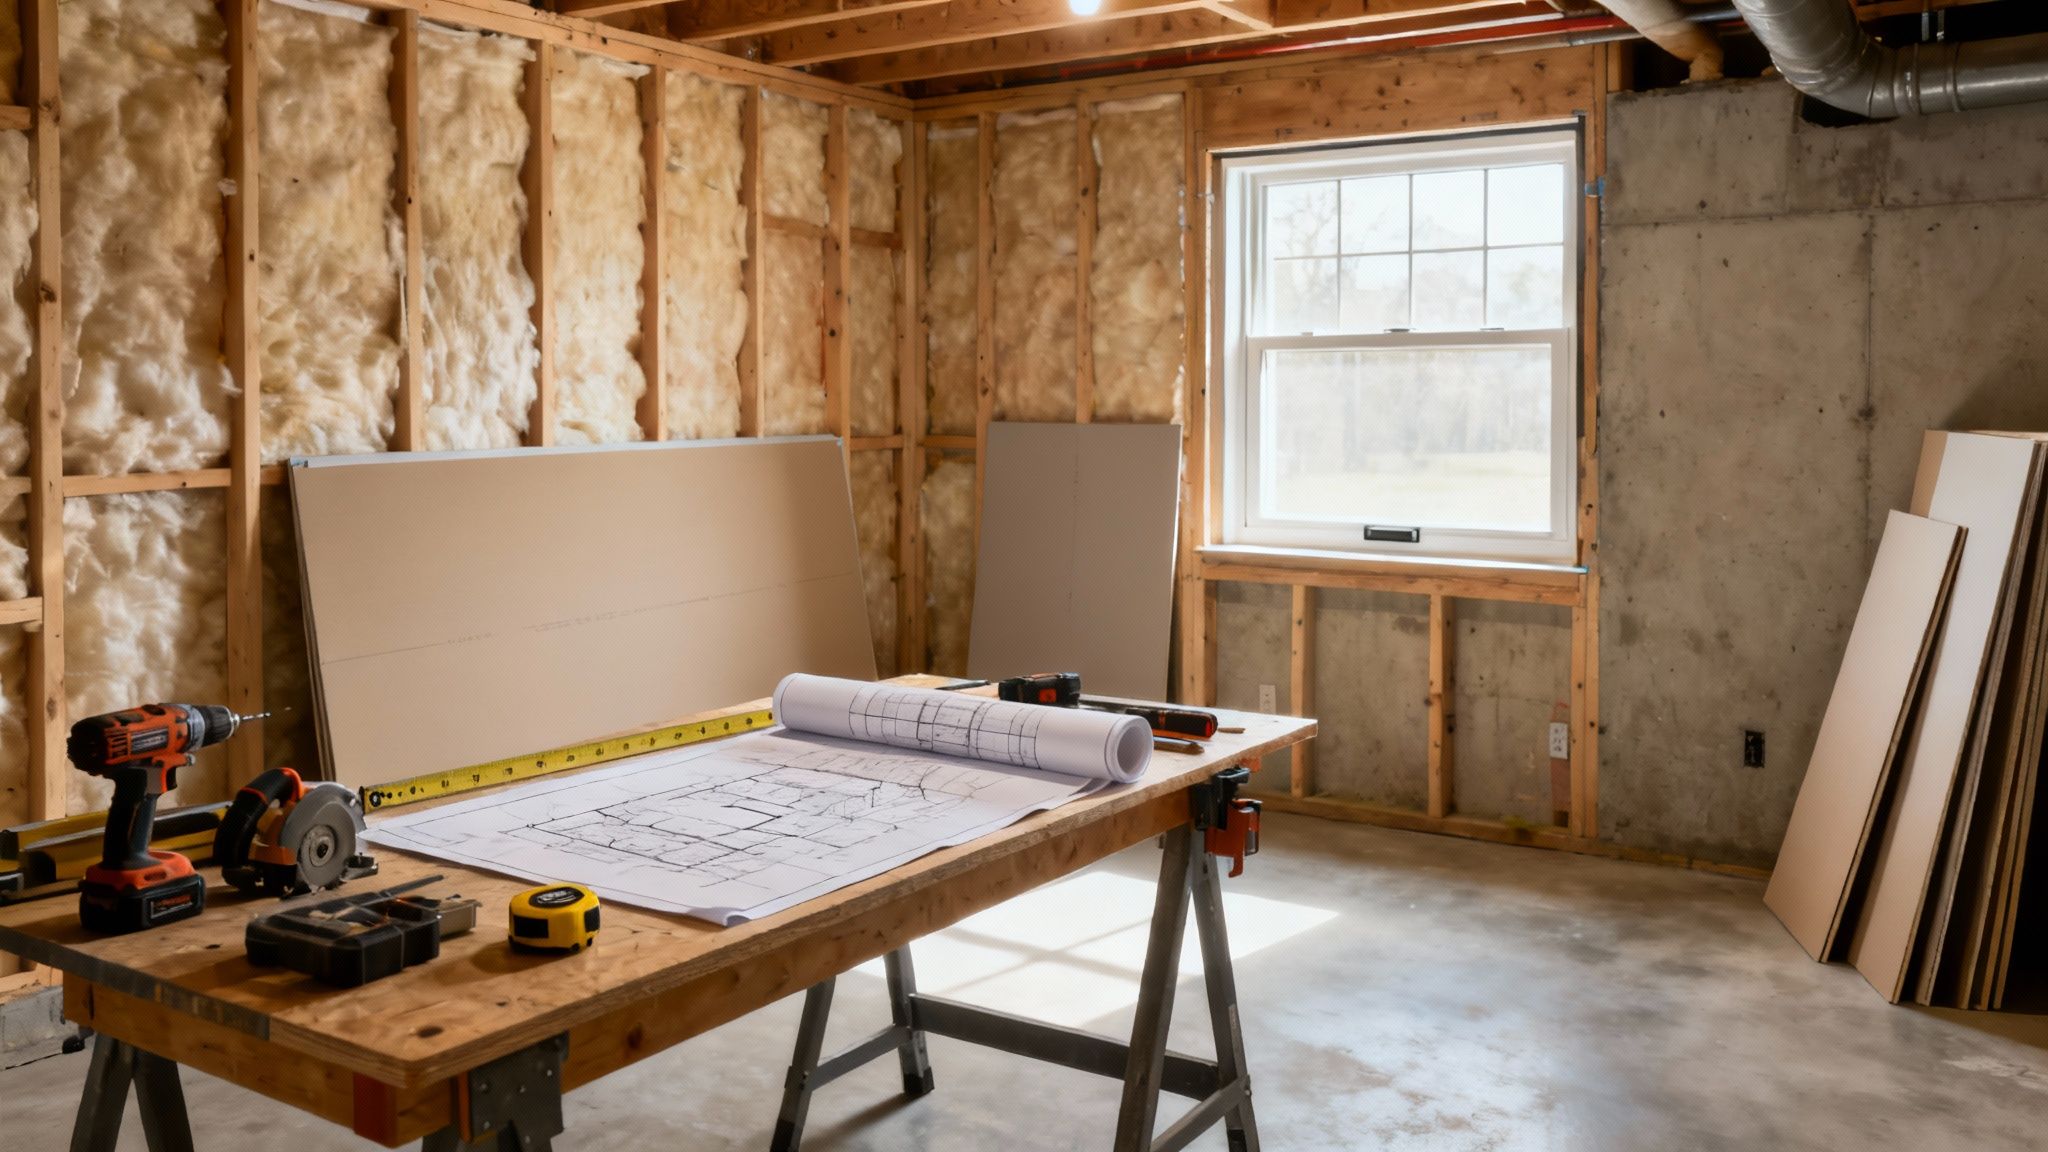
The most important work happens with a tape measure, a notepad, and a bit of research. A well-thought-out basement plan saves you from costly headaches down the road and ensures the final space actually works for your family. It turns a massive, overwhelming project into a series of manageable tasks.
You're not alone in this, either. The home remodeling industry is huge, valued at roughly USD 950 billion globally in 2023, and it's still growing. A big slice of that comes from homeowners just like you, finally unlocking their property's hidden potential.
Defining Your Basement's Purpose
First things first: what do you actually want to do down there? This is the single most important question you'll ask, because the answer drives every single decision that follows, from the type of flooring you pick to where the light switches go.
Don't settle for a vague goal like "more living space." Get specific.
- Family Entertainment Hub? You’ll probably want an open-concept layout, flooring that can take a beating, and dedicated wiring for a big-screen TV and sound system.
- Quiet Home Office & Guest Suite? Now you're thinking about soundproofing, creating separate rooms with proper egress, and almost certainly adding a bathroom.
- Home Gym or Hobby Room? The focus shifts to practical needs—maybe reinforced flooring for weights, great ventilation, and bright, targeted lighting.
Try to walk through how you'll use the space day-to-day. A playroom needs clear sightlines from a nearby couch, while a guest suite demands privacy and a clear path to the bathroom.
Measuring and Sketching a Functional Layout
Once you have a clear vision, it's time to get acquainted with your space. Grab a tape measure and create a detailed sketch of your basement's current state. Make sure to note the exact locations of everything you can't easily move: structural posts, the furnace, water heater, sump pump, and any low-hanging ductwork. These are your non-negotiables.
You can use simple graph paper or a free online tool to draw your floor plan to scale. This is where your ideas start to take shape. It’s your chance to play with room placement without lifting a single 2x4. Does that bedroom you envisioned actually fit, or is a support column right in the middle of it? Find out now, not after you've started framing.
Pro Tip: Don't just plan for walls; plan for furniture. Sketch in the couch, the desk, or that pool table you've always wanted. It's a classic rookie mistake to frame out a room only to discover it's too small to comfortably fit the furniture it was designed for.
Navigating Building Codes and Permits
I can't stress this enough: this step is non-negotiable. Before you do anything else, get in touch with your local building department. They are your ultimate resource for the specific rules in your area, which are all designed to keep your family safe.
Most finished basements have a few common code requirements you'll need to meet:
- Egress: Any bedroom must have a direct way out in case of a fire, which usually means a specific type of egress window or a door to the outside.
- Ceiling Height: There’s almost always a minimum finished ceiling height, typically around 7 feet. You can learn more by reviewing these basement ceiling height requirements.
- Ventilation: Good airflow is key, especially if you're adding a bathroom or kitchenette that will produce moisture.
Pulling permits isn't just about bureaucracy; it’s about protecting your investment. Unpermitted work can create massive problems when you decide to sell your home and could even void your homeowner's insurance if something goes wrong. The required inspections are there to ensure your project is built safely and will last for years to come.
Prepping Your Space for Transformation
With your plans and permits squared away, it’s time to get your hands dirty. This is where the real work begins, turning that abstract floor plan into a tangible project. Prepping the space isn't the most glamorous part of a basement remodel, but believe me, it's the most critical foundation you'll lay. Skimp on this stage, and you're setting yourself up for musty smells, mold, and costly repairs down the road.
First up is demolition. If you have an old, partially finished basement, you’ll need to strip it back to a clean slate. This means carefully taking down old wood paneling, water-stained drywall, or that hideous 70s-era shag carpet. Think controlled deconstruction, not a wild swinging match with a sledgehammer. The goal is to remove the old stuff without damaging essential components you plan to reuse, like structural posts, plumbing lines, or key electrical circuits.
Before you touch anything, especially in an older house, you absolutely must check for hazardous materials. It is critical to learn how to identify asbestos insulation before you start tearing into walls or ceilings. If you even suspect you have asbestos in old floor tiles, pipe wrap, or insulation, just stop. Call in a professional for proper testing and abatement—it’s not worth the risk to your family’s health.
Confronting the Moisture Monster
Once the space is cleared out, your number one enemy is moisture. Basements are, by nature, susceptible to dampness. Ignoring even a tiny bit of water will ruin all your hard work.
Start with a detailed inspection of your foundation walls and floor. Look for any cracks, no matter how small. Also, keep an eye out for efflorescence—that chalky, white powder that forms on concrete. It's a dead giveaway that water is wicking its way through the foundation.
For small, hairline cracks, you can often tackle the repair yourself. Here’s a simple, effective game plan:
- Prep the Area: Grab a wire brush and scrub the crack and the surrounding area clean. You need to get rid of any loose concrete, dirt, or old paint for a good bond.
- Fill the Void: Use hydraulic cement. This stuff is great because it actually expands as it cures, creating a rock-solid, watertight plug. Use a putty knife to really force it deep into the crack.
- Seal the Deal: After the cement is fully cured, paint the entire wall with a high-quality masonry waterproofer. This creates a final moisture-proof barrier.
This process highlights how a successful remodel is built on a sequence of smart decisions, from defining the purpose of the space to getting the proper permits before any of this prep work begins.
Ensuring Your Defenses Are Strong
Waterproofing is more than just patching a few cracks; it’s about a total defense system against water. For more significant dampness or recurring water issues, you’ll need a more robust strategy. We cover a variety of techniques in our comprehensive guide on https://buildnp.com/blogs/how-to-waterproof-basement-walls/.
Next, check on your sump pump. Don't have one? If you live anywhere with a moderate water table, it's a non-negotiable investment. If you do have one, test it! Pour a bucket of water into the pit to make sure the float engages and the pump kicks on, pushing the water out. A failed pump during a big rainstorm can flood your beautiful new basement in a matter of minutes.
A proactive approach to water management is the bedrock of a successful basement remodel. The time and effort you spend now on waterproofing and drainage will pay dividends for the life of your home, protecting your investment and creating a healthy living environment.
Finally, don't forget to look outside. Are your gutters clean and draining far away from the house? Is the ground around your foundation graded so that water slopes away, not toward it? These simple outdoor fixes can make a massive difference in how much moisture ever reaches your basement walls. By taking these prep steps seriously, you transform your basement from a damp, dark space into a solid, dry canvas ready for its new life.
Framing Walls and Running Utilities
This is where the magic really starts to happen. After all the planning, cleaning, and waterproofing, you finally get to see your basement floor plan come to life. Watching the walls go up is easily one of the most satisfying parts of any remodel, transforming an open, empty space into actual, defined rooms.
The frame you build now is the skeleton for everything else—the drywall, doors, outlets, and all the final touches. This is a job where precision is your best friend. A wall that isn't perfectly plumb (vertical) and square will cause a cascade of headaches down the line, from hanging drywall to installing trim. So, take your time and measure twice.
Building Out the Bones of Your New Space
Your first big framing decision is what material to use: classic wood studs or modern steel studs? Both get the job done, but they have their own quirks. Wood is what most of us are used to; it’s easy to work with using standard saws and is pretty forgiving. Steel studs, on the other hand, are perfectly straight every time, lightweight, and won't be bothered by moisture or pests—a huge plus for any basement.
Either way, you’ll start by laying out your bottom plate on the concrete floor and securing a top plate to the ceiling joists above. From there, you'll measure, cut, and install your vertical studs, which are typically spaced 16 inches on center.
A Pro Tip for a Clean Finish: Got awkward ductwork or pipes? Build a soffit around them. It's just a simple box frame that encloses the utilities, giving you a clean, intentional look instead of a random pipe poking through a wall. This simple step makes a huge difference in the final quality of the room.
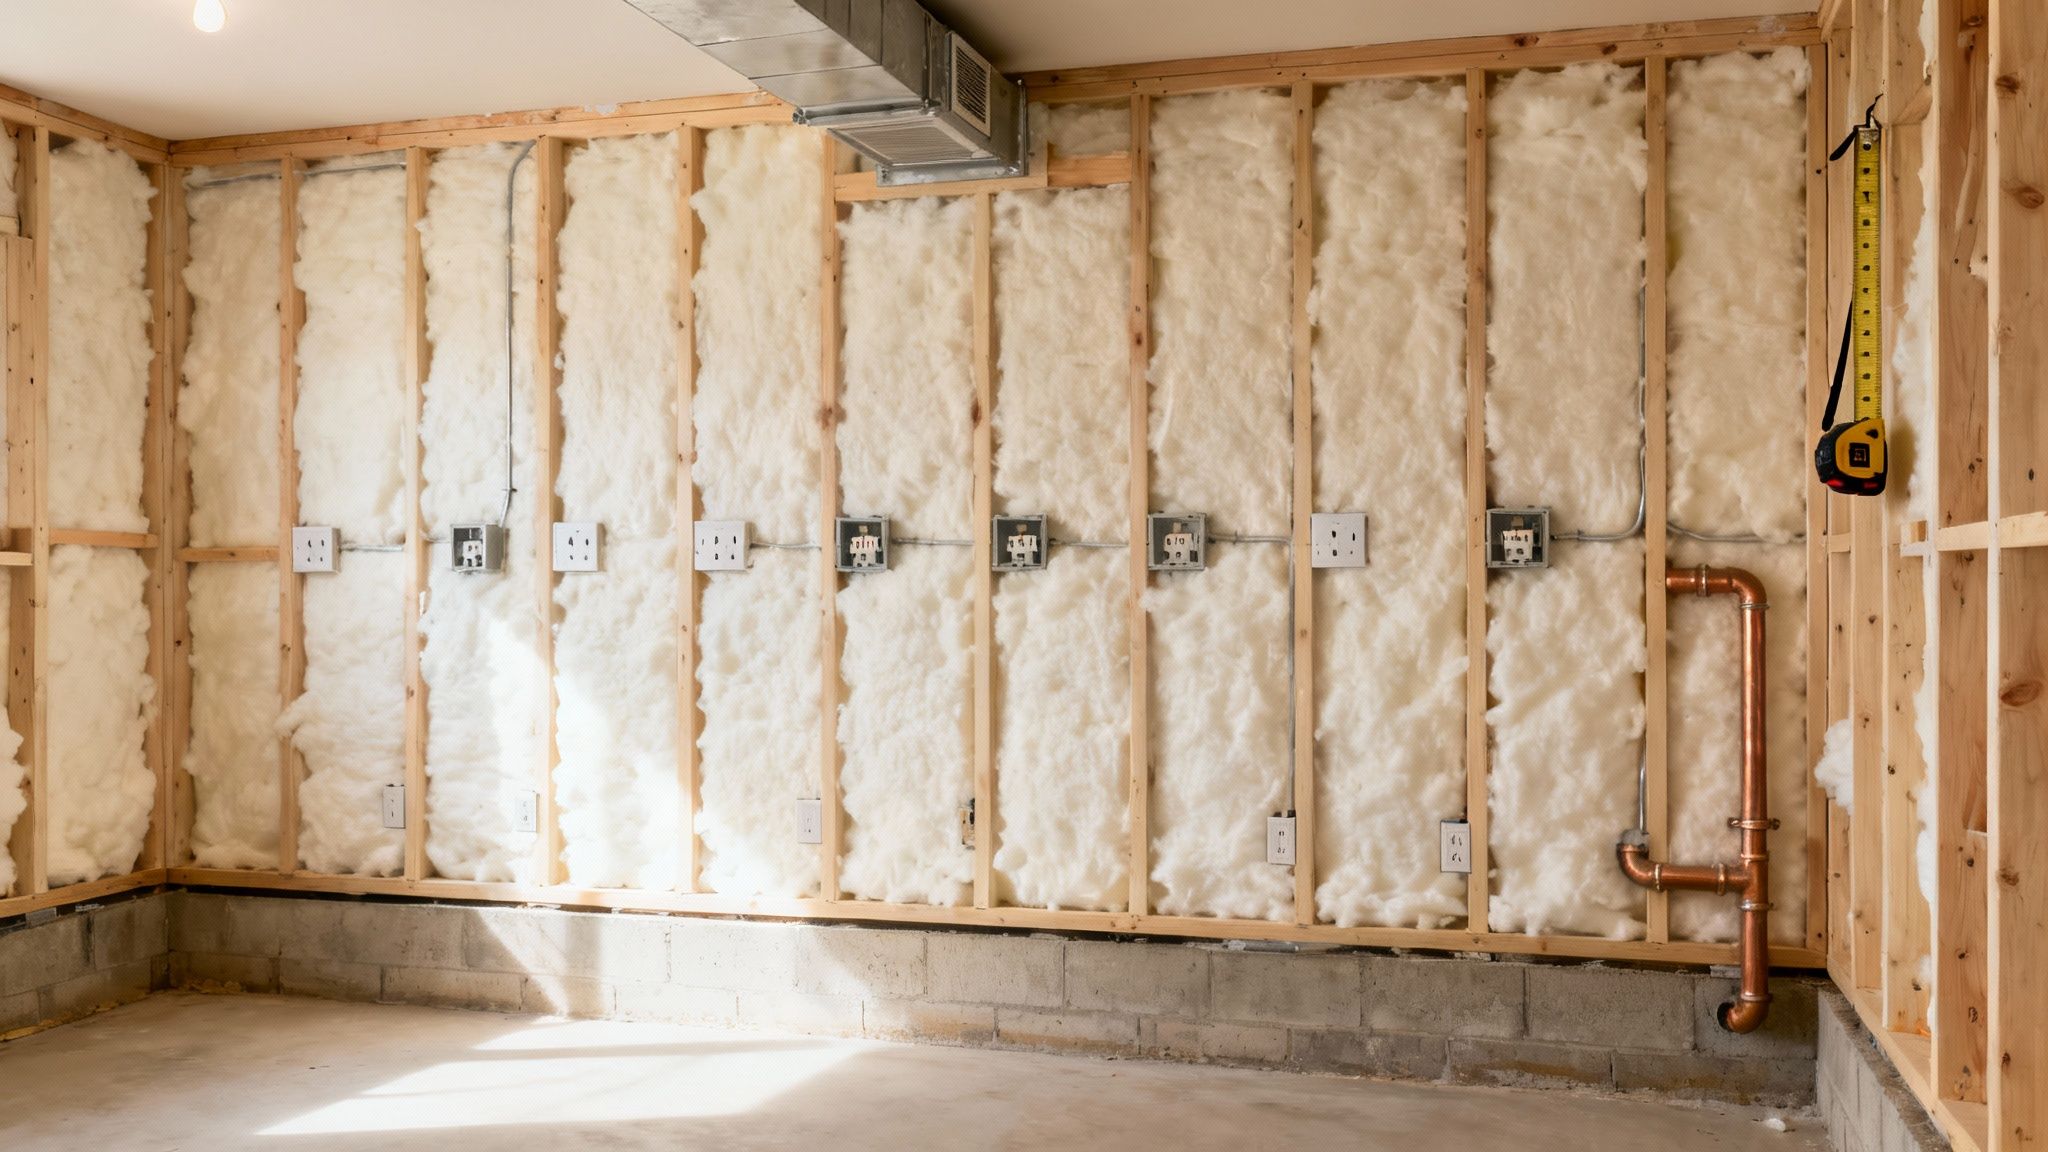
Insulating for Warmth and Efficiency
Once the frames are up, it’s time for insulation. Do not skip or skimp on this step. Good insulation is what separates a comfortable, livable basement from a cold, damp cave. It keeps the space warm, acts as a critical moisture barrier, and even helps with soundproofing.
For those concrete foundation walls, you have a couple of solid options:
- Rigid Foam Board: This is a great choice for DIYers. You can glue sheets of XPS or EPS foam directly to the concrete walls before you build your stud wall in front of it. This creates a continuous thermal break and an effective vapor barrier.
- Closed-Cell Spray Foam: This usually requires a pro, but it’s the gold standard. It delivers the highest R-value per inch and creates a perfect air seal by expanding into every little nook and cranny. You simply can't beat it for insulation and moisture control.
Don't forget the interior walls, too. Putting standard fiberglass batts in the walls around bathrooms, laundry rooms, or a home theater will do wonders for sound deadening.
Roughing In Your Electrical and Plumbing
With the wall cavities wide open, now is the perfect time to run your utilities. This is called the "rough-in," and it involves getting all the wires and pipes in place before any drywall covers them up. While you'll need licensed pros for the final hookups, a handy homeowner can save a lot of money by doing the prep work.
Walk through your newly framed rooms and imagine living in them. Where will the TV go? Where will you need an outlet for a lamp or a phone charger? Mark the locations for outlets and switches right on the studs. Think about your lighting—will you go with recessed lights, track lighting, or something else? Plan where the switches will be for maximum convenience.
If a bathroom or wet bar is in the plans, this is your chance to run the supply and drain lines. It's a thousand times easier now than trying to do it after the fact.
DIY Utility Prep Checklist:
Map Your Boxes: Use a pencil to mark the exact height and location for every electrical outlet and light switch box.
Drill the Pathways: Drill holes through the center of the studs where your electrical cables will need to run.
Plan Your Plumbing Routes: Figure out the straightest, most direct path for water and drain lines to keep things simple.
Getting this foundational work right ensures your finished basement isn't just beautiful, but also perfectly functional. It’s the behind-the-scenes effort that makes all the difference.
Walls, Floors, and Finishes: Bringing Your Basement to Life
This is the part everyone waits for. After all the planning, demolition, and rough-ins, you finally get to see your space transform from a framed skeleton into actual, livable rooms. All that foundational work is about to pay off in a big way as you hang drywall, lay flooring, and add the finishing touches that make it feel like home. This is easily the most rewarding part of a basement remodel.
You're not alone in this, either. Homeowners are tackling projects like this more than ever. The global DIY home improvement market hit about USD 0.87 trillion in 2024, with building materials—like drywall and flooring—making up a huge chunk of that. You can see more on this growing market at mordorintelligence.com.
Getting That Flawless Drywall Finish
Let’s be honest: finishing drywall is an art form. It's the one thing that can make a DIY project look truly professional... or painfully amateur. The secret isn't brute strength; it's patience.
Start by hanging your sheets, securing them to the studs with drywall screws. You’re looking for that perfect little "dimple" where the screw head sinks just below the paper surface without tearing it.
Once everything is hung, the real craft begins with taping and mudding. This is a multi-stage process, and you can’t rush it.
First Coat & Tape: Slather a layer of all-purpose joint compound (or "mud") into the recessed seam between panels. While it's still wet, press paper tape firmly into the mud with a drywall knife, squeezing out the excess from behind.
Second Coat: After the tape coat is bone dry, come back with a wider knife and apply a second, thicker coat of mud. The goal here is to "feather" the edges out, making the seam wider and flatter.
Finish Coat: Your final coat should be the widest and thinnest yet. Skim it on smoothly to completely hide the tape and feathered edges, making the seam disappear into the wall.
After each coat dries, you’ll be sanding. Get a pole sander, wear a good dust mask, and prepare for a mess. Don't stress about getting it perfect on the first or even second coat. It’s a gradual process of building up and smoothing out thin layers.
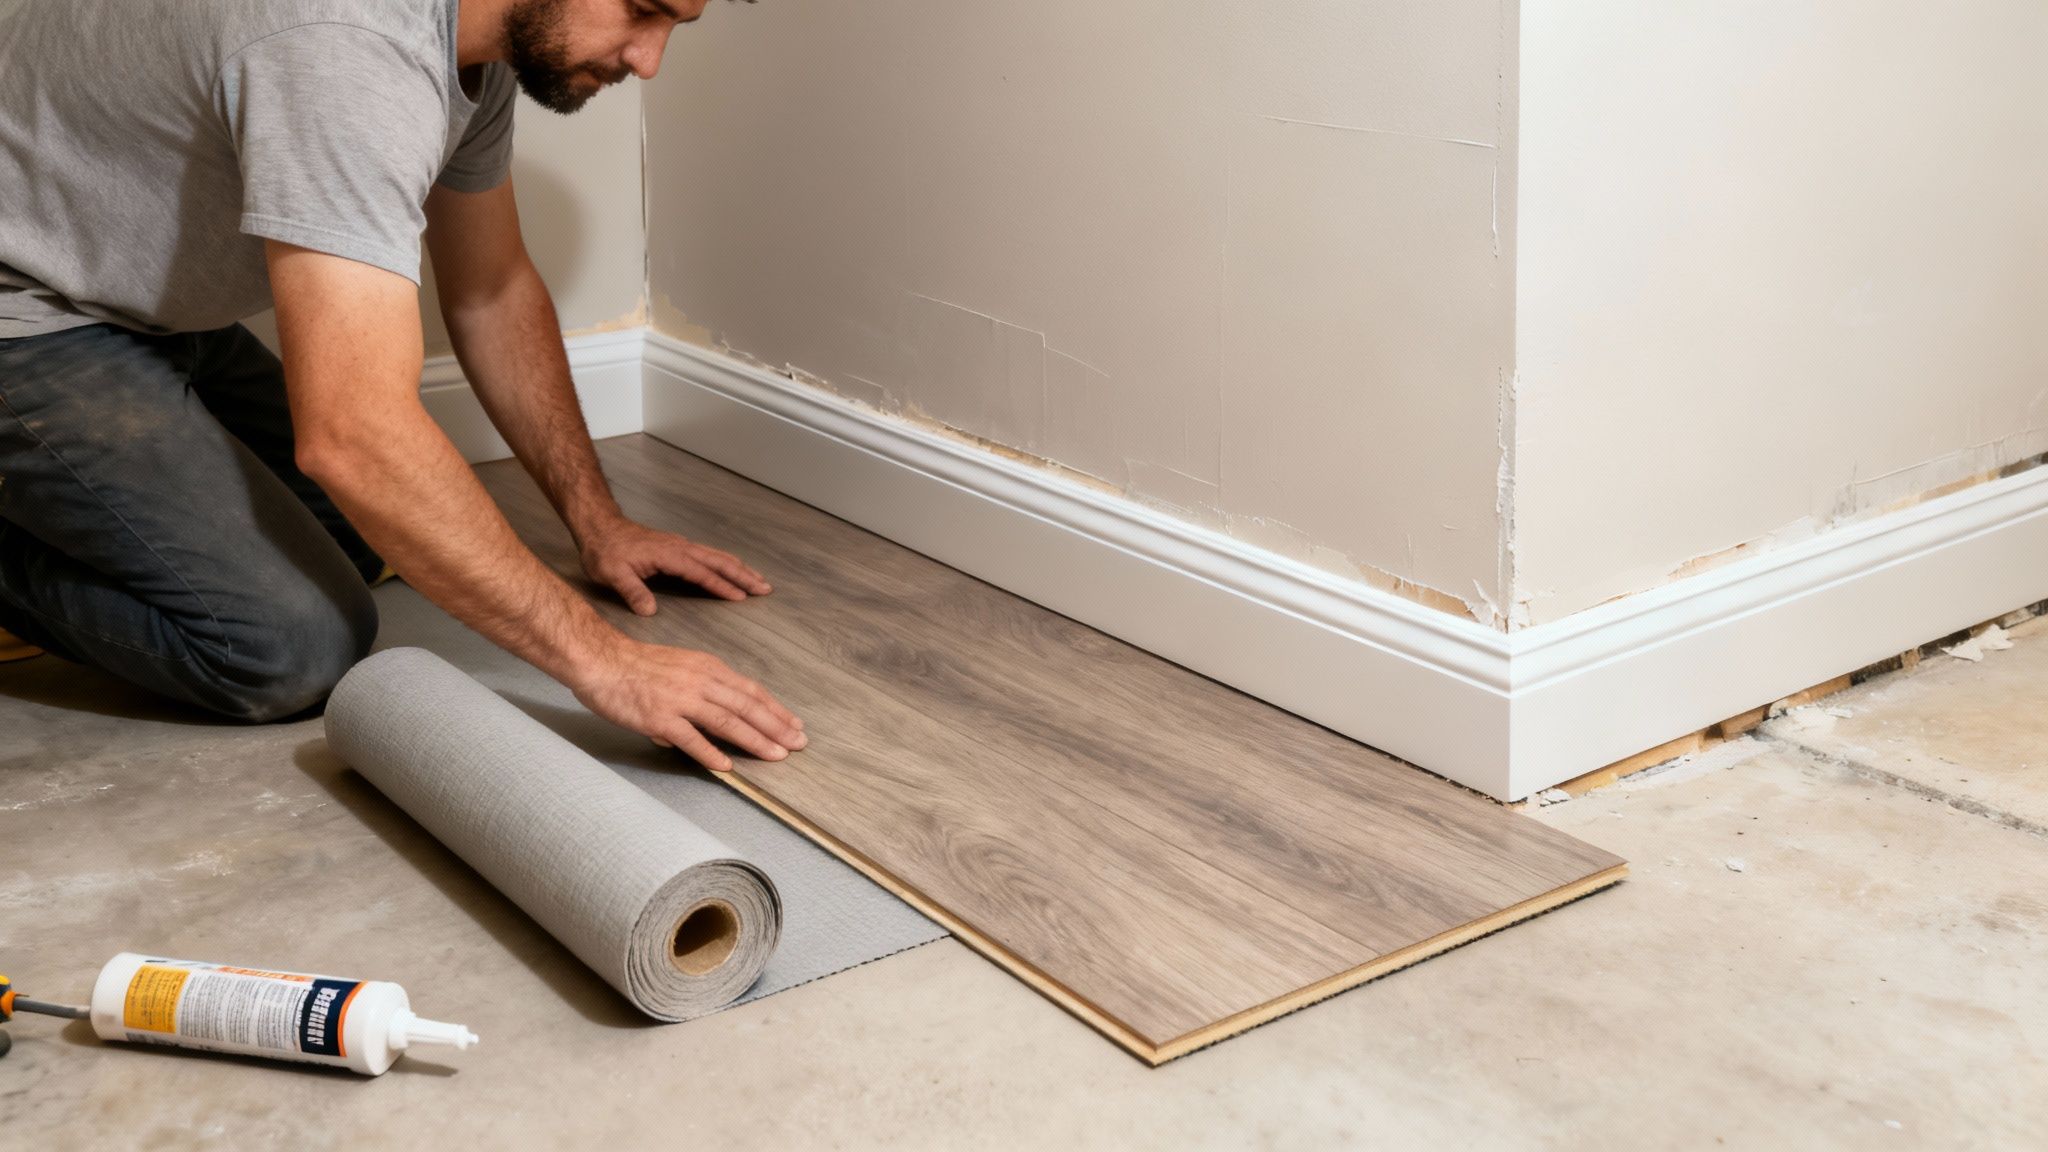
Picking and Laying the Perfect Basement Floor
Flooring choice is critical in a basement. Because it's below ground, you need something that won't mind a little moisture or humidity. This means solid hardwood is out, but that still leaves plenty of fantastic, DIY-friendly options.
My Go-To Flooring Choices for Basements:
- Luxury Vinyl Plank (LVP): This stuff is king for a reason. It's 100% waterproof, incredibly tough, and looks remarkably like real wood or stone. Most LVP uses a simple click-lock system, so if you can put together a puzzle, you can install this floor.
- Engineered Hardwood: Crave the feel of real wood? This is the way to go. Its layered construction handles humidity shifts much better than solid wood. Just be sure to get a "floating" floor variety that doesn't need to be nailed or glued to the subfloor.
- Carpet Tiles: Forget those giant, clumsy rolls of carpet. Modern carpet tiles are easy to handle and install with simple adhesive tabs. The best part? If you spill something nasty, you just pull up the one tile and replace it.
Quick pro tip: Always, always put down a quality underlayment first. It's a thin layer that acts as a thermal break against the cold concrete, adds a little cushion underfoot, and—most importantly—provides a vapor barrier to stop moisture from wicking up from the slab.
Adding the Final, Polished Touches
With the big surfaces done, it's time for the details that make a room feel complete. Trim, paint, and fixtures are what tie the entire project together.
First up, install your baseboards and any door or window casings. A miter saw is your best friend here for getting those perfect, tight corners. Use a nail gun to attach the trim, then go back and fill the tiny nail holes with wood putty. Run a bead of caulk along the top edge where the trim meets the wall for a seamless, professional look.
Next is paint. Because basements are often short on natural light, sticking with lighter colors can make the space feel much larger and more inviting. Use a good quality paint-and-primer-in-one, especially on that fresh drywall. And don't forget the ceiling—a coat of flat white paint works wonders to make it feel higher.
Finally, you get to install the fun stuff: light fixtures, outlet covers, and switch plates. This is the last step that officially turns your construction zone into a beautiful, functional part of your home.
Knowing When to Call a Professional
A successful basement remodel is as much about the work you do as it is about knowing when to step aside. Being a smart DIYer isn’t just about skill with a saw or a paintbrush; it’s about honestly assessing your limits and knowing exactly when to trade your tool belt for the phone.
Pushing past your expertise on certain jobs doesn't just risk a sloppy finish—it can be downright dangerous for your home and your family.
The Non-Negotiable Pro Jobs
Some tasks are simply non-negotiable. These are the jobs where the risk of fire, flood, or structural failure is just too high for even the most capable weekend warrior. They demand years of specialized training, expensive tools, and a deep understanding of building codes that exist purely to protect you from catastrophic mistakes.
Think of these pros as your project partners. While you tackle the framing, flooring, and finishing, they ensure the critical systems hidden behind the walls are safe, legal, and built to last. Handing these jobs off isn't admitting defeat; it’s the smartest move you can make to protect your investment.
- Major Electrical Work: Swapping out a light fixture is one thing. But if your plans involve upgrading the main electrical panel, adding a subpanel just for the basement, or any work that requires cutting power at the meter, you must call in a licensed electrician. Faulty wiring is a leading cause of house fires, period.
- Complex Plumbing: A basement project has plenty of DIY moments, but it's vital to know the plumbing DIY dos and don'ts to sidestep a disaster. Tapping into a main drain stack, moving water supply lines, or adding new sewer connections for a bathroom absolutely requires a licensed plumber. They understand the precise venting and slope needed to prevent nasty backups and dangerous sewer gas leaks.
- Structural Changes: Any modification that touches your home’s load-bearing skeleton is completely off-limits for DIY. This includes cutting a new doorway into a foundation wall, removing a support column, or notching out floor joists to run pipes. One wrong cut can compromise the integrity of the entire house above you.
A huge mistake I see is people underestimating how complex utility work really is. A pro isn't just connecting pipes or wires. They understand the whole system, ensuring that the new bathroom you're adding doesn't mess up the water pressure on the second floor.
Finding and Vetting Your Contractors
Once you know which jobs need a pro, you have to find the right one. Don’t just hire the first person who answers the phone. A little bit of homework now will save you from massive headaches down the road.
When you start making calls, have a clear scope of work ready. The more detail you give them, the more accurate their quote will be. When you meet them in person, come prepared with a few pointed questions:
"Can I see your state license and proof of insurance?" Never, ever work with an unlicensed or uninsured contractor. Their liability insurance protects your property from damage, and their workers' comp covers them if they get hurt on your job site.
"Will you be pulling the required permits?" The only acceptable answer is "yes." Any contractor who suggests skipping permits is cutting corners and putting all the risk squarely on your shoulders.
"Can you give me a few recent references for projects like this?" A good pro will be proud to connect you with happy customers. Make the calls!
By strategically hiring pros like Northpoint Construction for the heavy lifting, you're creating a powerful partnership. This hybrid approach lets you control costs on the parts you can handle while resting easy knowing the most critical systems are installed safely and up to code.
Got Questions About Your Basement Remodel? We've Got Answers.
Even the most well-thought-out DIY basement project can leave you scratching your head at times. It’s a huge undertaking, probably one of the biggest you'll tackle as a homeowner, so it’s completely normal for questions to bubble up.
We hear a lot of the same queries from ambitious homeowners diving into their own remodels. To help you out, we’ve put together some straight-shooting answers to the most common questions we get. Think of this as your quick-reference guide for when you hit a snag or just need a reality check.
So, How Much Should a DIY Basement Remodel Cost, Really?
This is always the first question, and the honest-to-goodness answer is: it depends. The final price tag on a basement remodeling diy project swings wildly based on the size of your space, the quality of materials you pick, and just how much of the work you’re truly willing to tackle yourself.
A simple, open-plan family room is going to be worlds cheaper than a full build-out with multiple bedrooms and a three-piece bathroom.
Your biggest costs will almost always fall into these buckets:
- Framing and Insulation: The bones of the project. Wood studs, steel studs, and quality insulation panels are a major upfront investment.
- Drywall and Finishes: This stuff adds up faster than you'd think. The cost of drywall sheets, joint compound, tape, primer, and paint can be substantial for a large area.
- Flooring: This is a big-ticket item. You can find luxury vinyl plank for anywhere from $2 to $7 per square foot, but your options are endless and so are the price points.
- Hiring Pros: Don't forget, even on a DIY job, you'll need to budget for licensed electricians and plumbers. This alone can run you several thousand dollars.
My best advice for managing your money? Track every single purchase. A simple spreadsheet is your best friend here. Log everything—from the flooring order down to the last box of screws. It’s the only way to know where your money is going in real-time and avoid nasty surprises down the road.
What's a Realistic Timeline for a DIY Project?
Patience isn't just a virtue in remodeling; it's a necessity. This is especially true when you're the one doing all the work. Unlike a professional crew that's on-site eight hours a day, your project timeline will be dictated by your free evenings and weekends. Being realistic about this from the start will save you from burnout.
For a typical 1,000-square-foot basement, a dedicated DIYer should plan for the project to take anywhere from four to eight months.
Here's a rough breakdown of how that time gets spent:
Prep and Framing (3-6 weekends): This covers demolition, any necessary waterproofing, and getting all the walls framed up.
Utilities Rough-In (Varies): This part of the schedule is entirely dependent on when you can get your hired electrician and plumber to the house.
Drywall (4-7 weekends): This is a grind. Hanging the board, taping, mudding (multiple coats!), and sanding is a slow, methodical process that can’t be rushed.
Finishing Touches (4-8 weekends): Finally, the fun part! This includes painting, laying the floor, installing all your trim and baseboards, and putting in lights and fixtures.
And remember, life happens. It’s always smart to build a little buffer time into your schedule.
Can I Really Save That Much Money Doing It Myself?
Yes, you absolutely can, but you have to be clear about where those savings come from. You're primarily saving on labor costs, which can easily make up 40-60% of a professionally finished basement's total price. You're swapping your own time and sweat for that cash. For a closer look at how the numbers break down, check out our guide on how much a basement remodel costs.
But you can't escape the cost of materials, permits, or the pros you have to hire for electrical and plumbing. According to recent industry data, the average cost to remodel a basement in 2025 is around $22,868, with a huge range based on the scope of the project. You can dig into those basement remodeling cost averages on angi.com for more details. Your DIY savings come from pocketing the money you would have paid a general contractor and their crew.
Taking on a basement remodel is a massive investment of both your time and money. While the DIY route can be incredibly rewarding (and save you a bundle), having a pro in your corner for the make-or-break stages can ensure everything is safe, up-to-code, and built to last.
Whether you need help with a few specialized tasks or want an expert to manage the entire project, the team at Northpoint Construction is here to help you turn that concrete box into a beautiful, functional living space. Visit us at https://buildnp.com to see how we can help with your project.