
Basement Remodeling How To Finish Your Space
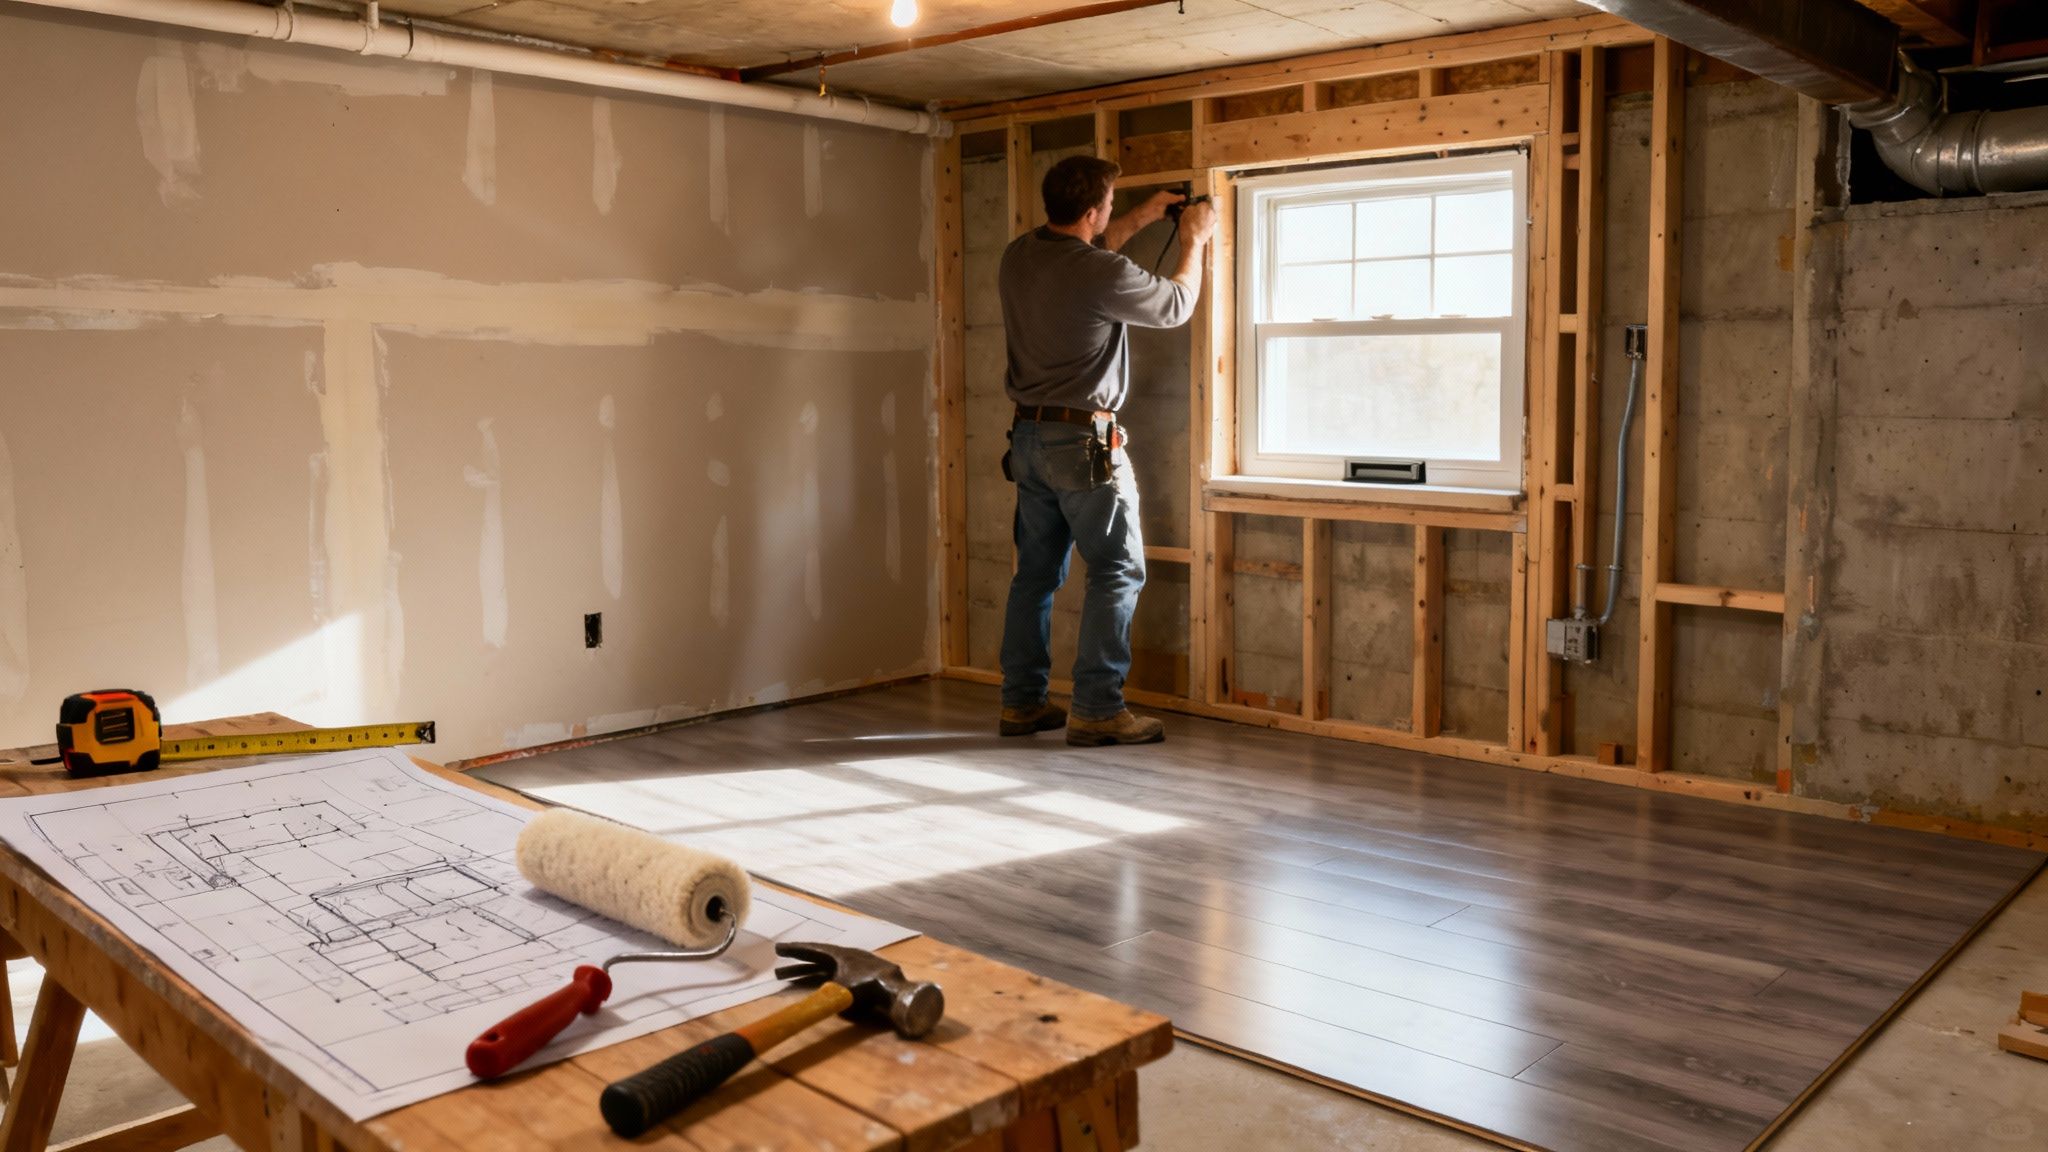
Turning a cold, concrete basement into a warm, functional living space is one of the most rewarding projects a homeowner can take on. It’s a journey that unfolds in three main acts: the initial planning and design, the heavy-lifting of construction and structural work, and finally, the detail-oriented finishing touches. This guide is your start-to-finish playbook for navigating that entire process.
Your Basement Remodeling Journey Starts Here
Forget the generic advice. We're going to walk through the real-world steps, from sketching out your first ideas to that final coat of paint. You'll get a clear picture of how to map out a smart layout, build a realistic budget, and, crucially, figure out which parts you can DIY and when it’s time to call in the pros. This is about more than just adding square footage; it's about creating a space that genuinely enhances your family's life.
Finishing a basement has become an incredibly popular upgrade, and it's easy to see why. The entire U.S. home improvement market is expected to hit a staggering $593.8 billion, with a steady 3.4% growth rate. Within that, about 48% of homeowners are actively planning renovations. With a median household spending $15,000 on these projects, basement remodels are right in the sweet spot for delivering big value. If you're curious, you can read more about current remodeling industry trends and statistics to see just how common these projects have become.
A High-Level Project Roadmap
Before diving into the weeds, it helps to see the whole project from 30,000 feet. Understanding the major stages from the get-go helps manage your expectations for both the timeline and the complexity involved.
A well-planned basement renovation can turn an underutilized space into the most valuable square footage in your home. It’s a project that combines practical construction with creative design, offering a significant return on both your financial investment and your family's quality of life.
The infographic below offers a great visual summary of the project's arc, breaking it down into the core phases of planning, building, and finishing.
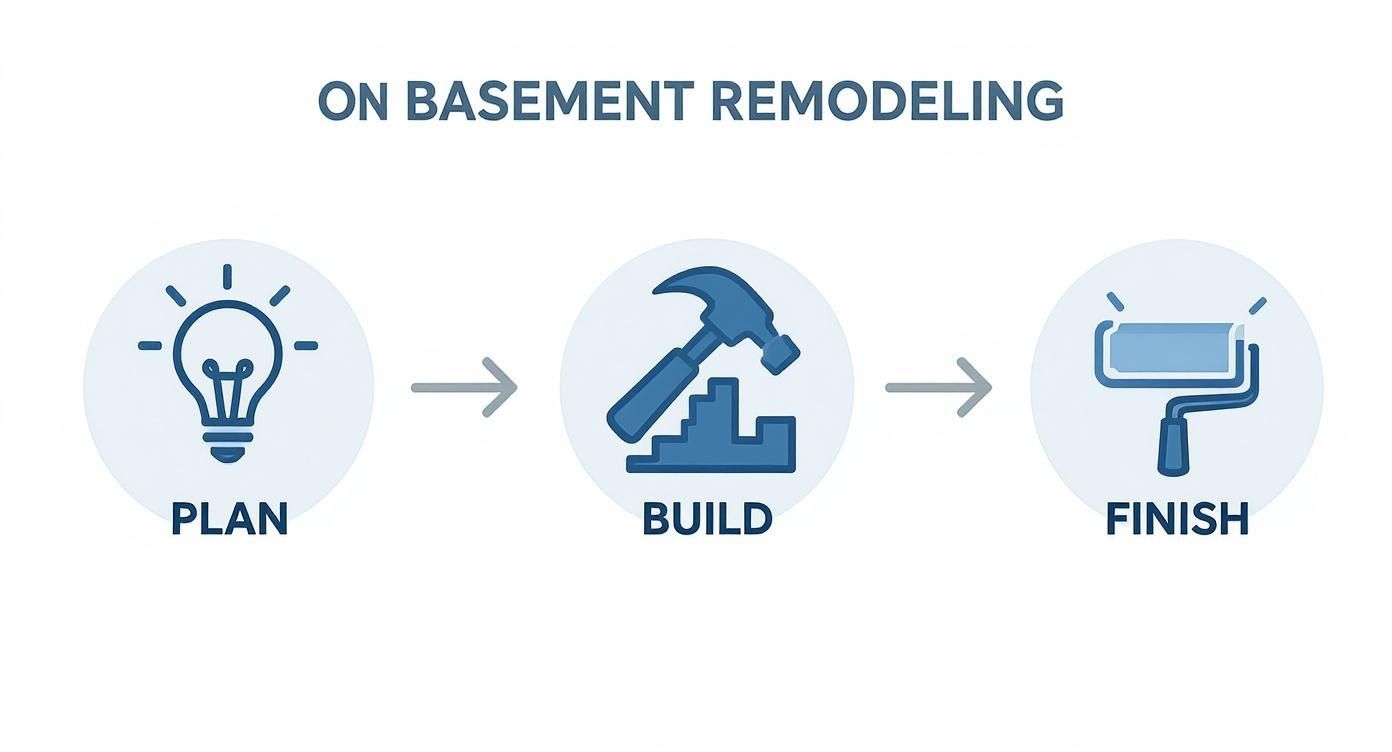
As you can see, a successful outcome is really forged in that initial planning stage. Time spent here pays off tenfold down the road.
Understanding the Major Project Phases
Every stage of a basement remodel has its own checklist, budget, and timeline. Getting a handle on these phases is the first step toward a smooth and successful project.
Here's a quick overview to get you started on what to expect.
Basement Remodeling Project Phases at a Glance
This table provides a high-level summary of the typical stages in a basement remodel, including estimated timelines and budget allocation percentages to help with initial planning.
| Planning, Design & Permitting | 3-6 Weeks | 10-15% |
| Demolition & Structural Work | 1-2 Weeks | 10-20% |
| Framing, Electrical & Plumbing | 2-4 Weeks | 25-35% |
| Drywall, Painting & Flooring | 2-3 Weeks | 20-30% |
| Finishing Touches & Final Trim | 1-2 Weeks | 10-15% |
This breakdown should give you a solid framework for how your project will likely flow and where your budget will be focused. By breaking the entire renovation down into these manageable stages, you can tackle the project with a clear head and a solid plan.
Vision and Budget: Where Your Remodel Truly Begins
Every great basement remodel starts long before the first hammer swings. This is the planning stage—the creative heart of the project where you figure out what you really want and, just as importantly, what you can realistically afford. It's about translating those "what if" daydreams into a concrete plan.
So, let's get specific. Don't just think "we need more room." Think about the problems you're trying to solve. Do you need a quiet, dedicated home office to escape the chaos upstairs? A legal, welcoming guest suite for the in-laws? Or maybe just a sound-proofed, indestructible playroom where the kids can unleash their energy without rattling the whole house.
Get to Know Your Starting Point
Before you dream up the perfect layout, you have to get intimate with the space you already have. This is a non-negotiable first step. Grab a tape measure, a notepad, and a good flashlight, and get ready to map out your basement's current state.
Here's what you're looking for:
- Get Accurate Measurements: Don't just get the total square footage; measure the ceiling height in multiple spots. You'll often find it varies. Make careful notes of any low-hanging ductwork, support beams, or pipes that will absolutely dictate your layout.
- Find Your Utilities: Pinpoint the exact location of the furnace, water heater, sump pump, and main electrical panel. It's far, far cheaper to design your layout around these essential systems than it is to move them.
- Go on a Moisture Hunt: Be a detective. Look for damp spots on the walls or floor, check for efflorescence (that white, chalky powder that forms on concrete), and trust your nose—a musty smell means moisture is hiding somewhere. Tackling water issues now will save you from mold, rot, and heartache later.
A dry basement is the bedrock of a successful remodel. I've seen too many projects ruined because a small leak was ignored. Fixing water problems is the one area where you absolutely cannot afford to cut corners.
Sketching Out a Smarter Layout
With your measurements and constraints in hand, you can start playing with floor plans. You don't need fancy software yet—a simple piece of graph paper will do the trick. The goal is to think about flow and function.
A home theater, for example, is best placed in an area with few or no windows to give you total light control. A home gym with heavy equipment should ideally sit right on the concrete slab for maximum support.
Consider keeping the layout as open as possible. It’s a classic trick for making a basement feel bigger and brighter. If you do need to frame out separate rooms, like a bedroom and bathroom, think carefully about how they connect and how you can strategically use windows or glass doors to share light between the spaces.
Talking Dollars and Sense: The Remodel Budget
Alright, let's get to the big question: what’s this all going to cost? Budgeting can feel like the scariest part, but it's manageable if you break it down. Before you even think about getting quotes, you need to understand how to budget for home renovation on your own terms. Your final price tag will always be a mix of materials, labor, and permits.
So, what's a typical number? Recent figures from Angi show most basement remodels land somewhere between $22,800 and $34,500. Of course, a simple, clean finish might only run you $12,000, while a high-end renovation with a custom bar and home theater can easily top $75,000. Want to add a bathroom? Plan on that adding $10,000 to $25,000 to the total, thanks to the plumbing work involved.
To get a handle on your own numbers, open up a spreadsheet and start listing out every possible expense.
Your Main Budget Buckets:
Waterproofing & Foundation: Your first priority. Don't skimp here.
Permits & Design Fees: The necessary cost of doing things legally and correctly.
Framing & Insulation: This is what turns a concrete box into actual rooms.
The "Big Three" (Electrical, Plumbing, HVAC): Almost always requires licensed pros.
Drywall & Paint: The step where it finally starts to feel like a real living space.
Flooring: Think durable, moisture-resistant options like LVP or basement-grade carpet.
Lighting & Fixtures: Crucial for making a basement feel bright and welcoming, not like a dungeon.
Doors, Trim & Finishes: The details that pull the whole look together.
Here’s the most important piece of budgeting advice I can give you: always add a contingency fund of 15-20% to your final estimate. Renovations are famous for surprises—you might find old wiring that needs replacing or a hidden foundation crack. This buffer ensures a minor hiccup doesn’t blow up your entire project.
To get a more personalized estimate, our basement finishing cost calculator is a great tool for breaking down the numbers based on your specific plans.
Navigating Permits and Building Codes
Trust me on this one: skipping the permit process is the most tempting—and most expensive—mistake you can make. I’ve seen the fallout. It might feel like a bureaucratic headache now, but getting the right permits is your best insurance policy for the future.
Permits make sure the job is done safely, which protects your family and your home's resale value. More importantly, it keeps you from getting a stop-work order or, even worse, being forced to tear out a beautiful, finished wall because an inspector needs to see the wiring behind it.
Think of building codes as the bare minimum for safety. They’re there to ensure your new space is structurally sound, the electrical work won’t cause a fire, and you have a clear way out in an emergency.
When Do You Actually Need a Permit?
So, when do you have to bite the bullet and head down to the building department? The short answer is for almost any major change. If you're just painting the walls or laying down some floating vinyl plank flooring, you're probably in the clear. But a real basement finish? That's a different story.
You’ll almost certainly need a building permit for these common jobs:
- Structural Changes: Anytime you’re adding, moving, or taking down walls, a permit is required. This definitely includes framing out new rooms.
- Electrical Work: This is non-negotiable. Adding outlets, putting in recessed lighting, or running new circuits absolutely requires a permit and a licensed electrician.
- Plumbing & HVAC: If you're dreaming of a new bathroom, a swanky wet bar, or even just moving your laundry hookups, you'll need a permit. The same goes for extending your HVAC system.
- Creating a "Habitable" Space: This is the big one. Turning that dusty, unfinished storage area into a legal living space (like a bedroom or family room) is the whole reason the permit process exists.
Your first move should be to check the website for your local municipal building department. Just search for "[Your Town] building department," and you'll find their specific rules, application forms, and fee schedules.
The Egress Window: A Critical Safety Requirement
Let's talk about one of the most important—and most often missed—rules for finishing a basement: egress. If you plan to add a legal bedroom downstairs, you must have at least one window or door that leads directly outside. This isn't a friendly suggestion; it's a non-negotiable life-safety code.
An egress window isn't just any window. It has to meet very specific size requirements for its opening height, width, and total area to make sure a firefighter can get in and a person can get out. If the window opens into a window well, that well also has strict size rules. Codes also get really specific about things like ceiling height. For a deeper dive, you can learn more about how basement ceiling height requirements can affect your design and your permit approval.
Cutting a new opening in your concrete foundation for an egress window is a major structural job. This is not a weekend DIY project. You need a professional to do this to make sure you don't compromise the integrity of your entire house.
What to Expect From the Inspection Process
Once your permit is issued, you’re not just let loose to build however you want. The whole point of the permit is the series of mandatory inspections that happen at key milestones. An inspector from your town will have to physically visit the site and sign off on the work before you can cover it up and move on.
Here are the typical inspection points:
- Framing Inspection: This happens after all the walls are framed but before you hang any insulation or drywall.
- Rough-in Inspection: This is a big one. It covers all the electrical, plumbing, and HVAC lines once they’re installed in the walls but are still visible.
- Final Inspection: The last step. The inspector comes back one last time after everything is finished to give the entire space their final blessing.
Passing these inspections is how you "close out" your permit, making your new basement an official, legal, and safe part of your home.
Building Your Basement From the Ground Up
Alright, the permits are in hand and the plans are approved. Now the real fun begins. This is where you start turning that concrete box into a genuine living space, and it all starts with getting the fundamentals right.
Before you even think about putting up a single 2x4, your top priority has to be moisture control and insulation. I’ve seen too many projects go south because this step was rushed. Once the walls are up, fixing a leak or a condensation problem becomes an absolute nightmare of demolition and rework. A dry, warm foundation is the only way to get a cozy retreat instead of a damp, musty problem zone.
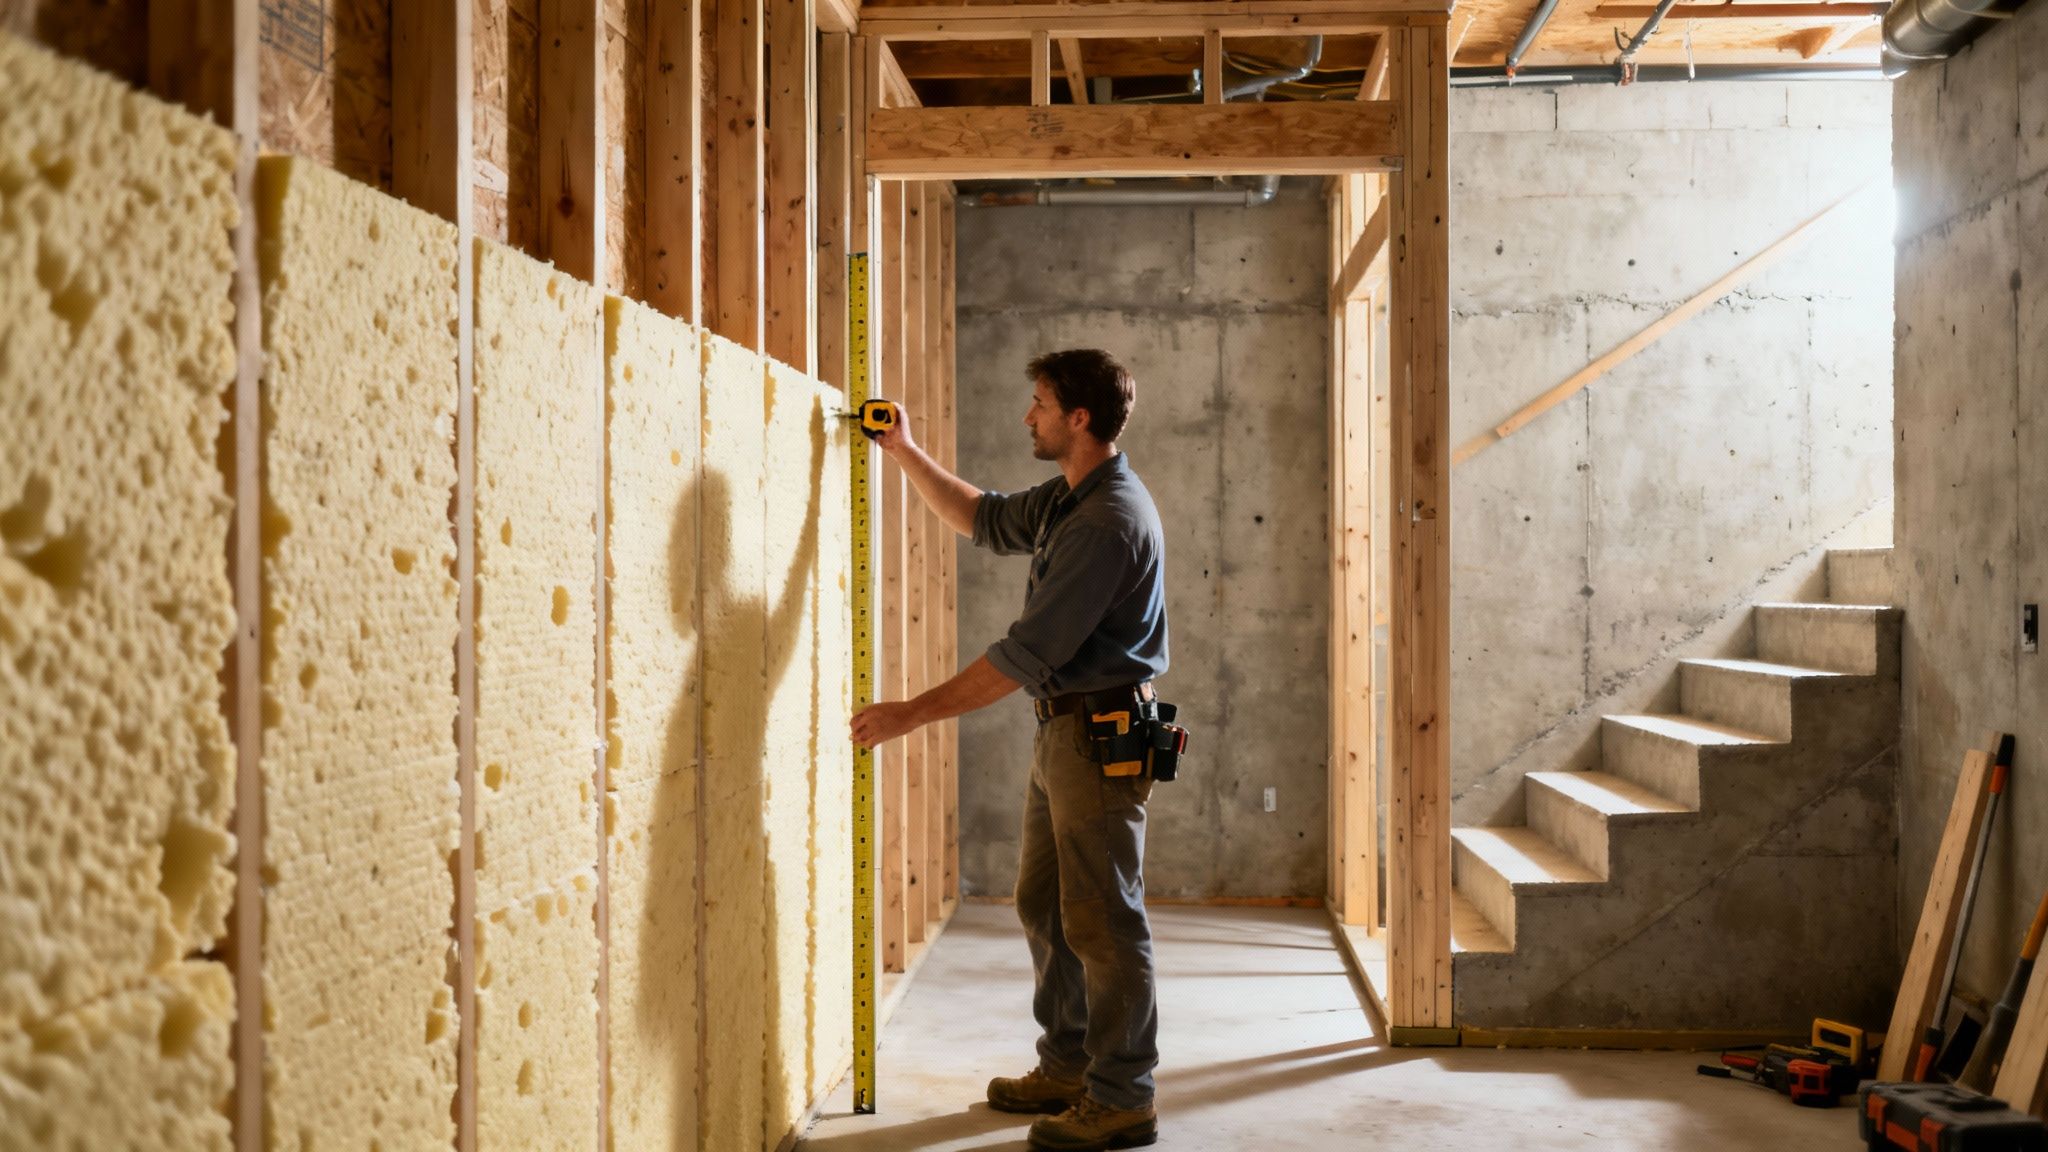
Mastering Moisture and Warmth
Down below grade, you’re fighting a constant battle against water vapor and heat loss. Your strategy has to tackle both at the same time.
Start by meticulously checking for any cracks in the foundation walls or floor. Seal every single one you find with hydraulic cement or a quality epoxy filler. After that, roll on a good waterproof sealant to the interior concrete walls for an extra layer of defense.
When it comes to insulation, a few options are tailor-made for basements:
- Spray Foam Insulation: This is the top-tier solution for a reason. Closed-cell spray foam creates a perfect, seamless barrier against both air and moisture. It sticks directly to the concrete, leaving no gaps for condensation to form, and its R-value is fantastic.
- Rigid Foam Board: A great DIY-friendly alternative. You’ll install large sheets of rigid foam (XPS or polyiso) directly against the concrete. The key here is to be obsessive about taping the seams. You need to create a continuous vapor barrier to stop warm, moist air from hitting the cold foundation.
I cannot stress this enough: Never put traditional fiberglass batt insulation directly against a concrete foundation wall. It’s like a sponge. It will soak up any moisture, grow mold, and become completely useless. You absolutely must have a vapor barrier, like foam board, between the concrete and your wall framing.
Framing Your New Rooms
With the foundation walls prepped, it's time to build the skeleton of your new space. This is where the floor plan you labored over finally starts to take shape. Using wood or metal studs, you’ll start framing the walls that will define your home office, family room, or guest bedroom.
Here’s a pro tip: for non-load-bearing walls, build them flat on the floor first. It’s much easier to get them perfectly square that way. Then you just lift them into place and secure them. And always remember to leave a small gap (about ½ inch) between the bottom plate of the frame and the concrete floor. This tiny detail prevents moisture from wicking up into the wood framing.
Roughing In Electrical, Plumbing, and HVAC
Once the framing is up but before any drywall goes on, it's time for the "rough-in." This is when licensed pros come in to run all the wiring, pipes, and ductwork through the open wall cavities. For safety, code compliance, and your own peace of mind, this is almost always a job for the professionals.
Here’s what’s happening during the rough-in phase:
Electrical: An electrician will pull all the wires for outlets, switches, and light fixtures. Seriously, think hard about outlet placement—and then add a few more. You’ll thank yourself later. If you’re planning a home theater or workshop, now is the time to add dedicated circuits.
Plumbing: Adding a bathroom or wet bar? A plumber will install all the water supply lines and the more complicated drain and vent pipes. This work has to be done right and will need to be inspected before you can even think about closing up the walls.
HVAC: To make the basement truly comfortable, an HVAC tech needs to extend your home's ductwork. This usually means adding new supply vents and, crucially, a cold-air return to ensure proper airflow.
Don’t forget about modern tech needs! This is the perfect, and easiest, time to run low-voltage wiring like Ethernet cables for hardwired internet, coaxial for cable TV, or speaker wire for a surround sound system. Doing it now is simple. Doing it later is a major headache.
Hanging and Finishing the Drywall
After all the rough-in work gets a passing grade from the inspector, you’re ready for the step that makes your basement finally feel like a real part of the house: drywall.
Hanging the large sheets of drywall is physically demanding but pretty straightforward. You’ll measure, cut, and screw the panels to your wall studs and ceiling joists.
The real skill comes next in the finishing. Taping and mudding the seams to get a perfectly smooth surface is an art form that requires patience. It involves applying joint compound (mud), embedding tape over the seams, and then adding several more thin coats, sanding between each one. A well-done Level 4 finish is the standard for most homes and is more than enough for a beautiful, paint-ready basement.
Choosing Finishes That Look Great and Last
With the heavy lifting done, we get to the fun part. This is where your basement’s personality really starts to shine through. After all the framing and wiring, the finishes are what turn a construction zone into a cozy, functional part of your home. But here’s the thing about basements: you have to choose materials with a different mindset. Everything you pick needs to stand up to potential moisture and make the most of limited natural light.
From the floor you walk on to the light fixtures above, every single choice matters. Let’s break down the best options that look great and are built to last below grade.
Smart Flooring for a Below-Grade Space
Basement flooring has to be a workhorse. It needs to handle potential dampness, feel good underfoot, and take a beating. For this reason, solid hardwood is almost always a bad idea—it just can't handle the humidity swings and will likely warp over time.
Thankfully, there are fantastic alternatives designed specifically for these conditions.
- Luxury Vinyl Plank (LVP): This is the undisputed king of basement flooring, and for good reason. LVP is 100% waterproof, tough as nails, and comes in an incredible range of designs that mimic real wood and stone. The click-lock installation also makes it a favorite for confident DIYers.
- Engineered Wood: If you absolutely must have the feel of real wood, engineered hardwood is your best bet. Its layered construction makes it far more stable than solid planks. Just be sure to install a high-quality vapor barrier underneath—don't skip this step.
- Carpet Tiles: For a softer, warmer touch in a family room or bedroom area, carpet tiles are a brilliant solution. Unlike traditional wall-to-wall carpet, if a tile gets stained or damaged from a leak, you just pop it out and replace that one square. It's a lifesaver.
Choosing the right flooring is a big decision, so weighing your options is key.
Basement Flooring Options Compared
This table gives you a quick side-by-side look at the most popular choices.
| Luxury Vinyl Plank (LVP) | Excellent | $2 - $7 | All-purpose areas, home gyms, bathrooms |
| Carpet Tiles | Good | $1 - $5 | Bedrooms, family rooms, play areas |
| Engineered Wood | Fair | $4 - $9 | Living areas where moisture is well-controlled |
| Stained Concrete | Excellent | $2 - $8 | Utility rooms, workshops, modern industrial style |
| Ceramic/Porcelain Tile | Excellent | $1 - $15 | Bathrooms, laundry rooms, wet bars |
Ultimately, the best choice depends on how you plan to use the space and what your local climate is like.
For a deeper dive into materials and what works best where, our guide on the best basement flooring options is a great resource. If you're looking for a budget-friendly and straightforward project, this DIY guide to peel and stick floor tiles is worth a look, too.
Layered Lighting Design
Good lighting is what separates a welcoming basement from a gloomy cave. A single light fixture in the middle of the room just won't do the trick. The secret is to think in layers, which creates depth, adds functionality, and sets the right mood.
A solid lighting plan incorporates three key types:
Ambient Lighting: This is your base layer of general illumination. Recessed can lights are the gold standard here. They provide clean, even light across the entire space without eating into your precious ceiling height.
Task Lighting: This is all about focused light for specific activities. It could be pendant lights hanging over a bar, under-cabinet strips in a kitchenette, or a sharp-looking floor lamp in a reading nook.
Accent Lighting: Think of this as the "jewelry" of your lighting scheme. Use it to highlight cool features like a stone wall or a piece of art. Track lighting or LED strips tucked into a tray ceiling are perfect for this.
Great lighting can completely transform how a basement feels. By layering your light sources, you get rid of harsh shadows, make the room feel bigger and brighter, and create an inviting atmosphere people will actually want to spend time in.
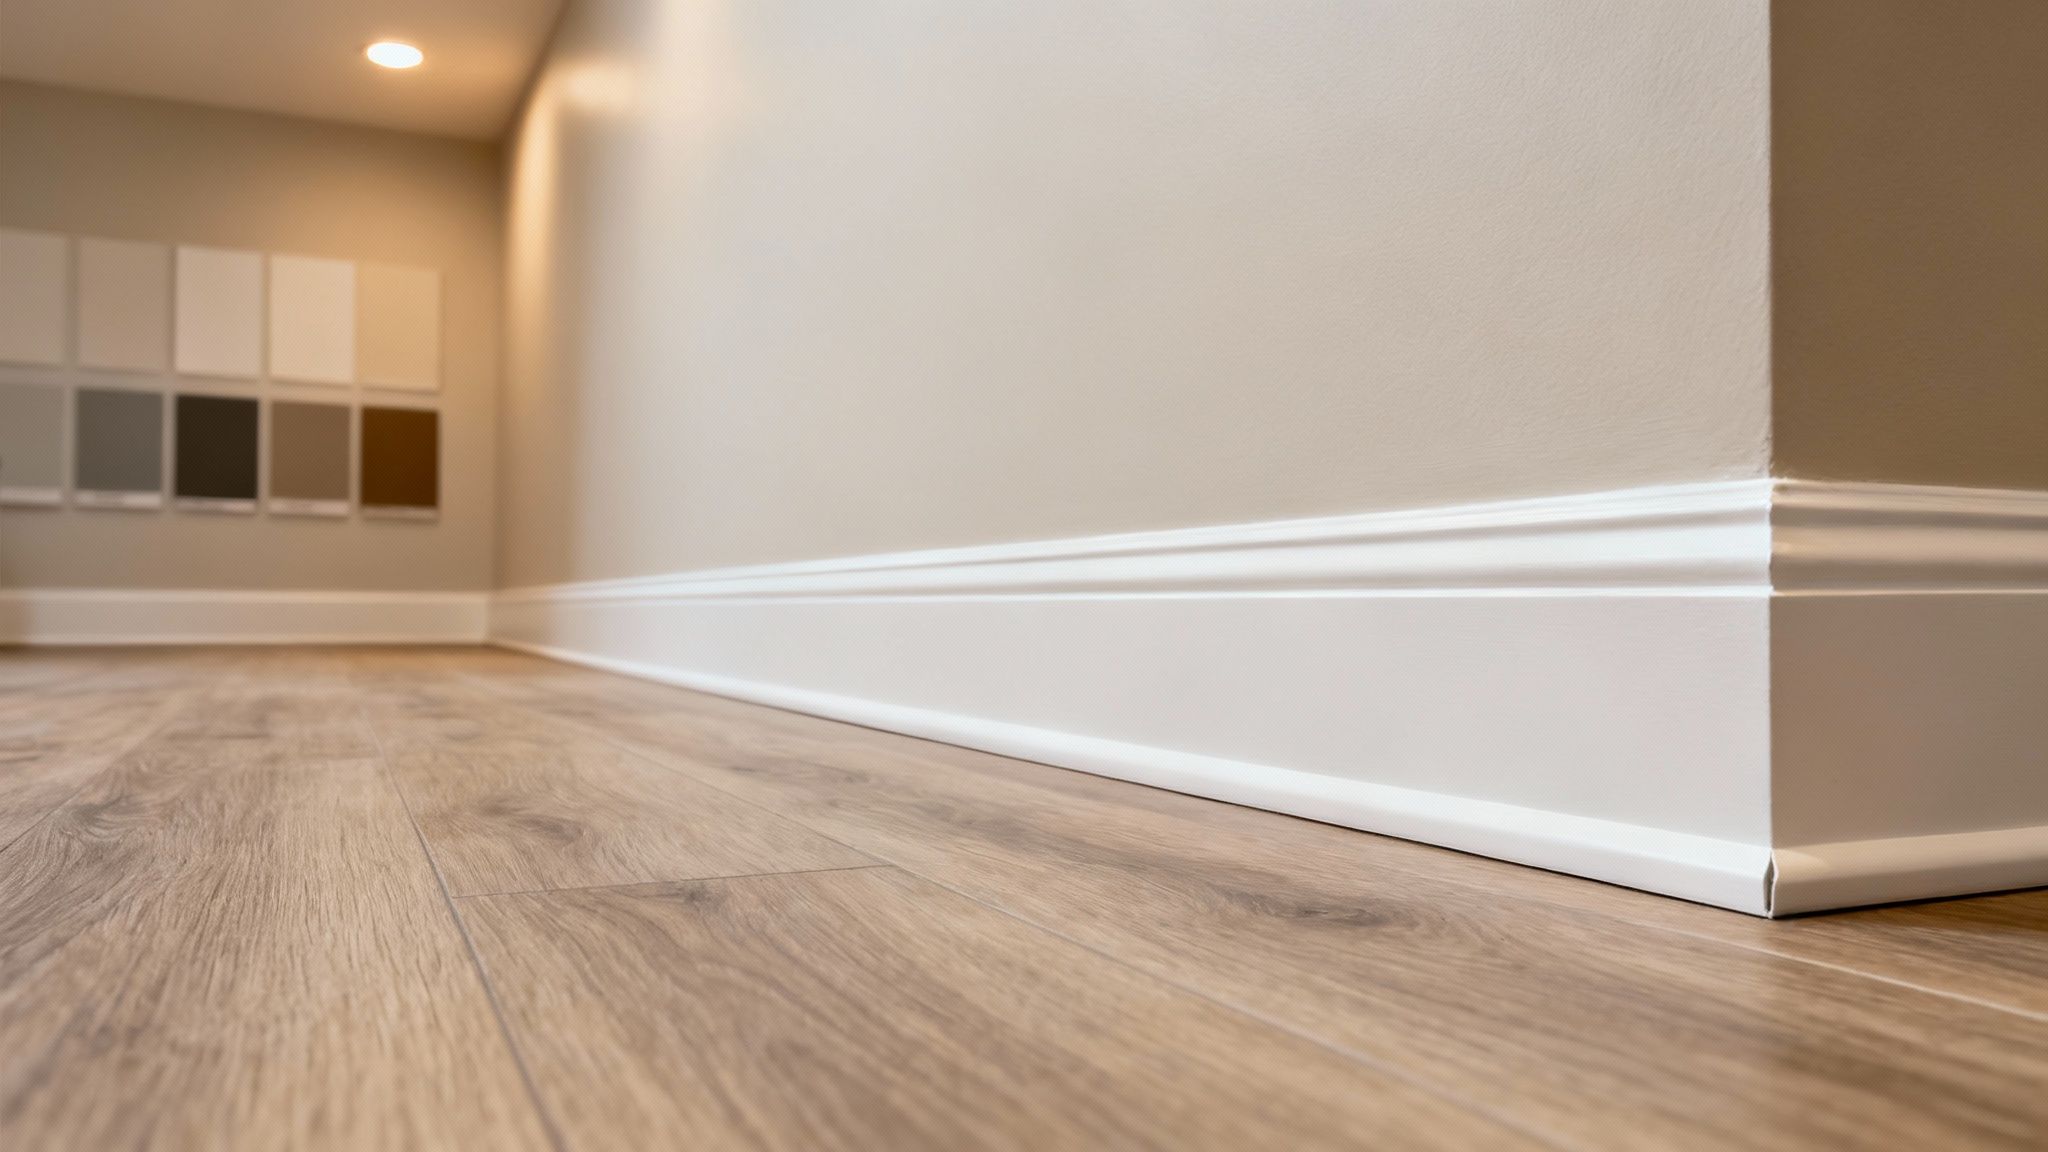
Ceilings, Paint, and Trim
These are the final puzzle pieces that pull the whole look together. For the ceiling, you have two main roads you can go down. A standard drywall ceiling gives you that seamless, finished look you have in the rest of your house. On the other hand, a drop ceiling (or suspended ceiling) allows for easy access to pipes, ducts, and wires down the road, which can be a huge advantage.
When you get to paint, think light and bright.
- Stick with colors like off-white, light gray, or soft beige. They do the best job of reflecting light and making the space feel more open and airy.
- Here’s a pro tip: paint the ceiling a shade lighter than the walls, or just pure bright white. This little trick creates the illusion of more height.
Finally, don’t skimp on the trim. Baseboards, door casings, and window trim should be made from a moisture-resistant material like PVC or MDF. Unlike wood, these materials won’t swell, warp, or rot if they ever encounter moisture, meaning your hard work will look great for years.
Turning Your Remodel Into Real Value
When you get to the end of a basement remodel, it's easy to just be happy it's over. But this is where you can really make sure the project pays off—not just as extra living space, but as a solid investment in your home's future value. A few smart choices in the finishing stages can make a huge difference when it comes time to sell.
The quality of the final product and the usefulness of the layout are everything. Think about it: a bright, open family room with good, sturdy flooring will always be more appealing to a potential buyer than a dark, chopped-up space. Beyond that, some features just flat-out deliver a better return on investment (ROI). Things like adding a proper, legal bedroom or a functional bathroom can seriously bump up your property value.
Focus on Features That Pay You Back
Not all upgrades are seen the same way in the real estate market. If you want to get the most for your money, you need to focus on additions that bring clear, functional value to your home.
- Add a Legal Bedroom: This is a big one. To make it official, you'll need an egress window and a closet. It's a bit of extra work, but it directly increases your home's bedroom count—a major selling point.
- Install a Three-Quarter Bathroom: A basement with a bathroom is infinitely more useful. Putting in a sink, toilet, and shower turns a simple rec room into a potential guest suite or a far more practical entertainment space.
- Build in Smart Storage: Don't let your beautiful new living area become a glorified storage unit. Well-designed built-in shelving or a dedicated, organized storage room keeps the clutter hidden and the living space usable.
A basement remodel is one of the smartest projects you can tackle for cost recovery. Converting your basement into a living area can recoup an estimated 71% of what you spend when you sell your home. That's a better return than you'll see from many other popular renovations. Check out more stats from the Remodeling Impact Report.
Of course, it's not all about the numbers. There's also what some people call the "joy score"—the value you get from actually living in the space. Creating a home theater for family movie nights or a dedicated playroom for the kids adds a value to your daily life that you can't put a price on.
Before you officially pop the champagne, do one last, thorough walkthrough. Test every single light switch and outlet. Open and close every door to make sure it hangs right. Check the paint lines for crispness. It’s this final attention to detail that ensures your new basement is perfect from the moment you start using it.
A Few Common Questions We Hear All the Time
Even the most meticulously planned project will have its share of questions pop up along the way. It’s just part of the process. Here are some of the things homeowners often ask us as they dive into a basement remodel.
How Do I Really Fix a Damp Basement for Good?
This is a big one, and the real solution always starts outside the house, not inside. First, get your gutters and downspouts in order. They need to be clear of debris and actively channeling water at least six to ten feet away from your foundation. You also need to check the grading; the ground should gently slope away from your home so rainwater doesn't just sit against the concrete.
Once the exterior is handled, you can move inside. Sealing up any visible foundation cracks is a must, followed by applying a high-quality waterproof sealant or membrane to the interior walls. Don't just paint over the problem; solve it at the source.
A dry basement isn't a bonus feature; it's the absolute starting point for a successful remodel. A tiny leak you ignore today will inevitably become a huge mold and rot problem after you've put up beautiful new walls.
What's a Realistic Timeline for a Basement Remodel?
Honestly, it varies a ton. If you're doing a straightforward, open-concept family room—think drywall, flooring, and paint—you could realistically be looking at 4-6 weeks.
But if your plans are more ambitious, like adding a full bathroom, a wet bar that needs new plumbing lines, or intricate custom built-ins, you should budget for something closer to 10-14 weeks. Don't forget that waiting for city permits and scheduling inspections can easily add a couple of weeks to even the simplest jobs.
Should I Do It Myself or Just Hire a Pro?
For most people, a mix-and-match approach is the sweet spot. If you're comfortable with it, you can definitely save some money by handling tasks like:
- Painting the walls and trim
- Laying down luxury vinyl plank (LVP) flooring
- Assembling pre-made cabinets or shelving
That said, some things are best left to licensed and insured professionals. For your safety and to make sure everything is up to code, always hire out for electrical work, plumbing, and cutting in a new egress window. Getting these wrong can be dangerous and incredibly expensive to fix later.
Ready to turn that underused space into a part of your home you'll actually love? The expert team at Northpoint Construction can guide you through every phase, from the first design sketch to the final nail.