
Utah's Best Waterproofing for Basements Guide
Dealing with a damp, musty basement is a classic headache for homeowners here in Utah, especially when that spring snowmelt really gets going. But here’s the thing: there's no single "best" waterproofing method that works for everyone. The right fix depends entirely on how and why water is finding its way into your home in the first place.
Your ideal solution has to match the specific problem you're facing, whether that's just a bit of nagging humidity or a full-blown active leak.
Your Guide to a Permanently Dry Utah Basement
A wet basement is so much more than a minor annoyance. It’s a real threat to your home's structural integrity and can create an unhealthy environment for your family. For those of us in Orem, Provo, and across Utah County, our local climate throws some unique punches—heavy spring runoff and those intense summer thunderstorms can cause the water table to rise fast.
When that happens, it puts immense hydrostatic pressure on your foundation walls.
Imagine that pressure as a relentless, invisible force constantly pushing against your foundation, searching for any tiny crack or porous spot in the concrete. It doesn't take much for that pressure to turn a solid wall into a source of stubborn moisture problems.
Finding the Right Solution for Your Home
This guide is designed to cut through the noise and help you figure out what's really going on. We'll start by helping you diagnose the problem, then walk you through the most effective solutions. Think of it as a clear roadmap to getting your dry, usable space back for good.
Here's a quick look at what we'll cover:
- Diagnosing the Source: We’ll show you how to pinpoint the root cause of the water—is it surface runoff, groundwater pressure, or cracks in the foundation?
- Comparing Methods: You'll get a detailed breakdown of the different waterproofing systems, both interior and exterior, from simple sealants to full-scale French drain installations.
- DIY vs. Professional: We'll give you straight advice on which fixes you might be able to handle yourself and when it’s absolutely time to call in a pro.
To kick things off, let's connect the dots between common symptoms and the right solutions. This table is a quick reference guide to help you start diagnosing your own basement's issues.
Matching Utah Basement Water Problems to Solutions
| Water leaking through floor/wall joint | Interior Drain System (French Drain) & Sump Pump | Relieving hydrostatic pressure and capturing groundwater before it enters the basement. |
| Damp, musty smell but no visible water | Interior Sealants & Vapor Barriers | Minor moisture seepage through porous concrete walls and preventing condensation. |
| Water seeping through foundation cracks | Polyurethane Crack Injection | Sealing specific, non-structural cracks in poured concrete walls to create a flexible, waterproof barrier. |
| Water pooling near foundation outside | Exterior Grading & Gutter/Downspout Fixes | Redirecting surface water (rain, snowmelt) away from the house before it can saturate the soil. |
| Water coming in through basement windows | Window Well Drains & Covers | Preventing rainwater and snowmelt from collecting in window wells and seeping inside. |
| High humidity levels throughout basement | Dehumidification & Improved Ventilation | Managing ambient moisture in the air that can lead to condensation and mold growth. |
This table should give you a solid starting point. As you read through the rest of this guide, you'll get a much deeper understanding of each of these methods and how they apply to your specific situation.
A dry basement is more than just a comfortable space—it’s a protected investment. Properly addressing water intrusion not only prevents costly structural repairs and mold remediation but also significantly increases your home’s value and usability.
Consider this your expert playbook for defending your home's foundation against Utah's unique climate. Once you understand the forces at play and the tools available, you can confidently choose the best waterproofing for your basement and reclaim that valuable square footage for good.
Why Is Your Utah Basement Leaking?
Before you can even think about a solution, you have to play detective. The single most important step in fixing a wet basement for good is figuring out exactly where the water is coming from and why. For homeowners here in Utah, the story almost always comes down to two things: immense pressure and hidden vulnerabilities, all thanks to our unique climate.
Water is relentless. It’s always looking for the easiest way in, and in your basement, that could be a hairline crack in the foundation, the naturally porous concrete of the walls, or the seam where the floor and walls meet. Knowing what you're up against is half the battle.
And it’s not just a local problem. The demand for effective solutions is booming. The global market for basement waterproofing coatings hit USD 3.5 billion in 2023 and is on track to nearly double by 2033. With North America making up 57% of that market, it’s clear that protecting our homes from water is a massive priority. You can dig into more of the data on this trend by reading about the growing global market for basement waterproofing.
The Power of Hydrostatic Pressure
One of the biggest culprits behind leaky Utah basements is something called hydrostatic pressure. The best way to picture it is as a giant, invisible force squeezing your foundation from every direction. This pressure builds when the soil around your home gets saturated, which happens a lot here during the spring snowmelt or after a heavy summer downpour.
Our local soil, especially the heavy clay types common in the Orem-Provo area, is terrible at draining. So when it gets soaked, that water has nowhere to go. It just sits there, pushing and pushing against your concrete walls. Even a perfectly poured foundation has microscopic pores, and with enough pressure, water will work its way right through, turning a solid-looking wall into a damp, weeping mess.
Hydrostatic pressure is the silent force that can turn a solid foundation into a water entry point. It doesn't need a large crack to cause problems; it leverages the natural porosity of concrete to seep into your basement.
This constant, inward force is exactly why a simple coat of waterproof paint often fails within a year. You're not just blocking a little dampness; you're trying to hold back a powerful force of nature.
Utah’s Freeze-Thaw Cycle
The other major factor we deal with is Utah’s infamous freeze-thaw cycle. In the winter, any moisture that’s soaked into the ground or seeped into tiny foundation cracks will freeze. When water freezes, it expands, acting like a tiny wedge that pries those cracks open just a little bit wider.
Then, when things warm up, the ice melts, leaving a bigger gap than before. The next time it rains or snows, even more water gets in, and the cycle repeats. Season after season, this slow-but-steady process can turn nearly invisible fractures into active, gushing leaks. It’s a relentless attack on your home’s main line of defense.
Common Signs Your Basement Has a Problem
Spotting the problem early is key. It’s worth learning how to detect water leaks before a small issue becomes a full-blown flood. Keep an eye out for these tell-tale clues:
- A Persistent Musty Smell: That damp, earthy odor is often the very first sign you have a moisture problem. It usually means mold or mildew is already growing somewhere, even if you can't see it yet.
- Chalky White Stains (Efflorescence): Ever see a crusty, white powder on your concrete walls or floor? That's efflorescence. It’s the salt and mineral deposits left behind when water seeps through the concrete and then evaporates, and it’s a dead giveaway that water is getting in.
- Peeling Paint or Bubbling Drywall: Moisture getting behind your finishes will cause paint to flake, bubble, or peel right off the wall.
- Visible Cracks: Pay close attention to any cracks you see in the foundation walls or the floor. Are they wet to the touch? Do they seem to be getting longer? Do they have that white, chalky efflorescence around them? These are all red flags.
- Damp Spots or Actual Puddles: This one is the most obvious. If you see dark, damp patches on the walls after a storm or find puddles on the floor, you have an active leak that needs attention.
When you can read these signs, you stop just reacting to the water and start proactively understanding what your home is up against. That’s the first step to finding a solution that will actually last.
Deciding on a Strategy: Interior vs. Exterior Waterproofing
When you discover water in your basement, the big question becomes: do we fight it from the inside or the outside? This is the fundamental choice in basement waterproofing. Both interior and exterior methods can be incredibly effective, but they work in completely different ways. The best one for your home depends entirely on where the water is coming from, how your house was built, and of course, your budget.
Think of it this way: interior methods are about managing water, while exterior methods are about blocking it.
An interior system essentially creates a controlled channel for any water that makes its way through your foundation, collecting it and pumping it out before it can do any damage. An exterior system, on the other hand, creates a powerful, waterproof shield around your foundation, stopping water from ever touching the concrete in the first place. Getting a handle on how each one works is the key to making a smart, long-term decision for your Orem or Provo home.
This diagram shows the three main culprits we see causing water issues for homeowners in our area.
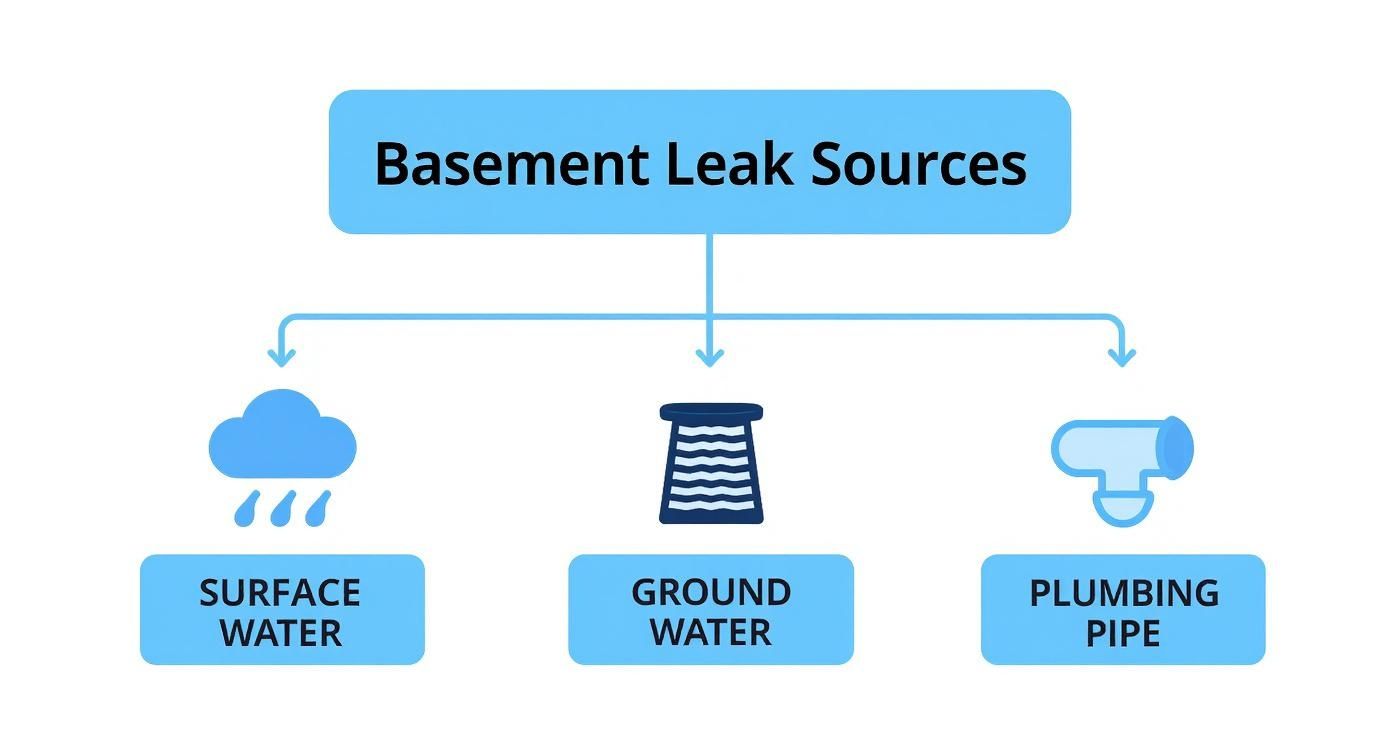
As you can see, your basement is under attack from all sides—from rain and snowmelt on the surface, from rising groundwater below, and sometimes even from your own plumbing.
Interior Waterproofing: The Water Management Approach
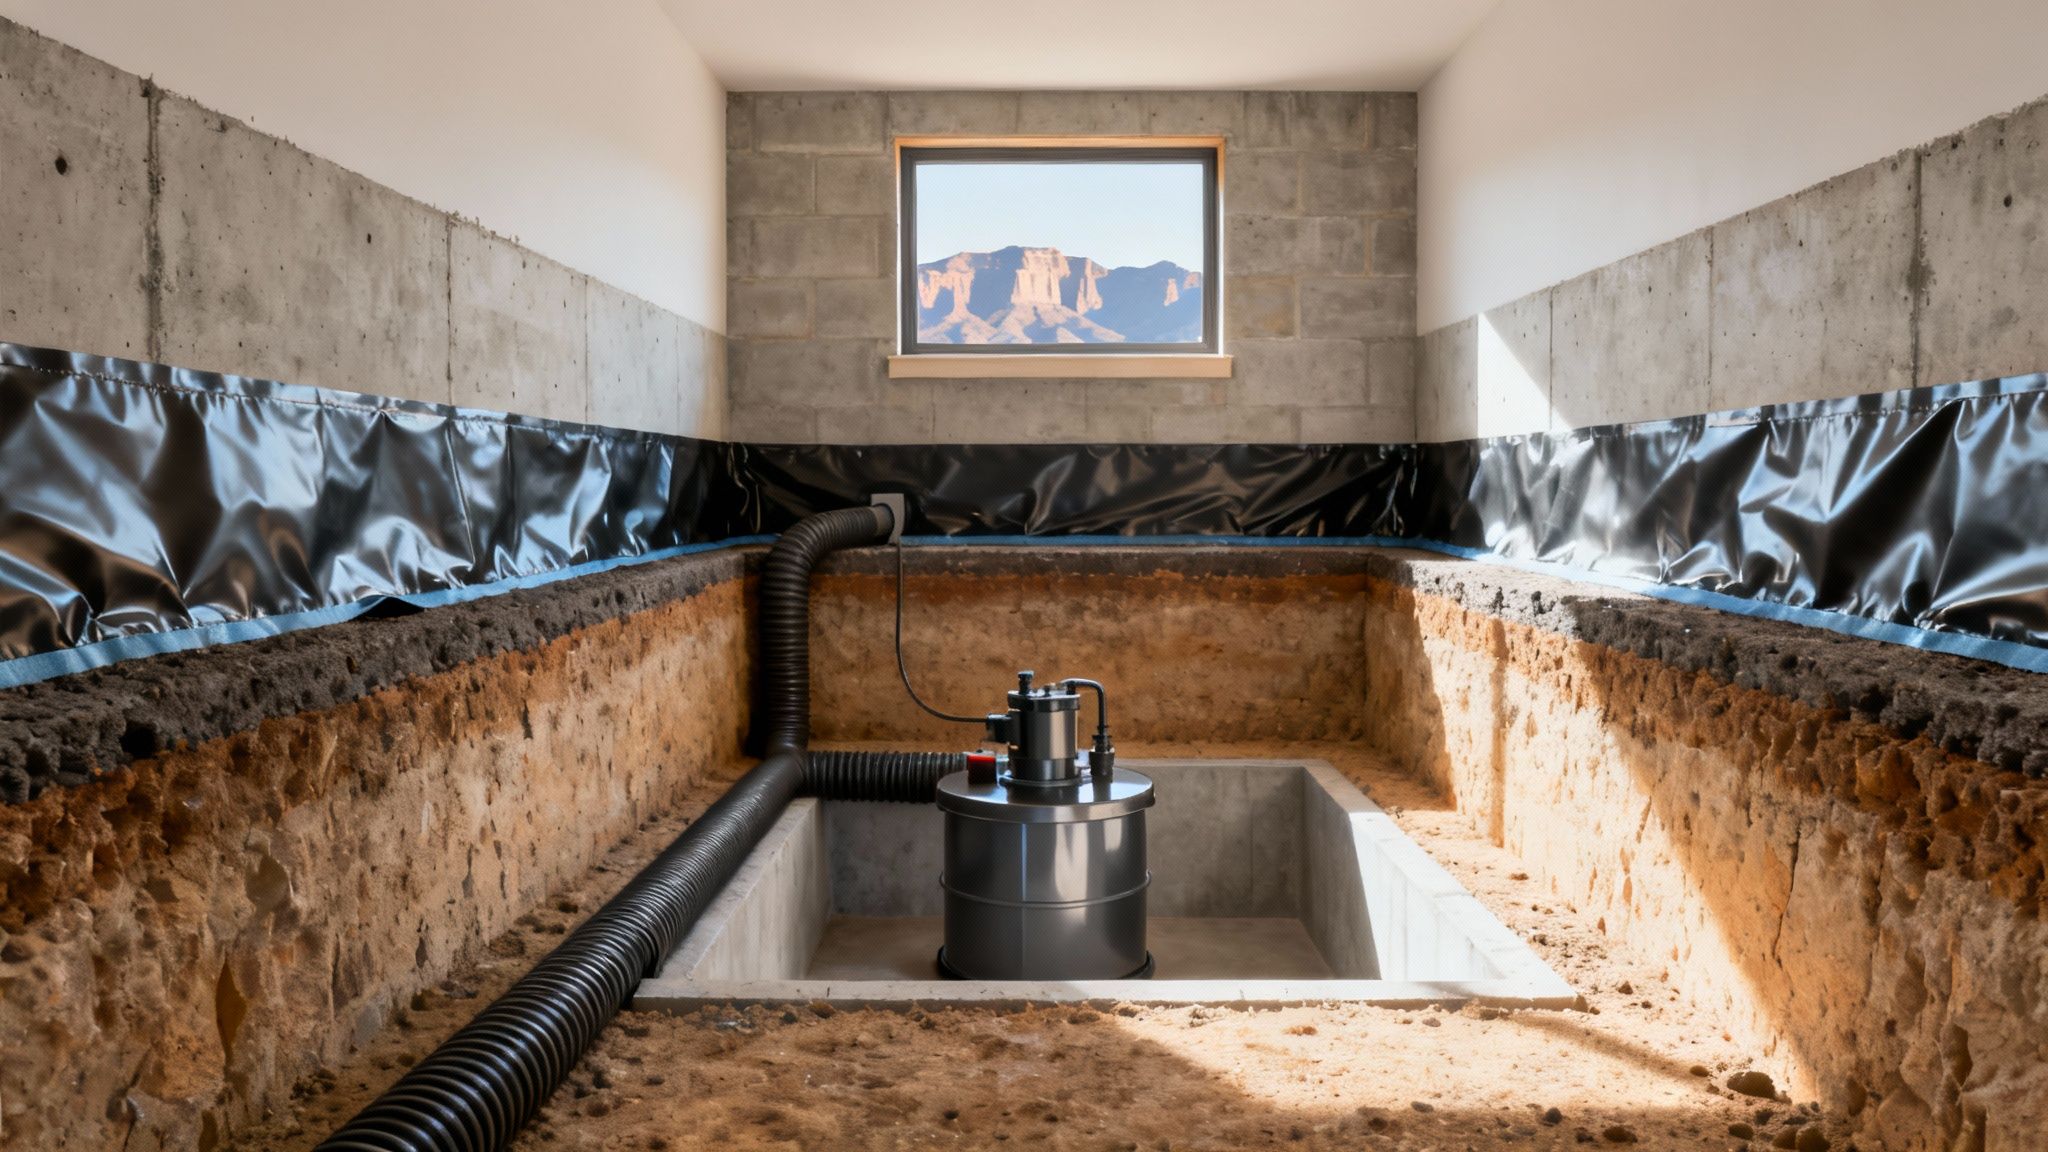
Interior waterproofing systems are designed to deal with water that has already found a way through your foundation walls. That might sound a little backward—why would you let water in just to get it out?—but it’s an extremely reliable and often more practical way to combat the constant force of hydrostatic pressure.
The workhorse of most interior solutions is an interior drainage system, which you’ll often hear called a French drain or a drain tile system. This is far more than just a ditch in your floor; it’s a carefully engineered system installed just beneath the concrete slab along the inside perimeter of your foundation.
Here’s the process in a nutshell:
We cut a clean, narrow trench into the concrete floor, right where it meets the foundation wall.
A special perforated pipe is laid in the trench, then surrounded by clean gravel to help water flow freely.
The system is then completely hidden when we pour new concrete over the trench, leaving your floor smooth and seamless.
Any water that seeps through the walls or pushes up from under the floor is immediately intercepted by this hidden channel. Gravity does the rest, guiding the water toward a central collection point where the real action happens.
The Unsung Hero: Your Sump Pump
An interior drain system is only half the equation. It needs a sump pump to actively get the water out of your house. This powerful pump sits inside a durable basin (the sump pit) installed at the lowest point of your basement floor. As the pit fills with water, a float switch triggers the pump, which then ejects the water through a discharge line, sending it far away from your foundation.
A good sump pump is your basement's silent guardian. It’s an automated defense system that stands ready 24/7, kicking on to remove groundwater before it ever has a chance to become a flood.
Modern sump pumps are incredibly reliable, and we always recommend a model with a battery backup. That’s a non-negotiable feature here in Utah, where a heavy summer thunderstorm can easily knock out the power right when your pump is needed most.
Exterior Waterproofing: The Barrier Approach
If an interior system is about managing water, an exterior system is about stopping it cold. This is the most comprehensive and bulletproof type of waterproofing because it tackles the problem at its source—on the outside of your home.
Be warned, this approach is a major undertaking. It involves excavating all the soil around your foundation, digging all the way down to the footings. This completely exposes the foundation walls, allowing our crew to build a multi-layered defense.
First, we meticulously clean the wall and repair any cracks. Then, we apply a thick, seamless waterproof membrane directly to the concrete. This isn't paint; it's a powerful, rubberized coating that acts like a form-fitting waterproof jacket for your foundation. Water simply can't get through it.
To complete the system, we install an exterior drainage system (another French drain) at the bottom of the trench, right beside the footing. Just like its interior cousin, this drain collects any groundwater and channels it away from your foundation, often using gravity to drain to a lower point on your property.
To help you weigh your options, we've put together a table that breaks down the key differences between these popular waterproofing methods.
Comparing Basement Waterproofing Methods
This table offers a side-by-side look at the main waterproofing techniques, helping you understand their costs, benefits, and drawbacks in the context of our local Utah conditions.
| Interior Drain System | Collects water that enters the basement via a hidden perimeter trench and channels it to a sump pump for removal. | $4,000 - $12,000 | • Less disruptive (no excavation) • Lower cost • Can be installed year-round | • Doesn't stop water from entering the foundation wall itself • Relies on a mechanical sump pump |
| Exterior Excavation | Excavates soil to the foundation footing, applies a waterproof membrane, and installs an exterior drain to block water. | $10,000 - $20,000+ | • Stops water completely before it touches the foundation • Protects structural integrity | • Extremely disruptive to landscaping • Highest cost • Weather-dependent for installation |
| Crack Injection | Injects polyurethane or epoxy from the inside directly into cracks in poured concrete walls, expanding to create a seal. | $500 - $1,500 per crack | • Highly effective for specific, isolated leaks • Minimally invasive and fast | • Only addresses active cracks, not widespread seepage or pressure • Not for block foundations |
| Exterior Sealants | A waterproof paint-like coating applied to interior basement walls. A temporary, surface-level fix. | $500 - $2,000 (DIY/Pro) | • Very low cost • Can be a DIY project | • Temporary fix; easily fails under hydrostatic pressure • Traps moisture inside the concrete |
| Grading & Gutters | Reshaping the landscape to slope away from the home and ensuring gutters and downspouts discharge water far from the foundation. | $1,000 - $4,000 | • Addresses the root cause of surface water problems • Relatively low cost for high impact | • Doesn't solve issues with high water tables or hydrostatic pressure • May not be enough on its own |
Ultimately, the right solution combines a clear understanding of the problem with a realistic look at your budget and property.
Specialized Fixes for Specific Problems
Sometimes, you don’t need a full-blown system. If you’re dealing with a single, pesky leak, a more targeted solution might be all you need.
- Crack Injection: Poured concrete foundations often develop small, non-structural cracks that become easy entry points for water. We can fix these from the inside using polyurethane or epoxy injections. The material is forced deep into the crack, where it expands and chemically bonds with the concrete to form a permanent, flexible, and totally waterproof seal. For a closer look at this process, see our guide on how to waterproof basement walls.
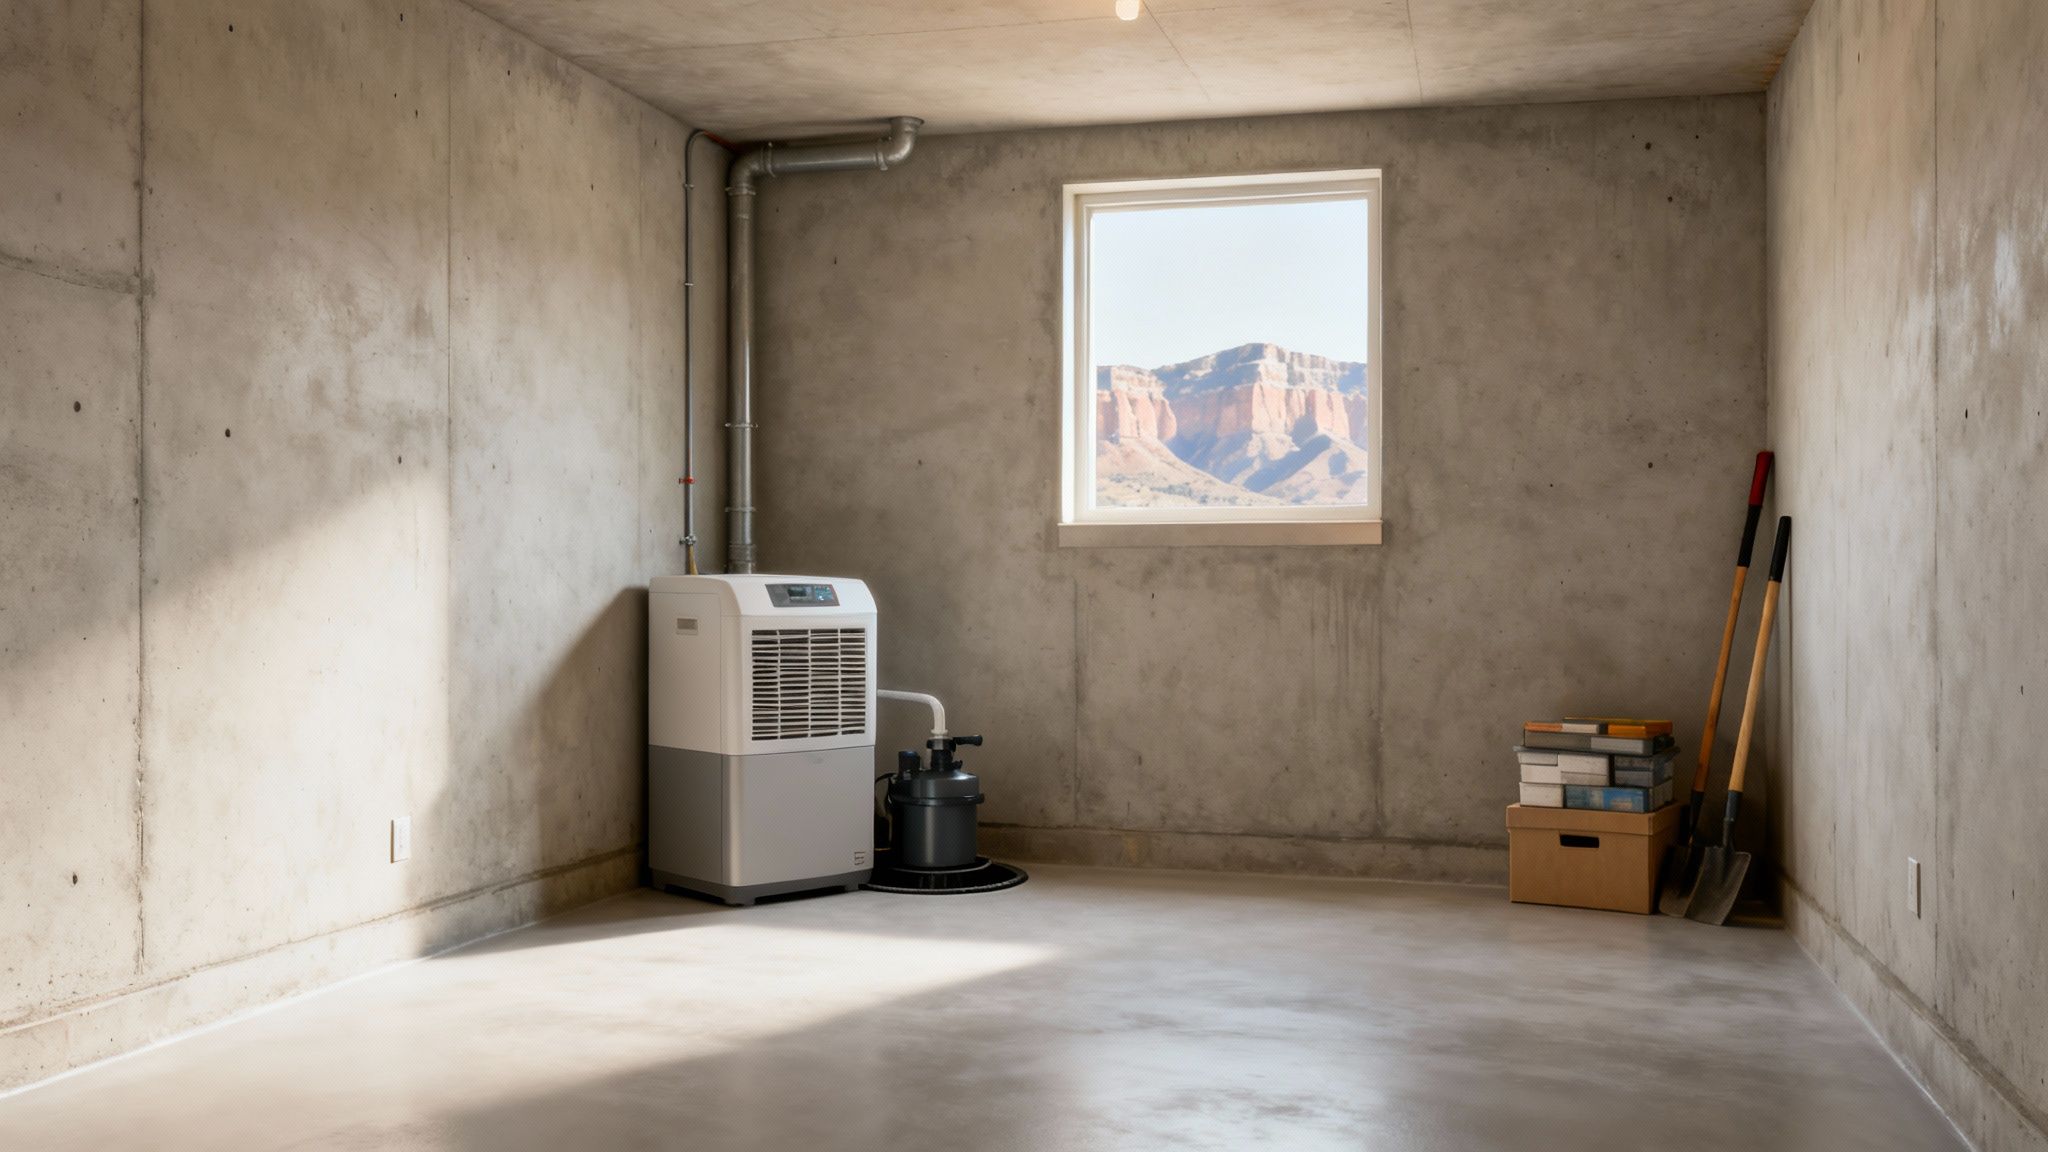
- Vapor Barriers: Is your problem less about active leaks and more about that damp, musty feeling and condensation on the walls? A heavy-duty vapor barrier could be the perfect solution. These are thick plastic liners that we install on the interior walls, creating a barrier that stops moisture within the concrete from evaporating into your basement air, which helps control humidity.
Choosing the right path forward really requires a professional diagnosis. An expert can pinpoint exactly how and why water is getting in, allowing you to invest in a solution that solves the problem for good.
Your First Line of Defense: Simple Homeowner Fixes
Before you even think about complex interior systems or major excavation projects, let's start where most basement water problems actually begin: right outside your house. A surprisingly high number of wet basements in Utah aren't caused by deep groundwater issues. They're the result of simple surface runoff—rain and snowmelt that isn't properly directed away from your foundation.
Think of the soil around your foundation as a giant sponge. If your yard, gutters, and downspouts are constantly dumping water onto that sponge, it's going to get saturated. Once it can't hold any more, that water has nowhere to go but down, pressing against your basement walls until it finds a way in.
The good news? Managing this surface water is often something you can tackle yourself in a single weekend. These fixes are your most powerful and cost-effective first steps.
Master Your Gutters and Downspouts
Your gutter system has one critical job: capture all the water hitting your massive roof and send it on a safe journey far away from your foundation. When that system fails, it becomes your basement's worst enemy, concentrating thousands of gallons of water in the absolute worst spot.
- Clean Your Gutters Religiously: Clogged gutters are useless. When they're full of leaves and debris, rainwater just cascades over the side, creating a waterfall that pounds the soil right next to your foundation. Make it a habit to clean them every spring and fall.
- Extend Your Downspouts: This might be the single most effective five-minute fix in homeownership. Most downspouts are too short, dumping water just a foot or two from the wall. You need to get that water at least six to ten feet away. Inexpensive plastic or metal extensions are available at any home improvement store.
Getting your gutters and downspouts right is fundamental. For more tips on keeping your home protected through every season, take a look at our complete seasonal home maintenance checklist.
Correct Your Landscape Grading
Take a look at the ground right next to your house. Does it slope away from the foundation, or does it look flat or, even worse, slope towards it? That slope is called grading, and it's critical.
Proper "positive" grading acts like a natural ramp, forcing water to flow away from your home. Over time, soil settles, and many homes end up with "negative" grading, which creates a mini-moat around the foundation where water can pool and soak in.
Correcting negative grading is like building a permanent, invisible shield around your home. By ensuring a gentle slope away from the foundation, you use gravity to your advantage, turning rainwater from a threat into a non-issue.
Fixing minor grading issues is a straightforward DIY project. All you need is some dense, clay-heavy topsoil to build up the ground against the foundation. The goal is to create a slope that drops about six inches over the first ten feet. This simple change forces surface water to flow harmlessly away, keeping the soil around your basement significantly drier and reducing the pressure on your walls. Taking these preventative steps is often the key to finding the best waterproofing for your basement because they can eliminate the problem at its source.
Deciding Between a DIY Fix or Calling a Professional
Knowing when to roll up your sleeves versus when to pick up the phone is a critical fork in the road on your waterproofing journey. Making the right call here will save you a ton of time, money, and headaches down the line. While some smaller tasks are perfect for a weekend warrior, others are best left to the pros—they carry serious risks if you get them wrong.
Think of this as a quick, honest gut-check of the problem and your own skills. The goal is to get the best waterproofing for your basement, period. That means a solution that actually works and is installed safely. A small mistake on a major project can quickly spiral from a manageable leak into a structural nightmare.
When a DIY Approach Makes Sense
For minor, surface-level moisture issues, a do-it-yourself approach can be a fantastic first step. These jobs are usually about managing the symptoms of light dampness or taking simple preventative steps, not fighting back active leaks or serious water pressure.
If you’re pretty handy around the house, you could definitely consider tackling these:
- Applying Waterproofing Paint: If you’re just dealing with a slightly clammy feeling or some of that white, chalky efflorescence on the walls, a good sealant like DRYLOK can do the trick. It’s basically a thick paint you roll on to create a barrier right on the surface.
- Sealing Small Gaps: You can pick up hydraulic cement or polyurethane caulk from any hardware store to fill minor, non-structural cracks or seal the gaps where pipes come through the foundation.
- Improving Gutter and Grade: As we talked about earlier, these are huge. Cleaning your gutters, adding downspout extenders, and building up the soil so it slopes away from your house are all powerful, low-skill fixes that can make a massive difference.
Many homeowners see great results with these initial efforts. If you're thinking about a bigger project, our guide on DIY basement renovations can help you figure out what you can realistically handle yourself.
Key Takeaway: DIY fixes are best for managing surface-level moisture and preventing future issues. They are not a real substitute for professional work when you're up against hydrostatic pressure, deep foundation cracks, or water actively coming into your basement.
When You Absolutely Need to Call a Professional
Some waterproofing jobs look deceptively simple on YouTube, but they require specialized tools, a deep well of experience, and an understanding of how your house works. Trying these yourself often leads to wasted money on materials, a fix that fails in the first big storm, and—in the worst cases—damage to your home’s foundation.
You should always bring in a professional for these heavy hitters:
- Interior Drain System Installation: This isn't just a small trench. It involves jackhammering your concrete floor, digging around your foundation's footing, and installing a complex system of pipes and a sump pump. One wrong move can compromise your entire foundation.
- Exterior Excavation and Membrane Application: Digging down to the base of your foundation is genuinely dangerous work. It requires heavy machinery and a real understanding of soil stability and structural loads to avoid a collapse.
- Foundation Crack Injection: It might sound like just squirting some goo into a crack, but it’s a science. Pros use specialized ports and high-pressure equipment to force polyurethane or epoxy deep into the crack, ensuring it penetrates the entire wall thickness for a permanent seal.
A professional contractor brings more than just a crew and some fancy tools. They bring years of experience dealing with local conditions, like Utah’s expansive clay soil, and they offer warranties that protect your investment. There's a reason the market for structural waterproofing services is growing at 4.5% annually in the U.S.—people are realizing the importance of getting it done right. You can see more on this in this structural waterproofing market analysis.
Ultimately, hiring a pro is about buying peace of mind and knowing the problem is solved for good.
Putting It All Together for a Permanently Dry Basement
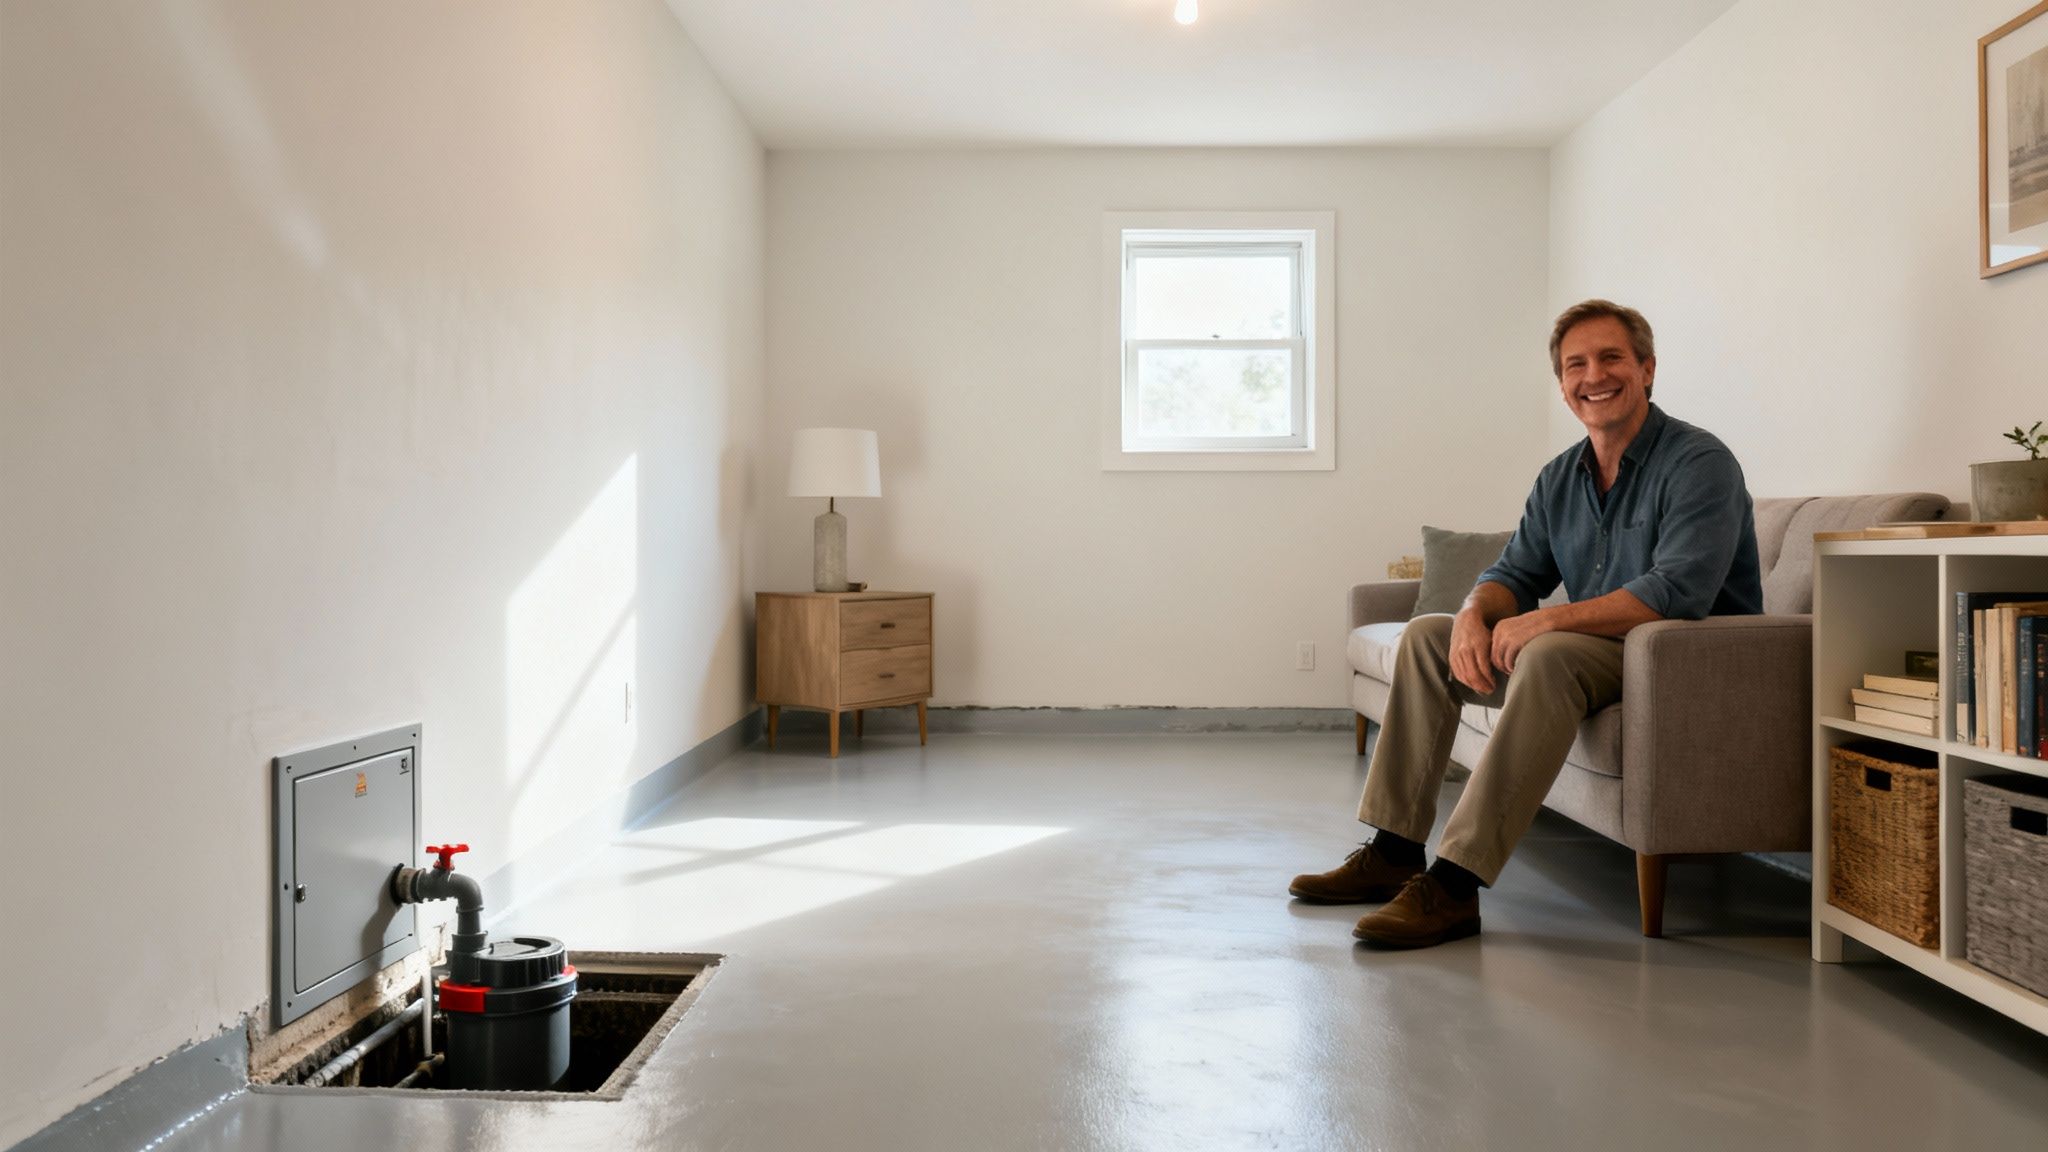
So, you've learned to spot the tell-tale signs of a water problem, from that faint musty smell to the cracks spiderwebbing across your foundation walls. You now know the difference between interior water management systems and exterior barriers that stop water before it ever gets in. And, most importantly, you have a solid feel for which issues are a quick DIY fix and which ones need a pro.
The next step is turning that knowledge into action. Reclaiming your basement isn't just about stopping a leak; it's about protecting your home's value, creating a healthier living environment for your family, and gaining back usable square footage. The journey to finding the best waterproofing for your basement really comes down to making that final, decisive move.
This is where having a trusted local expert in your corner makes all the difference.
Your Orem and Provo Waterproofing Partner
Here at Northpoint Construction, we know that a one-size-fits-all approach just doesn't work for basements. Our process always starts with a thorough, no-pressure inspection of your property. We dig deep to find the root cause of the problem—whether it’s hydrostatic pressure from Utah's notorious clay soil or something as simple as poor grading funneling spring runoff right at your foundation.
A lasting fix demands local knowledge. We live and work here, so we have a deep understanding of the climate and soil conditions in Orem, Provo, and across Utah County. That experience ensures we recommend a system built to handle our specific challenges.
Once we’ve pinpointed the source of the water, we lay out a clear, customized plan with a straightforward quote. We’ll walk you through all the options, explaining the pros and cons of each, so you feel confident in your decision. Our goal isn't just to patch a leak; it's to solve your water problem for good.
From Inspection to Installation: Our Promise to You
We’ve built our process around your peace of mind. Our team handles every detail with meticulous care, respecting your home and property to ensure a clean, efficient installation.
- Step 1: The Inspection: We start with a detailed assessment to find the exact cause of your basement moisture issues.
- Step 2: The Custom Plan: Based on our findings, we create a strategy that fits your home's unique needs and your budget.
- Step 3: The Professional Installation: Our experienced crew installs your waterproofing system the right way the first time, backed by our commitment to quality.
- Step 4: The Guarantee: We stand behind our work, giving you the confidence that comes with a permanently dry and valuable basement.
Don’t let a wet basement continue to be a source of stress. Contact Northpoint Construction today to schedule your free inspection and take the most important step toward a dry, healthy, and secure home.
Common Basement Waterproofing Questions in Utah
If you're thinking about waterproofing your basement, you've probably got a few questions. It’s a big decision, and here in Orem and Provo, we hear the same questions from homeowners all the time. Let's get you some clear, no-nonsense answers.
How Much Does Professional Waterproofing Cost in Utah?
This is usually the first question on everyone's mind, and the honest answer is: it depends. The price really hinges on the specific problem and the solution we use to fix it.
For a minor issue, like sealing a single crack in the foundation wall, you might only be looking at a few hundred dollars. But for a complete interior drainage system, the typical investment runs from $4,000 to $12,000.
If the situation calls for the most heavy-duty solution—excavating around the outside of your home to apply a waterproof membrane—the cost can climb to $10,000 to $20,000, sometimes more. That bigger price tag reflects the serious amount of labor and equipment needed for the job.
Does a Dry Basement Increase My Home Value?
Without a doubt. A properly waterproofed basement isn't just a repair; it's a major upgrade that significantly boosts your home's value. Think about it—you're not just stopping leaks, you're protecting the very foundation of your house from long-term damage.
On top of that, you're creating usable, livable space. A damp, musty basement is a liability. A dry one is a potential family room, home gym, or secure storage area. Homebuyers in Utah see that as a huge plus and are willing to pay for it.
A dry basement provides an immediate return on investment not just in property value, but in peace of mind. It eliminates worries about mold, property damage, and the structural health of your home.
How Long Will the Waterproofing Job Take?
Just like the cost, the timeline varies quite a bit. A simple polyurethane crack injection is a quick fix—our crew can often be in and out in just a few hours.
A full-scale interior French drain and sump pump installation is a more involved project, usually taking our team about two to four days to complete correctly. Exterior excavation is the longest job, often lasting a week or more, especially if we have to work around tricky landscaping or uncooperative weather. We’ll always give you a realistic timeline upfront so you know exactly what to expect.
Does Every Utah Basement Need a Sump Pump?
Not always, but for many homes in our area, it's an absolute must. If the water problem is caused by hydrostatic pressure—that's water in the soil pushing its way in—a sump pump working with an interior drain system is your best line of defense.
If you’re just dealing with a bit of dampness on the walls or some surface water from bad gutters, other fixes might do the trick. But if you see water seeping in where the floor meets the wall, that's a classic sign you need a sump pump system. It’s simply non-negotiable for that kind of issue. Of course, a big part of dealing with any water issue is understanding if homeowners insurance covers water damage, which can be a complex topic in itself.
Ready to get definitive answers for your home? The team at Northpoint Construction provides expert diagnostics and customized solutions to keep your basement dry for good. Schedule your free, no-obligation inspection today!