
Building a custom home isn't just another construction project. It's the art of creating a space that is truly, completely, and uniquely yours. Think of the custom home building process as a marathon, not a sprint—a journey that demands careful planning, a solid team, and a healthy dose of patience from start to finish.
This guide will walk you through the entire path, from the very first sketch to that final, joyful moment you get the keys.
Embarking on Your Custom Home Journey

Deciding to build a custom home is a huge step, but one that promises a home tailored perfectly to your family's lifestyle. It's a world away from buying an existing house. Here, you're in the driver's seat for every detail, from the floor plan and materials right down to the doorknobs. But with great control comes great responsibility—the process is naturally more involved.
From my experience, success is determined long before the first shovel ever breaks ground. It starts with a clear vision. The single biggest mistake I see homeowners make is jumping into design and construction without first defining how they want to live in the space. Without that roadmap, you're looking at frustrating delays, costly changes, and a final product that just doesn't feel right.
Understanding the Major Phases
To keep things from feeling overwhelming, it helps to break the journey down into a series of manageable phases. Each one builds on the last, moving you closer to your goal.
Here’s a bird’s-eye view of what to expect:
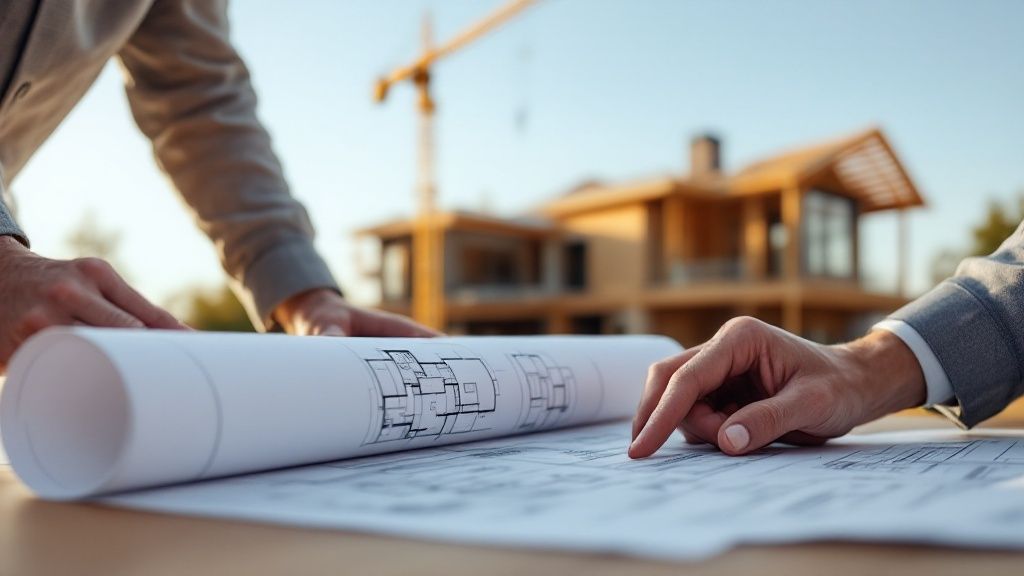
- Initial Planning and Design: This is the "dreaming" phase where you pin down your vision, set a realistic budget, assemble your team, and get architectural plans drawn up.
- Permitting and Site Prep: Time for the nitty-gritty. This involves getting the green light from your local authorities and preparing the land for the build.
- Foundation and Framing: Now things get real. The crew will pour the foundation and then erect the structural "skeleton" of your home.
- Interior and Exterior Work: This is where the house starts to take shape. Your team will install plumbing and electrical, then move on to drywall, flooring, siding, and roofing.
- Finishing and Final Walkthrough: The last stretch! This involves all the detail work—installing fixtures, painting, and conducting a final, meticulous inspection before the official handover.
The success of your entire project truly hinges on getting the right people on your team. Your builder, architect, and designer are the experts who will turn your vision into a physical reality. Choosing them is one of the most critical decisions you'll make.
A Resilient and Rewarding Path
Building a custom home isn't just an emotional investment; it’s a smart financial one, too. The custom home market has a knack for staying steady, even when the broader economy gets a little shaky.
For example, in the second quarter of 2025, the U.S. saw around 54,000 custom home starts. That's a 4% increase over the previous year, showing just how much people value personalized living spaces. For more on this, the National Association of Home Builders is a great resource for tracking industry trends.
This guide is here to give you the knowledge and confidence to move forward. By understanding what’s coming, you can set realistic expectations, ask the right questions, and make smart decisions. It all starts with that clear vision and finding an expert construction team you trust to bring it to life.
Laying the Groundwork for Your Dream Home
A successful home build starts long before the first shovel hits the dirt. This initial phase is all about turning your ideas into a solid, workable plan. The strategic decisions you make here are what prevent those nightmarish budget overruns and frustrating delays everyone warns you about. It’s about getting ahead of the project, not just reacting to it.
So many homeowners make the same mistake: they jump straight into design without really nailing down their vision first. A Pinterest board is a fantastic starting point for inspiration, but it’s not a blueprint for your life. You have to think about how you actually live. Without that clarity, decisions get rushed, you end up chasing trends instead of function, and you risk building a beautiful house that never quite feels like your home.
Assembling Your A-Team
First things first: you need to build the team that will bring your vision to life. This core group is usually your architect, your builder, and often an interior designer. Finding the right people is absolutely critical—you’re going to be working very, very closely with them for a long time.
Don't rush this. Spend time researching local pros, digging through their portfolios, and actually reading client reviews. Look for someone who has real experience with the style of home you’re imagining. A builder who specializes in sleek, modern farmhouses probably isn't the best choice for a traditional Tudor estate.
Once you’ve got a shortlist, set up interviews and go in prepared.
Key Questions to Ask Potential Team Members:
- How do you manage the budget and keep clients in the loop?
- Can I speak with a few references from recent projects similar to mine?
- What’s your process when changes or unexpected problems pop up during construction?
- How do you keep the project on schedule?
Their answers will tell you a lot more than just their technical skills. You'll get a real sense of their communication style and how they handle pressure. You need a team you can trust and talk to openly. For a deeper dive, check out our guide on the different kinds of home building services and how to pick the right pros for your job.
Nailing Down Your Budget and Financing
Think of your budget as the financial roadmap for the entire project. It has to be realistic and it has to be thorough, covering everything from buying the land to the very last light fixture and landscaping plant. A smart rule of thumb I always recommend is to build in a 10-15% contingency fund. Trust me, you'll be glad you have it for those inevitable surprises.
Financing a custom home isn’t like getting a standard mortgage. You'll most likely need a construction loan, which is a short-term loan that pays out in stages as work is completed. The requirements are usually a bit stricter, often demanding a higher down payment and a very detailed look at your building plans and budget. Lenders need to see that you have a well-thought-out plan and a reputable builder on board.
This custom approach is naturally more collaborative, which can mean longer project timelines. Unlike spec homes built for a quick sale, custom projects are built on a direct contract, meaning the builder doesn't carry an investment interest during construction. You can find more industry insights on the growth of custom home building on eyeonhousing.org.
Finding and Vetting the Perfect Piece of Land
The land you choose is every bit as important as the house itself. It dictates your home's design, your budget, and what your day-to-day life will look like for years. When you're looking at a potential lot, you have to see beyond the pretty view.
Get into the details and consider these critical factors:
- Zoning and Covenants: Dig into the local zoning laws. Can you even build the type of home you want? Some communities have strict covenants that control everything from home size and style to the color you can paint your front door.
- Utility Access: Is the lot already connected to public water, sewer, gas, and electricity? If it isn't, you need to budget for the often-shocking costs of drilling a well, installing a septic system, and trenching for utility lines.
- Soil and Topography: The slope of the land and the quality of the soil can make or break your foundation budget. A steep lot might require expensive excavation and retaining walls, while rocky soil could demand special engineering. It's always a good investment to get a geotechnical report before you buy.
I once worked with a family who fell in love with a gorgeous, sloped lot for their dream modern farmhouse. They had this perfect vision of a walk-out basement. The problem? They found out after buying that the entire lot was sitting on a shelf of solid rock. It ended up tripling their initial excavation and foundation budget. A little due diligence upfront would have saved them a massive headache and a lot of money.
Before you ever break ground, there's a lot of crucial work to be done. The table below outlines the key milestones you'll need to hit. Think of it as your pre-flight checklist.
Custom Home Pre-Construction Checklist
| Vision & Feasibility | Define must-haves, set a rough budget, and get pre-qualified for a loan. | 1-2 Months |
| Team Assembly | Interview and hire your architect, builder, and any other key professionals. | 1-2 Months |
| Land Acquisition | Find, vet, and purchase your plot of land. | 1-3 Months |
| Design & Engineering | Work with your architect to create schematic designs, then detailed construction drawings. | 3-6 Months |
| Budget & Financing | Finalize the construction budget with your builder and secure your construction loan. | 1-2 Months |
| Permitting | Submit final plans to the local building department and receive all necessary permits. | 1-4 Months |
Completing these steps thoroughly is non-negotiable. This meticulous planning is what sets the stage for a smoother, more predictable, and ultimately more rewarding journey to your custom home.
From Blueprints to a Standing Structure
With the permits approved, the paperwork phase is officially over. This is where the real fun begins—the moment your home starts to rise from the ground. The quiet lot you've been visiting transforms into a bustling construction site, and frankly, it's one of the most exciting parts of the whole process.
First thing's first: site preparation. This means clearing the land—getting rid of trees, rocks, and any other debris—and then excavating for the foundation. Whether you're planning a basement or a simple crawl space, this initial earth-moving work is done with incredible precision to ensure your home has proper drainage and a rock-solid base.
Next up is the foundation itself, the literal bedrock of your future home. It could be a slab-on-grade, a crawl space, or a full basement, but no matter the type, the concrete pour is a massive milestone. Getting this right is non-negotiable; it carries the entire weight of the house and protects it from the ground up.
This is the point where all that meticulous planning and architectural review pays off, unlocking the ability to finally break ground.
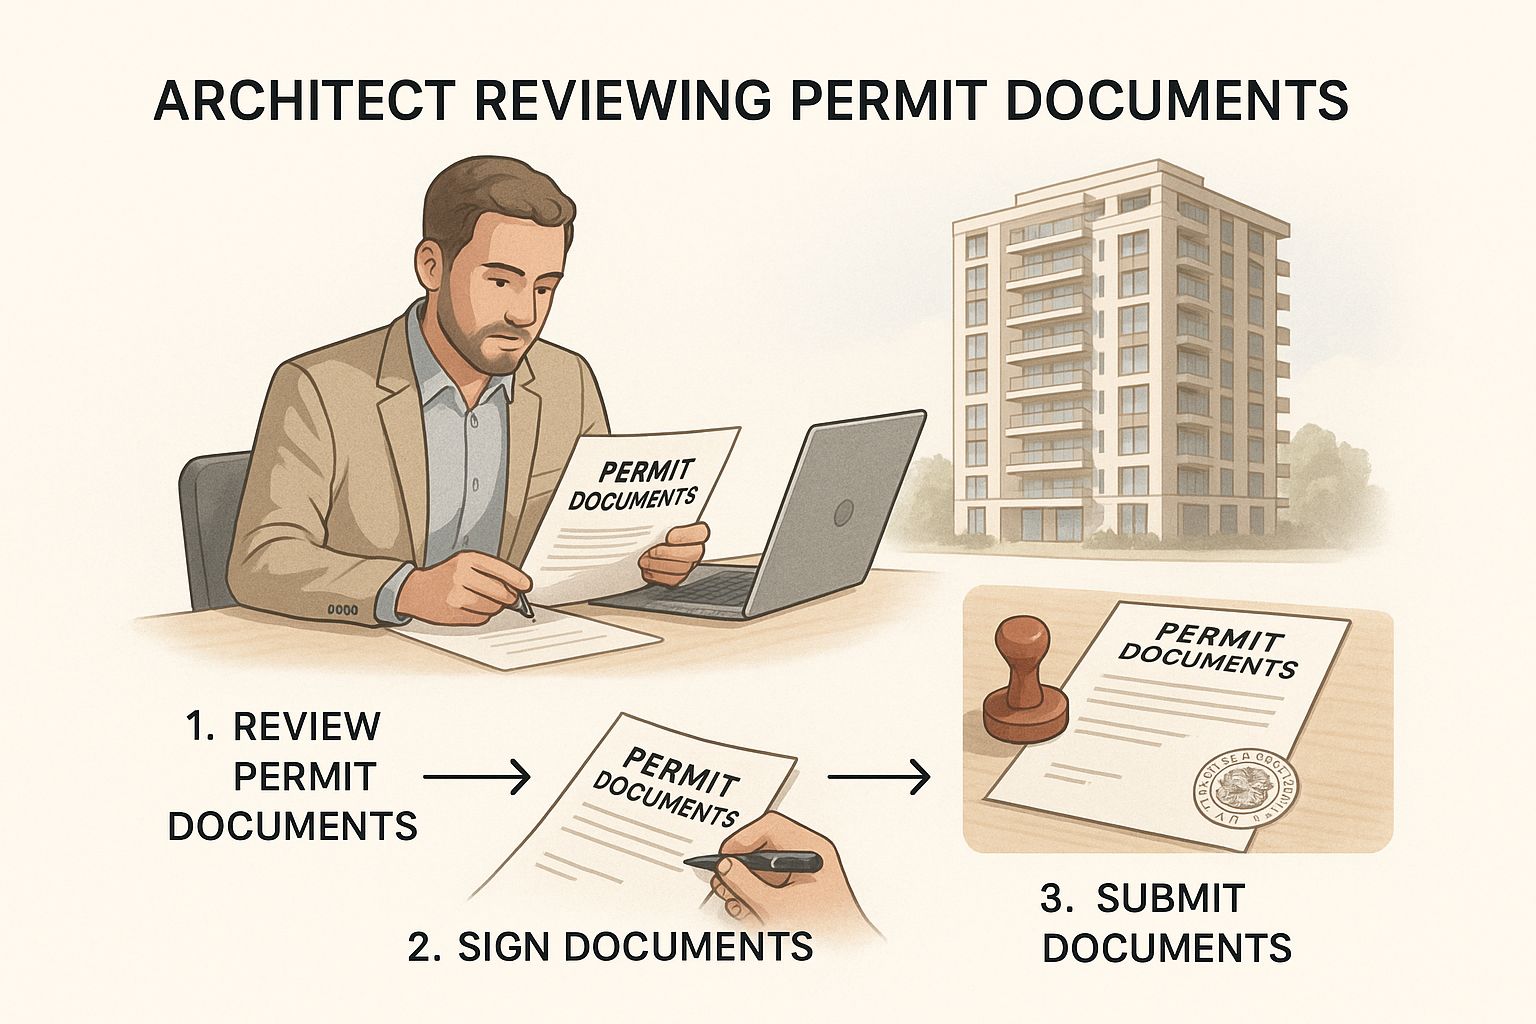
As you can see, the path from paper to physical structure is paved with detailed documentation. It’s the essential bridge you have to cross.
The Skeleton Takes Shape
Once the foundation has had time to cure properly, the framing starts. This stage often moves with surprising speed. One day it's a concrete slab, and seemingly the next, you have a skeletal structure of walls, floors, and roof trusses. This is when it really hits you. You can finally walk through the "rooms" and get a tangible feel for the scale and flow of your new home.
It’s an incredible feeling to stand in the space that will become your kitchen or living room. You’ll see the rough openings for windows and doors, and the lines on the blueprint suddenly become a three-dimensional reality.
From there, the house gets its "skin." This process has a few key layers:
- Sheathing: We cover the exterior wall frames and roof trusses with plywood or OSB (oriented strand board). This adds huge structural strength and gives us a solid surface to work with for the exterior finishes.
- House Wrap: Next, a weather-resistant barrier is wrapped around the entire structure. This is critical—it keeps rain out but allows water vapor to escape, which is your main defense against future mold and rot inside the walls.
- Roofing: Finally, shingles, metal, or whatever material you've chosen is installed. This makes the home watertight from the top down.
At this point, your home is considered "dried-in." It's a huge step because the structure is now protected from the elements, and interior work can begin without weather delays.
I always tell my clients to schedule a walkthrough with the builder right after the framing is up. It's the absolute best time to see the space and make sure everything feels right before the plumbing and electrical guts get installed. Trust me, it’s a lot easier to adjust a few studs now than it is to move a wall later.
Creating a Weather-Tight Shell
The last big step in this phase is to fully enclose the structure by installing the exterior doors and windows. A proper installation here is about more than just security; it’s a cornerstone of your home's long-term energy efficiency. I've seen how poorly sealed windows and doors can lead to drafts, heat loss, and frustratingly high utility bills for years to come.
Your involvement during this stage is invaluable. While your builder is managing the crew and the chaos, regular check-ins and clear communication will ensure the project is unfolding exactly as you envisioned.
Tips for Productive Site Visits
Always Schedule in Advance: Please, don't just show up. Construction sites are dangerous places. A scheduled visit means the site supervisor can walk you through safely and answer your questions without distraction.
Focus on Progress, Not Perfection: You’re going to see sawdust, scrap materials, and a general mess. Try to look past it. Focus on the structural milestones—the layout, the window placements—not minor cosmetic stuff that gets handled much later.
Bring Your Plans and a Camera: Have your blueprints handy to reference as you walk through. And take pictures of everything! This documentation can be incredibly helpful later if a question comes up.
Ask Questions: Your builder is your expert guide. If something doesn't look how you pictured it, ask about it. More often than not, there's a specific structural or building code reason behind it.
This is the phase where a house truly starts to look like a home. By staying involved and asking the right questions, you help ensure the structure rising from the ground is the one you’ve been dreaming of.
Bringing Your Home's Interior to Life
Now that the shell of your house is up and sealed from the weather, the action moves inside. This is where the magic really happens—where a raw structure starts to feel less like a construction site and more like your home. A whole lot happens behind the scenes at this point, but these next steps are what make your house comfortable, functional, and beautiful.
It all starts with what builders call the “rough-ins.” You’ll hear this term a lot. It’s the process of installing all the vital systems that live inside your walls, floors, and ceilings. Think of it as laying down the home’s circulatory and nervous systems before the skin—in this case, the drywall—goes on.
Installing Your Home's Core Systems
The rough-in stage is a carefully choreographed dance between plumbers, electricians, and HVAC technicians. One crew runs the water supply and drain lines, another pulls miles of wiring for outlets and lights, and a third installs the ductwork that will keep you warm in the winter and cool in the summer.
The decisions you make here, or don't make, can stick with you for years.
This is your last easy chance to get the details right. Have you thought about where your furniture will go? If you want a floor outlet in the middle of the great room for a reading lamp, now is the time to speak up. Daydreaming of a pot-filler faucet above your future stove? The plumber needs to know that before the walls are closed up.
A common regret I hear from homeowners is not thinking through their lighting plan in enough detail. Adding an extra overhead light or a dedicated outlet for holiday decorations is simple during the rough-in stage but becomes a much bigger, messier, and more expensive job after the drywall is up.
Once all the pipes, wires, and ducts are snaked through the framing, the city or county inspector comes out. This isn't optional; they have to sign off that everything is installed correctly and meets safety codes before anything else can happen.
From Skeleton to Defined Rooms
After passing those critical rough-in inspections, it’s time for insulation. Don't underestimate this step—it’s one of the most important for your home's long-term comfort and energy efficiency. Your builder will insulate all the exterior walls and ceilings, and sometimes interior walls between bedrooms or bathrooms for sound dampening. Good insulation can make a huge difference in your utility bills; some estimates suggest homeowners can save an average of 15% on energy costs.
With the insulation tucked away, the drywall goes up. This is easily one of the most dramatic transformations of the entire project. All of a sudden, the skeleton of studs and wires vanishes. In its place are smooth, solid walls that finally define each individual room. What was once an abstract floor plan now looks and feels like a real home.
Hanging the drywall is just the first part. The real artistry comes in taping and mudding the seams, then sanding everything perfectly smooth. A skilled drywall crew is worth its weight in gold—they’re the ones who give you a flawless surface that's ready for paint.
The Exciting Finishing Stages
This is where the fun really begins. The finishing stage is when all your design choices finally come to life and the house starts to show off its personality. It's a flurry of activity, with different crews coming in to install all the things you'll actually see and touch every day.
There's a specific order to this madness, all designed to protect newly installed materials from damage. Generally, it flows like this:
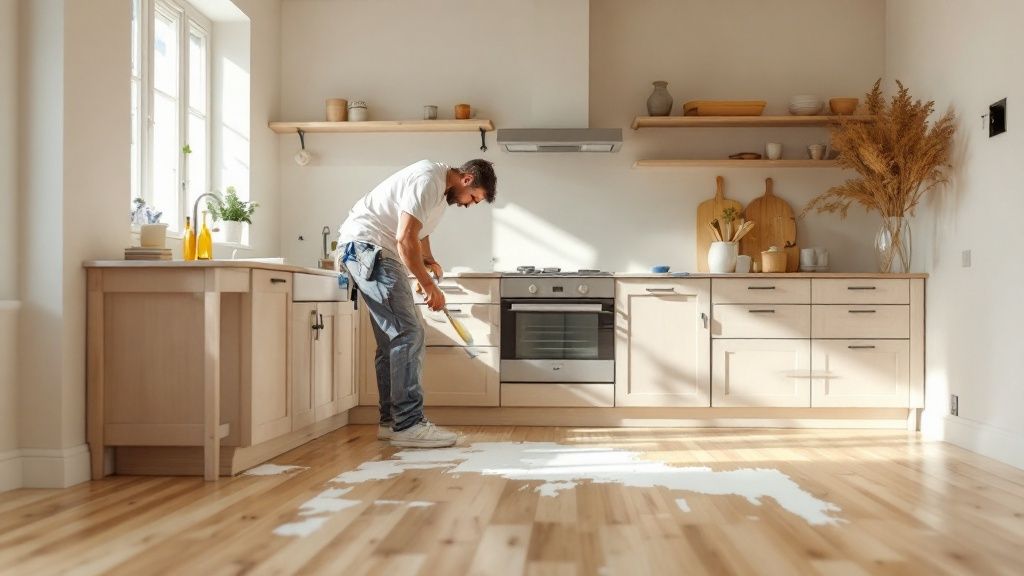
- Prime and Paint: The walls and ceilings get their first coat of primer and paint. Getting this done before the floors are in saves a lot of headaches and potential messes.
- Flooring Installation: Next, the flooring goes down. Whether you chose hardwood, tile, carpet, or luxury vinyl plank, this is the moment the space instantly feels warmer and more complete.
- Cabinetry and Countertops: Kitchen and bathroom cabinets are set in place, followed by the templating and installation of your countertops. This step gives the most functional rooms in your home their shape and purpose.
- Interior Trim and Doors: Finally, the crew installs baseboards, window casings, crown molding, and all the interior doors. These are the details that give a room its character and polished look.
Choosing all these finishes can feel overwhelming, but this is where your creative vision shines. For example, a light-colored engineered hardwood can make a smaller room feel bright and expansive, while a dark, hand-scraped wood adds warmth and a more traditional feel. Likewise, sleek quartz countertops offer a modern, low-maintenance surface, while a butcher block island can bring a rustic, organic touch to your kitchen.
This is the time to trust the design plan you put together months ago. Let that vision guide you as you make the final calls on fixtures, hardware, and finishes—the elements that will make this custom house uniquely yours.
Managing the Final Touches and Handover
You’re in the home stretch now. This is where a construction site truly starts to feel like a home. The focus pivots from the heavy structural work to the hundreds of little details that bring the space to life and give it that polished, finished look.
As the last of the interior work wraps up, crews will be buttoning up the exterior. This means finishing any siding or masonry, painting the trim, and pouring the final concrete for driveways and walkways. You'll also see some basic "builder's grade" landscaping go in, which is mainly about ensuring proper drainage and preventing erosion—it’s the clean slate for your future garden dreams.
Inside, it's a whirlwind of finishing touches. It’s amazing how quickly things come together at this stage:
- Plumbing Fixtures: Sinks, faucets, toilets, and showerheads are finally installed and hooked up.
- Electrical Trim: This is where your lighting plan becomes a reality as light fixtures, switches, and outlets are installed.
- Appliances: The kitchen and laundry room get outfitted with all the appliances you picked out months ago.
- Final Hardware: Doorknobs, cabinet pulls, and towel bars are the "jewelry" of the home, and they're some of the last things to go on.
Navigating the Inspection Gauntlet
Before you can even think about moving in, your new home has to pass its final inspections. This is a critical, non-negotiable step to ensure the house is safe and built to code. The most important inspection is the one performed by your local city or county building department.
The municipal inspector conducts a thorough review of the entire project. Their approval results in a Certificate of Occupancy (CO). This piece of paper is your official green light, certifying that the home is legally safe to live in. You cannot move in or close on your loan without it.
Many of our clients also choose to hire their own third-party inspector for one last look. It’s a great way to get an extra set of expert eyes on everything, providing an added layer of quality control and peace of mind.
The Final Walkthrough and Your Punch List
Once your builder considers the home substantially complete, they'll schedule a final walkthrough with you and the project manager. This is your moment to be meticulous. Go through every room, and don't be afraid to test everything.
Your job during this walkthrough is to spot anything that’s incomplete, incorrect, or just not up to the quality standard you expected. This list of small fixes—a paint scuff, a sticky drawer, a misaligned cabinet door—is what we call the "punch list."
A detailed punch list is your best friend. Take notes and photos of every single item. A good builder won't be offended; they’ll welcome the clear, actionable feedback and create a plan to get every last item checked off before handover.
The Official Handover and Closing
With the Certificate of Occupancy secured and the punch list complete, you're cleared for closing. This is where you'll sign the final loan documents, officially converting your construction loan into a standard mortgage. Your builder will also give you a comprehensive homeowner’s packet, which should include all your warranties, appliance manuals, and contact info for key subcontractors.
The desire for a personalized home remains strong. Despite wider economic shifts, custom home starts held steady at 34,000 units in the first quarter of 2025, showing just how much people value a home built specifically for them. You can read more about these U.S. custom building market trends on CustomBuilderOnline.com.
And then comes the best part: getting the keys. It’s the moment that all the planning, decisions, and patience have been leading up to. The building journey is over, and your life in your new home is just beginning. To get started on the right foot, check out our guide on proactive maintenance solutions for homeowners.
Of course, here is the rewritten section with a more natural, human-written tone.
Your Custom Build Questions, Answered
Building a custom home is an incredible journey, but it’s one that naturally kicks up a lot of questions. Getting straight answers from the get-go is the best way to quiet the anxieties and feel confident in your decisions. Let's walk through a few of the most common questions we hear from homeowners just like you.
Knowing what to expect ahead of time is half the battle. It helps you sidestep the common hiccups that can turn an exciting project into a stressful one.
How Long Does a Custom Build Really Take?
This is usually the very first thing people ask, and the most honest answer is, "it depends." For a truly custom home, you should realistically plan for a timeline of 12 to 18 months from the first design sketch to the day you get the keys. Sometimes, it can take even longer.
So, what pushes that timeline around? A few key things:
- The Complexity of Your Design: A sprawling, modern design with complex rooflines and unique architectural details is simply going to take more time to engineer and build than a more traditional, straightforward floor plan.
- The Permit Gauntlet: Your local building department is a huge variable. Depending on their backlog and the intricacy of your plans, getting permits approved can take anywhere from a few weeks to several months.
- Mother Nature: You can't control the weather. A brutally cold winter can halt foundation work, and a month of non-stop rain can turn a job site into a mud pit, causing serious delays, especially in the early stages.
- Supply and Demand: We're all familiar with supply chain headaches. The availability of specific materials or even skilled tradespeople in your area can definitely influence how quickly things move along.
Your builder should give you a detailed schedule, but it's smart to go in with a flexible mindset. The ultimate goal isn't just to finish fast; it's to build a quality home that lasts.
What Is a Contingency Fund and Why Do I Need One?
Think of a contingency fund as your project's built-in insurance policy. It's a non-negotiable part of your budget—typically 10-15% of your total construction cost—that you set aside purely for the "what ifs."
No matter how perfectly you plan, construction always involves a few curveballs. Maybe the excavator hits a massive boulder that has to be removed, or perhaps you see the framing up and decide you have to add a couple of extra windows.
I worked with a family who decided they wanted to add a built-in sound system throughout their home after the electrical rough-in was already complete. Their contingency fund made this change possible without derailing their entire budget or causing a major financial scramble.
Without that fund, one change order or unexpected problem could force you to compromise on things you really care about, like settling for cheaper appliances or flooring. It's the key to navigating the build without constantly sweating the budget.
How Often Should I Visit the Construction Site?
We love it when clients visit the site! It's your home, and seeing it come to life is one of the best parts of the process. That said, there’s a right way to do it. The best approach is to schedule all your visits in advance with your project manager.
Just dropping by unannounced can be disruptive and, more importantly, unsafe. A construction site has a lot of moving parts. When you schedule a visit, we can ensure the site supervisor is free to walk you through, show you the progress, and answer any questions you have. A weekly or bi-weekly check-in is a great rhythm for most projects.
When you're there, try to focus on the big picture—the quality of the framing, the overall flow of the spaces. Don't get too hung up on the daily construction mess. These visits are your chance to see how the plans you dreamed up are becoming a reality.
Ready to start your own custom home journey with a team that values clear communication and expert guidance? The professionals at Northpoint Construction are here to turn your vision into a beautiful reality. Learn more about building with us at buildnp.com.