
A DIY Basement Remodeling Guide for Real-World Results
Finishing a basement is one of the most rewarding DIY projects you can tackle. It’s a chance to transform a dark, forgotten space into a vibrant and functional part of your home—think family room, home gym, or even an extra bedroom. But success doesn't just happen; it starts with a solid game plan long before you swing a single hammer.
Creating Your Basement Remodeling Game Plan
Every successful basement remodel I've seen began with a clear, well-thought-out plan. This is the roadmap that guides every decision you'll make, from the big-picture layout down to the smallest light fixture. This initial phase is all about locking in your vision, understanding the project's scope, and being brutally honest about what you can realistically do yourself.
First things first: what do you want this space to be? A cozy media room for movie nights has completely different needs than a bright, functional home office or a guest suite with its own bathroom. The function dictates everything—lighting placement, the number of electrical outlets, plumbing runs, and even how much soundproofing you'll need.
To really nail down the feel and make sure all your ideas work together, I highly recommend looking at some interior design mood board examples. Putting one together for your own project is a fantastic way to visualize the final look and keep your material choices cohesive.
Defining the Scope and Your Role
With your vision in place, it's time to get practical and break the project down into logical steps. A smart remodel follows a specific sequence to avoid having to redo work later on.
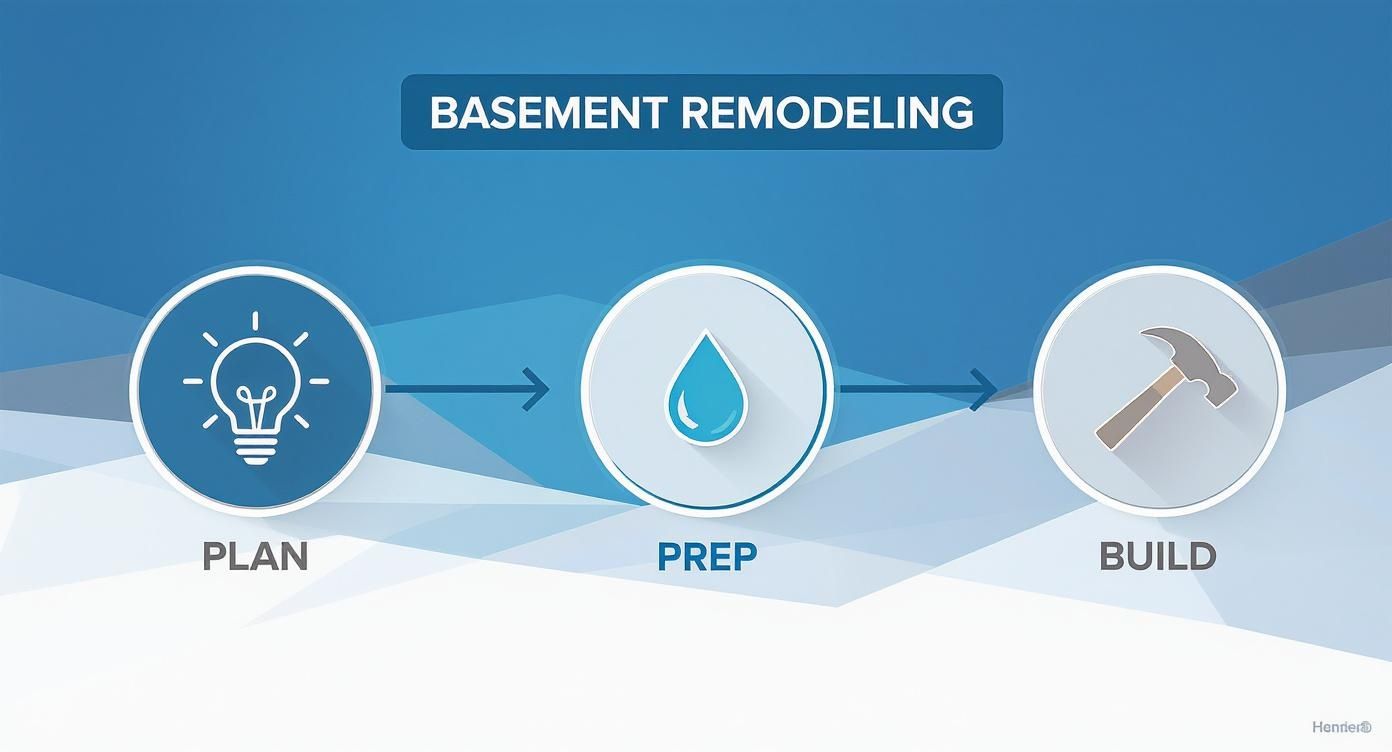
This simple breakdown highlights a crucial truth: a successful build depends on putting in the hard work during the planning and prep stages. Rushing into construction is a recipe for disaster.
Next comes the big question: what will you do, and what will you hire out? This "hybrid" approach is incredibly popular, and for good reason. Recent polling shows that while a confident 32% of homeowners plan to tackle the entire project themselves, a larger group of 46% opts for a mix. They’ll often handle tasks like framing, painting, and flooring but bring in licensed pros for the tricky stuff like electrical and plumbing.
Deciding where to draw the line can be tough. This table breaks down common tasks to help you figure out what makes sense for your skill level.
DIY vs Pro Task Breakdown
| Demolition | High | Safety first! Wear proper PPE. Check for asbestos or lead paint in older homes. |
| Framing Walls | High | Requires basic carpentry skills and tools. Must be square and plumb. |
| Moisture Control | Medium | Sealing minor cracks is DIY-friendly. Major water issues need a pro. |
| Electrical Wiring | Low | Strongly recommend a licensed electrician. Errors are a major fire hazard. |
| Plumbing | Low | Best left to a licensed plumber. Leaks can cause catastrophic damage. |
| Insulation | High | Relatively simple, but proper installation (vapor barriers) is key for efficiency. |
| Drywall | Medium | Hanging is manageable; finishing (taping/mudding) is an art that takes practice. |
| Painting & Trim | High | A perfect DIY task. Patience and good prep work are all you need. |
| Flooring (LVP/Carpet) | High | Modern flooring systems like LVP are designed for DIY installation. |
| HVAC Ductwork | Low | Hire an HVAC professional. Proper airflow and load calculations are critical. |
Ultimately, a hybrid approach often delivers the best balance of cost savings and professional-grade results where they matter most.
Be honest with yourself about your skills and experience. It's far cheaper to hire an electrician from the start than to pay one to fix mistakes and re-do work that won't pass inspection.
Setting a Realistic Budget and Timeline
With your scope defined, you can start building a real-world budget. Begin by pricing out the big-ticket items: framing lumber, insulation, drywall, and your chosen flooring. Don’t forget the hidden costs like tool rentals, permit fees, and—most importantly—a contingency fund of 15-20% for those inevitable surprises.
A realistic timeline is just as crucial. A basement remodel is a marathon, not a sprint; it can easily take several months of dedicated evenings and weekends. Map out each phase and attach a rough timeframe to it. This simple exercise will help keep you on track, manage expectations with your family, and turn a daunting project into a manageable and successful one.
Making Sure Your Basement Foundation is Bone-Dry
Before you even think about cutting a single 2x4 for framing, your basement has to be an impenetrable fortress against moisture. I can't stress this enough: this isn't the glamorous part of a DIY basement remodel, but it's absolutely the most critical. If you get this wrong, you're just inviting mold, rot, and that dreaded musty smell that will ruin all your hard work.
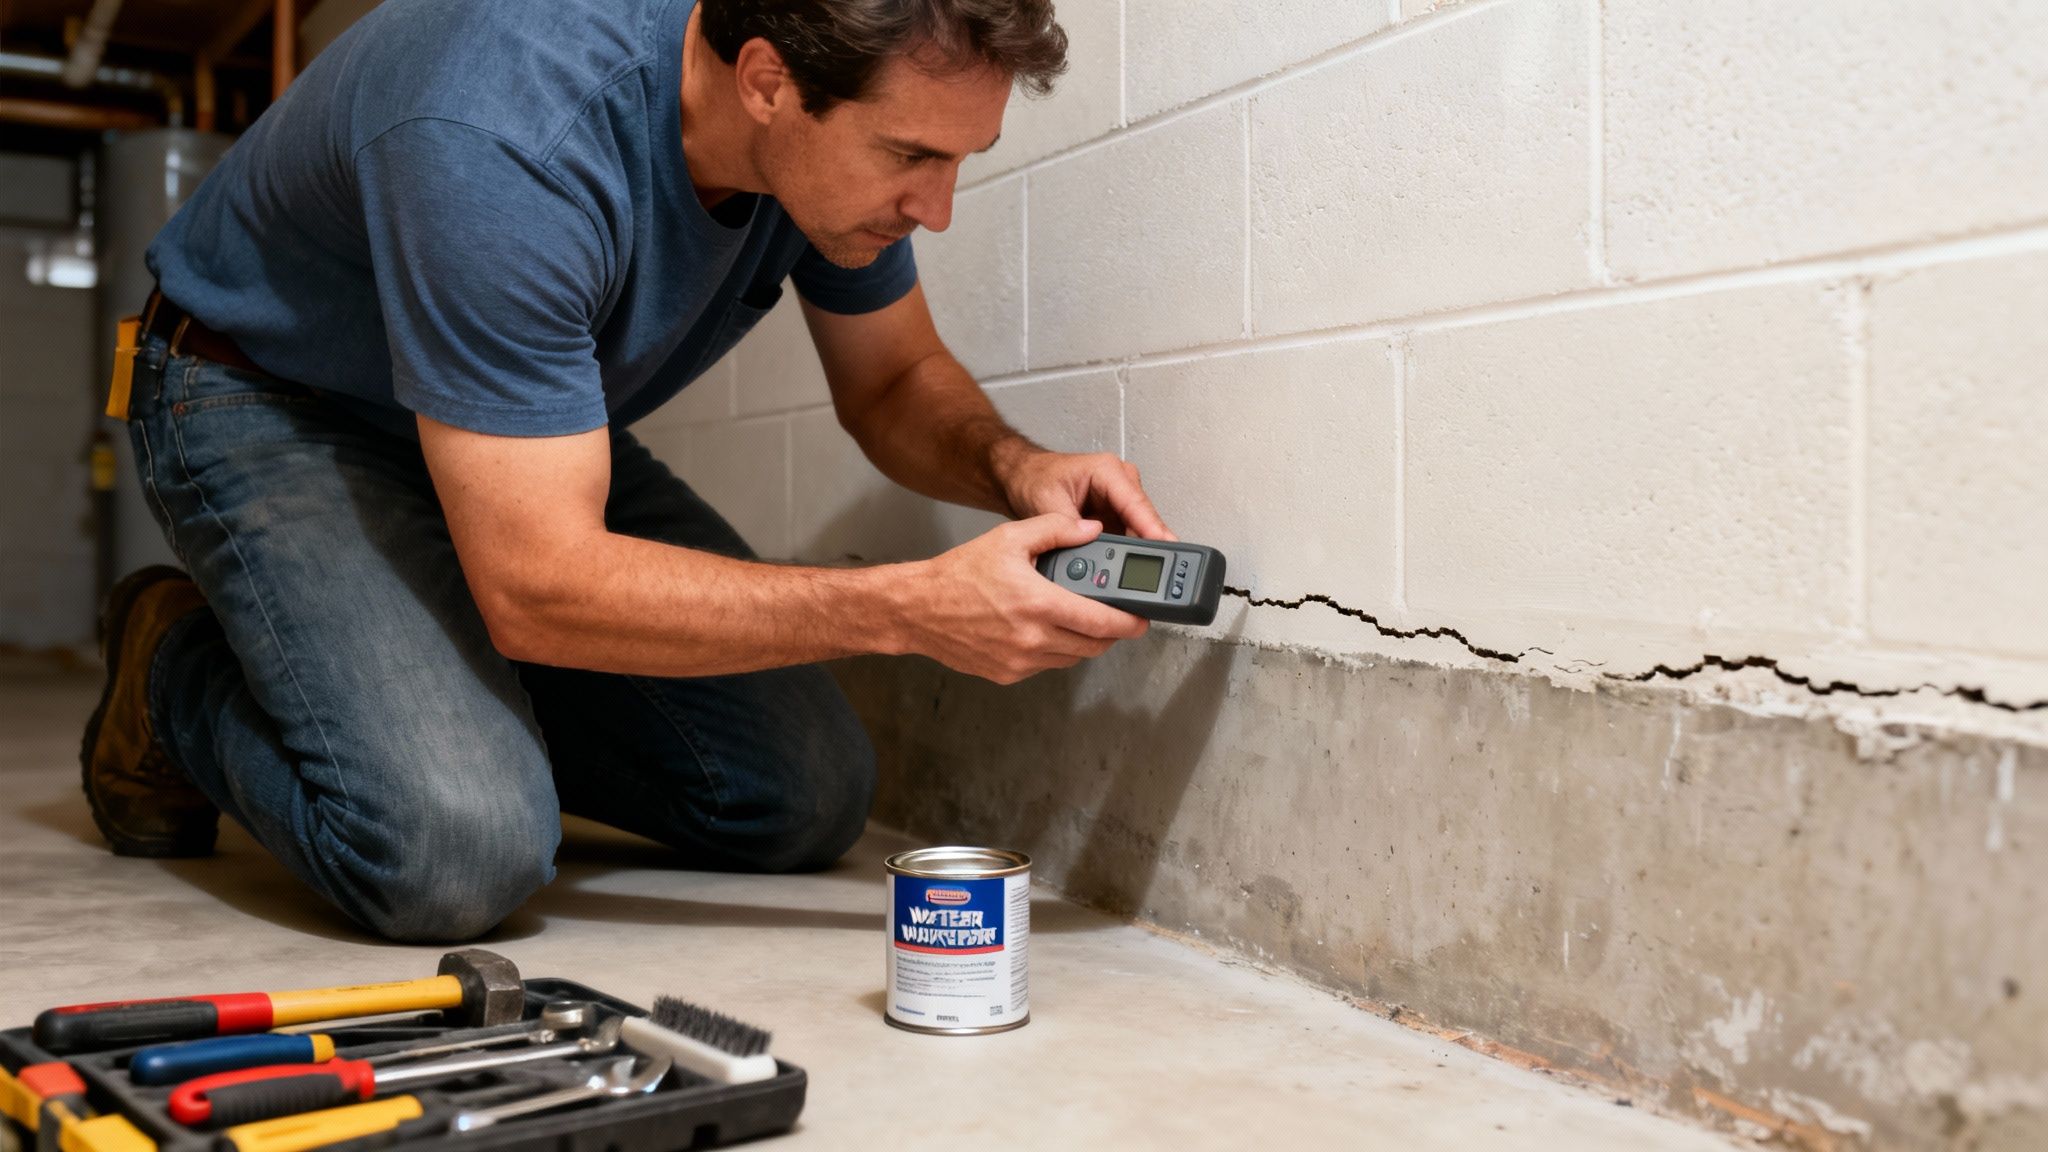
The first order of business is a thorough, hands-on inspection of every square inch of your foundation. You're not just looking for obvious puddles; you’re playing detective, hunting for the subtle clues that tell you water has been—or wants to be—a guest.
Get a powerful flashlight and slowly scan your concrete walls and floor. Pay special attention to the corners, the joint where the walls meet the floor, and around any pipes coming through the foundation.
Identifying Moisture Red Flags
Your inspection needs to be methodical. You're looking for specific signs that point to different kinds of moisture problems. Some are easy to spot, while others are a bit more sneaky.
Keep a sharp eye out for these common culprits:
- Hairline Cracks: These often pop up as your home’s foundation settles naturally. While a tiny crack might not be actively leaking, it's a weak point that can let water in when the ground is saturated.
- Efflorescence: See any chalky, white, or crystalline gunk on the walls? That's efflorescence. It’s left behind when water seeps through the concrete and then evaporates, leaving mineral deposits. It's a dead giveaway that moisture is passing through your foundation.
- Dark Stains or Water Marks: These are the ghosts of water past. Note their location and size. They often show up after a heavy rain or snowmelt, which can give you clues about where your exterior drainage might be failing.
- Peeling Paint or Damp Spots: If the basement was painted before, any blistering or peeling is a classic sign of moisture pushing its way through from the other side. A simple moisture meter can confirm if these spots have elevated moisture levels.
Pro Tip: Try the "plastic sheet test." Tape a 2-foot by 2-foot square of plastic sheeting to a section of your concrete wall and another to the floor. Leave it for a few days. If you see condensation on the inside of the plastic (wall side), water is seeping through the concrete. If it's on the outside (room side), you’ve just got high humidity in the basement air.
DIY Waterproofing Solutions That Actually Work
Once you've mapped out the problem areas, you can get to work on solutions. For most minor issues, DIY methods are surprisingly effective and will save you a ton of money compared to calling in a professional waterproofing company.
One of the most impactful things you can do is apply a high-quality interior waterproofing paint or sealant. This stuff is way thicker than regular paint and is specifically designed to create a barrier that stops water from seeping through the concrete's pores.
Before you start painting, though, you have to deal with every last crack. For hairline cracks, a flexible polyurethane caulk works great. If you have larger cracks (wider than an eighth of an inch), an epoxy injection kit will give you a much stronger, more permanent structural repair.
After the cracks are filled and the walls are spotlessly clean, you can apply the sealant according to the manufacturer’s directions, usually with a thick-napped roller. For a truly bulletproof barrier, our complete guide on how to waterproof basement walls from the inside digs deeper into the best products and techniques.
Don't Forget About Radon
While you're on the hunt for water, don't overlook another invisible threat: radon. It’s a naturally occurring radioactive gas that can seep into basements through the very same cracks you’re sealing. As the second leading cause of lung cancer, testing for it is a non-negotiable step in any basement remodel.
The good news is that testing is simple and cheap. You can grab a DIY radon test kit at any big-box home improvement store. If your test results come back with elevated levels (anything above 4 pCi/L), you'll need to hire a certified radon mitigation specialist to install a system.
This usually involves a simple pipe and fan that vents the gas from below your foundation safely outside. It’s far easier and cheaper to address this now, before you put up drywall and flooring, and it’s absolutely essential for your family's health. Taking these steps now ensures you’re building your dream basement on a safe, dry foundation.
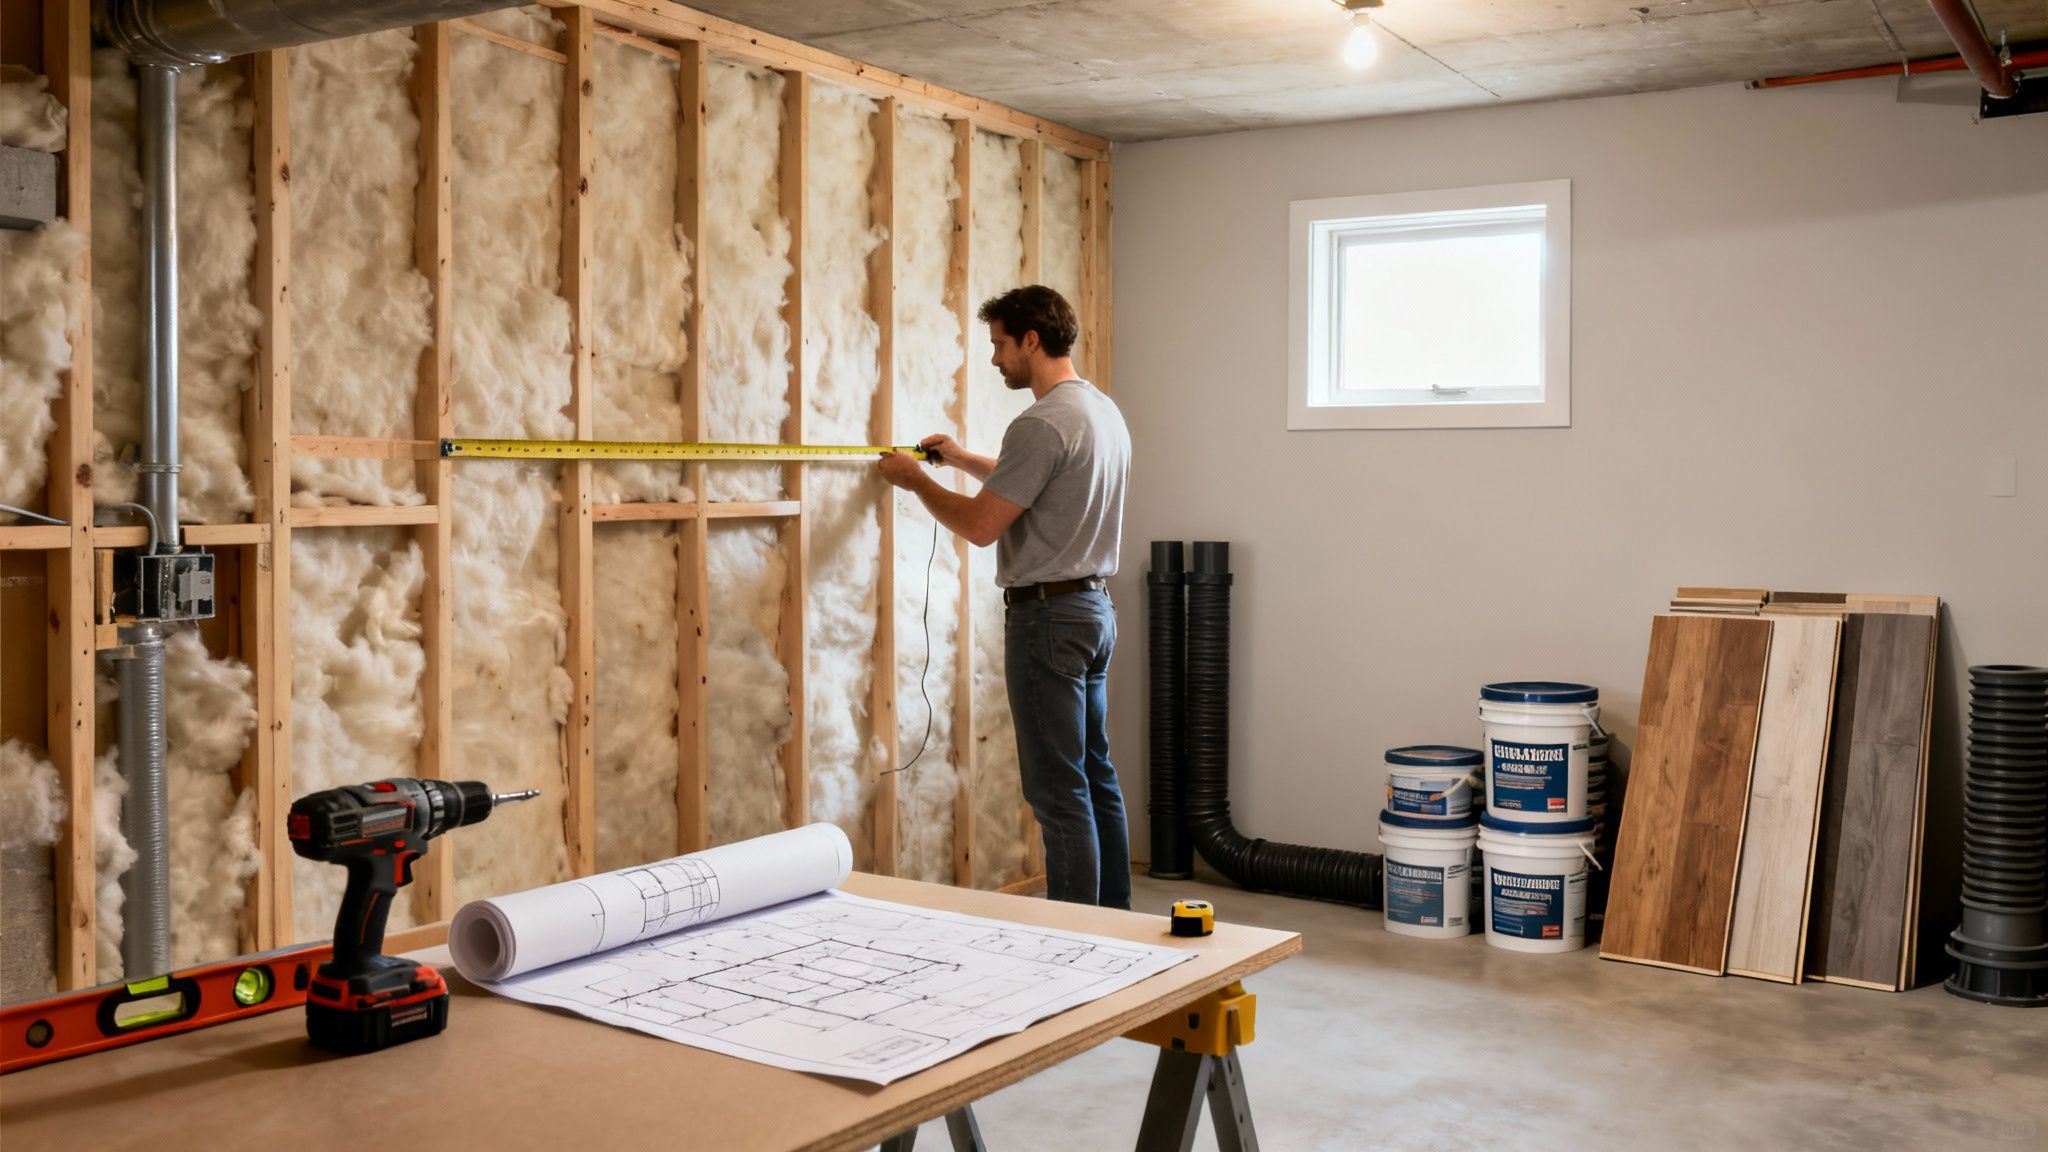
Framing and Insulating Your Basement Walls
Alright, with the foundation sealed and bone-dry, it's time for the fun part. This is where your concrete box truly starts to look and feel like a collection of rooms. Framing the walls is probably one of the most rewarding steps in a DIY basement remodeling project because you see huge progress, fast.
Before you haul any lumber down the stairs, let's talk materials. While you could use metal studs, most of us are more comfortable working with wood—it's familiar and forgiving. The single most important decision you'll make here isn't about the vertical studs, but about the bottom plate.
That one piece of lumber sitting directly on the concrete floor must be pressure-treated. No exceptions. Concrete is porous and will wick moisture right into untreated wood, causing it to rot. This could compromise your entire wall down the road. The rest of your lumber—the top plate and vertical studs—can be standard, non-treated wood.
Laying Out and Building Your Walls
Your first move is to map out exactly where the walls will go. Grab a chalk line and snap your layout directly onto the concrete floor. This gives you a crystal-clear guide for placing your bottom plates. Double and triple-check your measurements here to make sure your rooms are the right size and, crucially, that your corners are square.
With the layout marked, you can start building the frames. Here's a pro tip: it's a whole lot easier to build the wall sections flat on the floor and then hoist them into place, rather than trying to build them vertically piece by piece.
Here’s the basic workflow for assembling a wall frame:
- Cut Your Plates: Start by cutting the pressure-treated bottom plate and a standard 2x4 for the top plate to the exact length of the wall you're building.
- Mark Stud Locations: Lay the top and bottom plates side-by-side and mark where each stud will go. The standard spacing is 16 inches on center—that means the center of one stud is 16 inches from the center of the next. A tape measure and a speed square are your best friends here.
- Cut the Studs: Measure the height from your concrete floor to the bottom of the ceiling joists above. You’ll want to cut your vertical studs about 3 inches shorter than this measurement. This gap gives you the wiggle room needed to tilt the fully assembled wall up into position.
- Assemble the Frame: Lay everything out on the floor and nail it all together. The standard practice is to use two 16d nails driven through the plates into the top and bottom of each stud.
Once a wall frame is nailed together, get some help and lift it into place. You'll use shims between the top plate and the ceiling joists to get it snug and perfectly vertical (plumb). Then, you can secure it to the joists above and fasten the bottom plate to the concrete floor.
Insulating for Comfort and Efficiency
Now that you have walls, you need to insulate them. This is the step that transforms a chilly cellar into a warm, comfortable part of your home. In a basement, your main goal with insulation is to create a barrier against the cold earth surrounding your foundation.
You've got a few solid choices for basement insulation, and each has its place.
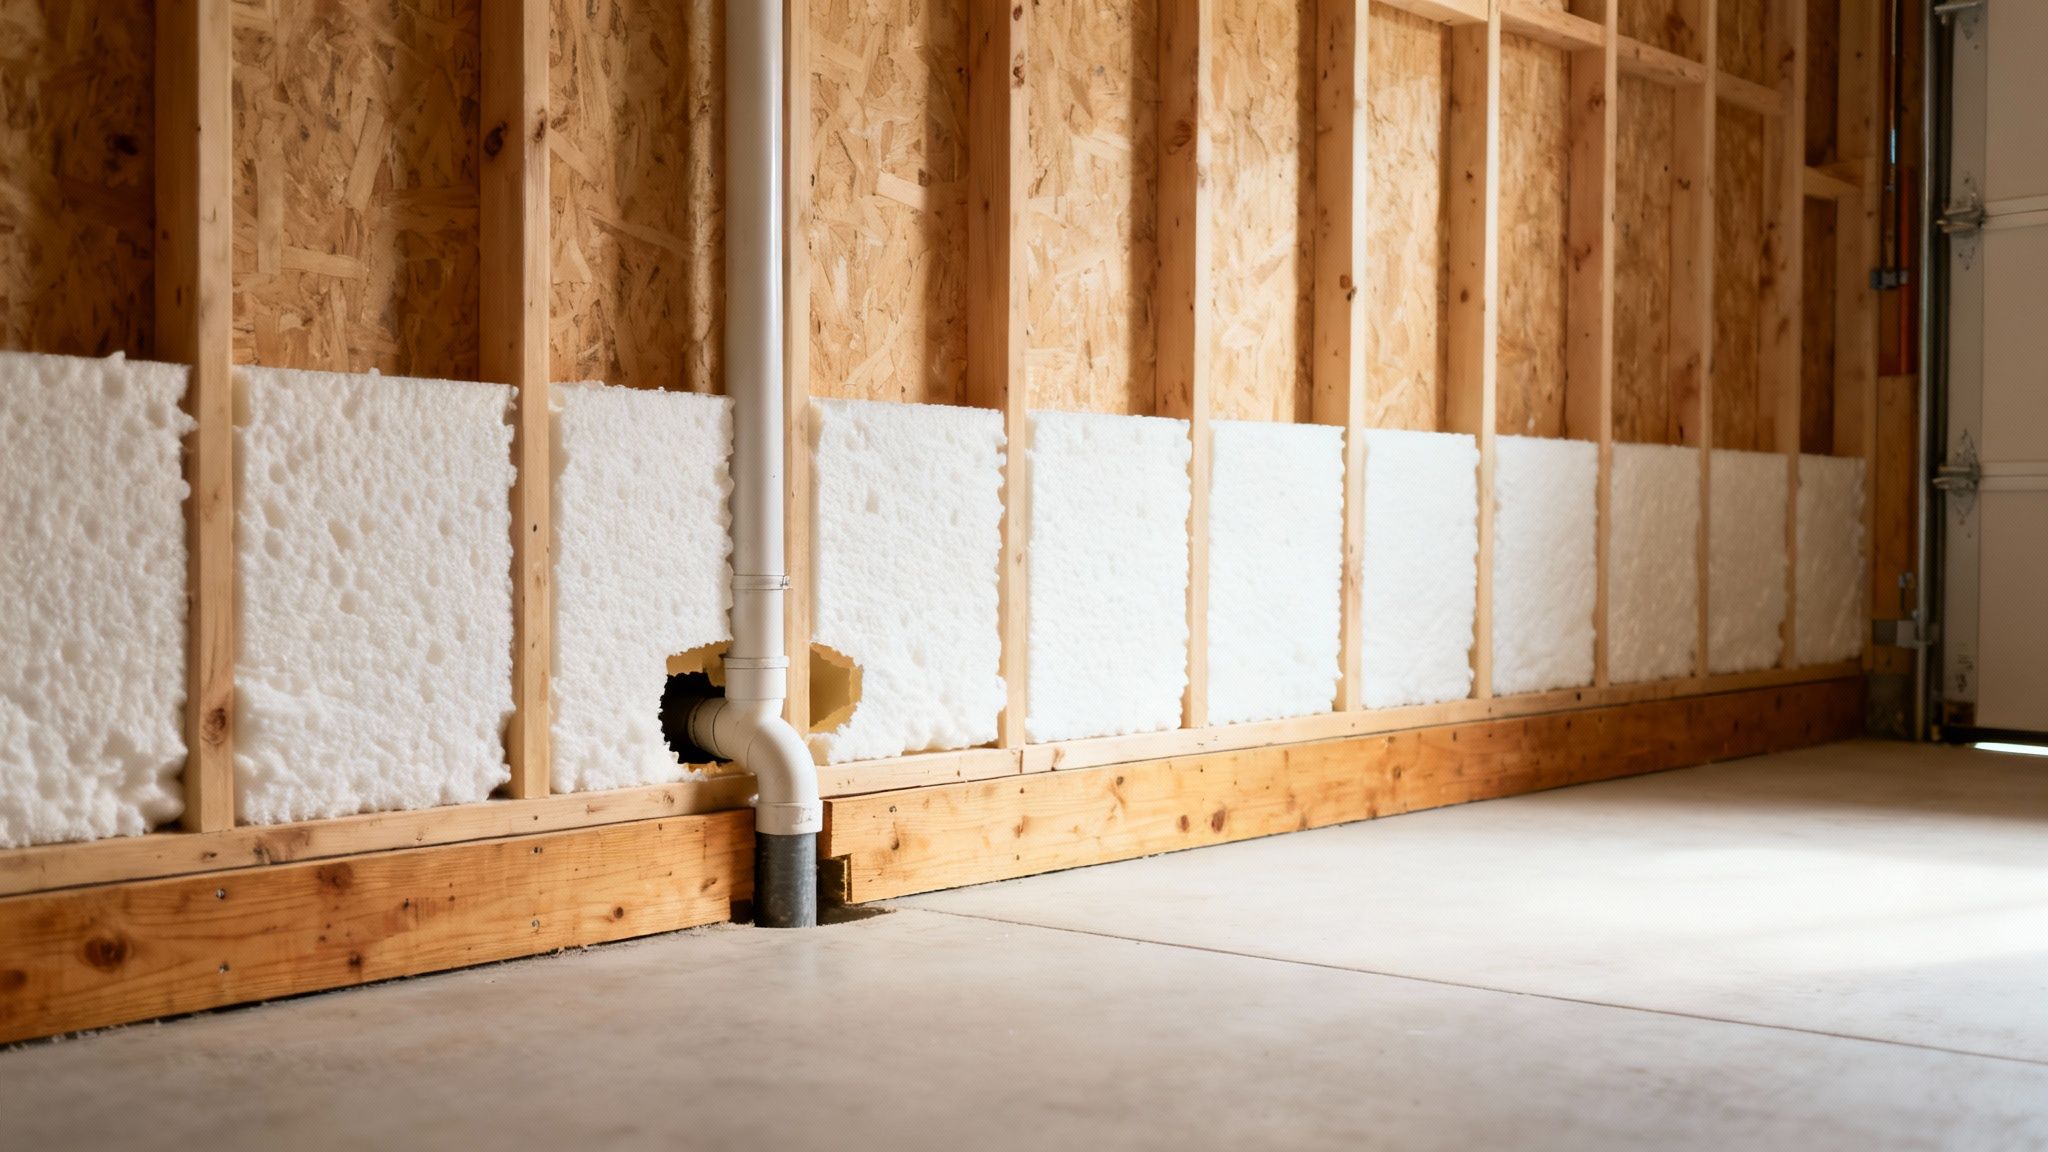
- Rigid Foam Board (XPS/EPS): In my experience, this is the best all-around option for foundation walls. It doesn't care about moisture, offers a great R-value for its thickness, and creates a continuous thermal break when you attach it directly to the concrete before you frame.
- Spray Foam: If budget allows, closed-cell spray foam is the gold standard. It provides the highest R-value and seals every tiny crack, creating a monolithic barrier against air and moisture. It's a job for the pros, but the performance is incredible.
- Fiberglass Batts: This is the classic, budget-friendly choice. Fiberglass is easy for any DIYer to install between studs. The big catch? It's useless if it gets wet and can become a breeding ground for mold, so it absolutely must be protected by a vapor barrier.
For most projects, a hybrid approach offers the best bang for your buck. First, glue 1-2 inches of rigid foam board directly to the concrete foundation walls, making sure to tape all the seams. Then, build your 2x4 stud wall right in front of it. This gives you the option to add inexpensive fiberglass batts between the studs for even more insulating power. This one-two punch gives you a fantastic thermal break, a reliable vapor barrier, and a high R-value to keep your new living space cozy for years to come.
Getting a Handle on Mechanicals: Wiring, Plumbing, and HVAC
Alright, let's talk about the guts of your basement remodel—the electrical, plumbing, and HVAC systems. This is the stage where a lot of DIYers start to feel a little out of their depth, and honestly, that’s a healthy reaction. These systems are complex, and getting them wrong can be dangerous and costly.
But here’s the good news: you don't have to be a master electrician or plumber to save a ton of money. Your goal is to do the heavy lifting—the planning and the rough-in work—and then bring in the licensed pros to make the final, critical connections. By running your own wires and setting drain lines, you can cut your labor costs by thousands, all while ensuring the job is done right.
Planning Your Electrical Layout
Before you even think about touching a wire, you need a rock-solid electrical plan. This is your roadmap for bringing your new basement to life. The best way to start is by grabbing a copy of your floor plan and walking through how you'll actually use the space day-to-day.
A media room has totally different needs than a home gym. One needs carefully placed outlets for a projector and speakers, while the other might require a dedicated 240-volt outlet for a beefy treadmill. Map out where every switch, outlet, and light fixture will go.
Think about flow and convenience:
- Outlets: As a rule of thumb, place outlets every 6 to 8 feet along the walls. No one likes hunting for an extension cord. I highly recommend adding a few with built-in USB ports near where you plan to have a couch or a desk.
- Switches: A three-way switch at the top and bottom of the stairs is a must-have. For other rooms, think about the natural path you take. Where would your hand automatically go to flip on a light? That's where the switch goes.
- Lighting: Don't just rely on one big overhead light. A great lighting plan uses layers. Plan for recessed cans for overall ambient light, focused task lighting over a wet bar or craft table, and maybe some accent lighting to show off a cool feature wall. Give each layer its own switch.
A classic rookie mistake is overloading a circuit. Your standard circuit is 15-amps, which is fine for general use. But if you're planning a kitchenette with a microwave or a workshop with power tools, you'll absolutely need a dedicated 20-amp circuit to avoid constantly tripping the breaker.
Tackling Plumbing and HVAC
Adding a bathroom or even a simple wet bar is one of the best ways to boost your basement's value. While I always insist that a licensed plumber makes the final tie-in to your main sewer line, you can absolutely handle the prep work.
This means mapping out your drain and vent lines and, yes, even cutting into the concrete to lay the pipes. It’s a big job, but completely doable. For a deeper dive, our guide on how to add a bathroom in the basement breaks down that specific project beautifully.
When you're laying out the plumbing, just remember the one rule that matters above all else: drains need slope. Waste has to flow downhill, which means a steady pitch of about ¼ inch per foot. Your building inspector will have a level out and will be looking for this specifically, so get it right.
Heating and cooling are just as critical for making the space feel like a true part of your home. Most of the time, the simplest solution is to extend the ductwork from your existing HVAC system.
Key HVAC Planning Steps
Do the Math on Airflow: You're adding a lot of cubic feet to your home's conditioned space. An HVAC pro can run what’s called a "load calculation" to see if your current furnace and A/C unit can even handle the extra demand. It's better to know this upfront.
Map Your Duct Runs: Look for the most direct routes to run new supply and return ducts from the main trunk lines in your ceiling. The shorter and straighter the run, the more efficient your system will be.
Place Vents Strategically: Put your supply (hot/cold air) vents near windows or along exterior walls to fight off the cold. Your return air vents should go on interior walls, far away from the supplies, to create a natural, circulating airflow.
You can definitely buy and hang the ductwork yourself, but I’d recommend having a professional double-check your layout and make the final connections. This ensures your whole system stays balanced and you don't put unnecessary strain on your expensive equipment.
Bringing Your Vision to Life With Finishes
This is the moment. It’s when your project finally sheds its construction-zone skin and starts to feel like a real, livable part of your home. The finishing stage is all about personality—covering the framing and utilities with the surfaces that define the look and feel you've been dreaming of.
All that hard work is about to pay off in a big way, starting with the blank canvas of drywall.
Mastering the Drywall and Paint Finish
Hanging drywall is mostly about muscle and good measurements. Finishing it, however, is a different beast altogether. Taping and mudding is a true art form that requires a ton of patience. Don't get discouraged if your first few seams look like a mess—it’s a skill that genuinely gets better with every pass of the trowel.
One of the most common mistakes I see is piling on too much joint compound, or "mud," all at once. The secret to a professional-looking wall is building up thin, successive layers and sanding lightly between each one. That's how you get that perfectly smooth, seamless finish that disappears under a coat of paint.
The whole point of finishing drywall is to make the seams between the sheets vanish. It’s a multi-step process, but skimping here will show in the final product.
- Taping the Joints: Once the sheets are up, you'll embed paper or mesh tape into a thin layer of mud over every seam. The tape is what gives the joint strength and prevents cracks from showing up down the road.
- Applying Fill Coats: After taping, you'll apply wider coats of mud over the tape. Each coat should be wider than the last, feathering the edges out to create a gradual, invisible transition.
- Sanding and Priming: The final step is a light sanding to knock down any ridges or imperfections. Then comes the primer. This is non-negotiable. Primer seals the porous drywall and mud, giving your paint a uniform surface to stick to so the color looks even and rich.
With the walls primed, you're ready for paint. This is one of the best places to save some serious money on a DIY project. Doing the painting yourself can save you $3 to $6 per square foot in professional fees.
Choosing the Right Basement Flooring
Now that the walls are done, it's time to look down. Basement flooring has to be a triple threat: tough, moisture-resistant, and comfortable. Solid hardwood is almost always a bad idea down here because of moisture, but there are plenty of other fantastic options that are perfect for a below-grade space.
For a DIYer, some choices are way more user-friendly than others. Here are the top contenders:
- Luxury Vinyl Plank (LVP): This stuff is the undisputed champion for basements. LVP is 100% waterproof, tough as nails, and comes in incredibly realistic wood and stone looks. Its click-lock installation was practically made for DIYers.
- Engineered Wood: If you're dead set on the feel of real wood, engineered wood is the answer. Its layered construction is far more stable than solid hardwood and can handle minor humidity swings—as long as you have a good subfloor and vapor barrier.
- Carpet Tiles: Forget everything you think you know about old-school roll carpet. Carpet tiles bring warmth and comfort with one huge advantage: if a tile gets stained or damaged, you just pull that single square up and replace it.
The right choice really boils down to how you'll use the space. For an in-depth look at all the pros and cons, check out this guide on the best basement flooring options.
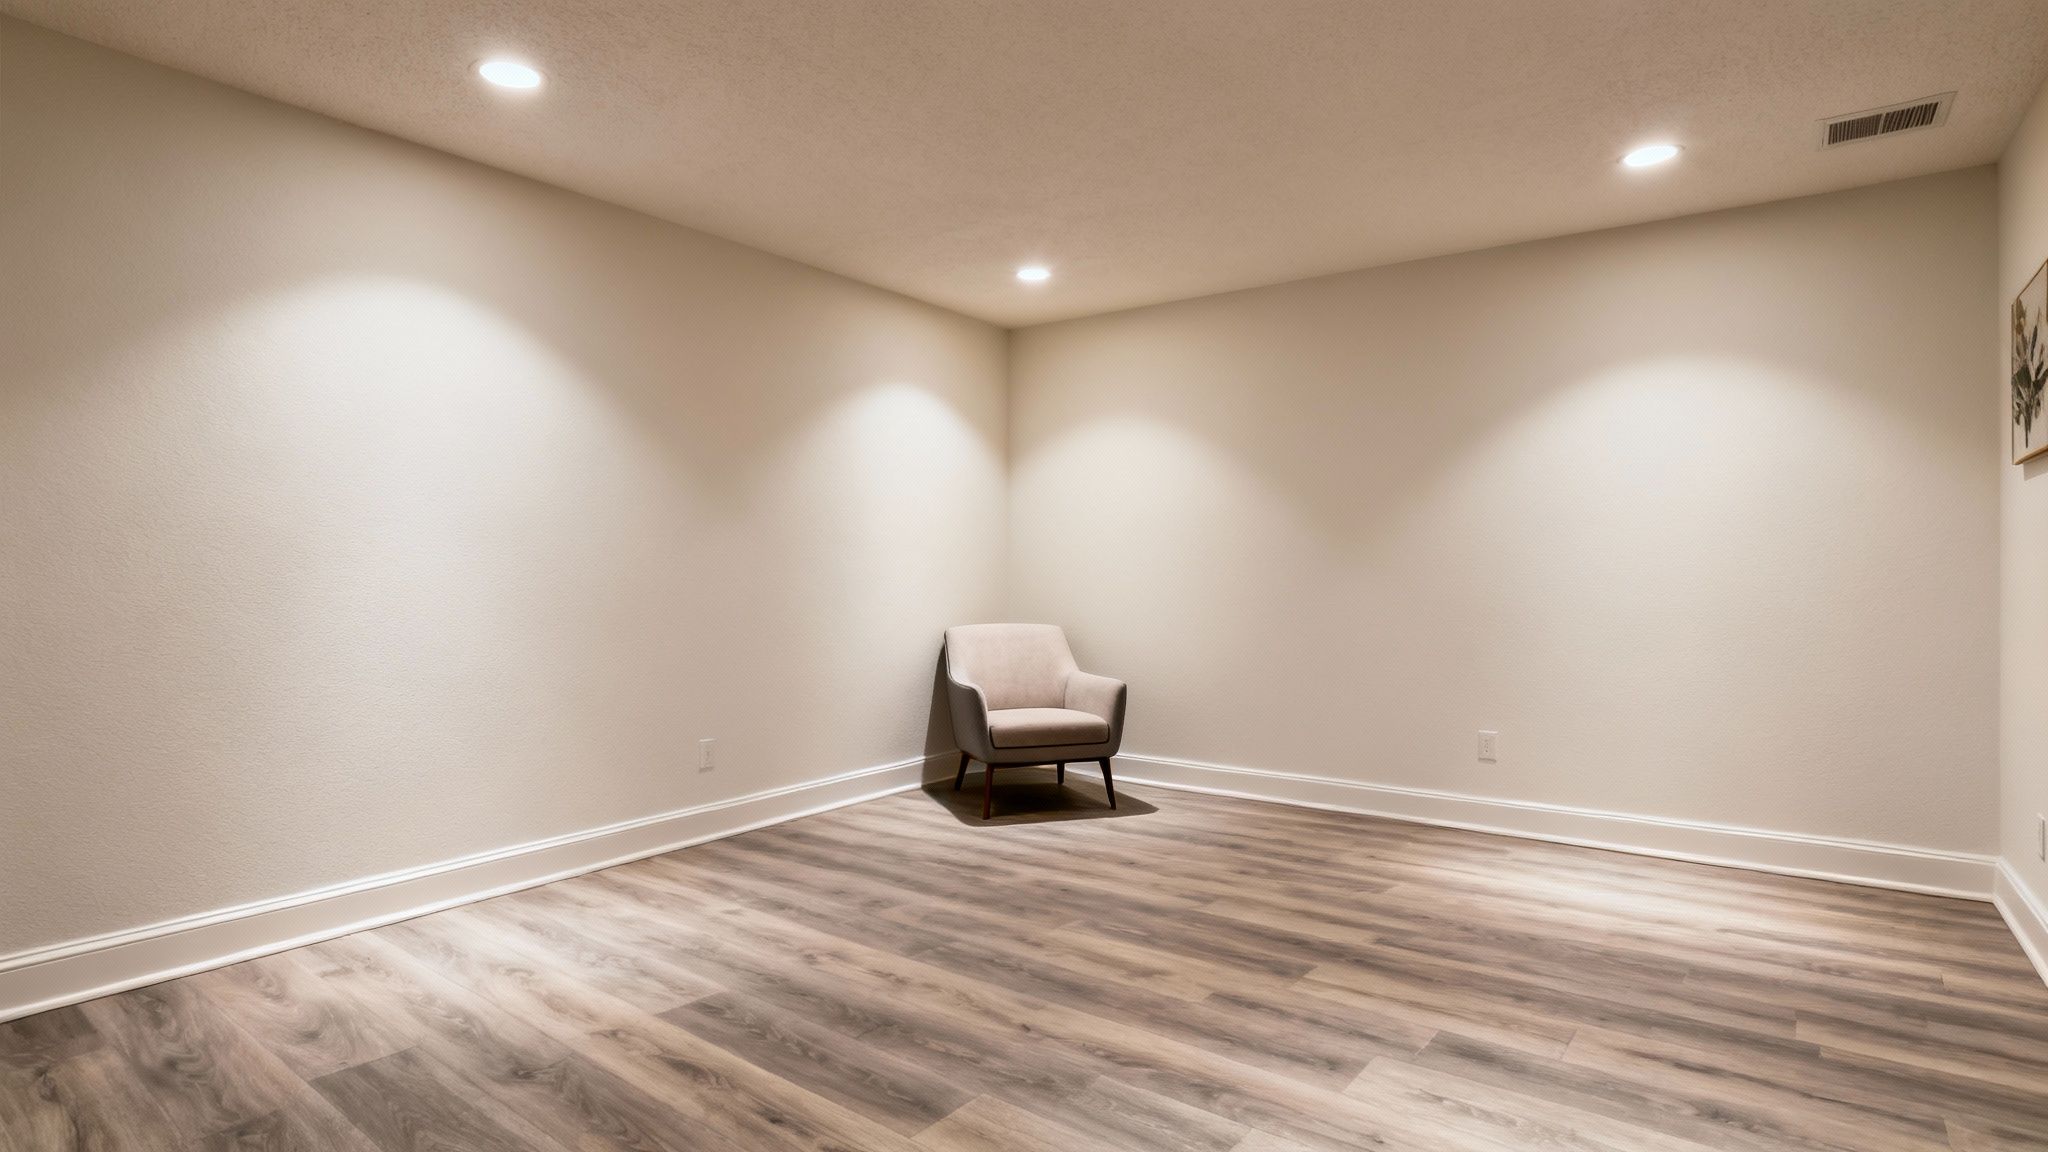
Illuminating Your Space with Layered Lighting
Great lighting is what separates a welcoming living area from a subterranean cave. A single, sad light fixture in the middle of the ceiling just won't do. The professional approach is a layered lighting strategy, which combines different types of light for both function and atmosphere.
A solid lighting plan needs three distinct layers:
- Ambient Lighting: This is your main, overall illumination. Recessed "can" lights are the go-to choice for good reason; they provide broad, even light across the whole room.
- Task Lighting: This is focused light aimed right where you need it for specific activities. Think of pendant lights hanging over a bar, under-cabinet strips in a kitchenette, or a nice floor lamp in a reading nook.
- Accent Lighting: This is the fun part—the "jewelry" of your design. Use it to highlight cool features like a textured wall, a piece of art, or built-in bookshelves.
When you put these three layers on separate switches, and ideally dimmers, you get total control over the mood. You can crank it up for game night with the kids or dim it way down for a cozy movie, making sure your new basement is perfect for any occasion.
Budgeting Your Remodel and Boosting Home Value
Alright, let's talk money. A successful basement remodel is where your dream vision meets a real-world financial plan. Getting your budget right from the start is the one thing that will keep your project on track and prevent it from becoming a source of stress. It's how you turn all that sweat equity into a genuine asset.
Your budget is more than just a big number you hope to stick to. It needs to be a detailed roadmap of every single cost you can think of, from the big stuff down to the last box of screws.
Breaking Down Your Expenses
The best way to wrangle your budget is to break it down into logical chunks. This helps you see where the money is really going and stops those small, forgotten costs from piling up and derailing your project.
Here are the main categories I always tell people to plan for:
- Permits and Fees: You'll get these numbers after your first chat with the local building department. Don't guess here.
- Tools: Be honest about what you need. Are you renting a drywall lift? Buying a powder-actuated nailer for the framing? It all adds up.
- Materials: This will be your biggest expense by far. Think lumber, insulation, drywall, flooring, paint, light fixtures—everything.
- Professional Labor: Unless you're a licensed pro, you'll need to budget for an electrician and possibly a plumber or HVAC technician.
The most critical line item in your entire budget? A 15-20% contingency fund. Seriously, don't skip this. This is your "uh-oh" money for when you find a hidden crack in the foundation or the price of lumber suddenly spikes. It happens.
Maximizing Your Return on Investment
A finished basement isn't just a new playroom or home office; it's a smart financial move. Every square foot of legal, livable space you add directly bumps up your home's value. As you plan your project, keep these strategies to boost home value in mind to make sure you get the most bang for your buck.
The numbers don't lie. Year after year, reports show that a basement remodel delivers an average return on investment between 50% and 70%. That makes it one of the smartest upgrades you can make. Potential buyers love seeing a finished basement—it often means a higher asking price and a quicker sale. Your hard work isn't just creating a new room; it's building real financial worth for your family's future.
Answering Your Top DIY Basement Remodeling Questions
It's natural to have a long list of questions before you start tearing into your basement. Let's tackle some of the most common ones I hear from homeowners. Getting these answers straight upfront can save you a ton of headaches down the road and give you the confidence to get started.
How Much Can I Really Save Doing It Myself?
This is the big one, right? The good news is, taking on a basement remodel yourself can save you a massive chunk of change—often 40-60% of what a full-service contractor would charge. That savings comes almost entirely from cutting out labor costs.
You'll bank the most by handling the demolition, framing, hanging drywall, painting, and laying down simple click-lock flooring. These are the jobs that are more about time and sweat equity than specialized, licensed skills.
But let's be realistic: "DIY" doesn't mean "free." You still have to budget for every single stud, screw, and sheet of drywall. You might need to rent or buy tools, and don't forget the permit fees. Most importantly, you must plan for the pros.
Never, ever skimp on electrical and plumbing. Budget for a licensed electrician and plumber for any new lines or final hookups. It's not just about passing inspection; it's about your family's safety and protecting your biggest investment.
Do I Actually Need a Permit?
I get this question all the time, and the answer is almost always a resounding yes. If your project involves putting up new walls, running a single new wire, or adding a new plumbing line, you’ll need to get a permit from your local city office, whether you're in Orem, Provo, or anywhere else in Utah County.
Think of it this way: when you finish a basement, you're legally adding habitable square footage to your home. That triggers a whole set of safety codes. Inspectors need to sign off that you've done everything correctly, from having proper emergency egress (like a window a person can fit through) to correct ventilation and safe wiring.
What’s the Best Flooring for a Basement?
Hands down, my top recommendation for basement flooring is Luxury Vinyl Plank, or LVP. It has become the gold standard for below-grade spaces for a few key reasons. First and foremost, it's 100% waterproof. Not water-resistant, but truly waterproof, which is your best line of defense against the moisture that basements are known for. It's also incredibly durable and one of the easiest flooring types for a DIYer to install.
Of course, you have other great options too:
- Engineered Hardwood: If you love the look of real wood, this is the way to go. It's built to be more dimensionally stable than solid hardwood, but you absolutely need a high-quality vapor barrier and subfloor.
- Carpet Tiles: These are fantastic for adding warmth and a cozy feel, especially in a basement family room or bedroom. The best part? If you spill something or a tile gets damaged, you just pop it out and replace that one square.
Ready to turn your basement vision into a reality without the stress? Let the experts at Northpoint Construction handle the heavy lifting. From initial design to final finishes, we ensure your project is completed to the highest standards. Learn more about our basement finishing services and get your project started today