
DIY Basement Renovations Your Complete Guide
Finishing your basement is one of the smartest ways to add serious living space to your home. But before you get carried away dreaming of a home theater or a sprawling playroom, you need to pump the brakes. A successful DIY basement renovation starts with a brutally honest look at the space you've got.
Before You Swing a Hammer: An Essential First Look
It's tempting to jump straight to Pinterest boards and floor plans, but skipping a thorough initial assessment is a classic rookie mistake. I’ve seen it happen time and again: homeowners get excited about the fun stuff and completely ignore the boring, but critical, foundational checks. This almost always leads to expensive headaches and major rework later on.
Your first job isn't demolition; it's detective work. You’re looking for any underlying issues that could sabotage your entire project. The goal is simple: create a dry, safe, and solid canvas to build upon. This thoughtful approach is a big reason why the DIY home improvement market, valued at around USD 735 billion in 2023, continues to explode. People want to make their homes work for them, and that starts with smart planning from the ground up.
Starting With the Non-Negotiables
Let's get down to brass tacks. Before you even think about framing a single wall, you have to verify a few things that will make or break your entire project. These are the deal-breakers.
- Moisture Intrusion: Basements and water have a long, complicated history. Be on the lookout for tell-tale signs: dark water stains on the concrete, a persistent musty smell, or powdery white efflorescence on the walls. If you find anything, you have to fix the source of the water before you do anything else. If you've got mold, learning about safe and effective mold removal from your basement is your absolute first priority.
- Ceiling Height: Grab a tape measure. Building codes almost always mandate a minimum finished ceiling height—typically 7 feet. Measure from the floor to the lowest point, which is usually a support beam, HVAC duct, or plumbing pipe. If you don't have the clearance, your plans might need a major rethink.
- Egress Options: This is a huge safety issue, especially if you plan on adding a bedroom. You need at least one legitimate egress point—a window or door that’s large enough for a person to escape through in a fire. Check your local codes for the specific size requirements.
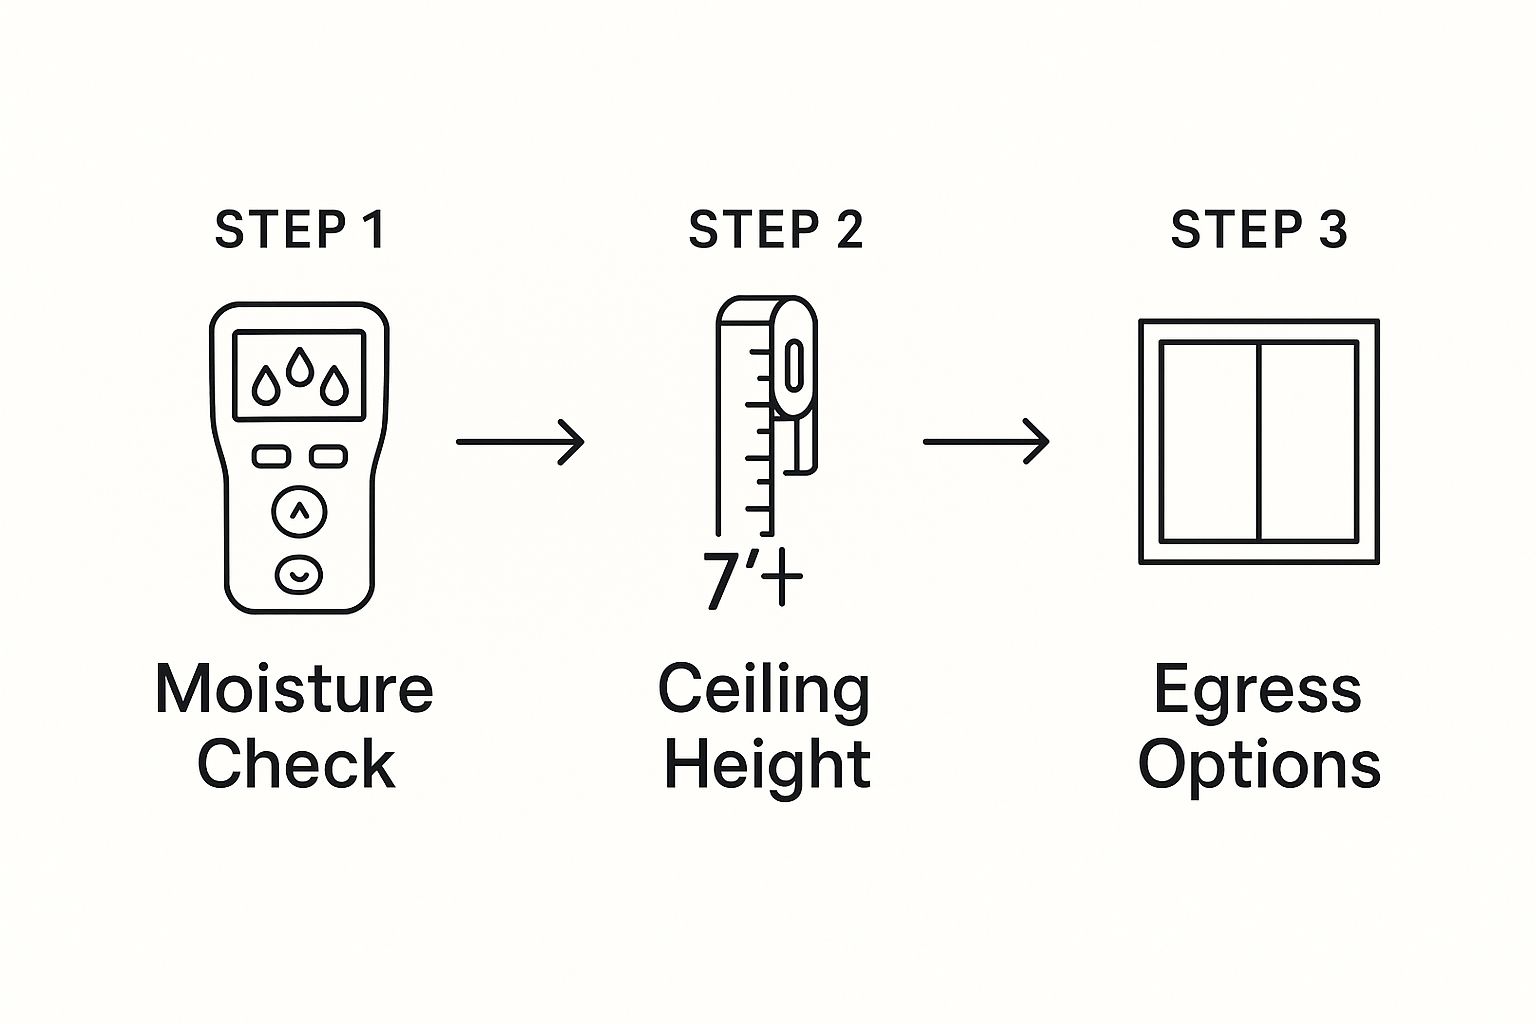
Nailing down these three checks—moisture, height, and egress—gives you a solid foundation to build your dream space on.
Defining Your Basement's Purpose
Okay, so you've confirmed the space is solid, dry, and safe. Now for the fun part: what is this new space going to be?
Don't just say "a finished basement." Get specific. Is it a cozy family den for movie nights? A quiet home office? Maybe a private guest suite with its own bathroom? The function you choose dictates everything that comes next, from the electrical plan and lighting to whether you need plumbing or soundproofing.
A well-defined purpose is your project's North Star. It keeps you on track, prevents the budget from spiraling out of control, and ensures every decision you make serves your ultimate goal.
Getting these initial steps right is the difference between a frustrating money pit and a valuable, functional addition to your home. To get a clearer picture of this transformation, it helps to understand the https://buildnp.com/blogs/finished-vs-unfinished-basement/ and what it takes to bridge that gap. Answering these questions now will save you a world of trouble and ensure your hard work pays off for years to come.
Planning Your Project and Navigating Permits
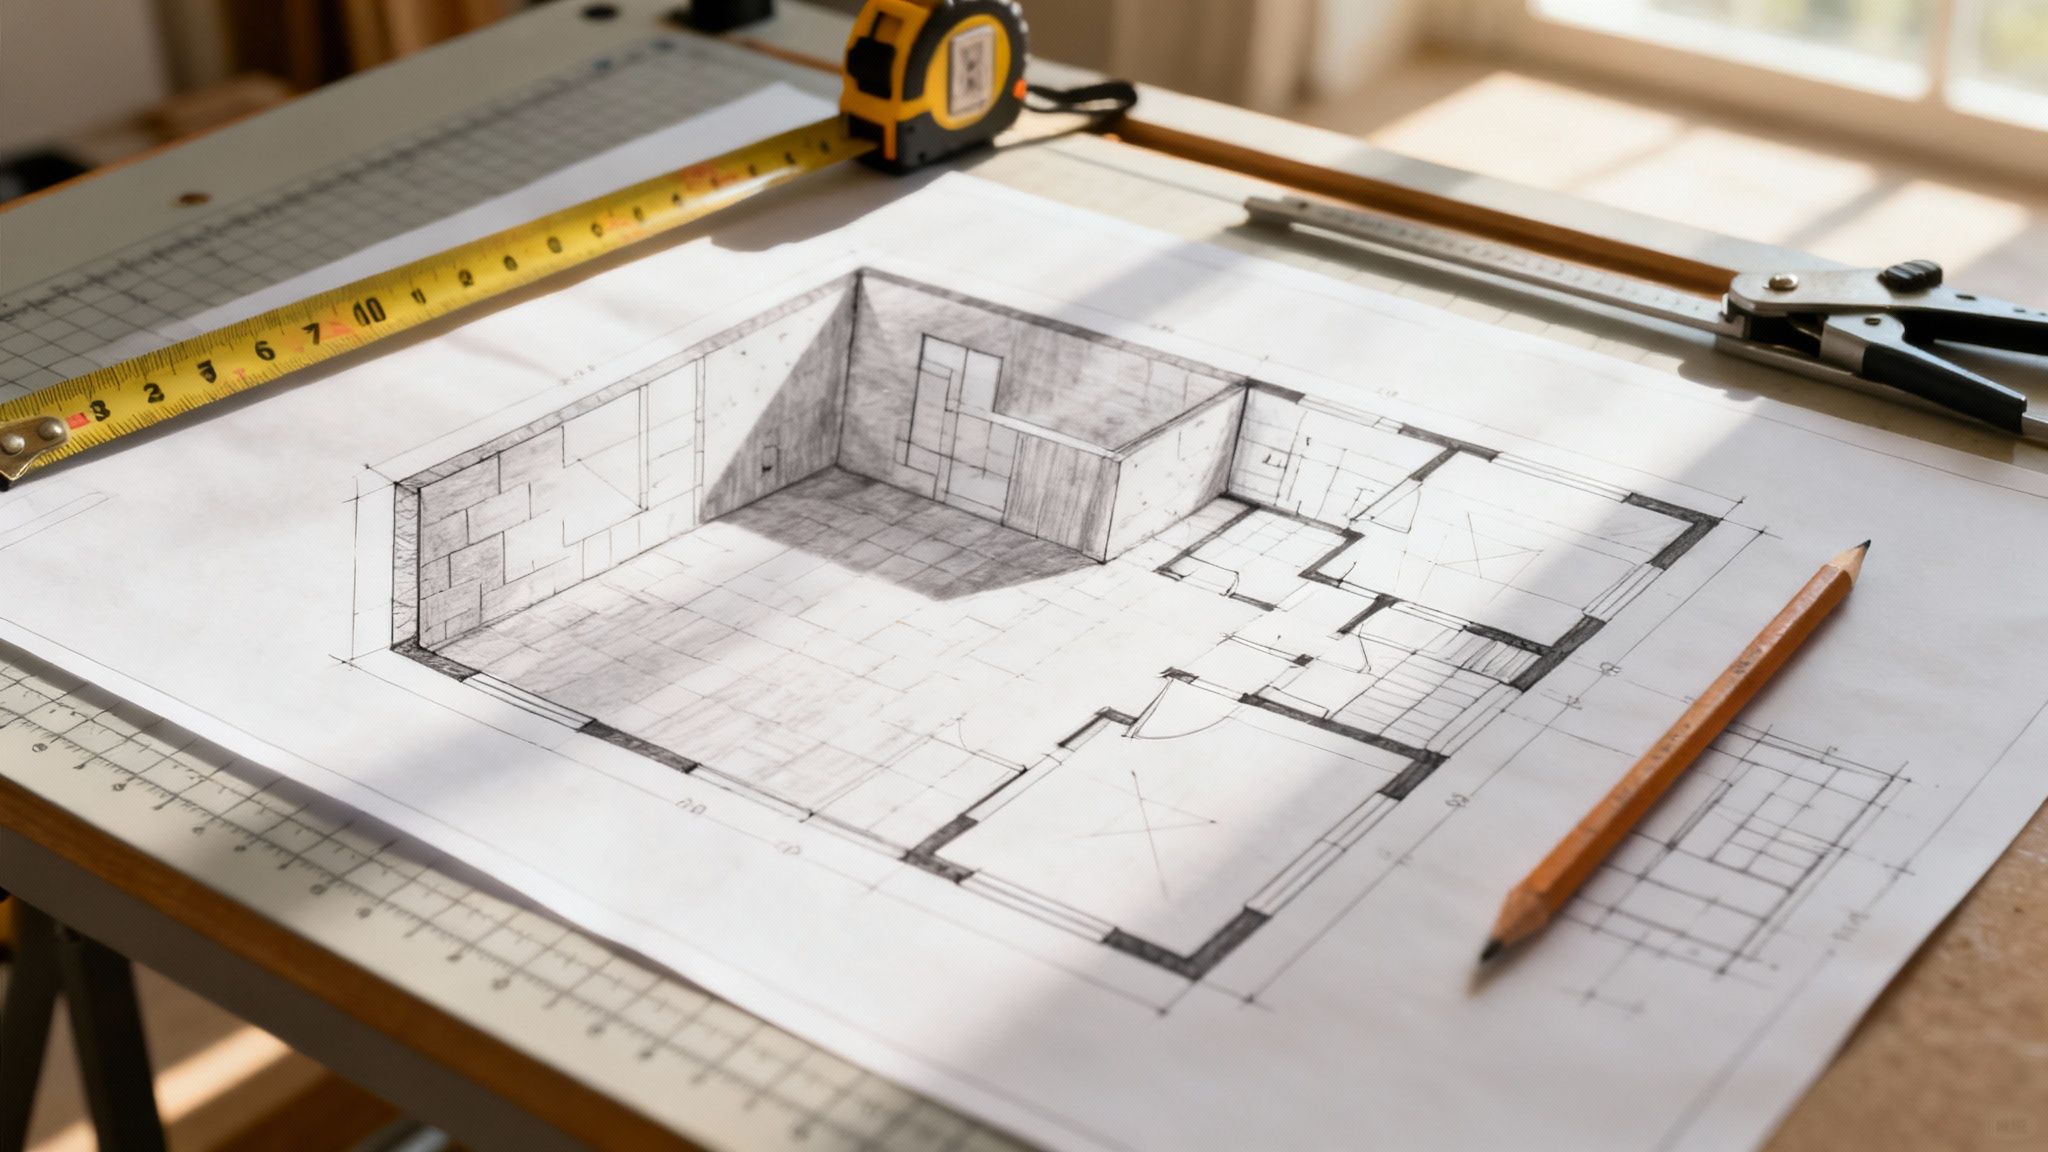
Every great basement renovation begins long before you pick up a hammer. It starts with a solid plan—the bridge between your vision of a cozy family room or a sleek home gym and the practical steps to get there. Trying to wing it at this stage is a recipe for disaster.
Think of your floor plan as the choreography for your new living space. You need to map out not just where the walls will go, but how people will move through the rooms. You wouldn't want the main path from the stairs to the playroom to slice right in front of the TV, right?
Seriously, consider your furniture now. It sounds premature, but knowing where that big sectional sofa will live dictates where your electrical outlets, light switches, and even cable jacks should be. A little forethought here saves a ton of headaches later.
Creating a Smart Basement Layout
Before you get too attached to a layout, take a hard look at your basement’s existing bones. The furnace, water heater, and main plumbing stacks are the immovable objects of your renovation. Designing around them instead of trying to move them is the single biggest money-saving decision you can make.
For example, a classic pro move is to group new plumbing—like a wet bar or a bathroom—as close as possible to the main drain stack. This simple choice can eliminate the need for costly trenching or expensive ejector pumps. If a new bathroom is on your wish list, it pays to understand what drives the budget. You can learn more about the cost to install a bathroom in the basement in our detailed guide.
Next, think in zones to give your layout purpose.
- Social Zones: Keep things like a family room and game area open and connected. This makes the space feel bigger and lets light travel.
- Quiet Zones: Tuck a home office or bedroom away from the noisy, high-traffic areas and the rumbling furnace.
- Utility Zones: Always, always plan for clear access to your electrical panel, furnace, and water shut-offs. Boxing them in without a proper access door is a mistake you’ll regret during the first emergency.
The goal is a layout that feels intentional and intuitive, not like you just threw up walls in the empty spots. A smart plan makes every square foot of your investment count.
Demystifying the Building Permit Process
Okay, let's tackle the topic that makes many DIYers nervous: building permits. It can feel like a mountain of red tape, but it’s an absolutely essential step. A permit ensures your project is safe, meets local building codes, and is done right.
Skipping the permit is a huge gamble. If you get caught, you could be hit with massive fines and, in a worst-case scenario, be ordered to rip everything out. Even if you get away with it, unpermitted work can void your homeowner's insurance and become a major deal-breaker when you decide to sell your home.
So, when do you need one? Pretty much for anything more than painting or new flooring.
- Structural Changes: Moving a support post or cutting a new window into the foundation.
- New Walls: Any framing to create new rooms.
- Electrical Work: Adding circuits, outlets, or light fixtures.
- Plumbing Work: Running new water or drain lines for a bathroom or wet bar.
- Egress: Installing a proper egress window or an exterior door.
How to Get Your Renovation Permit
Your first stop should be your local municipality's website or a quick call to the building department. They'll give you the exact checklist of what you need to submit, which almost always includes a detailed floor plan drawn to scale.
Don't worry, your drawings don't need to be professional architectural blueprints. They just need to be clear and contain key information: the dimensions of each new room, the location of doors and windows (especially egress), and a simple electrical map showing where you plan to put lights, switches, and outlets.
Once you’ve submitted everything, a building inspector will review your plans. They might have a few questions or suggest minor tweaks to ensure everything is up to code. After approval, you’ll get your permit, which needs to be posted somewhere visible on the job site. The inspector will also outline the key milestones—like framing, electrical rough-in, and insulation—where they’ll need to come back and sign off before you can cover up the walls.
To help you get started on the financial side of planning, here’s a look at how a typical DIY basement renovation budget might break down.
DIY Renovation Budget Breakdown
This table provides a sample budget allocation to help you plan your DIY basement renovation expenses effectively. Remember, these are estimates; your actual costs will vary based on your project's scope and the materials you choose.
| Framing & Drywall | 15-20% | Includes lumber, screws, drywall sheets, tape, and mud. |
| Electrical & Lighting | 10-15% | Covers wiring, outlets, switches, and all light fixtures. May require a licensed electrician for final hookup. |
| Plumbing | 10-15% | Critical for bathrooms or wet bars. This can fluctuate wildly depending on complexity. |
| Insulation | 5-10% | Rigid foam board for walls and batt insulation for ceiling/soundproofing. |
| Flooring | 15-20% | LVP, carpet, and tile are popular choices. Don't forget underlayment costs. |
| Finishing Materials | 15-20% | This includes doors, trim, paint, primer, and hardware. |
| Permits & Contingency | 10-15% | Always set aside a fund for permit fees and unexpected issues that will pop up. |
Having a clear budget from the start prevents overspending and helps you make smart decisions about where to invest and where to save.
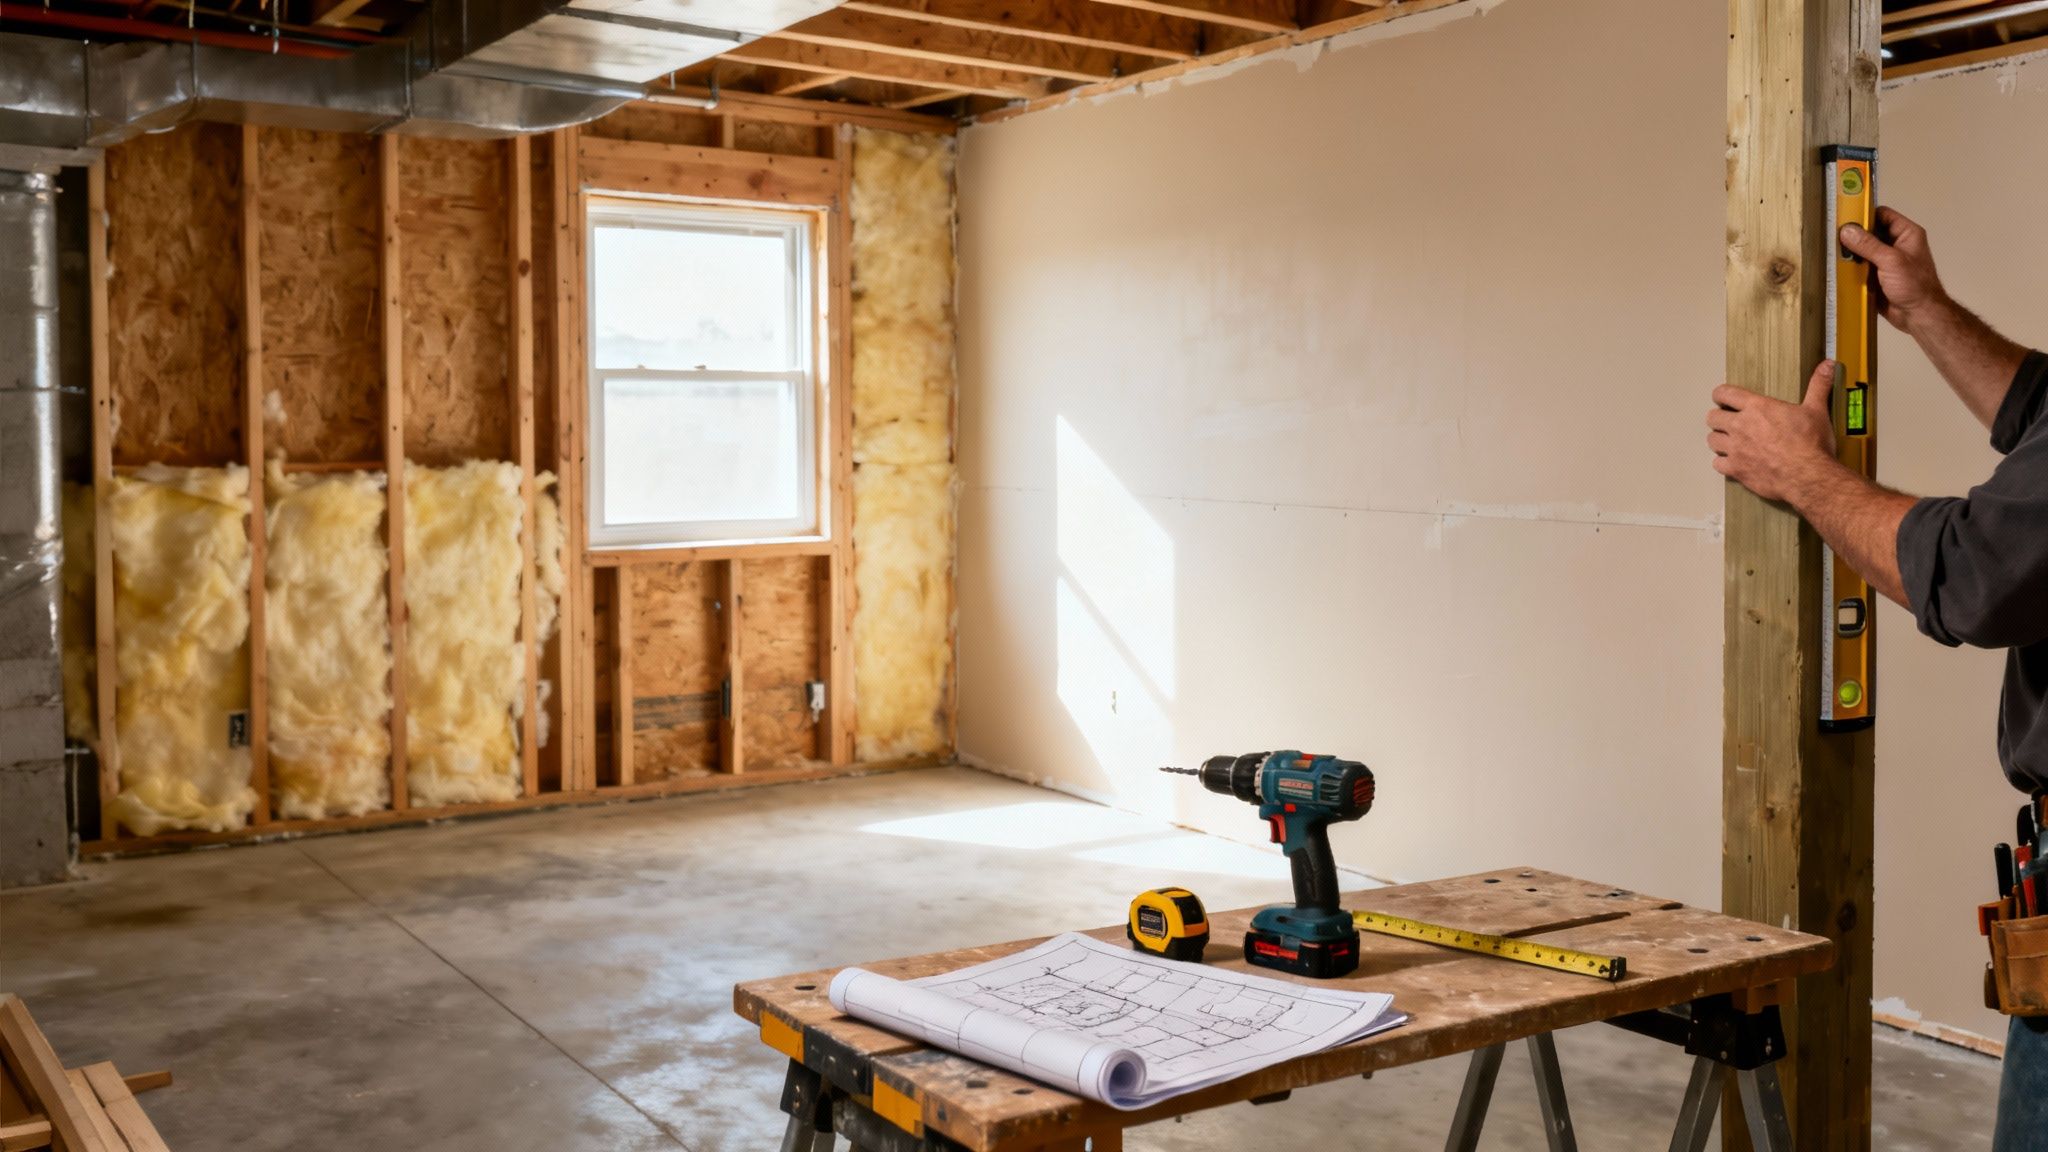
Building Your Walls: Framing and Insulation
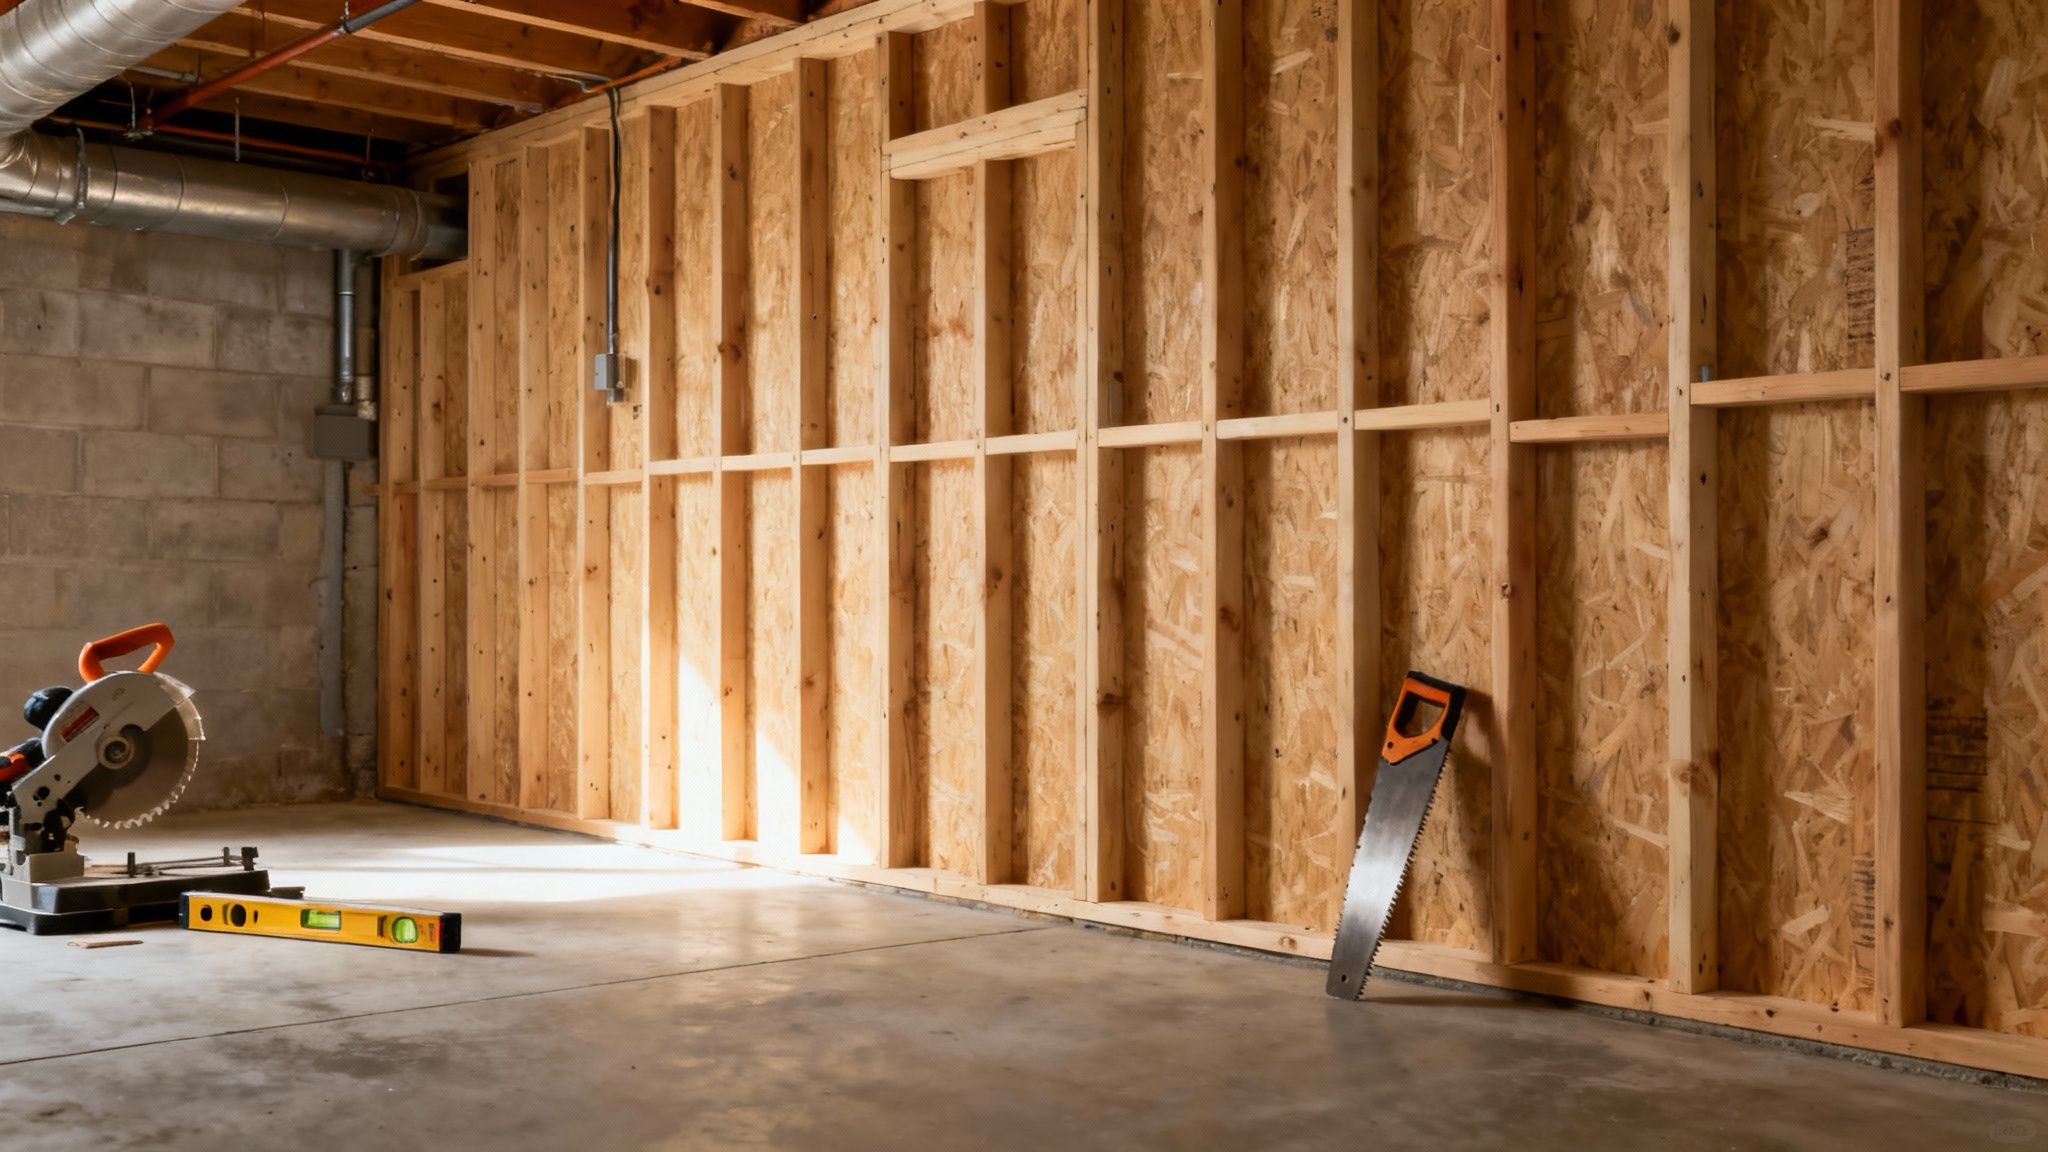
Okay, you've got your plan finalized and the permit is taped to the window. Now the real fun begins. This is the stage where all those chalk lines on the floor finally start to look like rooms, and it’s easily one of the most rewarding parts of any DIY basement renovation.
Your first stop is the lumberyard for some 2x4s. A word of advice from someone who's learned the hard way: don't just grab the first boards off the top of the stack. Spend a few extra minutes picking through the pile to find the straightest, cleanest lumber you can. A twisted stud, what we often call a "banana board," will cause endless headaches when it's time to hang drywall.
Constructing and Anchoring Your Walls
First things first, you'll be building the skeleton of each wall on the floor. This involves a bottom board, called the sole plate, and a matching top board, the top plate. Cut both of these to the exact same length for any given wall section.
Lay the two plates side-by-side and mark out where your studs will go. The industry standard is 16 inches on center—that means the center of one stud is 16 inches from the center of the next. Marking them together like this is a simple trick that guarantees your studs will be perfectly vertical.
Next, you'll cut your vertical studs. Measure the height from your concrete floor to the bottom of the ceiling joists above, then subtract 3 inches. Why? This accounts for the thickness of your top and sole plates (1.5 inches each) and gives you just enough wiggle room to easily tilt the finished wall frame into place.
Pro Tip: Never build your new walls tight against the foundation. Always leave at least a one-inch air gap between the back of your framing and the concrete. This space is absolutely vital for stopping moisture from wicking directly into the wood.
With all your pieces cut, go ahead and assemble the wall right on the floor. It’s far easier to nail everything together while it's lying flat. Once assembled, grab a helper, tilt the wall up, and slide it right onto your chalk lines.
Anchoring the wall is a two-part process:
Secure the Top Plate: Get your level out and make sure the wall is perfectly plumb (straight up and down). Then, drive 3-inch framing nails or screws straight up through the top plate and into the ceiling joists.
Anchor the Sole Plate: This part requires a bit more muscle. You need to fasten the pressure-treated sole plate securely to the concrete. The most common DIY-friendly methods are renting a powder-actuated nailer or using a hammer drill to make pilot holes for concrete screws like Tapcons.
Mastering Basement Insulation
With the skeleton of your rooms framed out, it’s time to think about insulation. This isn't just about warmth; in a basement, good insulation is your number one defense against moisture and mold. Below-grade spaces have their own set of rules, and a simple roll of fiberglass batt insulation just won't cut it on its own.
Your real enemy down here is condensation. When the warm, humid air from upstairs hits your cold concrete foundation walls, water droplets form. You have to stop this from happening inside your walls.
The best way to do this is by installing rigid foam board insulation directly onto the concrete before you even stand your walls up.
Why Rigid Foam Board Is Essential
Think of rigid foam board (like XPS or polyiso) as a protective shield. It's both an insulator and a vapor barrier, stopping warm interior air from ever making contact with the cold concrete. This is the key to preventing condensation where you can't see it.
Here’s the game plan for installing it:
- Choose the Right Thickness: Your local building codes will specify a minimum R-value. For most colder climates, a 2-inch thick board of XPS foam is a good starting point, giving you an R-value of 10.
- Attach it to the Wall: You'll use a specialty foam board adhesive. Squeeze it onto the back of the panel in a big "S" pattern, then press the board firmly against the concrete wall.
- Seal Every Seam: This step is critical, so don't skip it. Use a high-quality house wrap tape (like Tyvek tape) to seal every single seam where two boards meet. This creates a monolithic, unbroken barrier against air and moisture.
Once the rigid foam is up and taped, you can tilt your framed walls into position right in front of it, maintaining that crucial one-inch air gap. For even better performance, you can then fill the stud cavities with unfaced fiberglass or mineral wool. This combination, often called a "flash and batt" system, gives you fantastic thermal protection and moisture control, ensuring your new living space stays comfortable and dry for years to come.
Getting Your Basement Wired and Plumbed
With the framing in place, you can finally see the shape of your new basement. This is where it gets real. But it's the next step—running the electrical and plumbing—that truly breathes life into the space. We're talking about the "rough-in" phase, where all the wires and pipes are threaded through the open stud bays before any drywall goes up.
This is also the point where safety and building codes take center stage. While a savvy DIYer can definitely handle a lot of the rough-in work, you absolutely have to know your limits. A mistake with wiring or plumbing isn't like a bad paint job; it can have serious, even dangerous, consequences.
Laying Out the Electrical Plan
Before you touch a single wire, grab a roll of painter's tape and a Sharpie. Walk through the framed-out rooms and physically mark on the studs where every single switch, outlet, and light fixture will live. Really think about how you'll use each area. Where does the TV go? What about the reading lamp next to the sofa? Will you need an outlet for a vacuum in the hallway?
One of the most common rookie mistakes is not putting in enough outlets. Trust me on this. A good rule of thumb is to place one every 6 to 8 feet along a wall. It’s always better to have a few extra than to be hunting for an extension cord later.
Once your map is complete, you can start pulling wire. You'll primarily be working with a few key items:
- 14/2 NM-B Wire: This is your go-to for standard 15-amp circuits that power lights and most regular outlets. The "14" is the wire gauge, and the "2" tells you it has two conductors (black and white) plus a bare copper ground wire.
- 12/2 NM-B Wire: You'll need to step up to this thicker wire for 20-amp circuits. These are often required by code for bathrooms and might be needed for a wet bar or a dedicated home theater outlet.
- Outlet Boxes: Plastic "new work" boxes are a great choice for DIYers. They nail right onto the studs and are quick and easy to set.
The goal here is simple: run the wires from your main electrical panel area to each box you've installed. As you pull the wire into the box, leave a generous 8-10 inches of slack hanging out. This gives you (or your electrician) plenty of wire to work with when it's time to install the actual outlets and switches.
Don't connect anything yet! Just run the wires. The final, critical step of tying everything into the main breaker panel is a job for a pro.
In many places, it's not just a good idea—it's the law. A licensed electrician must make the final connections to your panel. Even if it's not required where you live, do it anyway. It's the best money you'll spend on the project for safety and peace of mind.
Tackling the Plumbing Rough-In
If a new bathroom or wet bar is part of your dream basement, it's time to think about plumbing. The rough-in here involves running three sets of pipes: supply lines for clean hot and cold water, drain lines to carry wastewater away, and vent lines to let air in so everything drains smoothly.
Just like with the electrical, a little forethought goes a long way. Try to locate your new bathroom or sink as close as you can to your home's existing main drain stack. The closer you are, the simpler your pipe runs will be, potentially saving you from needing a complex and costly ejector pump system.
Your Plumbing Shopping List
When you hit the plumbing aisle, you'll see a few different options. Here’s a quick breakdown of what you'll be looking at.
| PEX Tubing | Hot & Cold Supply Lines | Cross-linked polyethylene | It's flexible, easy to work with, and resists bursting if it freezes. A true DIY favorite. |
| PVC Pipe | Drain & Vent Lines | Polyvinyl chloride | Inexpensive, rigid, and simple to join together with special primer and cement. The industry standard for waste lines. |
| Copper Pipe | Supply Lines | Copper | The old-school choice. It's incredibly durable but requires a torch and soldering skills. |
For most homeowners, PEX tubing is the way to go for the water supply lines. You can snake it through studs just like electrical wire, and you connect it with simple tools like crimp rings or push-on fittings. No torch required.
For the drains, you just have to remember one simple, non-negotiable rule: water flows downhill. All your drainpipes must have a constant, gradual slope to let gravity do its work. The code-mandated minimum is 1/4 inch of drop for every foot of pipe. Your building inspector will absolutely have a level out to check this, so get it right.
Finally, your vent pipes will run up from the drains, through the walls, and connect into your home's main vent stack, which usually pokes out of the roof. This is a crucial part of the system that prevents vacuums from forming and lets nasty sewer gases escape safely.
From Drywall to Final Finishes
You’ve framed the skeleton and run the electrical and plumbing guts. Now comes the part where all that hard work really starts to pay off. This is the turning point in your DIY basement renovations where a rough construction zone magically begins to look like an actual room. Hanging drywall is one of the most satisfying jobs because it visually defines the space almost overnight.
This stage is a huge milestone. It's no wonder that a growing number of homeowners are tackling these projects themselves, turning underused basements into valuable living space. In fact, around 11% of homeowners in the United States focus on projects that add function and storage, with basement finishing being a prime example.
Hanging Drywall Like a Pro
Let’s be honest: hanging drywall, or sheetrock, is more about technique than pure muscle. The sheets are heavy and awkward, but a few pro tips will make the job much less of a headache.
Always, always start with the ceilings. It’s the toughest part, so just get it over with. Renting a drywall lift isn't a suggestion; it's a non-negotiable, back-saving investment for this part of the job. Trust me on this.
Once you move to the walls, things get a bit easier. Just remember the old carpenter’s mantra: measure twice, cut once. A sharp utility knife and a T-square are your best friends. A single, clean score followed by a firm snap will give you a perfect edge every time. To fasten the sheets, use drywall screws and a dimpler bit on your drill—this little gadget sinks the screw just below the paper's surface without tearing it, creating the perfect shallow "dimple" for the joint compound later.
A common rookie mistake is going overboard with screws. You only need one every 12 to 16 inches in the middle of the board and every 8 inches along the seams. Driving too many just creates a ton of extra work for yourself when it's time to mud.
With the sheets up, it’s time for taping and mudding. This is the true art of drywalling—applying joint compound (mud) and tape over the seams to create a flawless, smooth surface. Patience is everything here. You’ll be applying at least three thin coats, sanding lightly between each one, to make those joints disappear. If you're feeling intimidated, it's worth checking out the https://buildnp.com/blogs/cost-of-drywalling-basement/ to see if having a pro handle just this one step fits your budget.
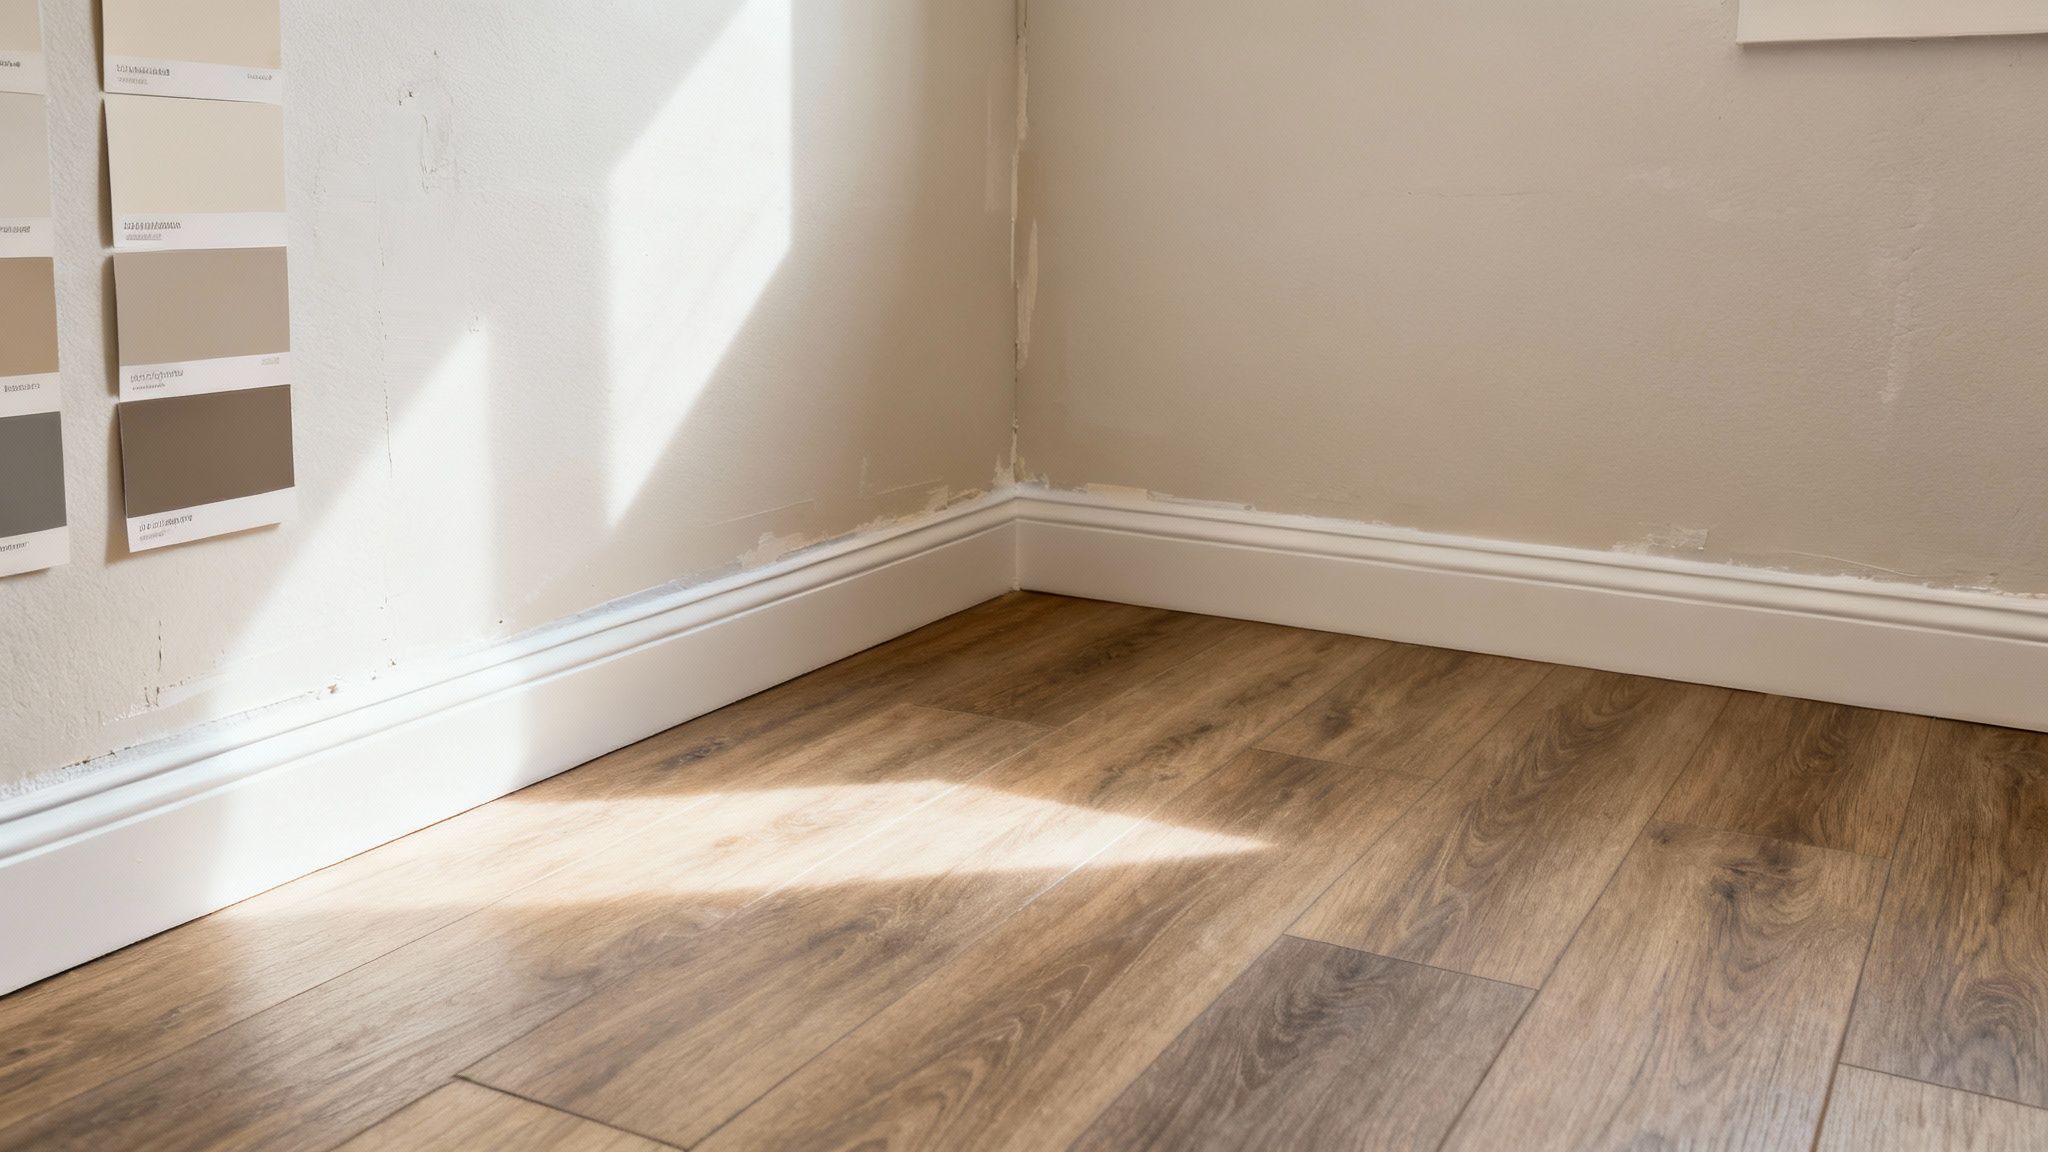
Choosing Your Basement Flooring
With the walls primed, your attention shifts downward. The flooring you choose is one of the most critical decisions for any below-grade space because the primary enemy is always moisture. Even a well-sealed basement can have higher humidity or suffer from unexpected water issues.
This reality immediately rules out certain materials. Solid hardwood, for example, is a definite no-go; it will warp and buckle in no time. You need to focus on materials specifically designed for these conditions. A big part of any basement project is selecting the best waterproof flooring options for basements to prevent future headaches.
Here are a few of the top contenders for a DIY renovation:
- Luxury Vinyl Plank (LVP): This is the undisputed champion of basement flooring. It's 100% waterproof, tough as nails, and modern styles with click-lock systems are incredibly easy to install.
- Engineered Hardwood: If you’re set on the look of real wood, this is a solid alternative. Its layered construction makes it more stable than solid wood in humid spaces, but you absolutely must install it over a high-quality vapor barrier subfloor.
- Tile (Ceramic or Porcelain): Tile is completely waterproof and extremely durable, which is why it's a go-to for basement bathrooms or kitchenettes. The only real downside is that it can feel pretty cold underfoot unless you install radiant heating.
The Final Touches: Trim, Paint, and Doors
You’re in the home stretch now. Installing baseboards, door casings, and window trim is what puts the finishing touch on a room, cleaning up the gaps where the drywall meets your floors and openings. For an easy, budget-friendly option, go with pre-primed MDF trim—it's a breeze to work with.
The right paint color can completely change the feel of a basement, which often lacks good natural light. Stick with lighter, brighter colors to make the space feel bigger and more inviting. And don't forget the ceiling! Painting it a crisp, flat white can create the illusion of extra height.
Finally, hanging the interior doors gives each new room its own identity and privacy. With the last doorknob installed and the final coat of paint dry, you can finally step back and admire what you’ve built. You've officially turned a concrete box into a warm, welcoming part of your home.
Got Questions About Your DIY Basement Renovation? We've Got Answers
Even with the best plans, questions are going to come up during a big project like a basement renovation. It happens to everyone. Let's walk through some of the most common hurdles you might face and get you the clear, straightforward answers you need to keep your project on track.
How Do I Waterproof My Basement Before I Start Building?
This is, without a doubt, the most critical step. Get this wrong, and nothing else matters. Your first move isn't inside with a bucket of sealant, but outside your house.
Take a good, hard look at the landscaping. Does the ground slope away from your foundation? It absolutely has to. Also, make sure your gutters are clear and the downspouts are dumping water at least six feet away from your house, not right next to the foundation.
Once the exterior is handled, head back inside and inspect every square inch of your concrete walls and floor. If you find cracks, you need to seal them up tight with hydraulic cement or an epoxy injection kit. After that's done, roll on a quality, cement-based waterproofing sealant over all the concrete surfaces. Think of it less like paint and more like a thick, rubberized membrane that locks moisture out.
For those in areas with a high water table or who simply want the best protection possible, the ultimate solution is an interior French drain system that channels any intruding water to a sump pump. This is the pro-level approach that guarantees a dry space before you even think about putting up a single stud.
Waterproofing isn't a single product; it's a complete system. When you combine proper exterior grading, meticulous interior sealing, and a reliable drainage solution, you're creating a multi-layered defense that will protect your hard work for years to come.
What's the Best Type of Flooring for a Basement?
For basements, Luxury Vinyl Plank (LVP) is the undisputed champion. It's totally waterproof, tough as nails when it comes to scratches and dents, and most brands feature a click-lock system that’s incredibly friendly for a DIY installation. You can lay it right on the concrete slab, just be sure to put down a vapor barrier first.
A couple of other great options to consider:
- Porcelain or Ceramic Tile: Just like LVP, tile is 100% waterproof and extremely durable. It's a perfect choice for a basement bathroom, laundry area, or kitchenette.
- Engineered Hardwood: If your heart is set on the look of real wood, this is the only way to go. Its layered construction makes it far more stable in humid environments than solid wood. However, you absolutely must install it over a proper subfloor, like Dricore, which provides a crucial air gap and moisture barrier.
One thing you should never do is install solid hardwood in a basement. The moisture and humidity swings will cause it to warp, cup, and buckle. It's a guaranteed failure and a very expensive mistake to fix.
Do I Really Need a Permit to Finish My Basement?
In almost every case, yes. While you can usually get away with purely cosmetic changes like new paint or carpet without one, anything more substantial will require a permit from your local building department.
You'll definitely need a permit if your project involves:
- Framing any new walls
- Adding or moving electrical outlets and light fixtures
- Running new plumbing for a bathroom or wet bar
- Making any structural changes, like cutting a new egress window
Don't think of a permit as just red tape—it’s your safety net. It ensures that a professional inspector will check your work to make sure it's up to code, especially for fire safety and electrical work. Skipping the permit can land you with big fines, an order to tear out all your hard work, and major headaches with your homeowner’s insurance or when you decide to sell the house. Your first call before you buy a single 2x4 should be to your local building department.
At Northpoint Construction, we turn your vision into a beautifully finished reality. If you're ready to add valuable living space to your home but want the assurance of professional craftsmanship, our team is here to help. From initial design to the final touches, we manage every detail of your basement finishing project.
Contact us today to schedule your consultation at https://buildnp.com.