
How to finish basement under $10 000: A Practical DIY Guide
Finishing a basement for under $10,000? It’s not just possible—it’s a fantastic goal if you're ready to roll up your sleeves and trade some sweat for savings. This kind of budget is all about smart planning, choosing the right materials, and doing most of the work yourself.
The most important thing? You have to start with a solid, dry foundation.
Is a $10,000 Basement Finish Actually Realistic?
A finished basement is one of the smartest ways to add square footage and value to your home, but it's easy to get sticker shock. We see quotes that climb past $30,000 all the time, mostly driven by high labor costs and premium materials. But you don't need to spend that much to get a great space.
This guide is your roadmap to getting it done for a fraction of the cost. The whole strategy boils down to a few key ideas:
- Be Your Own Contractor: Labor can eat up 40% of a typical remodel budget. When you handle the framing, hang the drywall, and lay the flooring, that money stays right in your wallet.
- Keep it Simple: This budget works best for spaces under 1,000 square feet. A smaller footprint keeps your material costs from spiraling.
- Embrace Open Space: An open-concept layout is your best friend on a tight budget. It means less lumber, fewer sheets of drywall, and simpler electrical runs compared to carving out multiple small rooms.
First Things First: Your Basement Must Be Dry
Before you even think about buying a single 2x4, you have to deal with moisture. Nothing will blow a $10,000 budget faster than a surprise water problem. Professional waterproofing can easily eat up half of your funds, so this plan assumes your basement is already dry and leak-free.
If you've got musty smells, damp spots, or actual water coming in, stop right there. You have to fix that first. Check out our guide on how to waterproof basement walls to see what’s involved before you move forward.
A Look at the Numbers
Let's put this budget in perspective. The national average to finish a basement is around $32,000, according to figures from sources like NerdWallet. That's a huge number, but it often includes complex plumbing, custom built-ins, and, of course, a general contractor's fee.
Our approach is different. We’re not about cutting corners on quality; we're about making smart choices that make every dollar count. This is about knowing where to spend a little more and where you can save big.
To see just how much you can save, here’s a quick comparison of a typical high-end remodel versus our budget-friendly approach.
Cost Comparison Typical Remodel vs Budget-Friendly Finish
This table breaks down the cost differences between an average, contractor-led basement renovation and a strategic DIY approach aimed at staying under $10,000.
| Framing | $3,500 - $5,000 | $1,000 - $1,500 | DIY labor, open-concept layout (fewer interior walls). |
| Insulation | $2,000 - $3,000 | $800 - $1,200 | Install it yourself; use cost-effective fiberglass batts. |
| Drywall | $3,000 - $4,500 | $1,200 - $1,800 | Hang and finish the drywall yourself (renting tools helps). |
| Electrical | $4,000 - $6,000 | $1,500 - $2,500 (Hire Pro) | Use simple lighting layouts and hire an electrician for this part only. |
| Flooring | $4,000 - $7,000 | $1,000 - $2,000 | Choose LVP or stained concrete; install it yourself. |
| Painting | $2,000 - $3,500 | $400 - $600 | DIY the painting; use contractor-grade paint for better value. |
| Trim/Doors | $1,500 - $2,500 | $500 - $800 | Opt for simple MDF trim and basic hollow-core doors. |
| Permits | $500 - $1,500 | $200 - $500 | Costs are lower for simpler, smaller-scale projects. |
| Total | $20,500 - $33,000+ | $6,600 - $10,900 | DIY labor is the biggest savings factor across all categories. |
As you can see, the path to a sub-$10k basement isn't about magic—it's about hands-on work and careful planning. By taking on the majority of the tasks, you can create a beautiful, functional space you’ll be proud of for years to come.
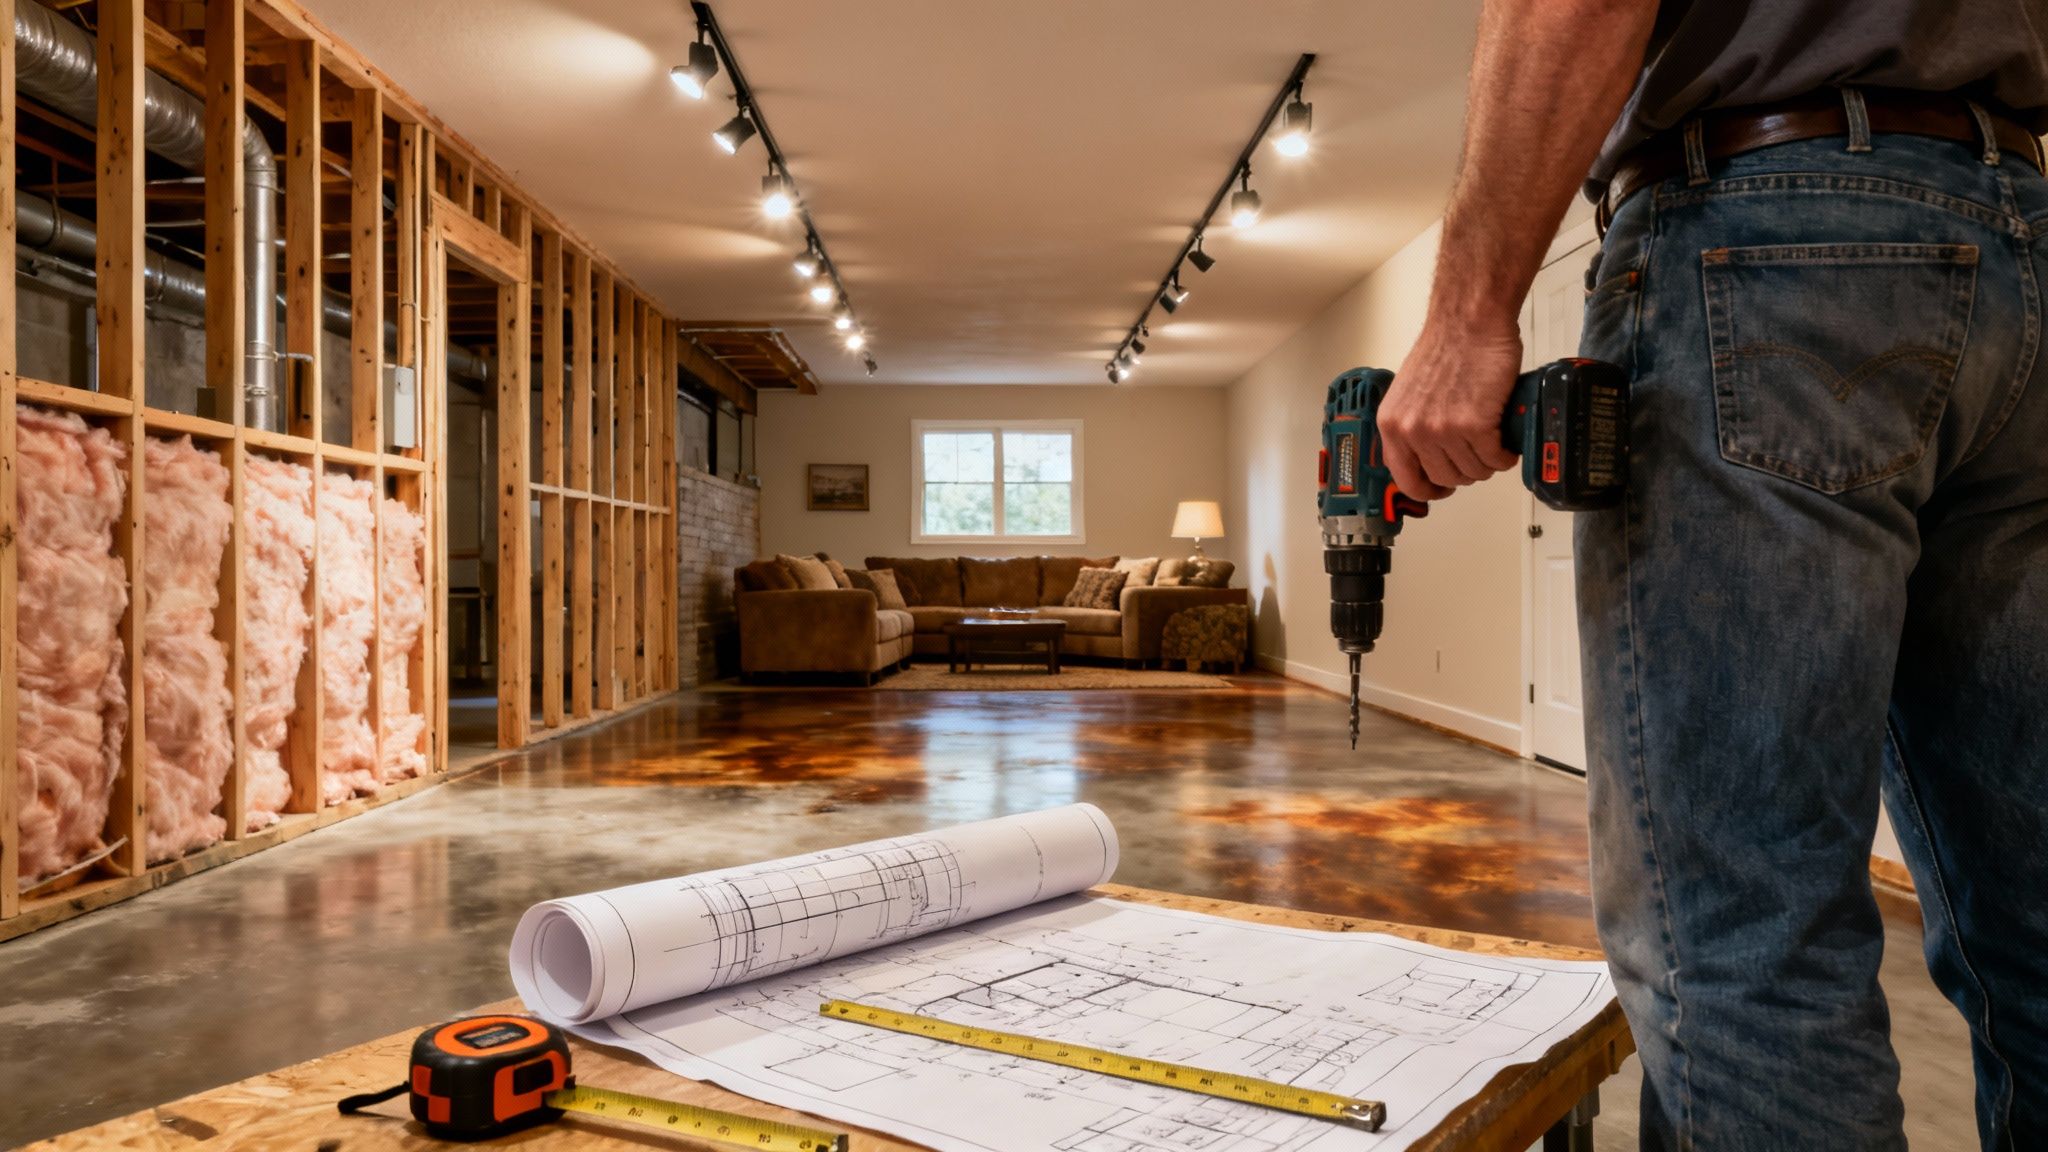
Your Blueprint for Finishing a Basement Under $10,000
Any successful, budget-friendly basement project is won or lost long before you swing a hammer. This is the planning stage, and honestly, it’s the most important part of the whole process. A solid plan is what separates a smooth, on-budget finish from a remodel that spirals into a mess of costly surprises.
Think of it as drawing a detailed map before you start a road trip. This is where you nail down your vision, catch potential headaches early, and assign a job to every single dollar. Get this part right, and the rest of the project has a fighting chance of staying on track and hitting that $10,000 goal.
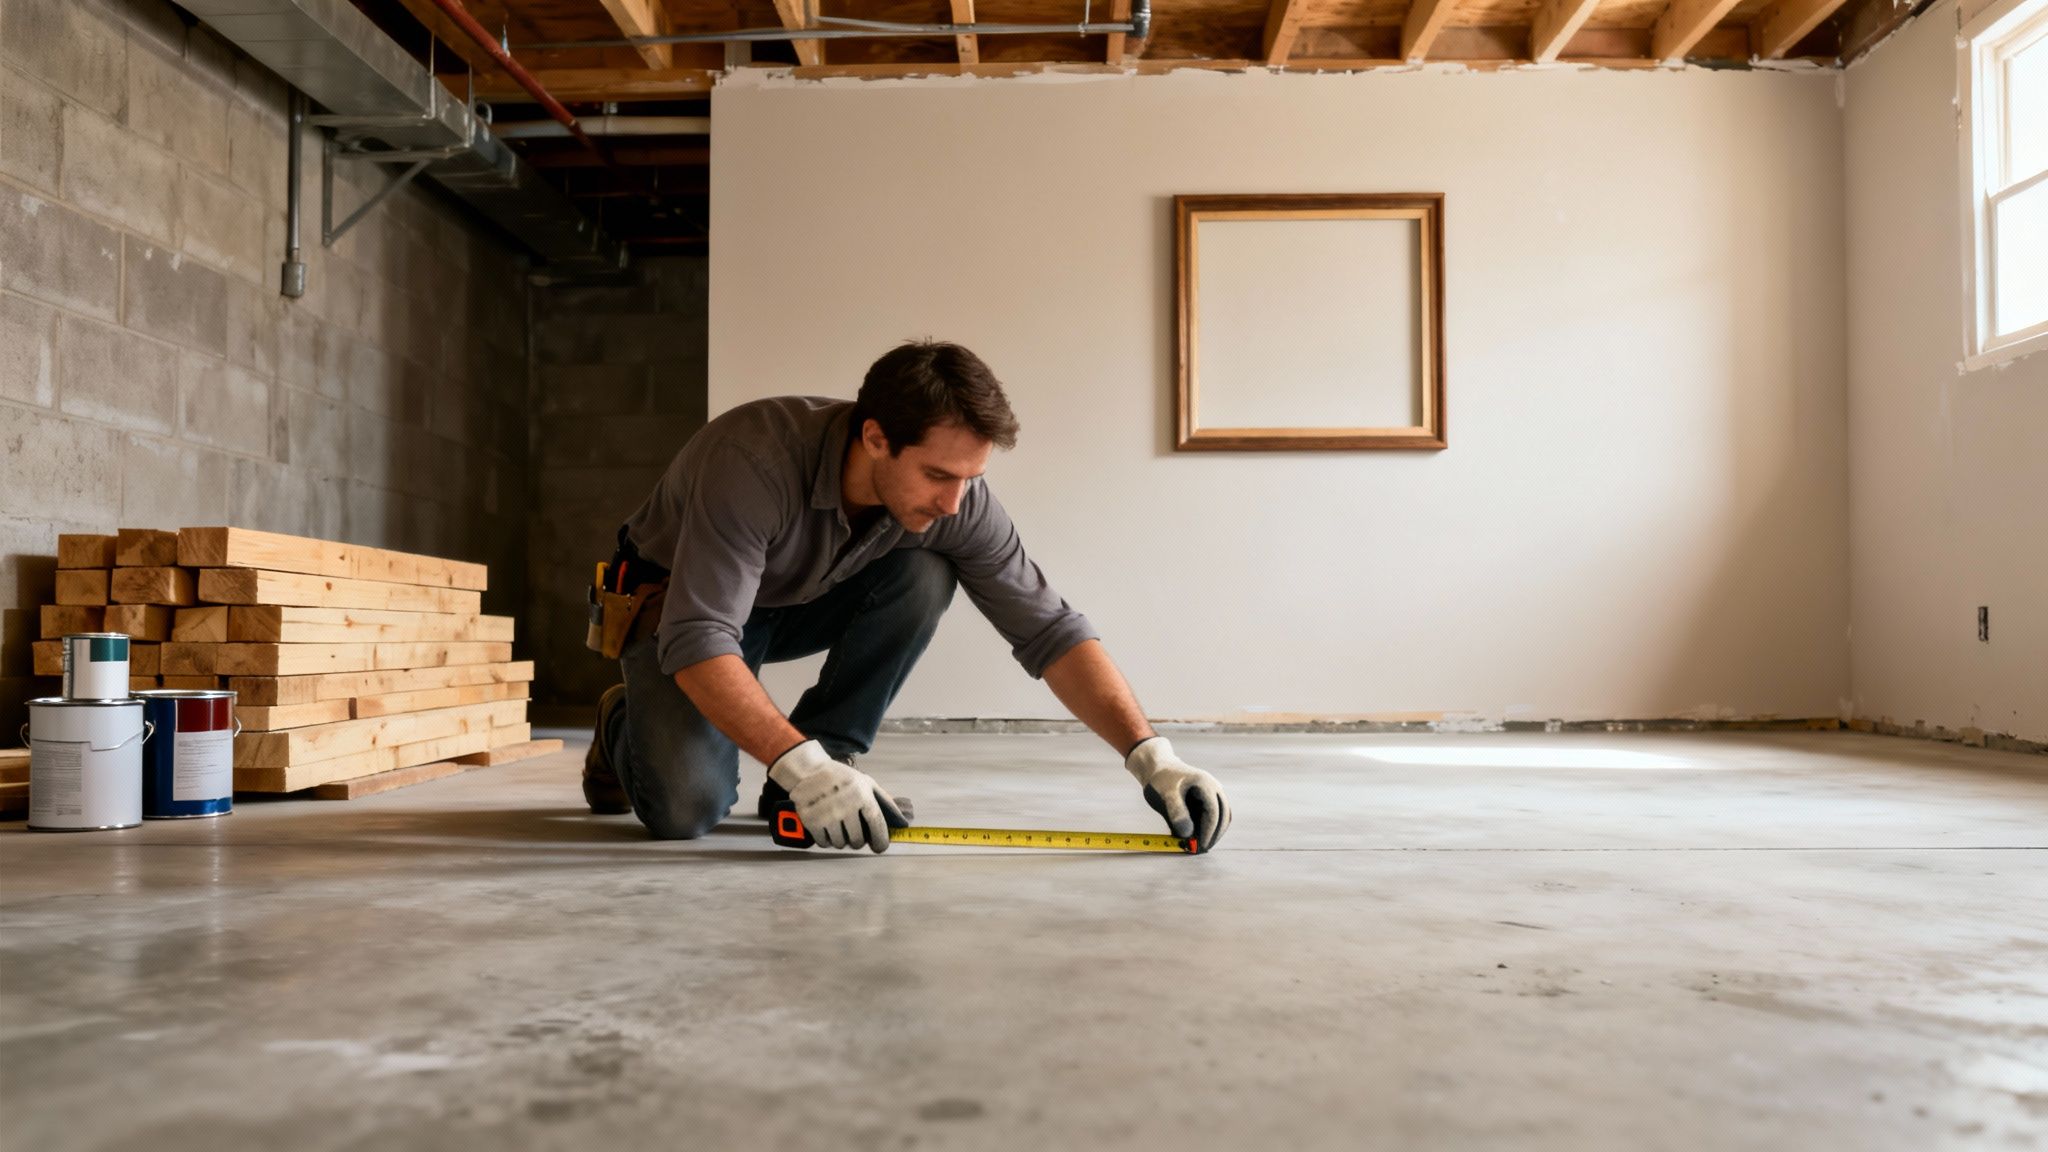
Start With What You Have
Before you can dream about the future of your basement, you need to get brutally honest about its present. It's time to play detective and give the entire space a top-to-bottom inspection. You're looking for any red flags that could sabotage your budget down the line.
The biggest enemy of a finished basement is moisture. Get up close and personal with the concrete walls and floor. Are there dark spots, a white chalky powder (efflorescence), or any actual dampness? Pay extra attention to the corners and where the walls meet the floor—these are notorious trouble spots. If you find any moisture issues, they are a full stop. You must fix them before a single 2x4 goes up.
Next, look for cracks. Tiny hairline cracks in the floor are usually just the house settling. But bigger, uneven cracks in the foundation walls? That could be a sign of a structural problem. Take notes and pictures of everything you find. This initial survey isn't just about finding problems; it's about understanding what you’re truly working with so you don't waste money covering up an issue that will cost you dearly later.
Decide What This New Space is For
Once you have a clear picture of your basement’s condition, the fun can start. What do you actually want this space to be? The answer to that question will guide every other decision, from the layout and materials to where the outlets go. Are you dreaming of a cozy family room for movie nights? A quiet, focused home office? A personal gym?
Don't just have a vague idea; get specific. This clarity is what helps you funnel your limited budget toward the things that actually matter for that purpose.
- Family Room: You'll want to prioritize a big, open area. Comfortable flooring that’s still durable, like luxury vinyl plank (LVP), is a great choice. You'll also want to think about lighting to create a warm, inviting vibe.
- Home Office: Here, killer lighting and plenty of strategically placed outlets are king. You probably don't need a massive open floor plan, so you can work with a smaller footprint.
- Home Gym: The floor is everything. You need something durable and shock-absorbent. This is a great place to save cash by leaving the ceiling joists exposed and putting your money into the floor and good ventilation instead.
The function of your space is the foundation of your floor plan. A clear purpose prevents "scope creep"—the tendency to add more features and rooms, which is the fastest way to blow your budget.
Sketch Out a Smart, Money-Saving Layout
Okay, grab some graph paper or fire up a simple design app. You don't have to be a professional architect to sketch out a layout that works and saves you money. The golden rule for a finish basement under $10,000 project is to fall in love with the open concept.
Fewer interior walls mean major savings. Seriously. Every wall you add means buying lumber for framing, more sheets of drywall, extra electrical wiring, and another door. By keeping the layout as open as possible, you slash both your material costs and the amount of labor needed.
Work with what you've got, not against it. Design your layout to incorporate existing support posts, ductwork, and plumbing lines instead of paying a fortune to move them. Boxing in a support column is infinitely cheaper than calling in an engineer to figure out how to relocate it. A simple, thoughtful layout that minimizes new construction is the secret weapon for keeping costs in check.
Build Your Real-World, Line-Item Budget
This is where the dream meets reality. Open up a spreadsheet and start listing out every single thing you anticipate buying. And I don't mean just "lumber" or "paint." Get granular.
- Framing: How many 2x4s? How many boxes of screws and nails?
- Electrical: How many feet of wire? How many outlets, switches, and junction boxes?
- Drywall: Count the number of sheets. Don't forget tape, mud, and drywall screws.
- Flooring: Calculate the square footage of LVP, underlayment, and any transition strips.
Go online to big box stores and price out each item. This painstaking process does two things: it shows you exactly where your money is going, and it empowers you to make smart trade-offs if you need to trim costs.
The Two Most Important Lines in Your Budget
After you've listed all your materials, add two final, non-negotiable line items to your spreadsheet. First, call your local city office—whether you're in Orem, Provo, or somewhere else—and ask about permit requirements. Building permit fees can run anywhere from $200 to $500 for a project like this. Skipping this step can lead to hefty fines and being forced to tear out your hard work.
Second, and this is the big one, add a contingency fund of 15-20% of your total estimated cost. On a $10,000 project, that’s an extra $1,500 to $2,000 you need to have set aside. Trust me, no project goes 100% according to plan. You'll mis-cut a board, need more paint than you thought, or uncover a minor plumbing leak you have to fix. This fund is your safety net. It’s what keeps a small hiccup from turning into a full-blown budget disaster.
The Under $10k Budget Breakdown: Where Your Money Goes
Alright, let's get down to the brass tacks: the money. A plan is just a dream until you start assigning dollar amounts to it. This is where we break down how to slice up that $10,000 to turn your concrete box into a genuine living space. I'll be honest—sticking to this budget is absolutely doable, but it takes discipline and a crystal-clear idea of where every single dollar is headed.
The biggest secret to making a finish basement under $10,000 project a reality is simple: DIY labor. On a typical renovation, labor can eat up a staggering 40% of the total cost. By rolling up your sleeves and handling things like framing, insulation, and painting yourself, you’re not just saving a little cash—you're freeing up thousands for the materials that will actually build the room.
Mapping Out Your Core Expenses
To keep spending in check, you have to stop thinking of your budget as one big $10,000 pile of cash. Instead, picture it as a series of smaller, dedicated funds for each stage of the project. This simple mental shift prevents you from getting carried away with fancy flooring only to find you've come up short for something non-negotiable, like electrical work.
Your main spending categories will look something like this:
- The Bones: This is all your structural stuff—framing, insulation, and any subflooring needed to create the basic shape of the rooms.
- The Guts: We're talking electrical and maybe some simple plumbing. Electrical is the one area where you absolutely bring in a pro. No exceptions.
- The Skin: This is what makes it look like a room. Drywall, paint, flooring, trim, and doors fall into this bucket.
- The "Just in Case": Permits and a contingency fund. Permits keep the city happy, and the contingency fund keeps you from having a meltdown when something unexpected pops up.
This little visual sums up the right way to approach it. You assess what you have, you make a solid plan, and then you build the budget.
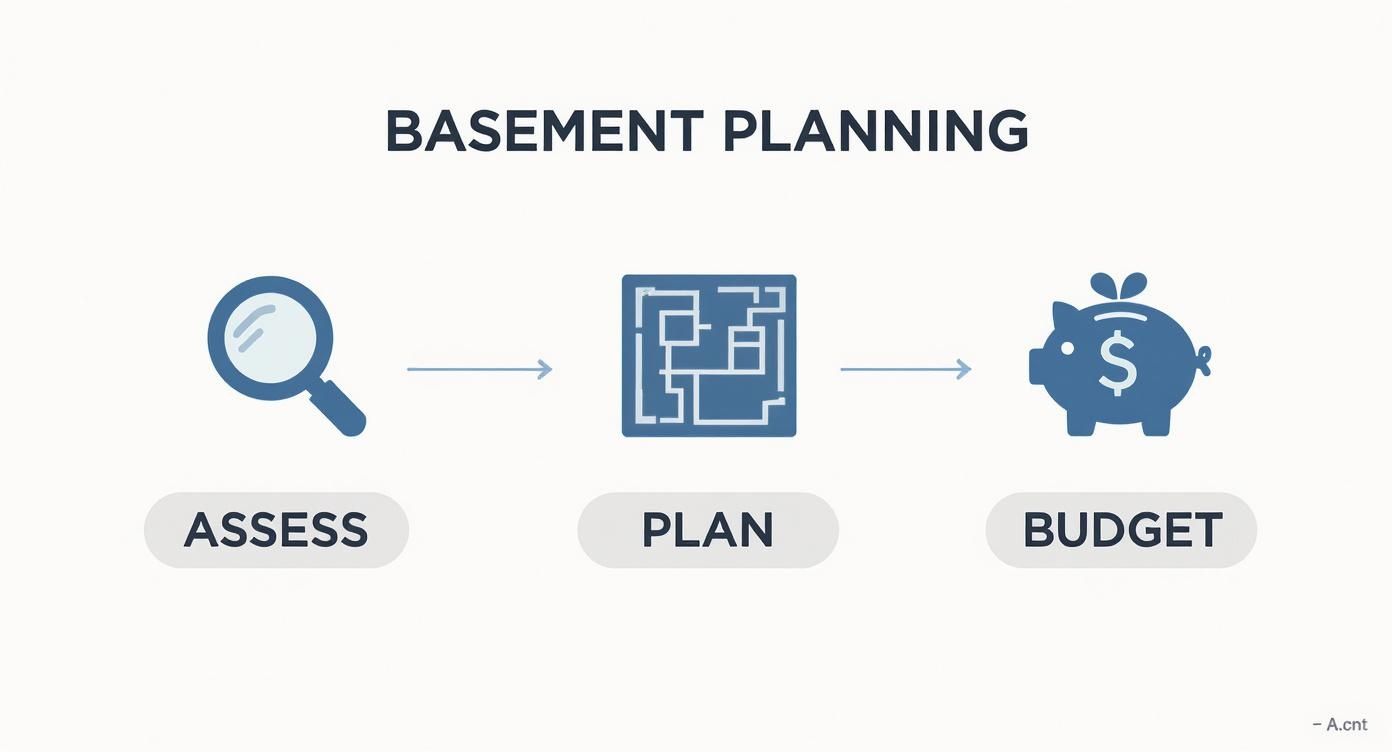
Get these steps in the right order, and you’ll avoid wasting time and money on a project that wasn’t thought through from the start.
A Sample Budget Allocation For a $10,000 Basement Project
So what does this look like in the real world? Here’s a sample budget I've put together that shows how you might allocate your funds for a modest 700-800 square foot basement. Think of it as a roadmap. Your local material costs will definitely vary—especially here in the Orem and Provo area—so always get fresh quotes before you buy.
| Permits & Fees | $250 - $500 | 2.5% - 5% | Keep the plan simple to minimize permit fees. A quick call to your local city office will give you the exact numbers. |
| Framing & Lumber | $1,200 - $1,700 | 12% - 17% | Go open-concept. Fewer interior walls mean a massive reduction in the lumber you need to buy. |
| Insulation | $800 - $1,200 | 8% - 12% | This is a perfect DIY job. Use affordable fiberglass batts or rigid foam panels and install them yourself. |
| Electrical (Hiring a Pro) | $1,800 - $2,500 | 18% - 25% | Save on the electrician's billable hours by doing the demo and prep work yourself. Keep the lighting plan simple. |
| Drywall & Finishing | $1,200 - $1,800 | 12% - 18% | Hanging drywall is tough work but totally doable. Renting a drywall lift for a weekend is a game-changer. |
| Flooring (LVP or Concrete) | $1,000 - $2,000 | 10% - 20% | Luxury Vinyl Plank (LVP) is a DIYer's best friend—it's waterproof and clicks together easily. Even cheaper? Stain your concrete. |
| Paint & Primer | $400 - $600 | 4% - 6% | Buy contractor-grade paint in 5-gallon buckets for the best value. You’ll be doing all the prep and painting anyway. |
| Trim, Doors, & Hardware | $500 - $800 | 5% - 8% | Simple MDF trim and basic hollow-core doors look great when finished properly and won't break the bank. |
| Contingency Fund (15%) | $1,500 | 15% | Do not skip this. This is your safety net for that cracked pipe you find, the extra materials you need, or a tool rental. |
| Total | $8,650 - $11,600 | 100% | As you can see, by managing your costs smartly, you can definitely land this project under $10,000. |
This line-item approach is the only way to stay on track. By breaking it down, you make the big number feel manageable and give every dollar a job to do.
Key Takeaway: The cost to finish a basement often lands between $7 and $23 per square foot nationally. With labor making up about 40% of that, and permits adding another $1,200 to $2,000, you can see exactly why taking on the structural and finishing work yourself is the cornerstone of a finish basement under $10,000 project.
Where Your Sweat Equity Pays Off Big Time
Looking at that budget, it’s pretty obvious where your own hard work delivers the biggest financial win. Framing, insulating, hanging drywall, painting, and laying down flooring are all jobs that are more about time and effort than specialized, licensed skill. By tackling these yourself, you could realistically save between $5,000 and $8,000 in labor costs. That's huge.
Want a more personalized look at the numbers? Try plugging your own square footage and project details into our handy basement finishing cost calculator.
While we're focused on basements, it's helpful to see how other major renovations are budgeted. For instance, checking out a practical price guide for kitchen renovation costs can offer some great perspective on how material and labor costs are split up on different projects. The principles are the same: a clear financial plan is what turns a project from an expensive headache into a valuable, enjoyable part of your home.
Deciding Between DIY and Hiring a Pro
Knowing what you can handle—and what you can't—is probably the single most important part of keeping this project under $10,000. Finishing a basement on a tight budget isn't an all-or-nothing game. You don't have to do every single thing yourself, nor do you have to hire out the whole job.
The secret is a smart hybrid approach. You strategically mix your own sweat equity with professional expertise where it truly counts. This lets you slash labor costs without ever touching the stuff that could compromise safety or quality.
The Best DIY Jobs for Maximum Savings
So, where can you save the most money by rolling up your sleeves? Think about the tasks that are labor-intensive but don't require a special license or years of training. These are your gold mines for savings.
Most homeowners, even with just a little bit of grit and a few YouTube tutorials, can confidently take on:
- Framing the Interior Walls: Think of this as building a life-sized puzzle with 2x4s. It's repetitive, sure, but with a good level and a chop saw, it's completely achievable. This is where the layout you planned starts to become real.
- Putting in Insulation: Whether you go with classic fiberglass batts or rigid foam boards, this is a straightforward job. It’s also one you’ll be thankful for every winter when your basement is cozy and your heating bills are lower.
- Hanging and Finishing Drywall: Let's be honest, getting a perfectly smooth, professional finish on drywall is an art form. But hanging the sheets and getting the first couple of coats of mud on? You can definitely do that. Renting a drywall lift is a back-saver and makes this a manageable job.
- Painting and Trim: This is the ultimate DIY win. A few gallons of paint provide a massive visual transformation for very little money. Cutting and nailing up baseboards and door casings is that final touch that makes the space feel complete.
- Laying Down Flooring: Modern flooring like Luxury Vinyl Plank (LVP) was practically made for DIYers. The pieces just click together—no messy glue, no special tools needed. You can knock out an entire room in a weekend.
When to Absolutely Call a Professional
Alright, let's talk about the hard stops. Some jobs are simply not worth the risk. Trying to save a few bucks here can lead to catastrophic failures, failed inspections, and costs that dwarf your original budget.
Never, ever compromise on safety to save a few hundred dollars. Licensed pros are insured for a reason. One mistake with wiring can cause a fire. One bad plumbing connection can cause a flood. It's just not worth it.
For these tasks, pick up the phone and call a licensed professional. It's non-negotiable.
- All Electrical Work: This is rule number one. Running new circuits for outlets and lights needs to be done by a licensed electrician, period. Bad wiring is one of the leading causes of house fires, and the inspector will be looking at this with a magnifying glass.
- Major Plumbing Changes: Tapping into a toilet drain or moving water lines for a new bathroom or wet bar is complex. One wrong move trying to tie into your home’s main sewer line can lead to nasty sewer gas leaks or serious water damage. Call a plumber.
- Any Structural Modifications: If you’re cutting a new window (especially an egress window), taking out a support post, or altering the foundation in any way, you need a pro. You might even need a structural engineer to sign off on the plans. This is your home's skeleton—don't mess with it.
- HVAC Ductwork: Extending your furnace and A/C into the basement isn't as simple as just adding a few vents. An HVAC pro will know how to properly size and run the new ducts so you don't mess up the airflow for the rest of the house.
It’s smart to get a handle on how much electricians typically charge so you can factor that cost into your budget from the start. By hiring out these critical, high-risk jobs, you free yourself up to focus on the tasks that safely build value and bring your basement to life.
Smart Material Choices and Layout Hacks That Save a Fortune
This is where your creativity and savvy choices will really pay off. A successful finish basement under $10,000 project hinges on finding that sweet spot: materials and designs that look high-end without the punishing price tag. It's all about being clever and stretching every single dollar.
The biggest impact—and the biggest potential for savings—comes from the largest surfaces in the room: the floor and the ceiling. Get these two right, and you've won half the battle.
Your Floor: The Budget Hero Below Your Feet
Flooring can absolutely swallow a budget whole if you let it. But here's the thing about basements: their unique challenges, like potential moisture, make expensive materials like traditional hardwood a risky proposition anyway. So, lean into the practical, budget-friendly options that just so happen to be perfect for the space.
Two materials consistently come out on top for a savvy basement finish:
- Luxury Vinyl Plank (LVP): I honestly can't recommend this stuff enough for DIY projects. It's 100% waterproof, tough as nails against scratches and dents, and today’s LVP looks shockingly like real wood. Best of all, the click-lock system means you can lay an entire floor over a weekend with just a few basic tools.
- Stained Concrete: Don't just cover up your concrete slab—celebrate it! With some grinding, polishing, and a good quality stain, your existing concrete can become a sleek, industrial, or even warm and rustic floor. It’s a custom look for a tiny fraction of the cost of adding new material.
If you want to get into the weeds on the pros and cons, check out our complete guide on the best basement flooring options. It'll help you nail down the perfect foundation for your project.
Here's a real-world example: By choosing LVP at $2.50 per square foot over engineered hardwood at $8 per square foot, you could save over $3,800 on a 700-square-foot basement. That's a huge chunk of your budget freed up for other things.
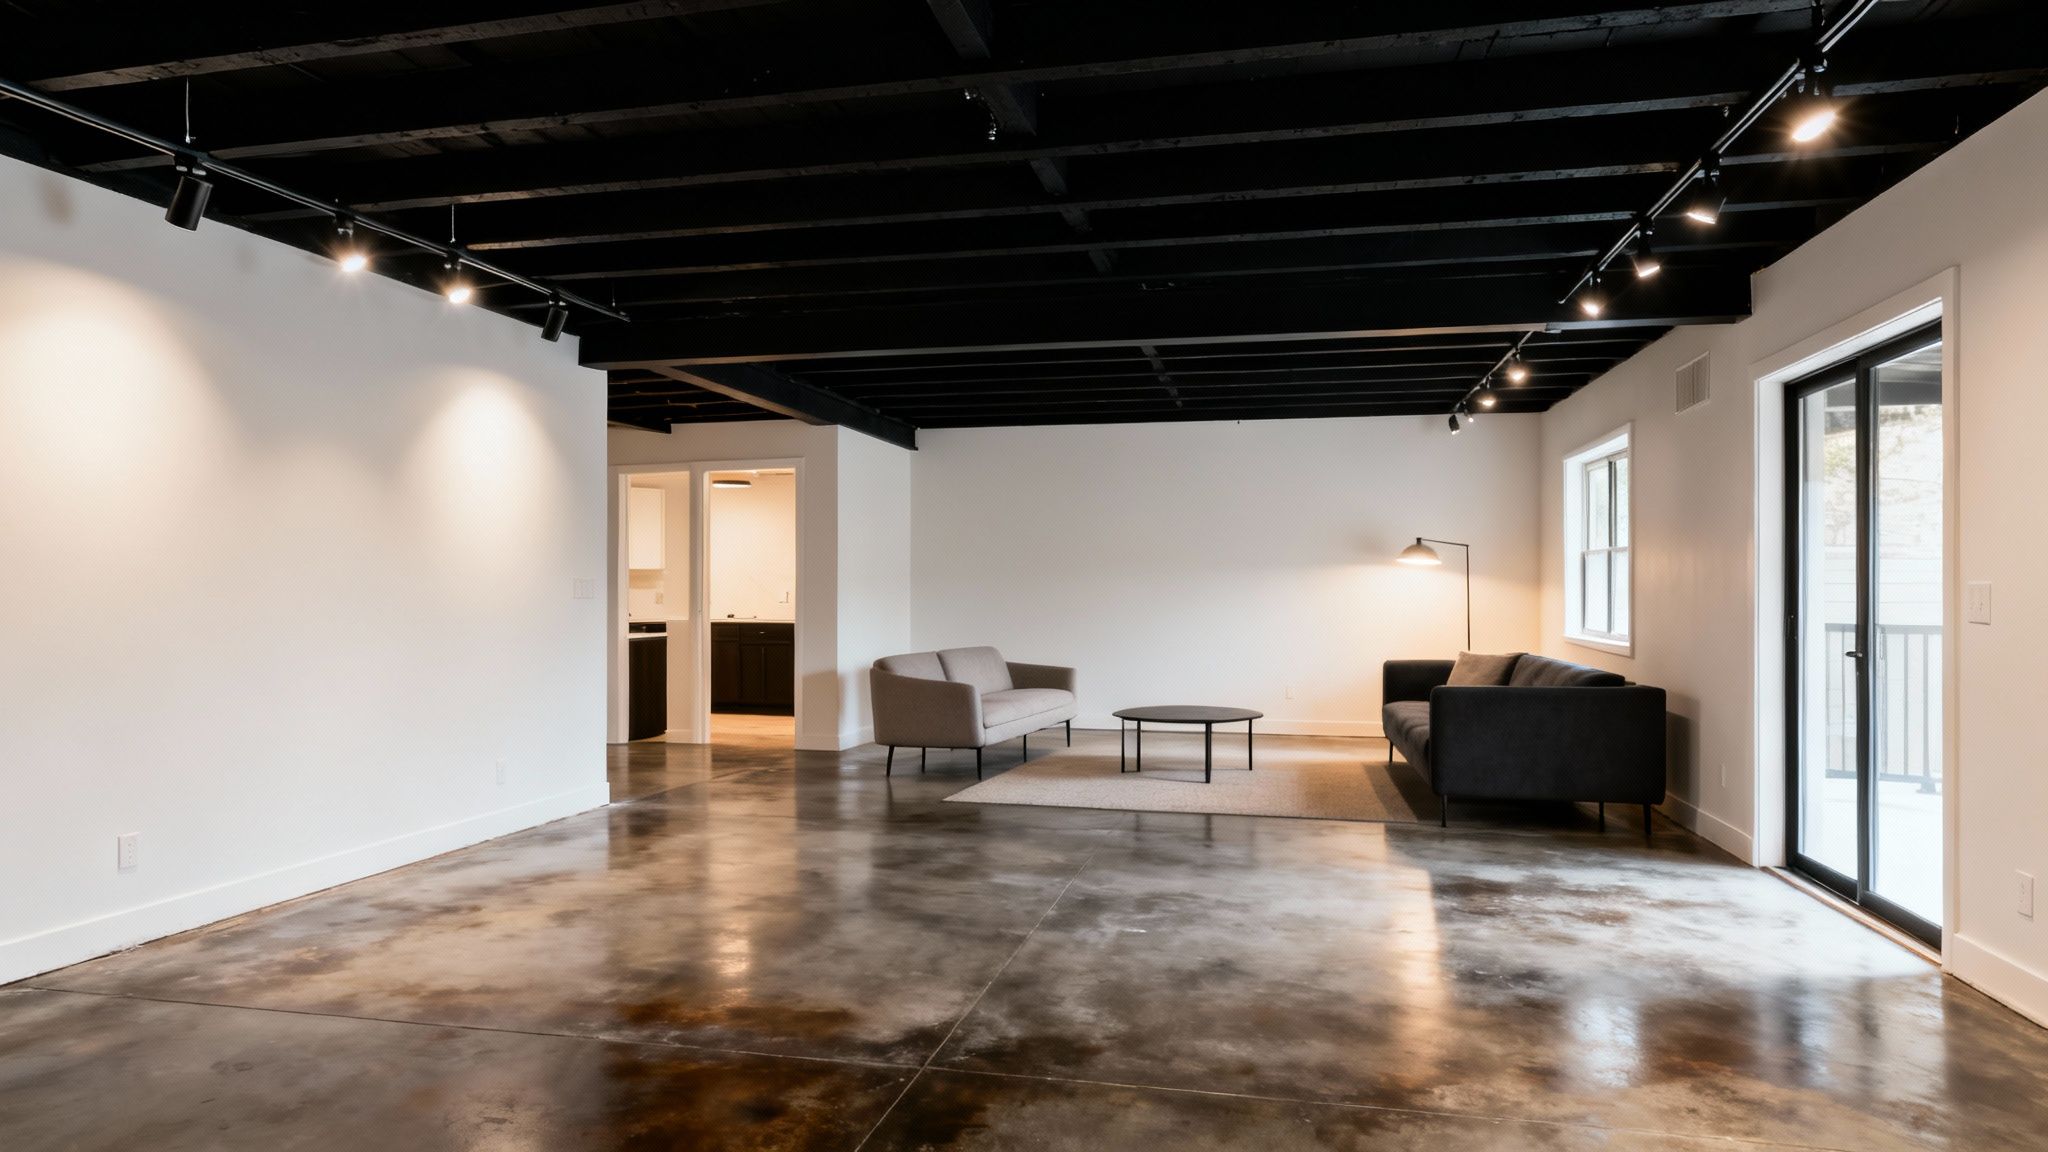
The Ceiling Hack That Saves Thousands
Let's be honest, the typical basement ceiling is a chaotic web of ductwork, pipes, and wires. The traditional solution is to frame it all in and hide it behind drywall. That means a lot of lumber, a lot of drywall sheets, and a lot of tedious finishing work. It gets expensive, fast.
The alternative? Embrace the industrial-chic look.
By painting the entire exposed ceiling—joists, pipes, ducts, and all—a single, uniform color like flat black or dark charcoal, you create an incredibly stylish and modern vibe. The dark color makes the ceiling visually recede, which has the cool effect of making the room feel taller. All those mechanicals just blend into the background. This one design choice can easily save you over $1,000 in materials and labor.
Embrace an Open Layout
Your floor plan is another area where less is definitely more for your wallet. It’s tempting to start carving out dedicated rooms—a home office here, a gym there—but every single interior wall you add is a major cost driver.
Just think about what one wall requires:
- Lumber for the frame
- Drywall for both sides
- Tape, mud, and sanding supplies
- An interior door, plus hardware
- Extra electrical wiring, outlets, and switches
By sticking to an open-concept plan, you slash all those costs. You can still create distinct "zones" for different activities using area rugs, furniture arrangement, and smart lighting. Not only does this save a ton of money, but it also makes the basement feel way more spacious and flexible.
Smart Lighting Without the High Cost
Good lighting is what separates a dreary cellar from a genuinely inviting living space. The default for many people is a grid of recessed can lights, but installing ten or twelve of those adds up quickly in both material cost and electrician fees.
Look at more flexible and budget-friendly solutions. Track lighting is a fantastic alternative. You install a single electrical box that powers several adjustable heads, letting you aim light exactly where you need it—on a reading nook, a piece of art, or a game table. This gives you a custom feel for a fraction of the cost. Combine that with a couple of well-placed floor lamps, and you'll create a warm, layered atmosphere that feels intentional, not cheap.
Answering Your Biggest Basement Finishing Questions
Embarking on a basement project, especially on a tight budget, always brings up a ton of questions. Let's be honest, it can be a little overwhelming. Getting these things sorted out upfront is the difference between a successful project and one that stalls out halfway through.
Here are the questions I hear most often from people trying to finish their basement for under $10,000.
How Long Does a DIY Basement Finish Really Take?
This is the million-dollar question, isn't it? The honest-to-goodness answer is that it really comes down to your schedule and your pace. A pro crew working full-time could probably bang out a basic basement in 3-8 weeks, but that’s not the reality for most of us.
For a DIYer chipping away at it on nights and weekends, a more realistic timeline is somewhere in the ballpark of 3-6 months.
To keep from getting burned out, you have to think in phases and be realistic about your free time:
- Framing and Electrical: This phase is all about structure. You can probably get the framing done yourself over 3-4 solid weekends. Just remember, while you can build the walls, you'll need a pro to come in for the wiring.
- Insulation and Drywall: Putting up insulation is usually a quick win—a single weekend job. Drywall, on the other hand, is a test of patience. Plan on at least 4-5 weekends for hanging the boards, then the multi-step process of taping, mudding, and sanding.
- Flooring and Painting: This is where you see the finish line! Once the drywall dust is gone, things move pretty quickly. You can likely knock out the painting in one weekend and get the flooring down in another.
The most important thing is just to keep moving. Even if you can only spare a few hours a week, that steady progress will keep the project from feeling like it’s dragging on forever.
What Are the Most Common Hidden Costs I Should Expect?
No budget is foolproof, and basements are infamous for throwing a curveball or two. This is exactly why that 15-20% contingency fund I mentioned earlier is non-negotiable. For a $10,000 project, that's an extra $1,500 to $2,000 you need to have set aside, ready to go.
So, where does that extra cash usually end up going?
- Dumpster Rental: You will generate way more trash than you think. A small dumpster for a week can easily run you $300-$500.
- Tool Purchases or Rentals: Sure, you have a drill. But do you have a drywall lift? A miter saw for perfect corner cuts? These things add up, whether you rent them for a weekend or buy them outright.
- Material Overages: It happens to everyone. You’ll mis-cut a 2x4, underestimate your paint needs, or run short on screws. Factor in a few "oops" trips to the hardware store.
Can I Actually Add a Bathroom and Keep it Under $10,000?
This is probably the toughest question to answer, and it's a big one. The short answer? It's incredibly difficult. It’s not totally impossible, but you’d need a lot of things to go just right. A bathroom can easily tack on $5,000 to $8,000 to the total cost because of the plumbing, fixtures, and extra labor involved.
The only scenario where this might be feasible on a tight budget is if you have direct access to existing plumbing lines. If your main drain is right there in the basement ceiling or in an adjacent wall, you might have a shot. If a plumber has to break up concrete to run new pipes, your budget is toast.
To even have a chance at pulling it off, you'll have to make some serious compromises:
- Stick to a basic, budget-friendly toilet and vanity combo.
- Opt for an inexpensive, pre-fabricated shower stall instead of custom tile.
- Plan on doing all the framing, drywall, and painting yourself after the plumber is done.
Even with these concessions, the bathroom will eat up the vast majority of your budget, leaving very little for flooring, paint, and lighting in the rest of the space. For most people aiming for that $10,000 goal, keeping the project "dry" (no plumbing) is the safest bet.
A project of this size is a serious undertaking, and navigating the specifics of permits and professional trades here in the Orem and Provo areas adds another layer. If you've laid out your plan and realized some parts of the job are better left to the pros, the team at Northpoint Construction is ready to step in. Whether it's ensuring the electrical work is done safely or you want a full quote for the project, we're here to help you turn your plans into a finished space. Get in touch with us today!