

Finishing Basement Ceilings Your Ultimate Guide
Finishing your basement ceiling is a game-changer. It’s the step that truly transforms a utilitarian space into a comfortable, finished part of your home. But which path do you take? Do you go for the clean, seamless look of drywall to match the upstairs? Or is the easy utility access of a drop ceiling more important? You could even lean into an industrial vibe with an open ceiling or add some character with wood planks.
Let’s dig into the best options and figure out which one makes the most sense for your project.
What Are My Options for Finishing Basement Ceilings?
Choosing a basement ceiling isn't just about looks; it's a practical decision that balances aesthetics, your budget, and how you need the space to function. The ceiling you pick sets the tone for the entire room, affecting everything from headroom and lighting placement to soundproofing.
More importantly, it dictates how easily you can get to the plumbing, wiring, and ductwork snaking through the joists. A future leak or electrical issue can be a minor inconvenience or a major renovation, depending on what's overhead.
Think of it as a simple decision process based on your project's needs.

As you can see, practical things like access and ceiling height quickly steer you toward the right solution for your basement.
Comparing the Top Ceiling Finishes
Let's break down the four most common ways people finish their basement ceilings. Each has its own unique benefits, costs, and installation quirks that can make it the perfect—or perfectly wrong—choice for your space.
- Drywall Ceilings: This is the go-to for a reason. Drywall gives you that polished, "main floor" look with a smooth, uninterrupted surface that makes the basement feel completely integrated with the rest of the house. It’s the best option for maximizing every precious inch of headroom and gives you a blank slate for any paint color or lighting plan you can dream up. The downside? The installation is a multi-step, messy process of hanging, taping, mudding, and sanding. And if you ever need to get to a pipe or wire, you’ll be cutting into your beautiful finish.
- Drop or Suspended Ceilings: If function is your top priority, you can't beat a drop ceiling. Often called a T-bar ceiling, it’s a simple system: a metal grid hangs from the joists, and lightweight panels pop right into place. Need to fix a leaky pipe? Just lift a tile. It’s that easy. Forget the bland office-park look of the past, too. Today’s tiles come in sophisticated designs that can mimic everything from pressed tin to coffered wood. The only real trade-off is giving up a few inches of ceiling height to accommodate the grid.
- Open or Industrial Ceilings: Why hide what's already there? This approach celebrates the raw, structural elements of your basement. Instead of covering everything up, you simply clean and paint the floor joists, ductwork, and pipes. A uniform coat of black, dark gray, or white creates a surprisingly stylish, urban-loft vibe that also makes the ceiling feel incredibly high. It's fast, budget-friendly, and saves every millimeter of headroom. Just know that it does very little to block sound from the floor above.
- Wood Plank or Shiplap Ceilings: Looking for warmth and character? Wood is the answer. Tongue-and-groove planks or classic shiplap can turn a boring ceiling into a stunning focal point, perfect for creating a rustic, cozy, or even coastal feel. While the materials cost more than drywall, many plank systems are designed to be DIY-friendly, which can save you money on labor.
Pro Tip: Before you finalize your choice, grab a roll of painter's tape and mark the locations of every critical shut-off valve, electrical junction box, and plumbing clean-out on the joists. If you opt for drywall, installing a few access panels in these key spots is a small task now that will save you a world of pain later.
Basement Ceiling Options at a Glance
Sometimes seeing it all side-by-side makes the decision easier. Here’s a quick comparison of the most popular basement ceiling finishes to help you weigh the pros and cons for your project.
| Drywall | $2.00 - $4.00 | High | A seamless, "upstairs" look; maximizing headroom; integrated lighting. |
| Drop / Suspended | $2.50 - $8.00 | Low to Medium | Easy access to pipes and wiring; rooms with lots of overhead utilities. |
| Open / Industrial | $1.00 - $3.00 | Low | Low ceilings; modern/urban aesthetic; budget-conscious renovations. |
| Wood Plank / Shiplap | $3.00 - $10.00+ | Medium | Creating a warm, rustic, or decorative focal point; adding character. |
This table gives you a solid starting point, but remember to factor in the specific needs of your space and your comfort level with DIY work when making the final call.
Essential Planning Before You Start
I can't stress this enough: jumping into a basement ceiling project without a solid plan is the fastest way to turn a weekend task into a month-long headache. Proper prep work isn't just about saving time; it's about avoiding the kind of expensive mistakes that can wreck the safety and quality of your new space. Think of this stage as laying the foundation for everything that comes after.
Spending a little extra time now to measure correctly, handle any underlying issues, and really understand your home's infrastructure is non-negotiable. This is what ensures you buy the right amount of materials, stay on the right side of local building codes, and end up with a ceiling that looks great for years to come.
Measure Twice and Map Everything
First things first, get the lay of the land. Grab a tape measure and figure out the exact square footage of your ceiling area. This one number is your starting point for ordering everything from drywall sheets and t-bar grid components to paint and insulation.
A quick pro tip: always add a 10-15% buffer to your material order. Trust me, this little bit of "waste" will cover the inevitable miscuts, mistakes, or a board that gets damaged on the way home. It’ll save you a frustrating last-minute trip back to the hardware store.
Once you have your dimensions, create a simple map of what’s already up there. You don't need fancy software—just use some painter's tape right on the joists or a marker to note the location of:
- Plumbing Pipes: Mark all water lines and drains, paying special attention to any shut-off valves. You'll want to access those later.
- Electrical Junction Boxes: Find every single one. By code, these must remain accessible.
- HVAC Ductwork: Trace the path of all your heating and cooling runs.
- Recessed Lighting: Figure out the exact placement for any can lights or other fixtures you're planning.
Speaking of utilities, it's critical to think through your ductwork situation before finalizing any ceiling plans. Getting this wrong can cause major headaches down the road. For homeowners who might need some professional guidance, Considering Ductwork Installation can be a really helpful resource.
Confront Moisture and Code Requirements
Basements and moisture go hand in hand, and covering up a damp problem is a surefire recipe for mold, mildew, and even structural damage. Before a single board goes up, do a serious inspection for any signs of water—look for damp spots on the foundation, that musty basement smell, or condensation on pipes.
If you find anything, stop and fix it now. This might mean sealing cracks in the foundation, improving the grading outside your house, or installing a dehumidifier. Your basement must be dry before you start finishing it.
Next up is building codes, especially when it comes to ceiling height. Most towns have rules about this. For example, it’s common to see a minimum finished ceiling height of 7 feet for a habitable space. To make sure your project is compliant from day one, check out our guide on understanding local basement ceiling height requirements.
Here's a common mistake I see all the time: people forget that the framing and drywall themselves will eat up several inches of headroom. Always measure from your finished floor to the lowest-hanging pipe or duct to find out what your true maximum ceiling height will be before you commit to a certain type of ceiling.
Plan for Insulation and Access
Insulation is one of the most important parts of a basement ceiling, but it's amazing how often it gets overlooked. Tucking insulation between the floor joists does two fantastic things: it seriously dampens sound transfer between floors (no more thundering footsteps from upstairs!), and it makes your home more energy-efficient.
Look into using mineral wool or fiberglass batts, specifically the kind designed for soundproofing and thermal resistance. This one simple step makes the basement a much quieter and more comfortable place to be all year round. In fact, homeowners are investing more and more in these kinds of functional upgrades. The global ceiling tiles market was valued at around USD 7.55 billion in 2023 and is only expected to grow from here.
Finally, think about the future. You will need to get into that ceiling again someday. Even if you're installing a permanent drywall ceiling, you can put in small, paintable access panels near critical spots like water shut-off valves or main junction boxes. A little foresight here turns a potential demolition job into a simple, five-minute fix down the line. Get this planning phase right, and the rest of the project will fall into place beautifully.
How to Install a Drywall Basement Ceiling
If you want your basement to feel less like a basement and more like a seamless part of your home, drywall is the classic choice. It delivers that smooth, finished surface that maximizes every inch of headroom and just looks right. It's a project that demands a good deal of patience and an eye for detail, but if you break it down into manageable steps, it's definitely within reach for a determined DIYer.
We'll walk through the whole process, starting with the all-important framing that sets the stage for success. From there, we'll cover the muscle work of hanging the sheets, the finesse of taping and mudding, and the final touches that pull it all together.
Framing for a Flawless Surface
Here’s a hard-earned lesson: your finished ceiling is only as good as the frame it's hanging on. Your floor joists might look straight, but I guarantee they have small crowns, dips, and imperfections. If you attach drywall directly to them, every one of those flaws will be magnified on your finished ceiling.
The professional solution is to install resilient channels (metal) or wood furring strips perpendicular to the joists. These serve a couple of crucial functions:
- A Perfectly Flat Plane: You can shim the channels or strips to create a truly level surface, completely hiding any wonkiness in the joists above.
- A Quieter Home: Resilient channels are fantastic for sound dampening. They create a small air gap that decouples the drywall from the framing, which cuts down on footstep noise from the floor above.
No matter which you choose, run them every 16 inches on center to properly support the drywall and prevent sagging down the road. Use a laser level or a simple string line to get them all at the exact same height.
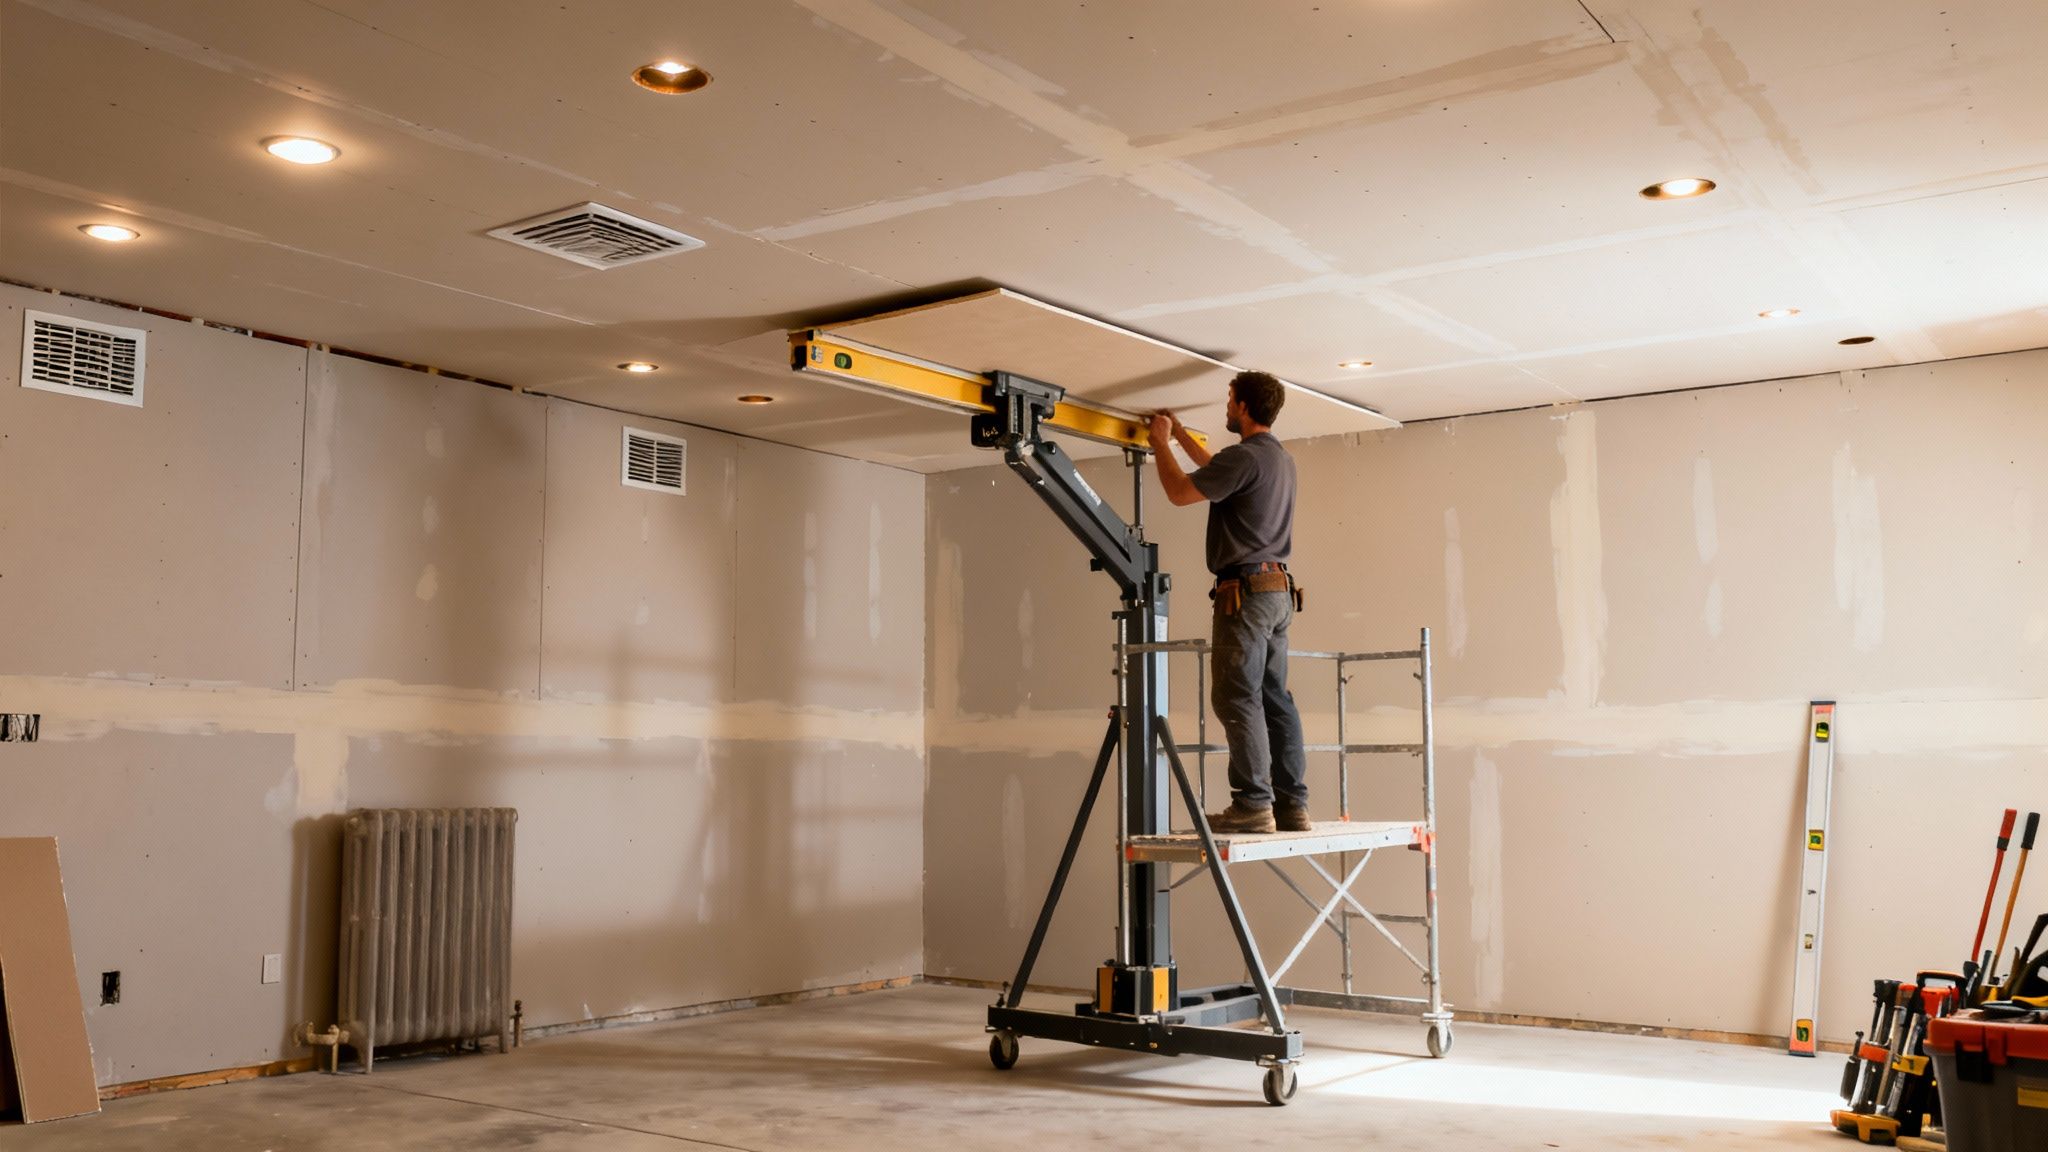
Hanging the Drywall Sheets
Let's be honest, hanging ceiling drywall is a workout. A standard 4x8 sheet of 1/2-inch drywall tips the scales at over 50 pounds. Trying to wrestle that into place overhead is tough. This is where a drywall lift becomes your absolute best friend. You can rent one for a pretty reasonable day rate, and it will save your back while letting you position the sheets perfectly.
If a lift is out of the question, you'll need at least one strong helper. Another old-school trick is to build a couple of simple "T-braces" from 2x4s to prop up one end of a sheet while you secure the other.
As you drive your screws, aim for a "dimple"—the screw head should sink just slightly below the paper surface without breaking through it. Tearing the paper compromises the screw's holding power.
Pro Tip: Always stagger your drywall seams, just like a bricklayer staggers bricks. A continuous seam is a weak point and a nightmare to finish cleanly. A staggered pattern makes the entire ceiling stronger and the joints far easier to hide.
Cutting Around Obstacles
Every basement ceiling has its share of light fixtures, HVAC vents, or plumbing pipes to work around. Making clean, precise cuts for these is what separates a pro job from an amateur one. Don't try to pre-measure and cut everything on the floor; it rarely works out.
The better way is to lift the panel into place, press it gently against the obstacle (like a junction box), or have someone mark its outline from above. Then, lower the panel and use a RotoZip-style tool or a simple drywall saw to make your cut. This way, you get a perfect fit every time and minimize the gaps you'll have to patch later. Keep in mind that the material and labor are real investments; you can explore the average cost of drywalling a basement to get a clearer picture of the budget.
The Art of Taping and Mudding
This is where the real skill comes in. The whole point of taping and mudding is to make every seam between the sheets vanish, creating one single, monolithic ceiling. The secret is using several thin coats of joint compound, not trying to slather on one thick coat.
Your Finishing Toolkit:
- All-Purpose Joint Compound: Good for everything, especially for setting the tape in the first coat.
- Topping Compound: This stuff is lighter, smoother, and sands like a dream. It's perfect for your final skim coat.
- Paper or Fiberglass Mesh Tape: I prefer paper tape for its strength, especially in corners. Mesh tape is self-adhesive, which is handy, but it's not quite as robust.
Lay down a thin bed of mud over a seam, press your tape into it with a drywall knife, and squeeze out all the excess from underneath. Once that's dry, you'll come back with at least two more coats, each one wider and thinner than the last, feathering the edges out smoothly. The same goes for all your screw dimples—fill, dry, and coat again. Be patient! Rushing this stage will leave you with a lumpy finish that will glare at you after it's painted.
Sanding, Priming, and Painting
When your last coat of mud is bone dry, it's time to make some dust. Using a fine-grit sanding sponge or a pole sander, gently smooth out any tool marks or high spots. Run your hand over the surface; it should feel perfectly seamless.
Wipe the entire ceiling with a damp cloth to get rid of every bit of that fine white dust. This is a non-negotiable step. If you paint over the dust, the paint won't stick properly.
Next up is primer. You need a specific PVA (polyvinyl acetate) drywall primer. It's made to seal the porous mud and new drywall paper so your paint absorbs evenly. If you skip primer, you'll likely end up with a blotchy finish where the seams show through as a different sheen.
Finally, roll on two coats of a good quality ceiling paint. After that last roller pass, step back and admire your work. You've just transformed your basement with a clean, professional finish that makes the whole space feel complete.
Installing a Drop Ceiling for Easy Access and Modern Style
A drop ceiling, often called a suspended or T-bar ceiling, is the hands-down winner when you need to keep future access to plumbing, wiring, and ductwork in mind. If the idea of tearing into fresh drywall just to fix a leaky pipe gives you hives, this is your solution. And forget those dingy, yellowed office panels from the 80s—today’s options deliver some seriously impressive style without giving up any of that practicality.
The whole system is brilliantly simple. A lightweight metal grid hangs from your floor joists, creating a framework where you just pop in finished ceiling panels. This makes it one of the most DIY-friendly ways to finish a basement, turning a potentially massive headache into a weekend project.
Let's walk through the whole process, from getting that grid perfectly level to cutting the final tiles for a clean, professional finish.
Start with a Level Foundation: The Wall Molding
The success of your entire drop ceiling hangs on one thing: a perfectly level starting point. This is non-negotiable. The wall molding is an L-shaped metal track that runs around the entire perimeter of the room, and it’s what supports the edges of your grid. Getting this part right is the first and most critical step.
Your best friend here is a laser level. Use it to project a crisp, unwavering line all around the room, marking the finished height of your new ceiling.
- Find Your Clearance: First, measure down from the floor joists to find the lowest-hanging obstacle, like a drain pipe or HVAC duct. Your ceiling grid needs to sit at least 3-4 inches below that point. This gives you just enough wiggle room to tilt the panels and pop them into place later.
- Mark the Perimeter: Once you've set your laser line, trace it with a pencil every few feet. No laser? No problem. A chalk line snapped between two level points works just as well.
- Install the Molding: Cut the wall molding to length with a pair of tin snips. Fasten it securely into the wall studs, making sure the bottom edge of the molding sits perfectly on your level line.
Pro Tip: Never assume your floor or the joists above are level—they almost never are. Always, always trust your level line, not your eye. Nailing this one step prevents any weird sags or slopes in the finished grid.
Hanging the Grid: Support Wires and Main Runners
With your perimeter locked in, it's time to build the core structure. This means hanging support wires from the joists and then attaching the main "runners" or "tees," which are the long, primary pieces of the grid.
First, stretch a mason's string tightly across the room from one side of the wall molding to the other. This string is now your guide for setting the height of all the main runners. Install eye lag screws into the sides of the joists every 4 feet along the path where each main runner will hang.
Now, attach your hanger wires to the eye screws, leaving them a little long for now. You can start hanging the main runners. Rest one end on the wall molding and attach the hanger wires along its length, using that guide string to make sure it's perfectly level and straight. The runners have pre-punched holes that make attaching the wires a breeze.
Assembling the Grid with Cross Tees
Your main runners should now be hanging parallel to each other, typically 4 feet apart. The next step is to connect them with the shorter "cross tees," which creates the 2x2 or 2x4 foot openings for your tiles. These pieces are designed with clever interlocking tabs that just click right into the slots on the main runners.
- For a 2x4 Grid: You'll install 4-foot cross tees every 2 feet, perpendicular to the main runners.
- For a 2x2 Grid: You'll first install 4-foot cross tees every 2 feet, and then snap shorter 2-foot cross tees between those to create the final square pattern.
This part of the job moves surprisingly fast once you get a rhythm going. The most important thing is to keep everything square. Every few sections, grab a framing square to check the corners of your grid. This simple check stops you from ending up with a skewed, diamond-shaped grid that will cause major headaches later.
Cutting and Fitting the Border Panels
The final step is cutting the border panels—the custom-sized tiles that fill the gap between your last full grid opening and the wall. Since walls are almost never perfectly straight, measure the opening from the grid to the wall molding in a few different spots.
Transfer those measurements to a ceiling panel and use a sharp utility knife with a fresh blade to make your cuts. For the cleanest edge, always cut the panel with the finished side facing up. The cut edge will rest on the wall molding, totally hidden from view, while the clean, factory edge locks neatly into the grid.
As more homeowners finish their basements, the demand for better materials has exploded. In fact, the ceiling tiles market is forecasted to grow from USD 8.03 billion in 2024 to USD 19.24 billion by 2033, driven by renovations just like this one. This growth reflects a huge consumer interest in materials that are durable, easy to install, and also improve a room's acoustics and energy efficiency. You can learn more about the growth in ceiling tile innovation on custommarketinsights.com. For you, this boom means more stylish and high-performance options than ever, from panels that mimic coffered wood to ones with sleek, modern textures.
Beyond Drywall: Creative Finishes Like Open Ceilings and Planks
If a standard drywall or drop ceiling just doesn't fit the vibe you're going for, don't worry. There are some fantastic alternatives that can bring a ton of character to your basement. Stepping away from the conventional choices opens up a whole world of design possibilities—from industrial-chic to rustic warmth—that can make your lower level the most interesting part of the house.
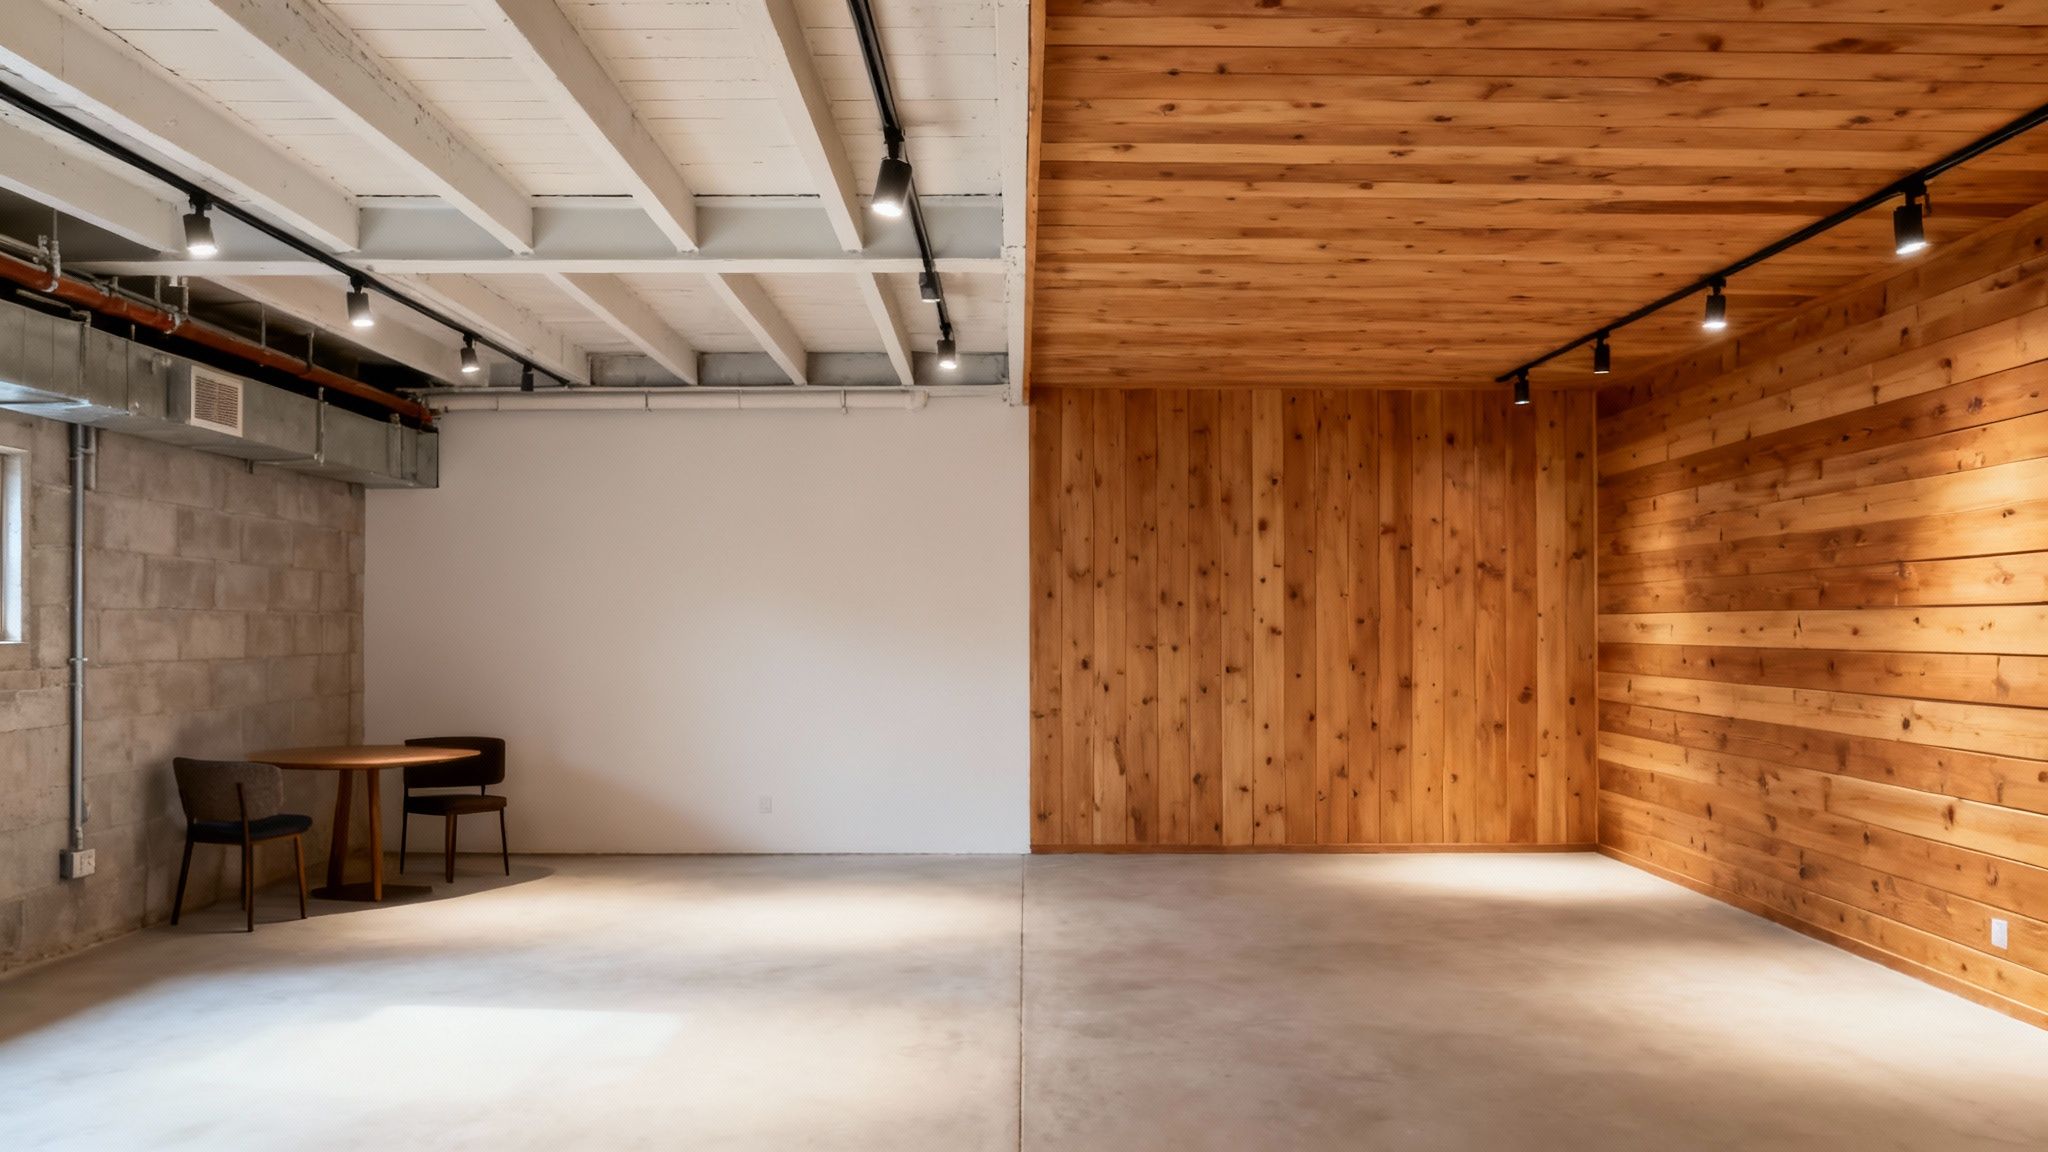
These approaches are perfect if you want to make a statement. You can either embrace the raw, structural bones of your home or layer in the rich, inviting texture of natural wood. Let's look at a couple of the most popular ways to do it.
The Industrial Vibe of an Open Ceiling
One of my favorite and most budget-friendly options is the open-concept, or "industrial," ceiling. The idea is simple: instead of covering up all the joists, pipes, and ductwork, you make them part of the design. This involves a serious cleaning and then painting everything overhead with a single, unifying color to make it look intentional.
Trust me, a paint sprayer is your best friend for this job. Trying to get a brush or roller into all those nooks and crannies is a recipe for frustration. A sprayer gives you a clean, even coat. Matte black is the go-to color because it makes the ceiling recede, creating a sense of height and doing a great job of hiding imperfections. If you want something brighter, white or light gray can give you an airy, "urban loft" feel while keeping that cool industrial edge.
The real secret to a great-looking open ceiling isn't the paint—it's the prep work. Take the time to meticulously clean every surface overhead. A shop vac with a brush attachment and a good degreasing cleaner will remove years of dust and grime, ensuring your paint adheres properly for a lasting finish.
The Warmth of Wood Planks and Shiplap
For a cozier, more finished feel, you really can't beat the character of wood. Installing tongue-and-groove planks or classic shiplap directly on your basement ceiling adds incredible warmth and architectural detail. It's a move that instantly elevates the space from "basement" to a true lower level, perfect for anything from a modern farmhouse den to a rustic mountain retreat.
The key to a professional-looking installation is creating a flat, stable surface to work with. You'll typically start by fastening 1x3 furring strips across the joists (perpendicular to them). This framework gives you a perfectly level plane for attaching the planks and smooths out any minor inconsistencies in your joists. From there, you just fasten the planks to the strips.
You have total control over the final look:
- Natural Stain: Let the beautiful grain of the wood be the star with a simple clear coat or a light stain.
- Painted Finish: You can't go wrong with classic white shiplap for a bright, spacious feel, or go bold with a dark, dramatic color.
While the materials might cost a bit more than drywall, many wood plank systems are designed with the DIYer in mind. If you're hunting for more unique ways to add personality down there, check out our guide full of inspiring basement finish ideas.
Modern and Specialized Finishes
Beyond the industrial and rustic looks, some really innovative options are starting to catch on. Stretch ceilings, for example, use a lightweight PVC membrane that’s stretched across a track system. The result is a perfectly smooth, flawless modern surface that can be installed quickly and can even incorporate complex lighting designs.
These newer systems show just how much the market for basement finishes is evolving. In fact, the stretch ceiling market alone is projected to hit USD 1.21 billion by 2033, which shows how many homeowners are looking for unique aesthetics and practical solutions. You can explore more on the rise of these innovative ceiling systems at sphericalinsights.com. When it comes to finishing basement ceilings, these alternatives prove your creativity is the only real limit.
Common Questions About Finishing Basement Ceilings
When you start digging into the details of finishing a basement ceiling, a few key questions always seem to pop up. Getting the right answers before you start can save you a world of headaches and rework down the line. Let's walk through some of the things homeowners ask us most often.
Thinking through these points will help you move forward with confidence, whether you're trying to figure out headroom, permits, or how to get the best bang for your buck.
Can I Just Paint My Exposed Basement Ceiling?
You absolutely can. This is the whole idea behind the "industrial" or "open-ceiling" look, and it's a brilliant, cost-effective solution. The process involves a deep clean of all the joists, pipes, and ductwork, followed by spraying everything a single, uniform color. Matte black, white, and dark gray are the most popular choices.
This method is a lifesaver for basements with low clearance because you don't sacrifice even a fraction of an inch of headroom. Just know that the prep work is everything—the final paint job will only look as good as the surfaces underneath, so a thorough cleaning is non-negotiable.
Do I Need a Permit for Finishing My Basement Ceiling?
This is a big one. The short answer is almost always yes, especially if your project involves running new electrical wiring or making any structural changes. Most local building departments, including those right here in Orem and Provo, see a basement finish as creating new, livable space.
Getting a permit isn't just about bureaucracy; it’s about safety. It ensures a professional inspector signs off on critical elements like:
- Safe electrical work: All junction boxes must stay accessible. You can't just bury them behind drywall.
- Egress windows: If any part of the basement will be a bedroom, you need a proper emergency exit.
- Minimum ceiling height: Most building codes require a minimum height of 7 feet for a finished, habitable room.
Do yourself a favor and call your local city office before you buy a single 2x4. Skipping the permit can cause major issues when it’s time to sell your home.
How Much Value Does a Finished Basement Add to a Home?
Finishing your basement is one of the better home improvement projects for return on investment. Many homeowners recoup over 70% of the project's cost when they sell. You're adding valuable, functional square footage, which is a huge draw for buyers needing a home office, gym, or a second family room. As you plan your ceiling investment, it’s helpful to understand how these improvements play into your home's market price and learn how to accurately price a home for sale.
A thoughtfully finished basement does more than just add square footage—it boosts the entire property's appeal and functionality, making it a standout in a crowded market. A great-looking ceiling is a huge part of that first impression.
What Is the Best Way to Soundproof a Basement Ceiling?
The thud of footsteps from upstairs is probably the number one complaint about finished basements. The best way to tackle this is by creating separation and adding mass. A great technique is to attach resilient channels to the joists before hanging the drywall. These channels create a small air gap that stops vibrations in their tracks.
For the best results, you'll want to fill the joist cavities with insulation designed for sound absorption, like mineral wool or fiberglass batts. Combining these two methods is incredibly effective and will give you a genuinely quiet, peaceful basement space.
At Northpoint Construction, we know that finishing a basement is a major investment in your property. If you're in the Orem, Provo, or Lehi area and want a professional, code-compliant finish without the DIY stress, our team is here to help. Contact us to turn your vision into a beautiful, functional space. https://buildnp.com