
Create Your Ideal Home Office in Basement | Expert Tips
A basement home office can be a game-changer—a truly dedicated, quiet workspace, tucked away from the chaos of daily life. It’s an amazing opportunity to create a zone for deep focus, but it’s not without its challenges. Before you dive in, you really need to weigh the pros and cons to see if it’s the right move for you.
Is a Basement Office Right for You?
Turning an unused basement into a command center for your work is a popular project these days, and for good reason. With so many of us working from home, the need for a quality office space is at an all-time high. This isn't just a fleeting trend; millions have shifted to remote work, making a dedicated, functional space a top priority for homeowners. You can find more insights on the home office trend and how it's reshaping our homes.
But before you start mentally framing walls and picking out paint colors, you need to get real about your space and your own work habits. A basement office isn't a perfect fit for everyone, and its success hinges on tackling a few key issues right from the start.
Evaluating the Pros and Cons
The biggest win for a basement office is separation. Being physically downstairs, away from the main living areas, creates a powerful mental shift. It helps you switch into "work mode" and tune out the distractions of laundry, kids, or the TV in the next room.
On the flip side, that same isolation can feel a bit... isolating. For some, a basement can feel disconnected or gloomy, which can be a real drag on motivation and mood. It’s a very personal thing, so you have to be honest with yourself.
Here's a quick rundown of what to think about:
- Noise Level: Basements are naturally quiet. This is a huge plus for taking calls and getting into a state of deep work without interruption.
- Natural Light: This is the big one. Most basements are starved for sunlight. You absolutely cannot skimp on a solid lighting plan to make the space feel bright and inviting.
- Moisture and Air Quality: Basements are notorious for dampness. You must do a thorough check for any moisture issues and plan for waterproofing if needed. This isn't a step you can skip.
- Cost vs. Convenience: You're using square footage you already have, which is great. But finishing a basement properly still costs money for things like insulation, drywall, flooring, and electrical work.
Ultimately, the decision comes down to a trade-off. Are you prepared to invest the time and money to create a dry, well-lit, and comfortable space in exchange for a truly private and productive work zone? Answering that question honestly is the first step toward a successful project.
Laying a Dry and Healthy Foundation for Your Workspace
If there's one thing that can derail a basement office project before it even starts, it's moisture. This is the absolute first hurdle to clear. If you skip this part, you're setting yourself up for musty smells, humidity that's brutal on your electronics, and even mold. A dry basement isn't just nice to have; it's the bedrock of a healthy, usable office.
Before a single 2x4 goes up, you need to become a moisture detective. Your nose is often the best first tool—that distinct "damp basement" smell is a dead giveaway. Beyond that, keep an eye out for tell-tale signs like dark water stains on the concrete, a chalky white powder (that's efflorescence), or any paint that's bubbling or peeling off the walls.
There’s a simple trick I always recommend to clients. Grab some plastic sheeting and duct tape. Tape a one-foot square of plastic tightly to a concrete wall and another to the floor, sealing all the edges. Leave it for a day or two. When you peel it back, check for condensation. If the underside of the plastic is wet, water is coming through the concrete. If the top side is wet, the air in your basement is just too humid.
Finding and Fixing the Source of the Problem
Once you know you have a moisture issue, the next step is tracking it to its source. Most water problems in a basement come from a handful of usual suspects.
- Leaks and Cracks: Get up close and personal with your foundation walls. Even tiny, hairline cracks can act as a superhighway for water, especially after a heavy rain. These can often be sealed for good with professional epoxy or polyurethane injections.
- Condensation: This is what happens when warm, humid air hits those naturally cool basement walls. The long-term fix here is twofold: improve your air circulation and properly insulate the foundation walls.
- Bad Exterior Drainage: More often than not, the problem starts outside. Check your gutters—are they clean? Do your downspouts dump water at least five to six feet away from the foundation? The soil around your house should also have a gentle slope away from the walls, not toward them.
Don't think of a high-quality dehumidifier as an optional extra; it's essential equipment for any basement office. Your goal should be to maintain a relative humidity between 30% and 50%. This sweet spot stops mold in its tracks and keeps the air comfortable for you and safe for your computer gear.
Waterproofing and Choosing the Right Floor
After you've dealt with any active leaks and sorted out your drainage, it's time to add a layer of defense inside. This usually starts with applying a silicate-based concrete sealer to the walls and floor. It soaks into the concrete's pores and creates an internal barrier against moisture.
Another crucial step is installing a vapor barrier. This is basically a thick sheet of plastic that goes up against the concrete walls before you build your frames. It’s a simple but incredibly effective way to keep moisture from ever reaching your insulation and drywall.
Finally, think carefully about your flooring. I’ve seen too many people put down standard carpet only to rip it out a few years later because it became a damp, moldy mess. You need to choose materials designed for a below-grade environment.
Here are a few options that hold up beautifully in basements:
- Luxury Vinyl Plank (LVP): This is my go-to recommendation. It's completely waterproof, tough as nails, and comes in some surprisingly realistic wood and stone looks.
- Engineered Hardwood: If you absolutely love the feel of real wood, make sure you get an engineered version specifically rated for below-grade installations. Solid hardwood is a definite no-go.
- Polished or Stained Concrete: For a more modern, industrial vibe, just embrace the concrete itself. When polished or stained, it's an incredibly durable, stylish, and totally waterproof flooring solution.
Making the right choice here from the start saves you a world of headaches later. If you want to dive deeper, our complete guide on the best basement flooring options breaks down all the pros and cons to help you decide.
Handling Permits, Framing, and Insulation
With the moisture handled, it's time for the exciting part—turning that empty space into an actual room. This is where your basement home office starts to take shape, with walls going up and the layout becoming real. But before you get carried away, this stage is all about being deliberate with permits, structure, and comfort.
First things first: your local building department. Before you even think about buying a single 2x4, you need to talk to them. Any project that adds walls or electrical wiring almost certainly requires a building permit. I’ve seen homeowners try to skip this step, and it can lead to massive headaches later, from fines to having to rip out all your hard work when it's time to sell.
Getting the permit is usually pretty simple. You'll need a basic sketch of your plan, showing the dimensions and where the office will be. They're just making sure your project is safe and meets code, especially for things like having a proper exit in case of an emergency.
Framing Your Future Workspace
Permit in hand? Great, now you can start framing. This is where you physically build the skeleton of your office. A lot of people default to wood studs, but I’m a big fan of using steel studs in a basement. They're lightweight, perfectly straight, and, most importantly, they're completely immune to moisture, mold, and pests. It's a smart upgrade for any below-grade space.
Think about the flow of the room. Do you need a fully enclosed, quiet sanctuary, or would a half-wall keep the basement feeling open while still marking out your dedicated workspace? If you're dreaming of built-in bookshelves or a recessed desk nook, now is the time to frame them out. Planning for these details at this stage makes the final result look so much more professional.
The Critical Role of Insulation
In a basement office, insulation is doing more than just keeping you warm. It's your secret weapon for soundproofing. Properly insulating the walls and ceiling can make your office feel like a quiet retreat, completely separate from the sounds of kids playing or the TV blaring on the floor above.
Investing in a comfortable, quiet space makes every other choice—like picking the right chair or desk—even more impactful.
When it comes to insulating, you have several options, each with its own strengths for a basement environment.
Insulation Options for Your Basement Office
Choosing the right insulation can feel a bit overwhelming, but breaking it down by type makes it much clearer. This table compares some of the most common choices for basements.
| Rigid Foam Board | Exterior foundation walls | Excellent thermal break; moisture resistant; easy to install against concrete. | Higher upfront cost; not great for soundproofing on its own. |
| Fiberglass Batts | In between wall studs | Inexpensive; widely available; good thermal performance. | Can lose R-value if it gets damp; requires a vapor barrier. |
| Rockwool (Mineral Wool) | Soundproofing walls & ceiling | Superior sound dampening; fire-resistant; moisture-resistant. | More expensive than fiberglass; can be dusty to install. |
| Spray Foam | Sealing rim joists & gaps | Creates an airtight seal; high R-value per inch; moisture barrier. | Requires professional installation; most expensive option. |
For a truly effective setup, a combination approach often works best. For example, use rigid foam against the concrete, then build your stud wall and fill it with Rockwool for maximum thermal and acoustic performance.
Here are the key areas to focus on for a perfectly insulated office:
- Exterior Walls: Start with rigid foam board right against the concrete foundation. This creates a crucial thermal break. Then, install batt insulation (like fiberglass or Rockwool) between the studs of your new frame.
- Ceiling: This is where you win the battle against noise. Pack the space between the ceiling joists with sound-dampening insulation to dramatically reduce the sound of footsteps from above.
- Rim Joists: Don’t overlook the small cavities where the house frame sits on the foundation. Use spray foam to seal and insulate these spots—it’s the single best way to stop cold drafts in their tracks.
This push for better home workspaces is part of a massive trend. The global home office spending market is projected to skyrocket from USD 32.3 billion in 2025 to over USD 144.2 billion by 2035. It's clear that high-quality, permanent home offices are becoming the new standard.
If you’re working with a tight budget, don’t worry. Our guide on how to finish a basement on a budget is packed with tips to help you save money without compromising on these crucial steps.
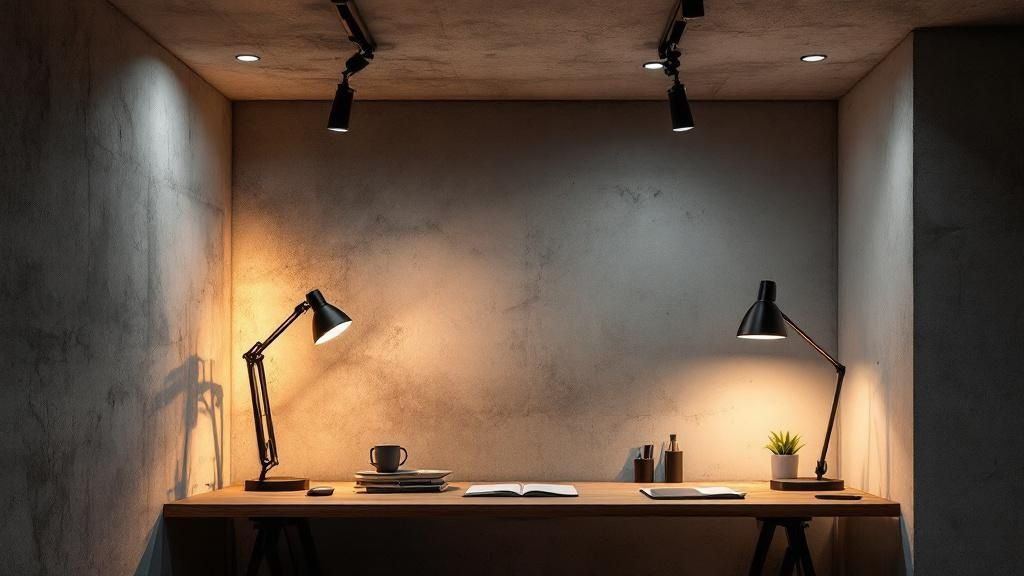
Designing a Lighting and Electrical Plan
If there’s one thing that makes a basement office feel like, well, a basement, it’s bad lighting. Getting the lighting and electrical plan right is what will transform the space from a functional cave into a place you genuinely want to work. This goes way beyond just screwing in a few bright bulbs. We're talking about creating layers of light that work together to kill shadows, cut down on eye strain, and frankly, make the space feel energizing.
The best way to tackle this is by thinking in three distinct layers. When you get them all working together, the result is a perfectly balanced and inviting room.
- Ambient Lighting: This is your room’s primary light source. In a basement with low ceilings, recessed LED pot lights are the gold standard. They give you clean, even light across the entire office without eating into that valuable headroom.
- Task Lighting: This is all about focused light for your actual work. A high-quality, adjustable desk lamp isn't optional; it's essential. It puts light exactly where you need it for reading documents and eliminates that annoying glare on your computer screen.
- Accent Lighting: Now for the fun part. This layer adds personality and depth. Think about a cool floor lamp in a reading nook or track lighting pointed at a piece of art on the wall. It’s what makes the space feel designed, not just assembled.
Planning Your Electrical Outlets
Don't just think about the lights—you have to map out your electrical needs just as carefully. I’ve seen it time and time again: people drastically underestimate the number of outlets they'll need. Sit down and list everything that needs power: your computer, one or two monitors, a printer, phone charger, desk lamp, maybe even a small space heater or fan. It adds up fast.
A good rule of thumb is to install a quad outlet (a block of four) right behind your desk and at least one standard duplex outlet on every other wall. This gives you incredible flexibility for future furniture arrangements. Spreading them out ensures you won’t have a snake pit of extension cords, which are messy and a serious fire hazard.
Pro Tip: For any home office with a lot of tech, insist on a dedicated 20-amp circuit. This gives your computer and other sensitive electronics a clean, uninterrupted power supply. You won't have to worry about the breaker tripping every time someone fires up a power tool somewhere else in the house.
Advanced Lighting and Power Considerations
With the fundamentals in place, a few extra touches can make a world of difference. Dimmer switches for your ambient lighting are a must. They let you dial in the perfect brightness, whether you're trying to focus in the middle of the day or wind down in the evening.
You could also explore smart home features. Smart plugs and bulbs give you control over your lights and devices with your phone or voice commands—a nice little convenience to add to your workflow. This level of detail is similar to what you'd see in a high-end entertainment space; you can find some overlapping ideas in our guide to designing a basement home theater.
Ultimately, the goal is an electrical and lighting system you never even have to think about. When every switch and outlet is exactly where you need it, you can keep your focus where it belongs: on your work.
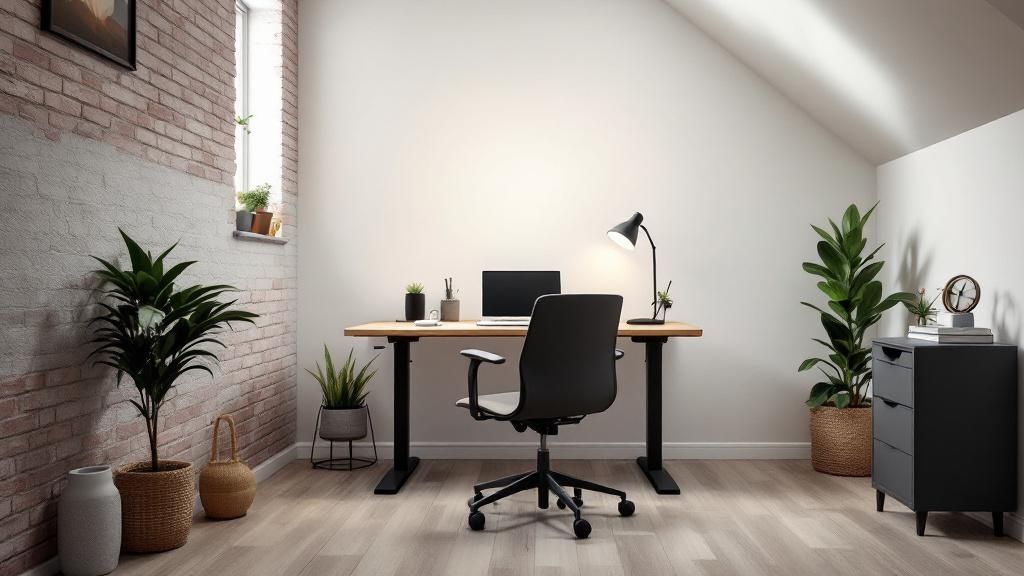
Choosing Furniture and Creating Your Layout
Alright, the heavy lifting is done. The walls are up, the lights are in, and the outlets are ready to go. Now comes the fun part: turning that blank canvas into a functional, comfortable home office. This is where you pick your tools—the desk, the chair, the storage—and arrange them in a way that actually helps you get work done.
A truly productive home office in a basement is so much more than just a place to put your laptop. It's an environment you build for focus.
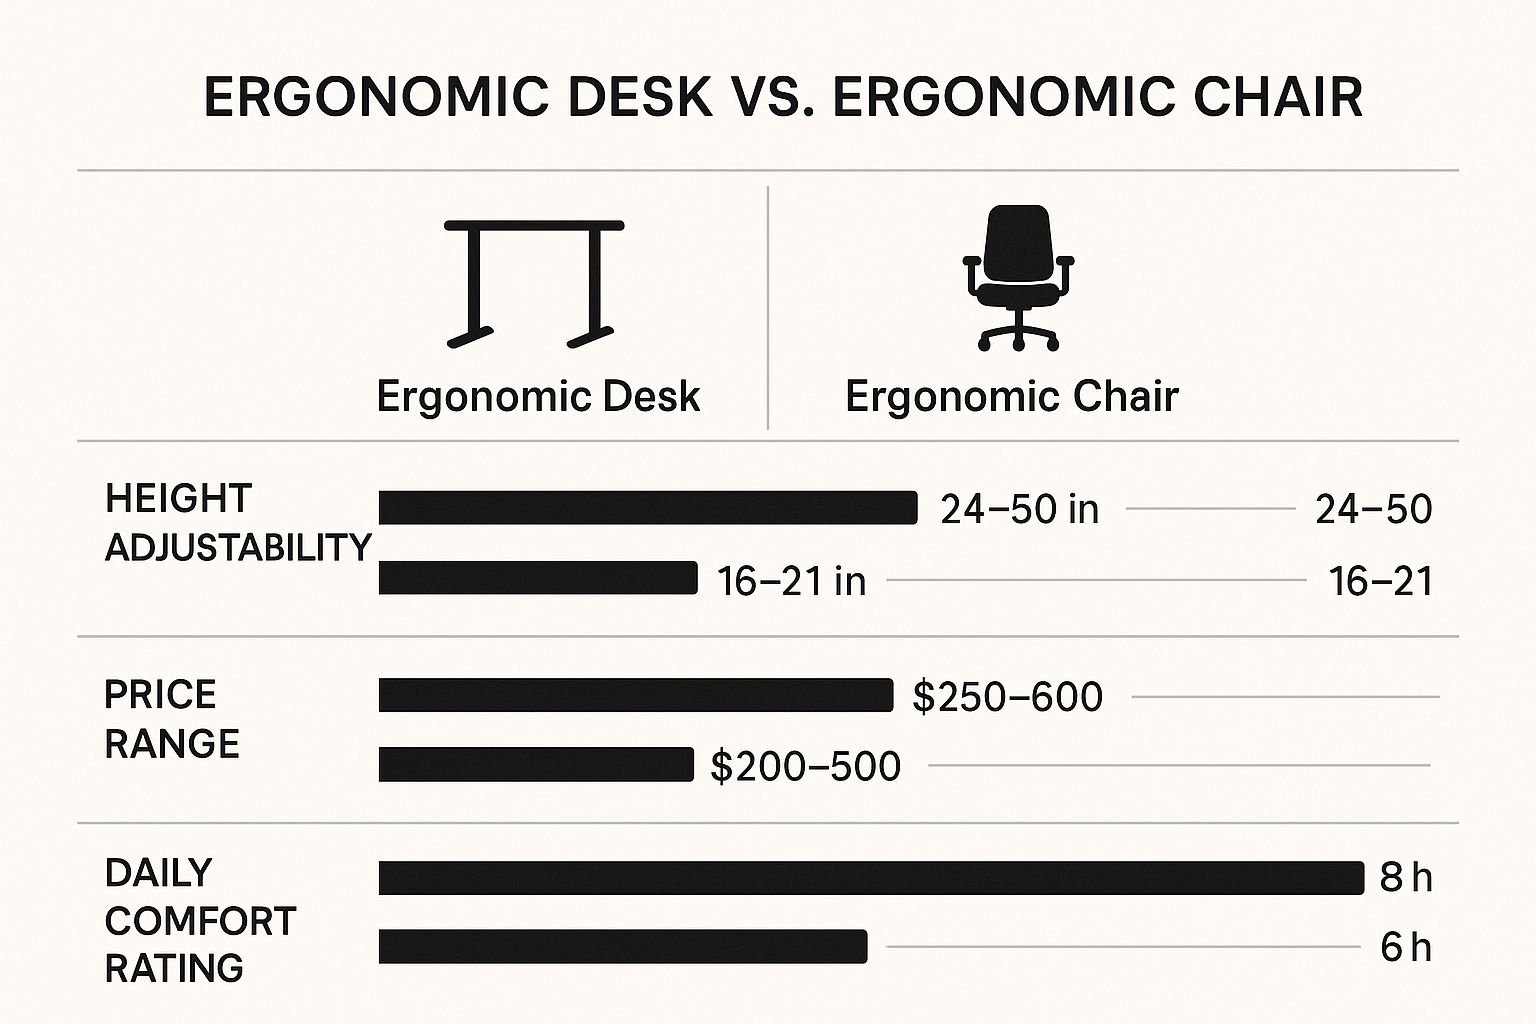
Your Body Will Thank You: Nailing the Ergonomics
Let’s be honest, you're going to spend a lot of time in this space. So, the first and most critical investment is in furniture that won’t leave you with a sore back. Think of ergonomics not as a buzzword, but as a long-term strategy for your own well-being.
Your chair is the absolute cornerstone. I always tell people to look for a chair with adjustable everything: height, lumbar support, and armrests. The goal is simple: feet flat on the floor, knees at a 90-degree angle. A good chair is the difference between a productive eight-hour day and tapping out at lunch because your shoulders are screaming.
Next up is the desk. I’m a huge advocate for adjustable-height or standing desks. Being able to switch from sitting to standing throughout the day is a massive boost for your energy and circulation. When you are sitting, make sure your elbows can rest at a 90-degree angle with your wrists straight as you type. It seems like a small detail, but it makes all the difference.
This shift towards better home office gear isn't just a trend; it's a massive market movement. The global home office furniture market was valued at around USD 23 billion in 2022 and is projected to hit USD 42.75 billion by 2030. That tells you people are finally realizing that a quality workspace directly impacts their health and productivity. You can dive deeper into this growing furniture market on Mordor Intelligence.
An ergonomic setup isn't about having the fanciest gear. It's about creating a sustainable workspace for your body. When you're comfortable, you can stay in a state of flow for much longer without physical pain breaking your concentration.
Smart Layouts for Awkward Basement Spaces
With your core pieces selected, it's time to think about placement. Basements are notorious for their odd shapes—long and skinny, L-shaped, or sometimes just a big, undefined cavern. You can't just plop a desk in the middle and call it a day. The key is to create zones.
Here are a few layout ideas I've seen work well in common basement footprints:
- Long and Narrow: Stick your desk at one of the far ends, facing the wall. This instantly cuts down on visual distractions. Then, use the long walls for vertical storage—think tall, narrow bookshelves or floating shelves. This keeps the floor clear and tricks the eye into thinking the space is wider than it is.
- L-Shaped: This is a gift for zoning! The smaller leg of the "L" is perfect for your primary desk area, creating a cozy, focused nook. The longer section can then become a secondary space—maybe a small meeting area with a couple of chairs, a spot for your printer and supplies, or even a reading corner to decompress.
- Open Concept: For a big, open basement, you have to create your own boundaries. A large area rug is your best friend here; it visually anchors the entire office zone. Try placing a credenza or a low bookshelf behind your desk to act as a soft "wall," separating your workspace from a future play area or home gym.
No matter what shape you're working with, always think vertically. Basements can feel a bit cave-like, but drawing the eye upward with tall furniture, art, or shelving instantly makes the room feel taller and more open. It’s the smartest way to maximize every inch of your new office.
Answering Those Lingering Basement Office Questions
Even with a perfect plan on paper, a few questions always seem to pop up during a basement project. When you're turning that space downstairs into a professional home office, there are a few common hurdles that nearly everyone faces. Getting these final details right is what makes the difference between an office you tolerate and one you love.
Let's walk through some of the most common issues that come up. Nailing these will ensure your new workspace is comfortable, functional, and ready for whatever your workday throws at it.
How Can I Get Decent Internet Down There?
This is probably the #1 technical headache. Concrete walls and floors are basically kryptonite for Wi-Fi signals, which means you're staring down the barrel of slow speeds and choppy video calls. In a home office, a spotty connection is a non-starter.
You might be tempted to just plug in a simple Wi-Fi extender, but those often just amplify an already weak signal. If you want a rock-solid connection for important calls and big file transfers, you need a better solution.
- Mesh Wi-Fi System: This is the go-to for most homes now. A mesh system uses a few different "nodes" placed around your house to create one seamless, powerful network that covers every nook and cranny—including the basement.
- Powerline Adapter: These are pretty slick. A powerline adapter uses your home's own electrical wiring to carry the internet signal. You plug one in near your router and the other in your office, giving you a stable, almost-wired connection without drilling holes.
- Hardwire with Ethernet: For pure, unadulterated speed and reliability, you just can't beat running a dedicated Ethernet cable from your router straight to your office. It's more of an upfront job, but it completely eliminates any connection worries.
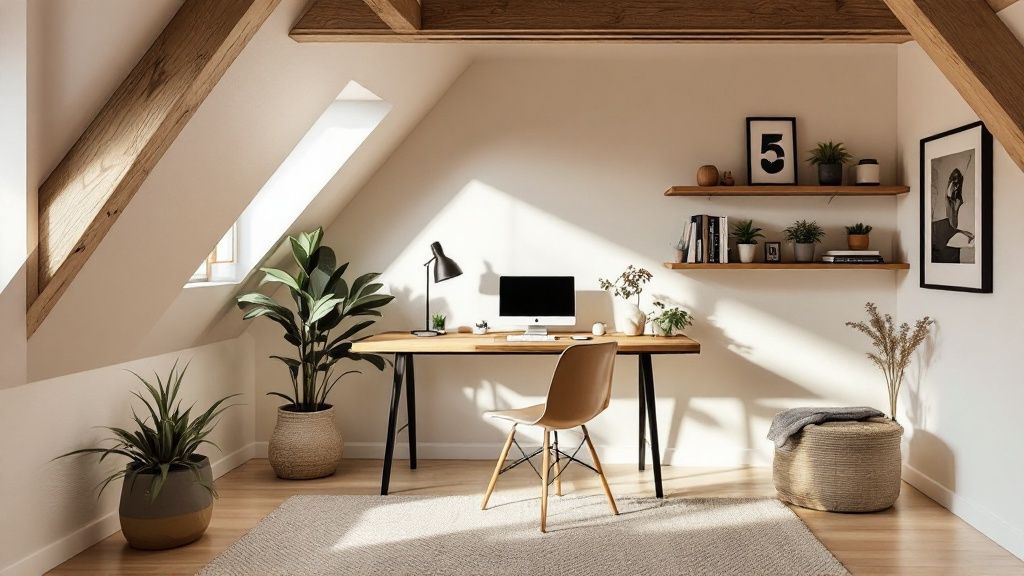
How Do I Keep My Office From Feeling Like a Cold Dungeon?
Ah, the "dungeon" vibe. It's a real risk, but one you can absolutely avoid with some thoughtful design. Good insulation is your foundation, but the finishing touches are what really warm up the space and give it personality.
You have to think beyond just a desk and a chair. You're creating an atmosphere. Start with warm paint colors—soft whites, greiges, or maybe a moody, dark accent wall can feel incredibly cozy. Then, layer in different textures. Think about a plush area rug underfoot, a comfortable fabric for your chair, or the natural grain of wood furniture. And don't forget to bring in a bit of life with plants that don't need a ton of sun, like a snake plant or a ZZ plant.
The key is to make the space feel deliberate, not like a forgotten corner of the house. When you layer in personal touches, great lighting, and comfortable materials, you forget you're in a basement. It just becomes your office.
What Should I Do About Air Quality and Radon?
This is a big one. Since basements don't get a lot of natural airflow, air quality is something to take seriously. A good dehumidifier is non-negotiable; it's your first line of defense against that damp, musty feeling and potential mold. On top of that, an air purifier with a HEPA filter is a great investment to trap dust, allergens, and other gunk floating around.
You also need to check for radon. It's a naturally occurring gas that's invisible and odorless, and it can seep in from the ground and build up in basements. You can grab an inexpensive home test kit from any hardware store. If the test shows high levels, don't panic—a professional radon mitigation system is a common and highly effective fix that will give you total peace of mind.
At Northpoint Construction, we've helped countless homeowners turn their challenging basements into incredible, functional home offices. If you're in Orem, Provo, or the surrounding Utah areas and are ready to get started, we'd love to help. Visit us online to start planning your project!