
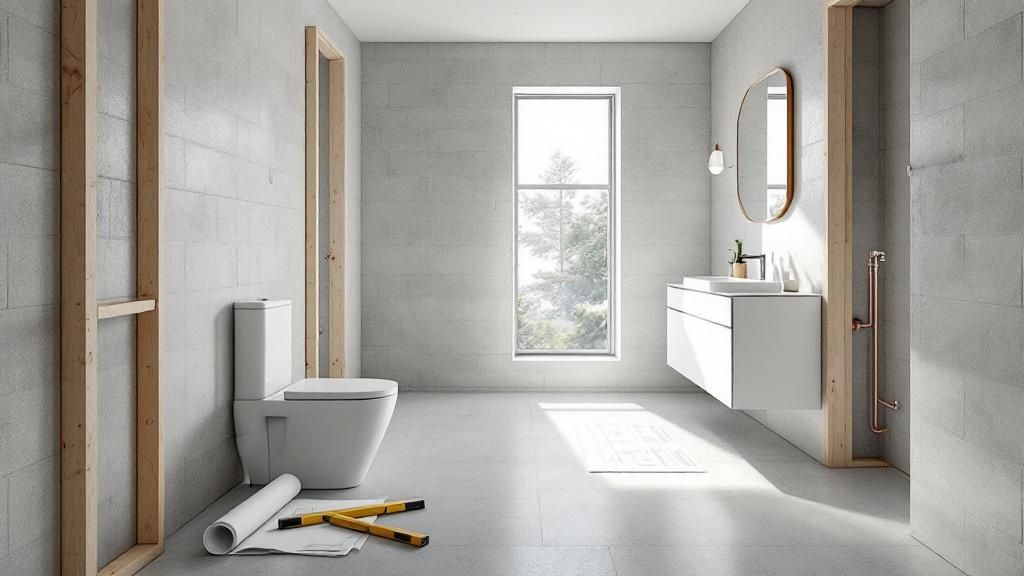
Putting a bathroom in your basement is a game-changer. It transforms a forgotten space into a genuinely usable part of your home. But getting it right means doing your homework before a single hammer swings. This is all about smart planning—figuring out where it goes, how it will work, and what it will cost.
Laying the Groundwork for Your Project
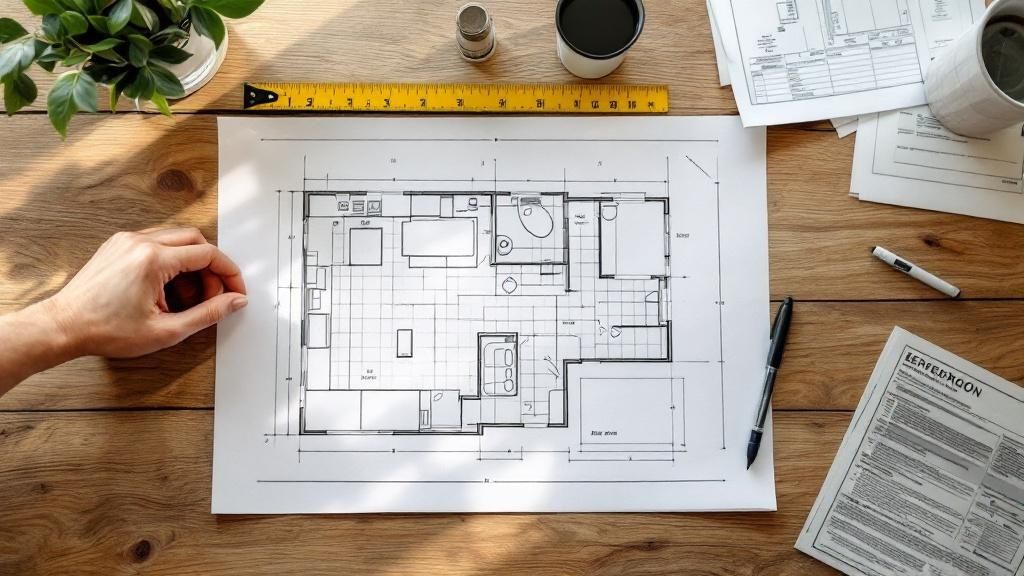
Before you even think about buying a toilet, you need a solid plan. I've seen too many projects go off the rails because this crucial first step was rushed. The decisions you make right now will dictate your budget, your timeline, and ultimately, how happy you are with the finished bathroom.
Finding the Best Location
The golden rule of basement plumbing? Work with what you've got. The easiest and most cost-effective spot for your new bathroom is almost always directly below an existing bathroom or kitchen on the main floor. Why? Because you can tap directly into the main drain and vent lines that are already there.
If you place the bathroom on the opposite side of the basement, you’re signing up for a lot more work—breaking up way more concrete for new drain lines and running longer pipes. That means more time and more money. Don't forget about electricity, either; being closer to your main electrical panel makes the wiring job simpler.
Finally, look up. You need enough headroom to make the space feel comfortable, not like a cave. Aim for at least 7 feet of ceiling height after all the finishing is done.
Creating a Functional Floor Plan
Once you've picked a spot, it's time to map it out. You don't need professional drafting software; good old-fashioned graph paper works just fine. Measure your space and start thinking about the core components.
Here are a few essential clearances to keep in mind:
- The Toilet: Plan for at least 21 inches of clear space in front of it. It also needs 15 inches from its center line to any wall or fixture next to it.
- The Vanity: Most are between 18-21 inches deep. Make sure you can open the vanity doors (and the main bathroom door) without them colliding.
- The Shower: A 36x36 inch shower is a common and comfortable minimum. If you're tight on space, a corner shower unit can be a real lifesaver.
Arrange these fixtures logically to create a room that flows well. The goal is a bathroom that’s easy to use, not an obstacle course.
My Go-To Trick: Grab a roll of painter's tape and mark the footprint of the toilet, vanity, and shower right on the concrete floor. It’s a simple way to get a real feel for the space and catch any awkward layout issues before you’ve built a single wall.
Navigating Building Permits
Let's be clear: any project that involves adding new plumbing and electrical circuits requires a permit. Trying to skip this step is a classic mistake that can lead to big fines and major headaches when you eventually sell your house.
The permit process isn't just bureaucracy; it ensures the work is done safely and to code. Your local building department will want to review your floor plan and will have specific rules for things like ventilation fans and GFCI outlets. Get in touch with them early on. It’ll save you a lot of time and prevent delays down the road.
Building a Realistic Budget
Now for the big question: what’s this all going to cost? A basement bathroom has a huge price range, mostly driven by the complexity of the plumbing and the quality of the finishes you choose.
To give you a ballpark, adding a new bathroom can run anywhere from $10,000 to $50,000. A small half-bath (think 15-20 sq ft) might land in the $8,000 to $12,000 range. For a mid-sized full bathroom, you're more likely looking at $18,000 to $28,000.
For a more precise projection based on your specific plans, using a basement finishing cost calculator is a great way to dial in your numbers.
To help you see where the money goes, here's a typical breakdown of costs you can expect.
Basement Bathroom Budget Breakdown
| Plumbing & Drain Work | $3,000 - $8,000+ | This is the biggest variable. Costs rise if you need to break a lot of concrete or install a sewage ejector pump. |
| Framing & Drywall | $1,500 - $4,000 | Includes materials and labor for walls and ceiling. More complex layouts will cost more. |
| Electrical Work | $1,000 - $3,000 | Covers new circuits, outlets, lighting, and a ventilation fan. |
| Fixtures (Toilet, Sink, Shower) | $1,000 - $5,000+ | Ranges from basic, builder-grade fixtures to high-end custom shower systems and vanities. |
| Tile & Flooring | $1,000 - $4,000 | Material choice is the biggest factor here. Luxury vinyl plank is often cheaper than custom tile work. |
| Permits & Inspections | $400 - $1,500 | Varies widely by municipality. Don't forget to factor this in! |
| Finishing (Paint, Trim, etc.) | $600 - $2,000 | The final touches that complete the room. |
This table gives you a framework, but remember that labor costs in your area and the materials you select will have the final say on your total project cost.
Tackling Basement Plumbing and Drainage
Let's be honest: the plumbing is where most basement bathroom projects either succeed or become a real headache. It's the heart of the operation, but because you're below ground, it comes with a unique set of challenges.
Your home's plumbing on the upper floors has a major advantage: gravity. Waste flows downhill naturally to your main sewer line. In a basement, you're often below that line, which means gravity is working against you. This is where things get interesting, but don't worry—it's a problem that's been solved for decades.
The fundamental rule of thumb for any plumbing job is that every drain needs a vent. The drainpipe carries waste away, while the vent pipe lets air into the system. Without a proper vent, you'll create a vacuum that can stop your drains from flowing and, even worse, siphon the water right out of your fixture traps, letting nasty sewer gas seep into your home. Nailing this drain-waste-vent (DWV) system is absolutely non-negotiable.
This infographic breaks down the essential steps for installing new drain lines, from that first concrete cut to the final pipe connection.
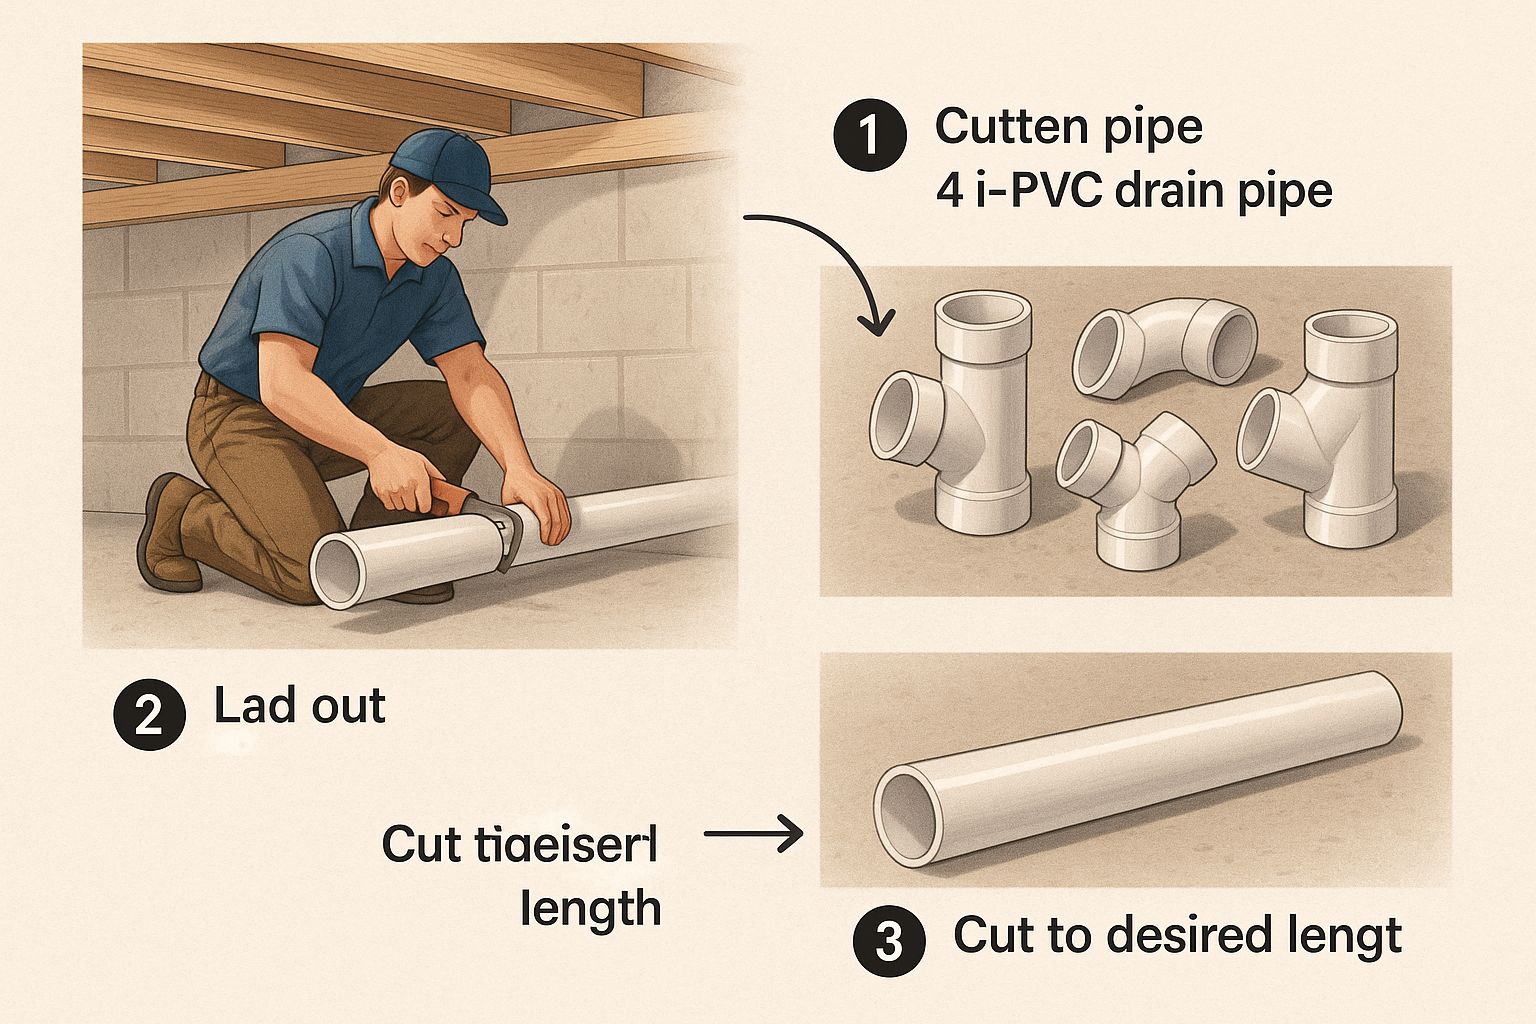
As you can see, getting the slope right and ensuring every connection is rock-solid is the key to a system that won't give you problems down the road.
Choosing Your Drainage System
Since you can't rely on gravity, you’ll need a pump to get waste up and out to the main sewer line. You have two main paths you can take here, and your decision will likely come down to budget, space, and how much you're willing to tear up your concrete floor.
- Up-Flush Toilet Systems: You might hear these called macerating toilets. They feature a special pump and grinder unit that sits behind the toilet. When flushed, it pulverizes waste into a slurry and powerfully pumps it up to the main drain through a small pipe. It's a clever, less-invasive solution.
- Sewage Ejector Pumps: This is the more traditional, heavy-duty approach. It involves cutting a hole in the concrete to install a sealed basin, or sump pit. A submersible pump lives inside this pit, and all the fixtures—toilet, sink, and shower—drain into it. Once the waste reaches a certain level, a float switch kicks the pump on, and everything is ejected up to the main sewer line.
If there's one key takeaway, it's this: An up-flush system is often less disruptive and cheaper to install upfront. However, a sewage ejector pump is the more permanent, robust solution that's built to handle higher volume and is typically more reliable over the long haul.
Breaking Concrete for Drain Lines
If you go with a sewage ejector pump or need to run new drains for your shower and sink, there's no way around it—you'll be cutting into your concrete slab. It’s a loud, dusty job, but totally manageable if you have the right equipment and a healthy respect for safety.
You’ll need to rent a concrete saw. While you're at it, grab your personal protective equipment (PPE): safety glasses, hearing protection, a quality dust mask or respirator, and steel-toed boots are a must.
To keep the dust storm at bay, get a saw with a water hookup. It sprays the blade as you cut, turning the concrete dust into a manageable slurry. You'll cut shallow trenches for the drainpipes, meticulously maintaining the proper slope. The code standard is a minimum of 1/4 inch of fall for every foot of pipe. This is critical for ensuring waste flows properly to the ejector pit. After cutting the outlines, you can break out the concrete chunks with a sledgehammer or a rented jackhammer.
Running Water Supply Lines
After wrestling with drains and concrete, running the hot and cold water supply lines will feel like a walk in the park. The main goal here is to find and tap into existing supply lines. Look for lines feeding a bathroom directly above or maybe your laundry room.
You've got a couple of great options for piping:
- PEX (Cross-linked Polyethylene): This flexible plastic tubing is a DIYer's best friend. It’s easy to cut, bends around corners effortlessly, and uses simple fittings that either push to connect or crimp on.
- Copper: This is the old-school, traditional choice. It’s incredibly durable but requires a torch to solder the joints, which is a skill that takes practice and serious safety awareness.
You’ll run one line for hot and another for cold, strapping them neatly to the ceiling joists or wall studs. Carefully map out the path to your sink, toilet (cold only), and shower. A pro tip: install shut-off valves at every single fixture. It might seem like overkill now, but you’ll thank yourself when you need to fix a leaky faucet without shutting off water to the whole house.
The plumbing phase is where a good chunk of your budget will be spent. For a deeper look at the numbers, you might find our guide on the cost to install a bathroom in the basement helpful.
Plumbing alone can easily account for a significant portion of the expense, often ranging from $2,000 to $10,000. That cost can jump by another $1,000 to $3,000 if you need to install a new sewage ejector pump system. Homeowners lucky enough to have existing plumbing rough-ins in their basement will see substantial savings, as breaking concrete and running new lines is one of the project's most expensive parts.
Putting Up Walls and Powering the Room
With the concrete work and messy plumbing out of the way, things start to get really satisfying. Framing is where you finally see the bathroom take shape, moving from a chalk outline on the floor to a real, defined space. After the walls are up, we'll run the wires for lights, outlets, and the all-important exhaust fan.
The good news? The walls you're building are simple partitions, not load-bearing walls. That means they don't have to support the weight of the house, which makes the job much more straightforward. Your mission is to build them straight, strong, and square.
Framing Your Bathroom Walls
Before you even think about cutting lumber, get that chalk line out. Snap your bathroom layout directly onto the concrete floor. This is your blueprint, and it makes everything that follows a whole lot easier.
Your first move is to lay down the sole plate—the bottom board of your wall. Because this piece sits directly on the concrete, you must use pressure-treated lumber. No exceptions. This wood is designed to resist moisture and prevent rot. You can fasten it to the slab using a powder-actuated nailer (a lot of fun to use) or simple concrete screws.
With the bottom plate secured, you'll install the top plate, which anchors to the ceiling joists above. Now you can measure the distance between them to cut your vertical studs. The standard is 16 inches on-center, but it never hurts to double-check your local building codes. As you install each stud, use a level to make sure it’s perfectly plumb before nailing it home.
A quick but critical tip on doors: Remember to frame a rough opening, not the exact size of the door. For a standard pre-hung door, this usually means an opening that's 2 inches wider and about 2.5 inches taller than the door slab itself. This gives you wiggle room for installation.
Planning the Electrical
Once the skeleton of the room is up, it's so much easier to visualize where your lights and outlets will go. Electrical work can feel daunting, but a solid plan simplifies it immensely. For a new basement bathroom, you'll typically need to run at least two dedicated circuits from your main breaker panel.
- A 20-Amp GFCI Circuit: Code requires that all bathroom outlets have Ground Fault Circuit Interrupter (GFCI) protection. This is a non-negotiable safety feature that can save a life. This circuit will power the outlets by the sink where you’ll plug in things like hair dryers and electric toothbrushes.
- A 15-Amp Lighting Circuit: Use a separate circuit for all your lighting and the exhaust fan. This prevents the lights from dimming or the breaker from tripping every time someone uses a high-power appliance on the outlet circuit.
And speaking of the fan, proper ventilation is your best defense against moisture and mold in a basement bathroom. Don’t cut corners here. Get a fan rated for your bathroom's square footage and ensure it vents all the way to the outside of your house—not just into the space between ceiling joists.
Running the Wires
With your circuit plan in hand, it's time for the electrical rough-in. This is the stage where you run all the cables and install the boxes before any drywall goes up.
Start by drilling holes through the center of the studs where your wires need to pass. For most homes, you'll use 12-gauge Romex wire for the 20-amp outlet circuit and 14-gauge Romex for the 15-amp lighting. Try to keep your runs neat and tidy, securing the cable to the studs with staples. Just be careful not to drive the staples in so tight that they pinch the wire's outer sheathing.
Next, you'll mount the electrical boxes that will hold your switches, outlets, and light fixtures.
A Few Rules of Thumb for Box Placement:
- Switch Boxes: Typically installed 48 inches up from the finished floor.
- Outlet Boxes: Standard height is 12-18 inches from the floor. However, vanity outlets are best placed a few inches above the finished height of your countertop.
- Vanity Light Box: Center this box over the sink location, usually around 75-80 inches from the floor.
Always leave about 6-8 inches of extra wire coiled up inside each box. You’ll thank yourself later when you're connecting the devices and aren't fighting with a short wire. Once all the wires are pulled and boxes are set, you're officially ready for the rough-in electrical inspection.
Waterproofing Your Walls and Installing Flooring
Alright, with the bones of your new bathroom in place—the framing and rough-ins—it's time to create the shell. This is where you build your defenses against moisture, which, as any seasoned remodeler will tell you, is the arch-nemesis of any basement project. Get this part right, and you'll have a bathroom that lasts for decades.
First things first, forget about using standard drywall. In a basement bathroom, that's just asking for trouble.
You'll want to use moisture-resistant drywall, often called "green board," for all the walls outside of the direct wet zones. Its specially treated core and paper facing are designed to stand up to the high humidity that's common in a bathroom environment, helping to keep mold and mildew at bay.
For the areas that are going to get soaked—specifically the shower or tub surround—you need to bring in the heavy-hitter: cement board. This stuff is completely inert to water. It won't swell, rot, or break down, no matter how much water it sees, making it the perfect, unshakeable foundation for your tile.
Creating a Watertight Seal
Hanging the right kind of board is just the start. The real magic happens when you seal everything up to create a monolithic, waterproof barrier. This is a step where cutting corners will come back to haunt you, guaranteed.
The key is a liquid waterproofing membrane. Think of it as a thick, paint-on rubber coating that you apply directly over the cement board in your shower. When it cures, it forms a seamless, flexible, and completely waterproof shield behind your future tile.
Here’s how you create a shower enclosure that’s truly bulletproof:
- Tape Every Seam: Start by applying fiberglass mesh tape over all the joints where cement board panels meet, as well as in the corners.
- Embed the Tape: Using a paintbrush, slather a thick coat of the liquid membrane directly over the tape. You want to fully embed it, so it becomes one with the membrane. This is your first line of defense against water getting into the seams.
- Roll on the Coats: With the seams handled, grab a roller and apply two or three generous coats of the membrane over the entire surface of the cement board in the shower. Always follow the manufacturer’s instructions for drying time between coats.
Take your time here. A small, hidden leak from a poorly sealed shower can cause catastrophic damage over time. This isn't the place to rush.
Finishing the Drywall for a Smooth Look
Now that your wet areas are locked down and secure, you can shift your focus to the rest of the walls. The goal here is to make the seams between the green board panels vanish, leaving you with a perfectly smooth surface ready for paint.
This process of taping and "mudding" with joint compound is more of an art than a science. It takes a bit of patience. You'll apply multiple thin layers of mud, feathering the edges and sanding lightly between coats, until the joints are completely invisible to the eye.
Once you’re happy with the smoothness, don't skip the primer. A good PVA drywall primer seals the porous drywall and joint compound, which is essential for getting an even, professional-looking final coat of paint.
Choosing the Right Basement Flooring
Let’s talk about the floor. A basement bathroom floor has a tough job. It needs to be 100% waterproof, tough enough for daily use, and compatible with a concrete subfloor. This immediately takes options like hardwood, carpet, and most laminates off the table.
You really have two top-tier choices for this application:
- Luxury Vinyl Tile (LVT) or Plank (LVP): This is easily the most popular choice for basements today, and for good reason. It’s completely waterproof, feels much warmer underfoot than tile, and comes in an incredible variety of convincing wood and stone looks. Many styles feature a click-lock installation system, making it a great project for a confident DIYer.
- Porcelain or Ceramic Tile: This is the classic, time-tested solution. Tile is virtually indestructible and offers limitless design potential. The trade-offs? It can be cold on bare feet (unless you install in-floor heating), and the installation process is more labor-intensive, especially on a concrete slab that might not be perfectly level.
No matter which flooring you choose, your prep work is critical. The concrete slab must be spotlessly clean, totally dry, and flat. You'll likely need to use a self-leveling compound to fill any dips or low spots to ensure a perfect installation. For a deeper dive, checking out a guide on the best basement flooring options can give you a much broader perspective.
These decisions—from the right backer board to the final flooring—heavily influence the project's longevity and final price tag. While adding a bathroom can run anywhere from $12,000 for a simple setup to over $75,000 for a high-end spa-like retreat, investing in proper waterproofing is what protects that entire investment. You can find more detailed breakdowns of basement remodeling costs on megakitchenandbath.com.
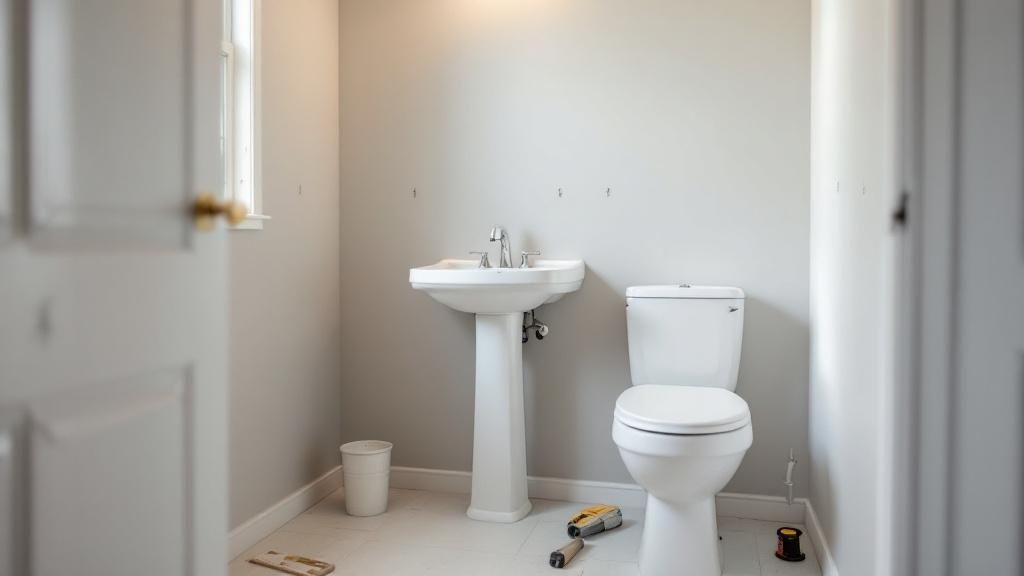
Putting in the Fixtures and Final Touches
Alright, this is the moment we've been working towards. With all the tough, behind-the-scenes work done—the plumbing, framing, and waterproofing—it's time to see your new bathroom take shape. This is easily the most satisfying part of the entire project. Each fixture you install turns the space less into a construction zone and more into the bathroom you envisioned.
This is where the finish line comes into view, but it’s also where patience and a sharp eye for detail really count. Rushing now can lead to headaches later, so take your time and do it right. A well-installed fixture not only looks good but will function perfectly for years to come.
Setting the Toilet
Placing the toilet is a huge milestone. It feels like the room is finally, officially a bathroom. The most critical part of this job is getting a perfect, watertight seal between the toilet and the drain pipe on the very first try.
Your main tool for this is the wax ring. Start by placing it on the toilet flange in the floor. Then, carefully lift the toilet and position it directly over the flange, using the closet bolts sticking up from the floor as your guides. Lower the toilet straight down onto the ring with firm, even pressure. Once it's down, don't twist or rock it. Any movement can break that crucial wax seal and cause a hidden leak down the road.
Now, hand-tighten the nuts onto the closet bolts, then switch to a wrench. Tighten them a little at a time, alternating from side to side to keep the pressure even until the toilet is snug and stable. A word of caution: don't go crazy with the wrench. Overtightening can easily crack the porcelain base. With the toilet secure, hook up the water supply line, turn the valve on slowly, and watch carefully for any drips.
Mounting the Vanity and Sink
The vanity is often the bathroom's focal point, so its installation sets the tone for the whole room. Before you even move it into place, grab a stud finder and mark the stud locations on the wall. A vanity loaded with toiletries and cleaning supplies gets heavy, so anchoring it to the studs isn't optional—it's essential.
Slide the vanity into position and get your level out. Basement floors are rarely perfectly flat, so you’ll likely need to use shims under the base to get it perfectly level both front-to-back and side-to-side. Once it’s level, drive long screws through the vanity's sturdy back rail and directly into the wall studs you marked earlier.
With the cabinet anchored, it's time for the countertop and sink. Squeeze a continuous bead of silicone adhesive along the top edge of the cabinet before you gently lower the countertop into place. It's much easier to install the faucet and drain assembly onto the sink now, before you connect the plumbing underneath. Finally, connect the P-trap to the drain stub-out in the wall and hook up the hot and cold water lines.
Here’s a pro tip I've picked up over the years: after everything is installed, run a thin bead of clear silicone caulk where the base of the toilet meets the floor and along the back of the vanity top where it touches the wall. It creates a clean, finished look and, more importantly, stops water from sneaking into gaps you can't see.
Shower and Tub Installation
Whether you're going with a sleek walk-in shower or a classic tub-shower combo, the process starts with setting the main unit. This piece absolutely must be perfectly level and solidly supported. Many pros, myself included, swear by setting the tub or shower base in a bed of mortar. This creates a rock-solid foundation that eliminates any chance of flexing, creaking, or future cracks.
After the base is set and secure, you can install the faucet trim, showerhead, and tub spout, connecting them to the valve and pipes you roughed in earlier. This is another spot where precision pays off. Use plumber's tape on all threaded connections to ensure you don't end up with one of those frustrating, slow drips happening behind your brand-new wall.
If you’re installing a glass shower door, stick to the manufacturer's instructions like glue. It typically involves mounting tracks to the walls and curb, then carefully hanging the heavy glass door. Your level is your best friend here; an even slightly off-kilter installation will cause the door to swing open or shut on its own.
Adding the Final Details
With the big three—toilet, vanity, and shower—in place, you're on the home stretch. These last little details are what tie the room together and give it that polished, finished feel.
- Lighting and Fan Cover: Wire up your vanity light and any ceiling lights. The last step here is snapping the plastic cover onto your exhaust fan.
- Mirror or Medicine Cabinet: This is a two-person job if the mirror is large. Measure carefully to center it over the vanity before hanging it.
- Hardware: Now for the easy wins. Install the toilet paper holder, towel bars, and any hooks. Use your level one last time to make sure they're all perfectly straight.
From creating a leak-proof toilet seal to hanging a perfectly level towel bar, these final steps are all about careful execution. It's this attention to detail that ensures your new basement bathroom is not just beautiful, but also a durable and functional addition to your home.
Frequently Asked Questions About Basement Bathrooms
Even with a solid plan, a big project like a basement bathroom always brings up a few head-scratchers. Knowing the answers to the most common questions before you start can save you a world of headaches and unexpected costs down the road. Let’s tackle some of the issues that pop up time and time again.
I’ve seen homeowners get stuck on these same points over the years, so let's clear them up right now.
Do I Really Need a Permit for This?
I get this one a lot. The short answer is, almost without exception, yes. You absolutely need a permit. This isn't a simple cosmetic update; you're adding complex plumbing, running new electrical wiring, and altering your home's structure.
Think of it this way: building codes are there to protect you. A permit ensures a qualified inspector will check the work at critical stages, verifying that everything is safe and won't lead to disasters like floods, electrical fires, or structural failures. Trying to save a few hundred bucks by skipping this step is a huge gamble.
Imagine you go to sell your house five years from now. A home inspector spots the unpermitted bathroom, and suddenly your deal is on the line. You could be on the hook for major fines or, even worse, be forced to tear out the entire bathroom. It’s just not worth the risk.
What's the Best Flooring for a Basement Bathroom?
When it comes to flooring in a basement bathroom, your mantra should be 100% waterproof. Period. Basements are naturally prone to moisture, and bathrooms are, well, wet. This immediately takes options like hardwood, laminate, or carpet off the table.
Here are the two top contenders I always recommend:
- Luxury Vinyl Tile (LVT) or Planks (LVP): This has become the gold standard for a reason. It's completely waterproof, feels much warmer underfoot than tile, and is tough as nails. Plus, it's a very approachable material for a confident DIYer.
- Porcelain or Ceramic Tile: You can't go wrong with classic tile. It’s the original bulletproof choice for bathrooms, offering endless style options and a lifespan that will likely outlast the house itself. The only real knock is that it gets cold, but that's nothing a little in-floor heating can't solve.
Either of these will give you a durable, worry-free surface that’s built to handle the unique challenges of a below-grade bathroom.
How Do I Make a Bathroom Work if My Sewer Pipe Is Too High?
This is the classic basement plumbing dilemma. Gravity is not on your side when the main drain line is higher than your new bathroom fixtures. Fortunately, this is a solved problem, and you have two excellent, reliable options to pump waste up to the sewer line.
The first route is an up-flush toilet, which you might also hear called a macerating toilet. This clever system has a grinder and a pump built into a unit that sits right behind the toilet. It liquefies waste and then powerfully shoots it up to the main drain through a small pipe. It’s a brilliant, less invasive solution.
Your other choice is the more traditional sewage ejector pump. This is a bit more involved, as it requires cutting a hole in your concrete slab to install a sealed basin. All the drains from the shower, sink, and toilet empty into this pit. When it fills, a powerful pump inside automatically turns on and sends everything up and out. It’s a bigger job upfront, but it’s an incredibly robust, heavy-duty system.
At Northpoint Construction, we turn complex renovation challenges into beautiful, functional realities. If you're planning a basement project in Orem, Provo, or the surrounding areas and want it done right, let's talk. Contact us today to get started on your dream space at https://buildnp.com.