
How to Add a Bathroom in Basement: A Step-by-Step Guide
Before you can even think about swinging a hammer, adding a basement bathroom really boils down to four main stages: nailing down the layout, getting your permits in order, tackling the plumbing and electrical, and finally, bringing it all to life with fixtures and finishes. Trust me, a solid plan that accounts for your basement's specific quirks—like where the plumbing is and how to manage moisture—is the secret to avoiding headaches and costly mistakes later on.
Laying the Groundwork for Your Basement Bathroom
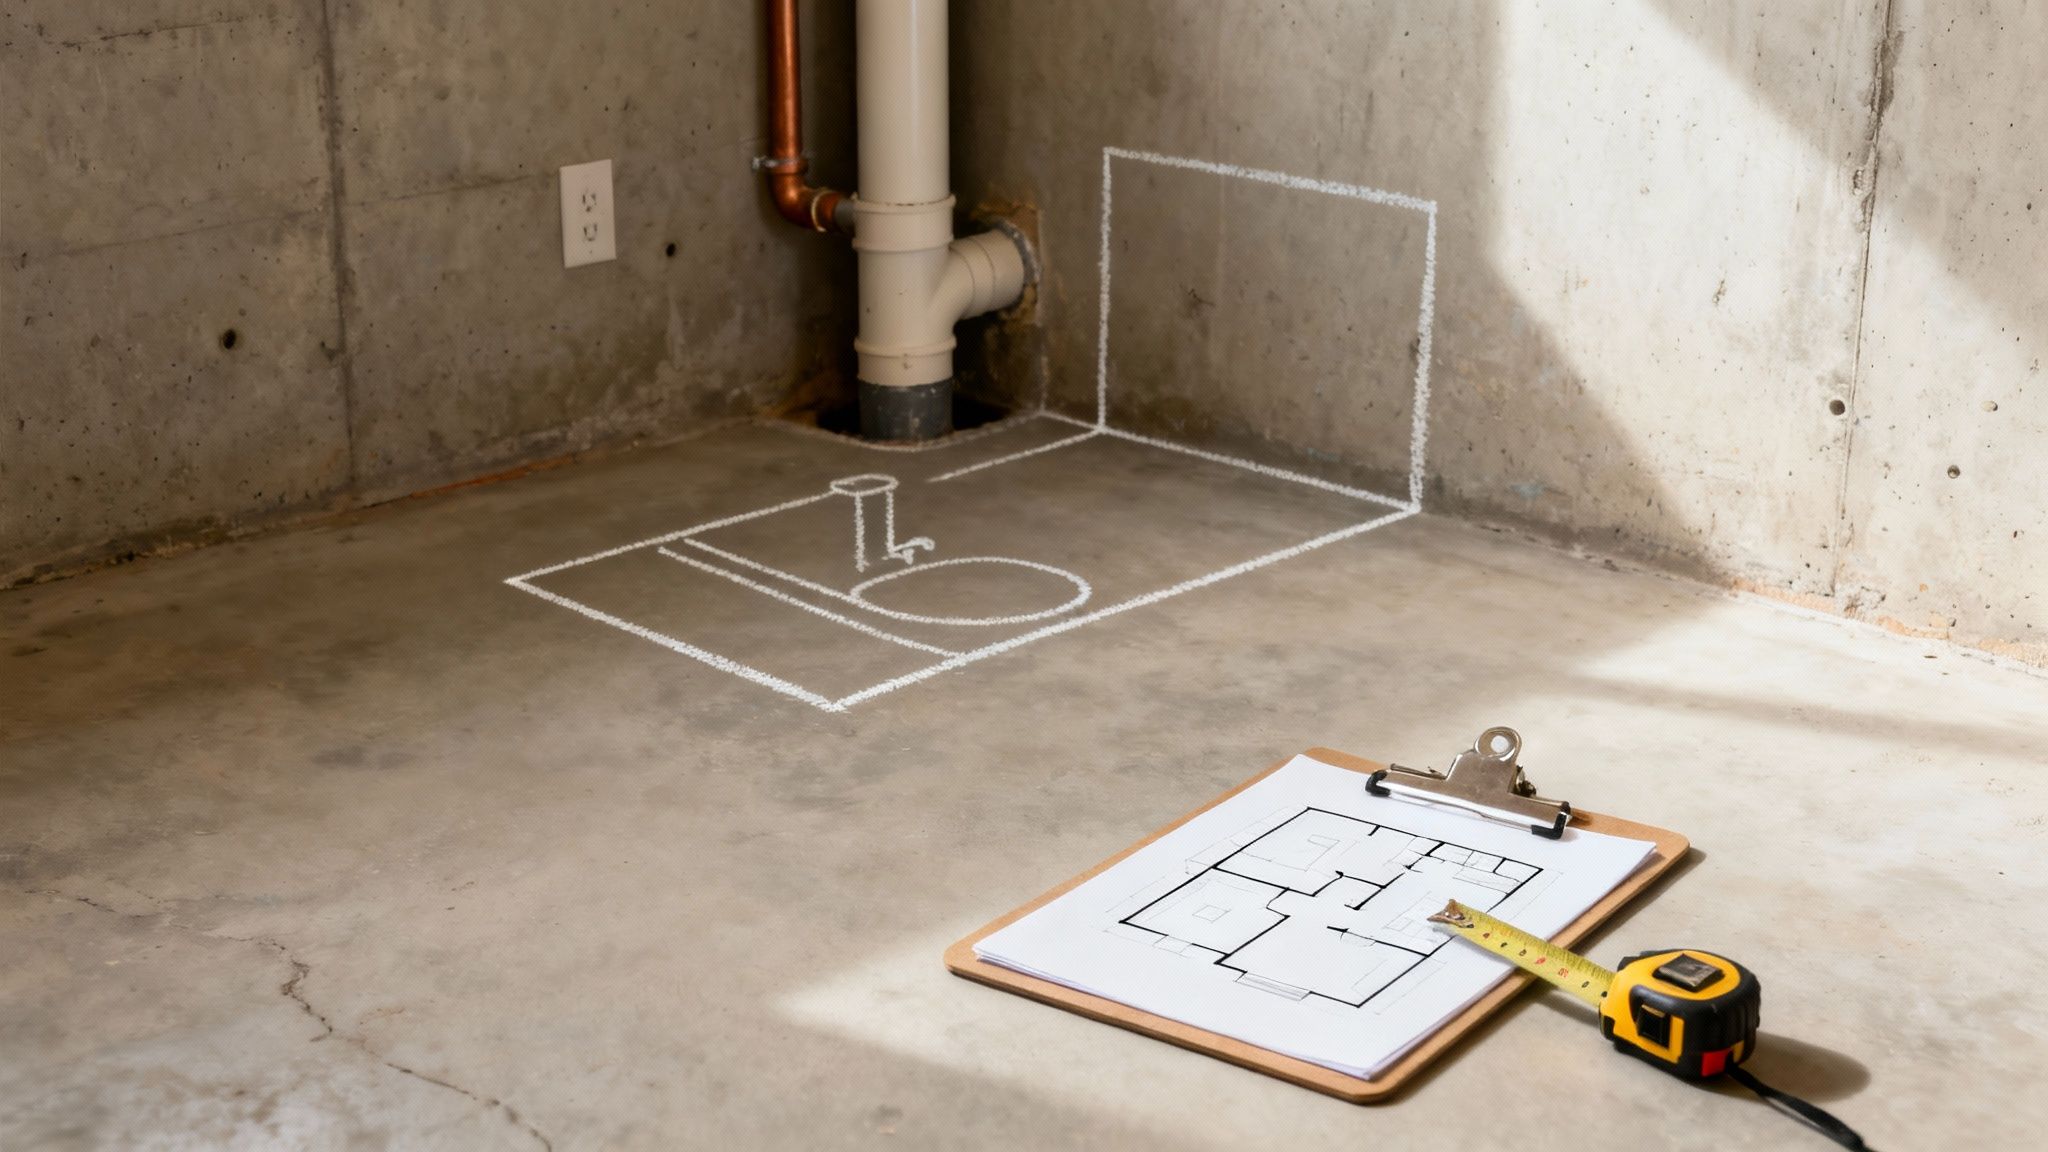
The most critical work happens long before the construction starts. It happens on paper, with a measuring tape, and maybe a little bit of chalk on the concrete floor. A well-thought-out plan isn't just about making the bathroom functional; it's about saving yourself from budget-busting surprises.
So, the first real question to ask yourself is: what's this bathroom for?
Is it going to be a simple half-bath for the family room you're finishing? Or are you planning a full bathroom with a shower to go with a new guest bedroom or home gym? The answer completely changes the game—it dictates the layout, the fixtures you'll need, and the final price tag. A small powder room has a much smaller footprint and far less complicated plumbing than a three-quarter or full bath.
Choosing the Optimal Location
The golden rule I always share with homeowners is to work with your house, not against it. Finding a spot for the new bathroom that's close to existing plumbing and electrical lines is the single biggest move you can make to keep costs down. The farther you have to run new pipes and wires, the more your budget for labor and materials will climb.
Your best bet is to scout for a location directly below a bathroom or kitchen on the main floor. This usually means your main drain stack and water supply lines are right there, which can save you from the expensive and messy job of trenching through your concrete slab. Also, try to find a spot near an exterior wall. This makes it so much easier to run a ventilation fan duct straight outside, which is absolutely essential for controlling humidity.
A smart layout can make even a small, windowless basement bathroom feel surprisingly spacious. The key is to avoid fighting the existing structure of your home. Work with your plumbing stacks, not against them, and you'll keep the project on budget and on schedule.
Mapping a Functional Layout
Once you've zeroed in on a location, it’s time to get a real feel for the space. You don't need a huge area to create a comfortable bathroom; you just need a clever design. Grab a tape measure and sketch out a floor plan to scale.
Here are a few practical layout tips from years in the field:
- Mind the Door Swing: Make sure the door can open fully without hitting the toilet or vanity. If space is tight, a pocket door or a door that swings out into the hall can be a game-changer.
- Give Yourself Room: Local building codes, and common sense, require minimum clearances. In Utah, you generally need at least 21 inches of clear space in front of a toilet to pass inspection and use it comfortably.
- Think About Sightlines: Consider what you see the moment you open the door. Ideally, the toilet shouldn't be the main event. A nice vanity or a decorative wall is a much better first impression.
Selecting the Right Materials
Basements are naturally damp environments. This isn't just a suggestion; it's a non-negotiable part of the plan: you must choose moisture-resistant materials to prevent mold, mildew, and long-term water damage.
And I'm not just talking about the pretty stuff you see on the surface. You have to build for durability from the ground up.
Start with flooring that is 100% waterproof, like luxury vinyl tile (LVT) or classic porcelain tile. For the walls, especially inside a shower or tub enclosure, use moisture-resistant drywall (often called "green board") and, more importantly, a quality waterproofing membrane behind your tile. Finish it off with a good-quality bathroom paint that contains a mildewcide. These choices aren't just upgrades; they're essentials for creating a bathroom that will last.
Getting to Know Local Building Codes and Permits
Let's talk about the part of the job that makes most homeowners groan: building codes and permits. I know, it sounds like a mountain of red tape, but trust me on this—it’s the single most critical step for making sure your new bathroom is safe, functional, and actually adds value to your home.
Trying to fly under the radar without a permit is a recipe for disaster. It can lead to expensive tear-outs, failed inspections, and a massive headache when you try to sell your house down the road. Think of the permit process as the blueprint for success. Get this part right, and the rest of the project will fall into place smoothly.
For anyone in Utah County, especially in places like Orem and Provo, adding a basement bathroom isn't just a matter of getting one single permit. You’re actually looking at a bundle of permits covering each specific part of the job.
The Permits You'll Actually Need
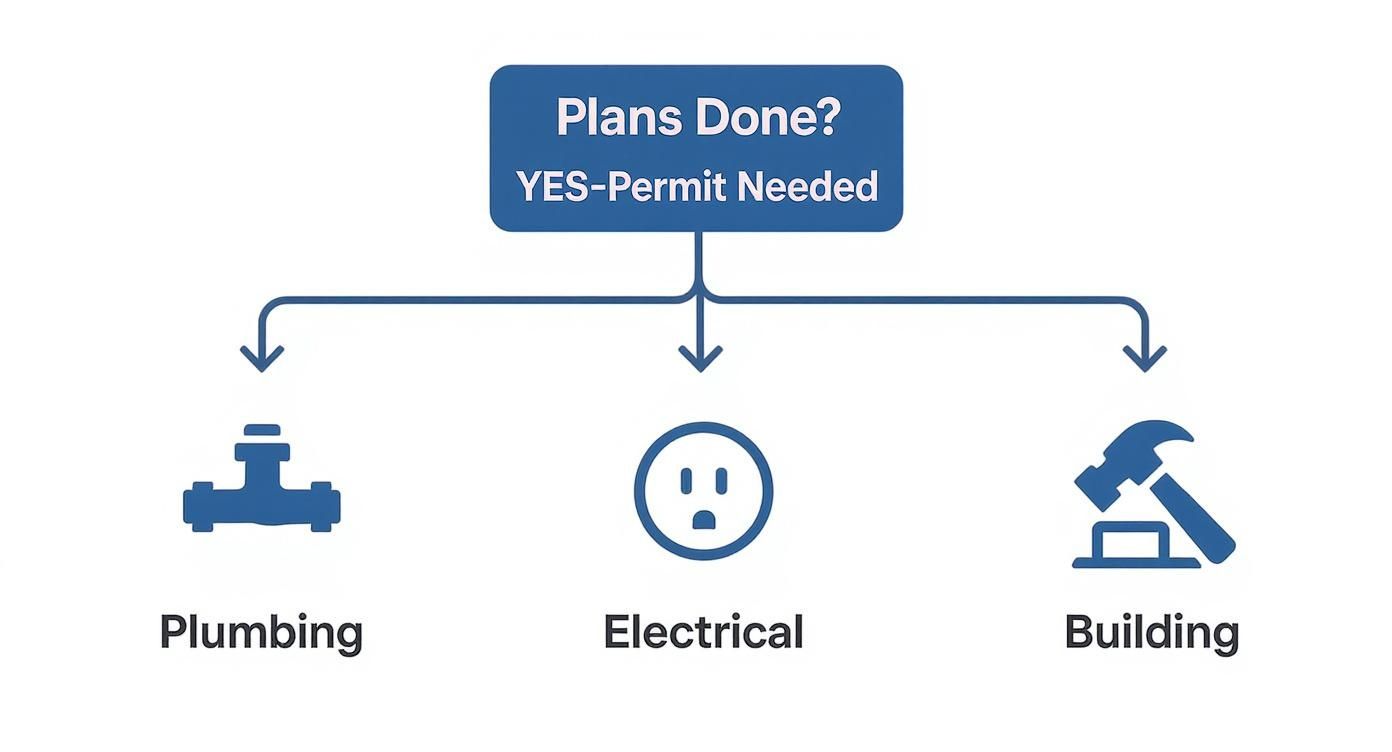
Most of the time, a project like this requires at least three distinct permits. Your local building department needs to see that every piece of the puzzle, from the pipes to the wires, is done correctly and meets current safety standards.
- Building Permit: This is the big one. It covers the structural side of things—framing the new walls, putting in a door, and making sure the room itself is legally compliant.
- Plumbing Permit: This is for all the new drain lines, water pipes, and connections to your toilet, sink, and shower. An inspector will be looking for proper slope on the drains, correct venting to prevent sewer gas from entering your home, and leak-proof connections.
- Electrical Permit: This one is all about safety. It covers the new wiring, outlets, light fixtures, and the exhaust fan. The inspector’s main concern is preventing fires, so they'll check for proper grounding, GFCI protection, and making sure circuits aren’t overloaded.
To get your hands on these permits, you'll need to submit a set of detailed plans. This usually means a to-scale floor plan showing the layout, where the fixtures will go, and all the key dimensions. You’ll also need diagrams for the plumbing and electrical work. Don't let that intimidate you—any good contractor will take care of all this paperwork and submission for you.
What Inspectors Are Looking for in a Basement Bathroom
When the city inspector shows up, they aren't just there to admire your work. They have a very specific checklist, and knowing what’s on it can save you the pain of a failed inspection.
An unpermitted bathroom is a liability, not an asset. When it comes time to sell, unpermitted work can scare off buyers and force you into costly, last-minute repairs to bring the space up to code. Investing in the permit process protects your investment and your peace of mind.
Here are a few of the non-negotiables they'll be checking:
- Ceiling Height: In Utah, you need a finished ceiling height of at least 6 feet 8 inches in a bathroom. Keep a close eye on any low-hanging ductwork or support beams that could drop you below that minimum.
- Proper Ventilation: Every bathroom needs an exhaust fan, and it absolutely must vent to the outside. Venting into an attic or between joists is a major no-go. The fan also needs the right CFM (cubic feet per minute) rating for the size of your bathroom to pull moisture out effectively.
- GFCI Protection: This is a huge safety item. Every single electrical outlet in the bathroom must be protected by a Ground Fault Circuit Interrupter (GFCI). It's what prevents electric shock in a wet environment.
- Fixture Clearances: Inspectors will literally pull out a tape measure for this. They'll check for at least 21 inches of clear space in front of the toilet and ensure it’s not too close to a wall or vanity on the side.
Getting a handle on these requirements from the start helps you have smarter conversations with your contractor. It ensures your new bathroom isn't just a pretty space—it's a safe, legal, and solid investment in your home.
Solving Basement Plumbing and Drainage Challenges
Let’s be honest, the biggest puzzle in a basement bathroom project isn't picking out tile—it's figuring out the plumbing. You're working below your home's main drain line, which means you have to outsmart gravity to get waste up and out of the house. This is the single biggest hurdle you'll face.
Fortunately, you’re not the first person to tackle this. There are really two main ways to solve the problem: the modern, less-invasive upflush toilet system or the classic, brute-force gravity-fed system. Each has its pros and cons, and the right choice for you depends on your basement, your budget, and how much disruption you can tolerate.
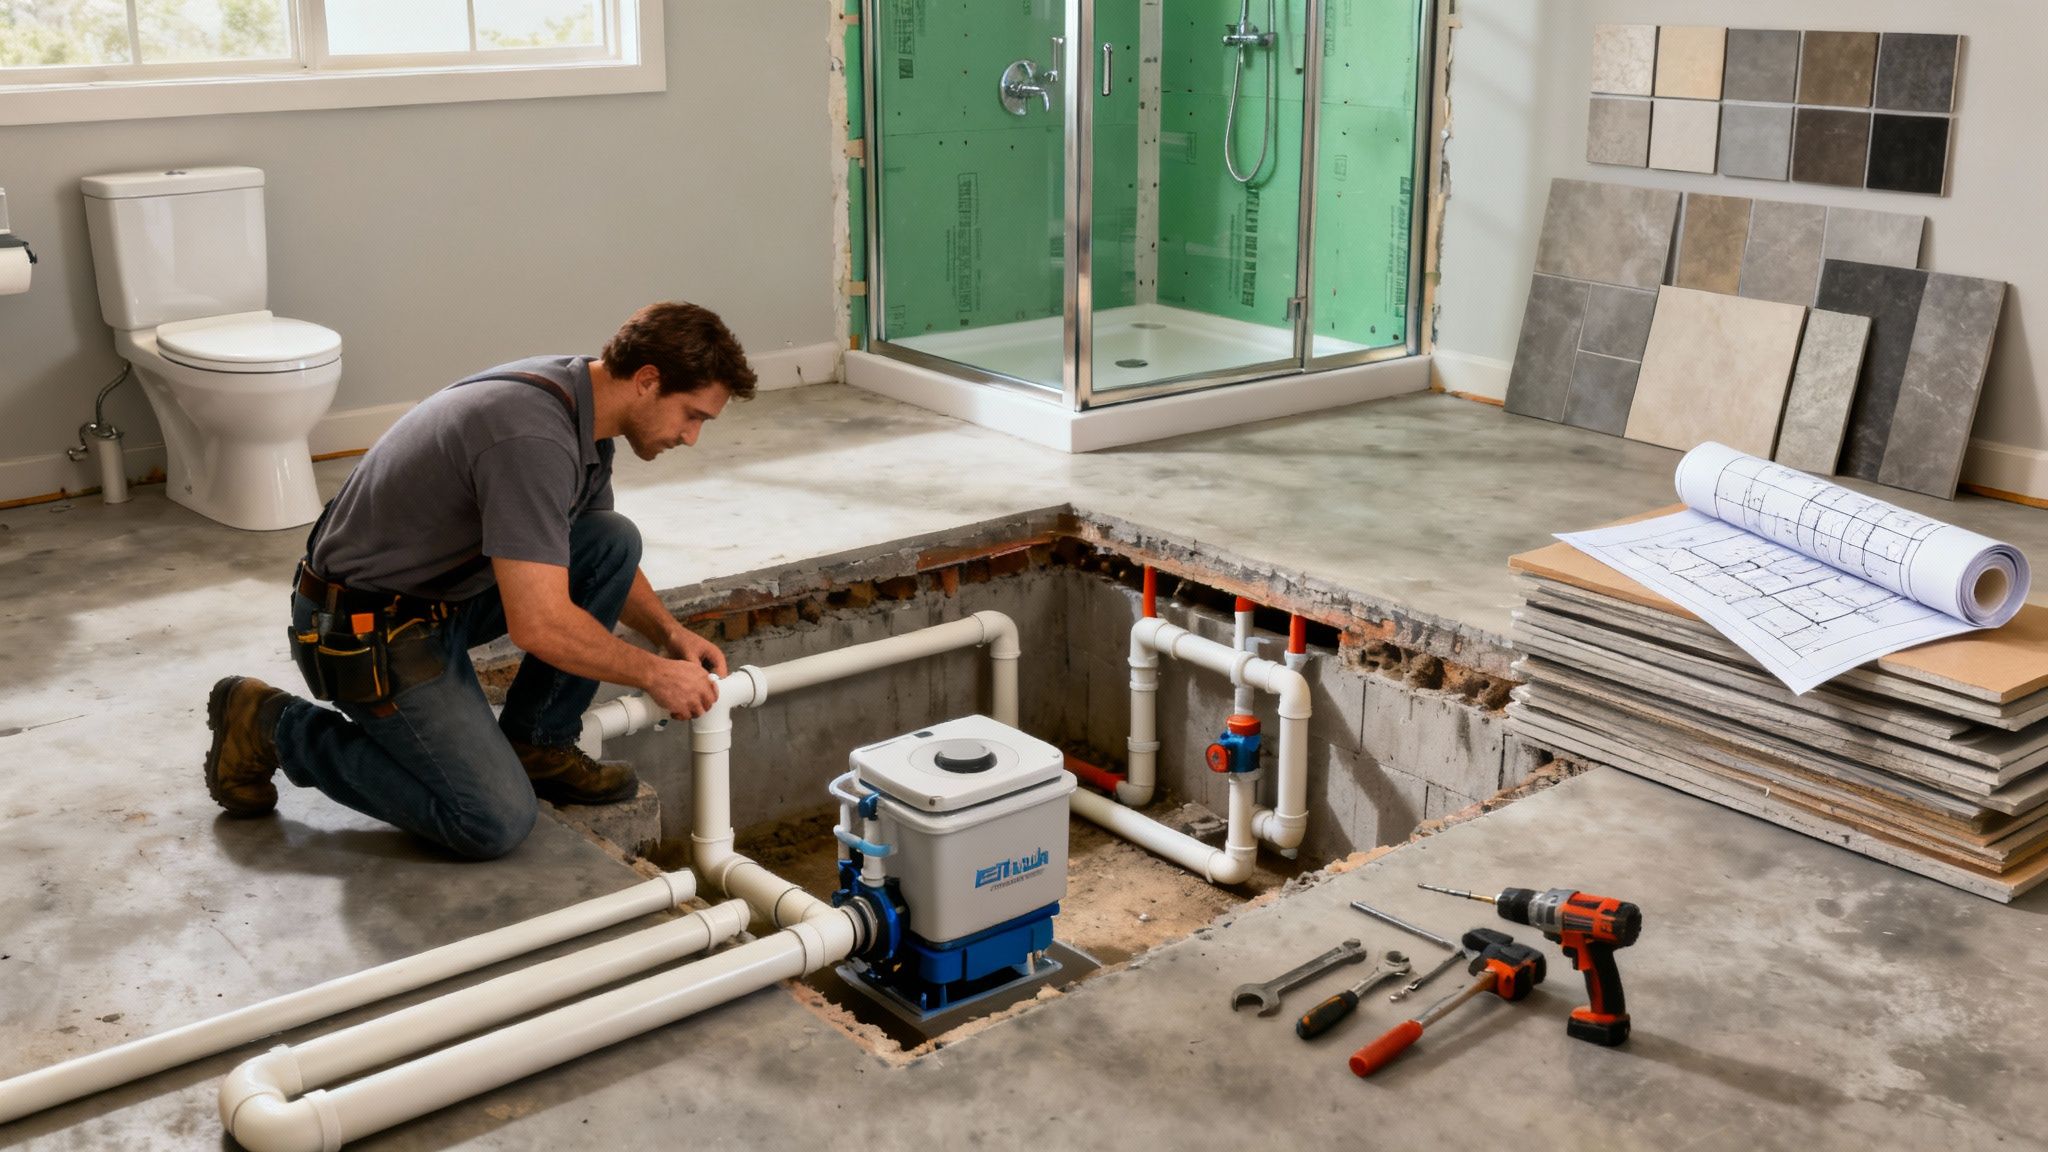
The Upflush System: Macerators and Grinders
An upflush toilet, often called a macerating or grinder toilet, is a clever solution designed specifically for tricky spots like basements. Instead of relying on a downward slope, it uses a powerful pump tucked away in a unit behind the toilet or inside the wall.
When you flush, waste goes into the macerator unit. A high-speed blade liquefies everything (or a heavy-duty grinder chews it up), and then the pump shoots the resulting slurry upwards through a small pipe. This pipe then connects into your home's main sewer or septic line. It’s a pretty neat system.
Here’s why so many homeowners in Utah County are choosing them:
- No Concrete Demolition: This is the big one. You don't have to jackhammer your basement floor. This alone saves a massive amount of dust, noise, and disruption, especially if your basement is already finished.
- Place It Anywhere: Since you aren't tied to the location of an existing drain, you have a ton of flexibility. Want the bathroom in that far corner? No problem.
- Lower Initial Labor Costs: Skipping the concrete work means fewer hours for the crew, which can often make the project more affordable right out of the gate.
The trade-off? These systems need electricity to run the pump, and because they have moving parts, they will eventually require some maintenance.
The Traditional Gravity-Fed System
The gravity-fed option is the old-school, bulletproof method. To make it work in a basement, a plumber has to cut a channel, or trench, through your concrete slab. It’s a messy, loud process involving a concrete saw and a jackhammer.
Once the trench is dug, they lay new drain pipes with the perfect downward slope, connecting them directly into your home's main drain line. Then, they pour new concrete to patch it all up.
It’s a lot of hassle upfront, I won't sugarcoat it. But a gravity system brings some serious long-term peace of mind:
- Permanent and Passive: Once it's in, it just works. There are no motors, pumps, or electrical parts to break down. You can pretty much set it and forget it.
- Zero Maintenance: With no moving parts, there’s nothing to maintain beyond standard plumbing care. It's silent and will work reliably for decades.
- Handles Anything: It’s just like any other bathroom in your house. You don't have to worry about what can and can't go down the drain.
No matter which path you choose, you're going to need permits. Both approaches involve significant plumbing and electrical work that your local Orem or Utah County building department will want to inspect.
As you can see, you’ll be pulling plumbing, electrical, and general building permits to make sure everything is done to code. This isn’t just red tape; it’s about making sure your new bathroom is safe and functional for the long haul.
Making the Right Choice: Upflush vs. Gravity
Deciding between these two plumbing systems is often the most critical decision of the entire project. To make it easier, here's a direct comparison of the features you should consider.
Upflush Toilet vs Traditional Gravity Plumbing
| Installation | Less invasive; no need to break concrete. | Highly disruptive; requires jackhammering the floor. |
| Cost | Often lower initial labor cost. | Higher upfront labor and material costs. |
| Location | Highly flexible, can be installed almost anywhere. | Limited to areas where a downward slope to the main drain is possible. |
| Maintenance | Requires electricity; moving parts may need eventual repair/replacement. | Virtually maintenance-free; no moving parts to fail. |
| Noise | A quiet hum from the pump when flushed. | Silent operation. |
| Reliability | Very reliable but dependent on power and mechanical parts. | Extremely reliable; powered by gravity. |
Ultimately, if your budget is tight and you want to avoid a major construction mess, the upflush system is a fantastic option. But if you're looking for a permanent, maintenance-free solution and can handle the upfront demolition, a traditional gravity system is unmatched for its long-term reliability.
Tapping into Water Lines and Ensuring Proper Slope
Of course, waste isn't the only thing you need to manage. Your new bathroom needs hot and cold water. A good plumber can usually find and tap into nearby supply lines, running new PEX or copper pipes through the ceiling joists to your sink, toilet, and shower.
Getting the drainage right for the sink and shower is also critical. Every drain line must have a perfect, consistent downward slope—the standard is 1/4 inch of drop for every foot of pipe. If this slope is off, you’ll be dealing with slow drains and constant clogs forever. This is one of those things you absolutely want a pro to handle.
One final, critical note: before you even think about plumbing, make sure your basement is completely dry. Water issues will ruin all your hard work. It's worth taking the time to learn how to waterproof basement walls properly to prevent any moisture problems down the road.
Framing, Electrical, and Ventilation: Building the Bones
With your plumbing roughed in, you can finally start to see the shape of a real room emerging from the concrete. Now comes the exciting part: framing the walls, running the electrical, and getting the ventilation right. This is where you build the bones of your new bathroom, and getting these fundamentals right is what separates a great project from a future headache.
The first step is framing the walls. This is what creates the structure for your drywall, vanity, and everything else. It might look simple, but basements have their own set of rules.
You absolutely must use pressure-treated lumber for the bottom plate—the piece of wood that makes direct contact with your concrete floor. Concrete wicks moisture, and standard lumber will rot over time. Using pressure-treated wood here is cheap insurance against future problems. It’s a non-negotiable part of the job.
Taming the Wires: Electrical Done Right
Once the skeleton of the room is up, it's time to run the wires. Honestly, this is one of the few areas where I tell even seasoned DIYers to pause and consider calling a pro. Bad plumbing makes a mess; bad electrical work can be deadly. A licensed electrician knows the local Orem codes inside and out and will make sure everything is safe. If you're determined to learn, you can get a sense of the basics by understanding things like how to wire a light fixture, but a full bathroom circuit is another level of complexity.
Here are the non-negotiables for your bathroom's electrical system:
- GFCI Outlets are Mandatory: Every single outlet in a bathroom needs to be a Ground Fault Circuit Interrupter (GFCI). They sense imbalances in the current and cut the power in milliseconds, preventing a serious shock if an appliance meets water.
- Think About Dedicated Circuits: If you're planning on a nice built-in heater or a high-powered vent fan, it will likely need its own circuit. Lumping it in with your lights and outlets is a surefire way to be constantly tripping the breaker.
- Shower Lighting Needs to be Sealed: Any light you put directly over your shower or tub needs to be officially rated for wet locations. This keeps steam and moisture out of the fixture's internal wiring, where it could cause a dangerous short.
I can't stress this enough: hiring a licensed electrician is an investment in safety. They’ll get the job done right, ensuring you pass inspection and can sleep at night knowing your home is safe.
Don't Skip the Fan: The Importance of Good Ventilation
If there's one fatal flaw I see in basement bathrooms, it's skimping on ventilation. Basements are already damp environments. Add daily showers, and you've got a perfect recipe for mold, mildew, peeling paint, and that classic musty basement smell. A good exhaust fan isn't a luxury; it's essential.
The key spec to look for is CFM, or Cubic Feet per Minute. This tells you how much air the fan can move. The simple rule is you need at least 1 CFM per square foot of floor space. So for a typical 5-foot by 8-foot bathroom (40 square feet), you'll want a fan rated for at least 50 CFM. I usually recommend going a little bigger.
Just having the fan isn't enough—it has to go somewhere. You must vent the exhaust duct directly outside the house. Never, ever vent it into the space between your ceiling joists, your attic, or another part of the basement. All you're doing is moving the moisture problem somewhere you can't see it, where it can cause rot and mold.
Taking the time to do the framing, electrical, and ventilation properly sets the stage for a bathroom that's not just beautiful, but safe, healthy, and built to last. For more ideas on what you can do with your newfound space, check out our other posts on DIY basement renovations.
How to Budget Your Basement Bathroom Project
Alright, let's talk about the big question: what is this actually going to cost? Nailing down a realistic budget is probably the single most important part of planning a basement bathroom. It’s what keeps the project moving smoothly and prevents those heart-stopping financial surprises down the road.
The final price tag can swing dramatically. It all depends on how complex your plumbing will be, the quality of fixtures you pick out, and how much of the work you plan to do yourself versus hiring out.
Adding a bathroom in the basement has become a go-to project for adding home value, especially around here in Utah. Looking ahead to 2025, you can generally expect to pay somewhere around $200 to $250 per square foot. For a small, simple powder room—say, about 30 square feet—you might be looking at a range of $3,000 to $12,500. But if you're planning a larger full bathroom with a shower or tub, that number can easily jump to $10,000 to $50,000 once you factor in nicer finishes and more complex features.
Itemizing Your Core Expenses
To get a real handle on your budget, you have to break the project down piece by piece. Every stage has its own costs, from the lumber for framing all the way to the light fixtures and paint. A detailed budget stops sticker shock in its tracks and helps you figure out where you can save a little and where you might want to splurge.
Here’s a quick rundown of the major things you'll need to account for:
- Permits: Don't forget this one. You'll need to budget for building, plumbing, and electrical permits from your local Orem or Utah County office. It's a non-negotiable part of doing the job right.
- Framing and Drywall: This covers all the basics—lumber, screws, insulation, and most importantly, moisture-resistant drywall.
- Plumbing Rough-In: This is often your biggest wild card. The cost will be much higher if you have to break up concrete for a traditional gravity-fed system compared to installing a less invasive upflush toilet.
- Electrical Work: Plan on hiring a licensed electrician. You'll need new wiring, GFCI outlets (a must for bathrooms), a good vent fan, and your light fixtures all installed to code.
- Fixtures: This is the fun part! It includes your toilet, sink, faucet, and shower or tub. Prices here can go from a few hundred dollars for basic models to thousands for high-end designer pieces.
- Finishes: This category is all about the look and feel—your flooring, tile, paint, vanity, countertops, and lighting.
Uncovering Hidden and Unexpected Costs
A smart budget doesn't just list the obvious stuff; it anticipates the problems that can pop up and threaten to derail everything. Basements, in my experience, are famous for throwing curveballs. Being financially prepared for them is everything. For a more detailed look, you might be interested in our guide on the full cost to install a bathroom in the basement.
Here are a few of the "surprise" expenses I see all the time:
Moisture Remediation: You tear out an old wall and find a damp spot or an active leak. Before you can build anything, you have to fix the source, which might mean sealing foundation cracks or improving your exterior drainage.
Electrical Panel Upgrade: This is common in older homes. The existing panel just might not have enough juice to handle the dedicated circuits a new bathroom requires. Upgrading a panel is a significant, but often necessary, expense.
Unexpected Plumbing Issues: You might tap into an existing line only to discover the pipes are old, corroded, or not up to current code. Suddenly, a small tie-in becomes a much bigger re-piping job.
Egress Window Installation: If you're adding this bathroom as part of a new basement bedroom here in Utah, code will likely require you to install an egress window. This can add a few thousand dollars to the project.
The most successful projects I've seen always include a 15-20% contingency fund in the budget. Think of it not as "extra" money, but as a planned buffer to absorb the headaches that inevitably pop up during a renovation.
Sample Basement Bathroom Budget Breakdown
To help you visualize how these costs can play out, here’s a sample breakdown. This table shows estimated ranges for a mid-sized (around 6' x 8') basement bathroom. Remember, these are just ballpark figures and will definitely change based on your location, material choices, and who does the work, but it's a great starting point for your own planning.
| Permits & Fees | $300 - $600 | $500 - $1,000 | $800 - $1,500 |
| Plumbing (Upflush) | $2,000 - $4,000 | $4,000 - $7,000 | $7,000 - $10,000+ |
| Electrical Work | $1,000 - $2,000 | $1,800 - $3,000 | $3,000 - $5,000 |
| Framing & Drywall | $800 - $1,500 | $1,500 - $2,500 | $2,500 - $4,000 |
| Fixtures (Toilet, Sink) | $500 - $1,000 | $1,000 - $2,500 | $2,500 - $6,000 |
| Shower/Tub | $800 - $2,000 | $2,000 - $4,000 | $4,000 - $8,000+ |
| Flooring & Finishes | $1,000 - $2,500 | $2,500 - $5,000 | $5,000 - $12,000 |
| Estimated Total | $6,400 - $13,600 | $13,300 - $25,000 | $25,800 - $46,500+ |
Think of this financial roadmap as your best tool for making informed decisions. A well-planned, realistic budget is what ultimately ensures your basement bathroom project is a success from the first swing of the hammer to the final coat of paint.
Finishing Your Space and Final Touches
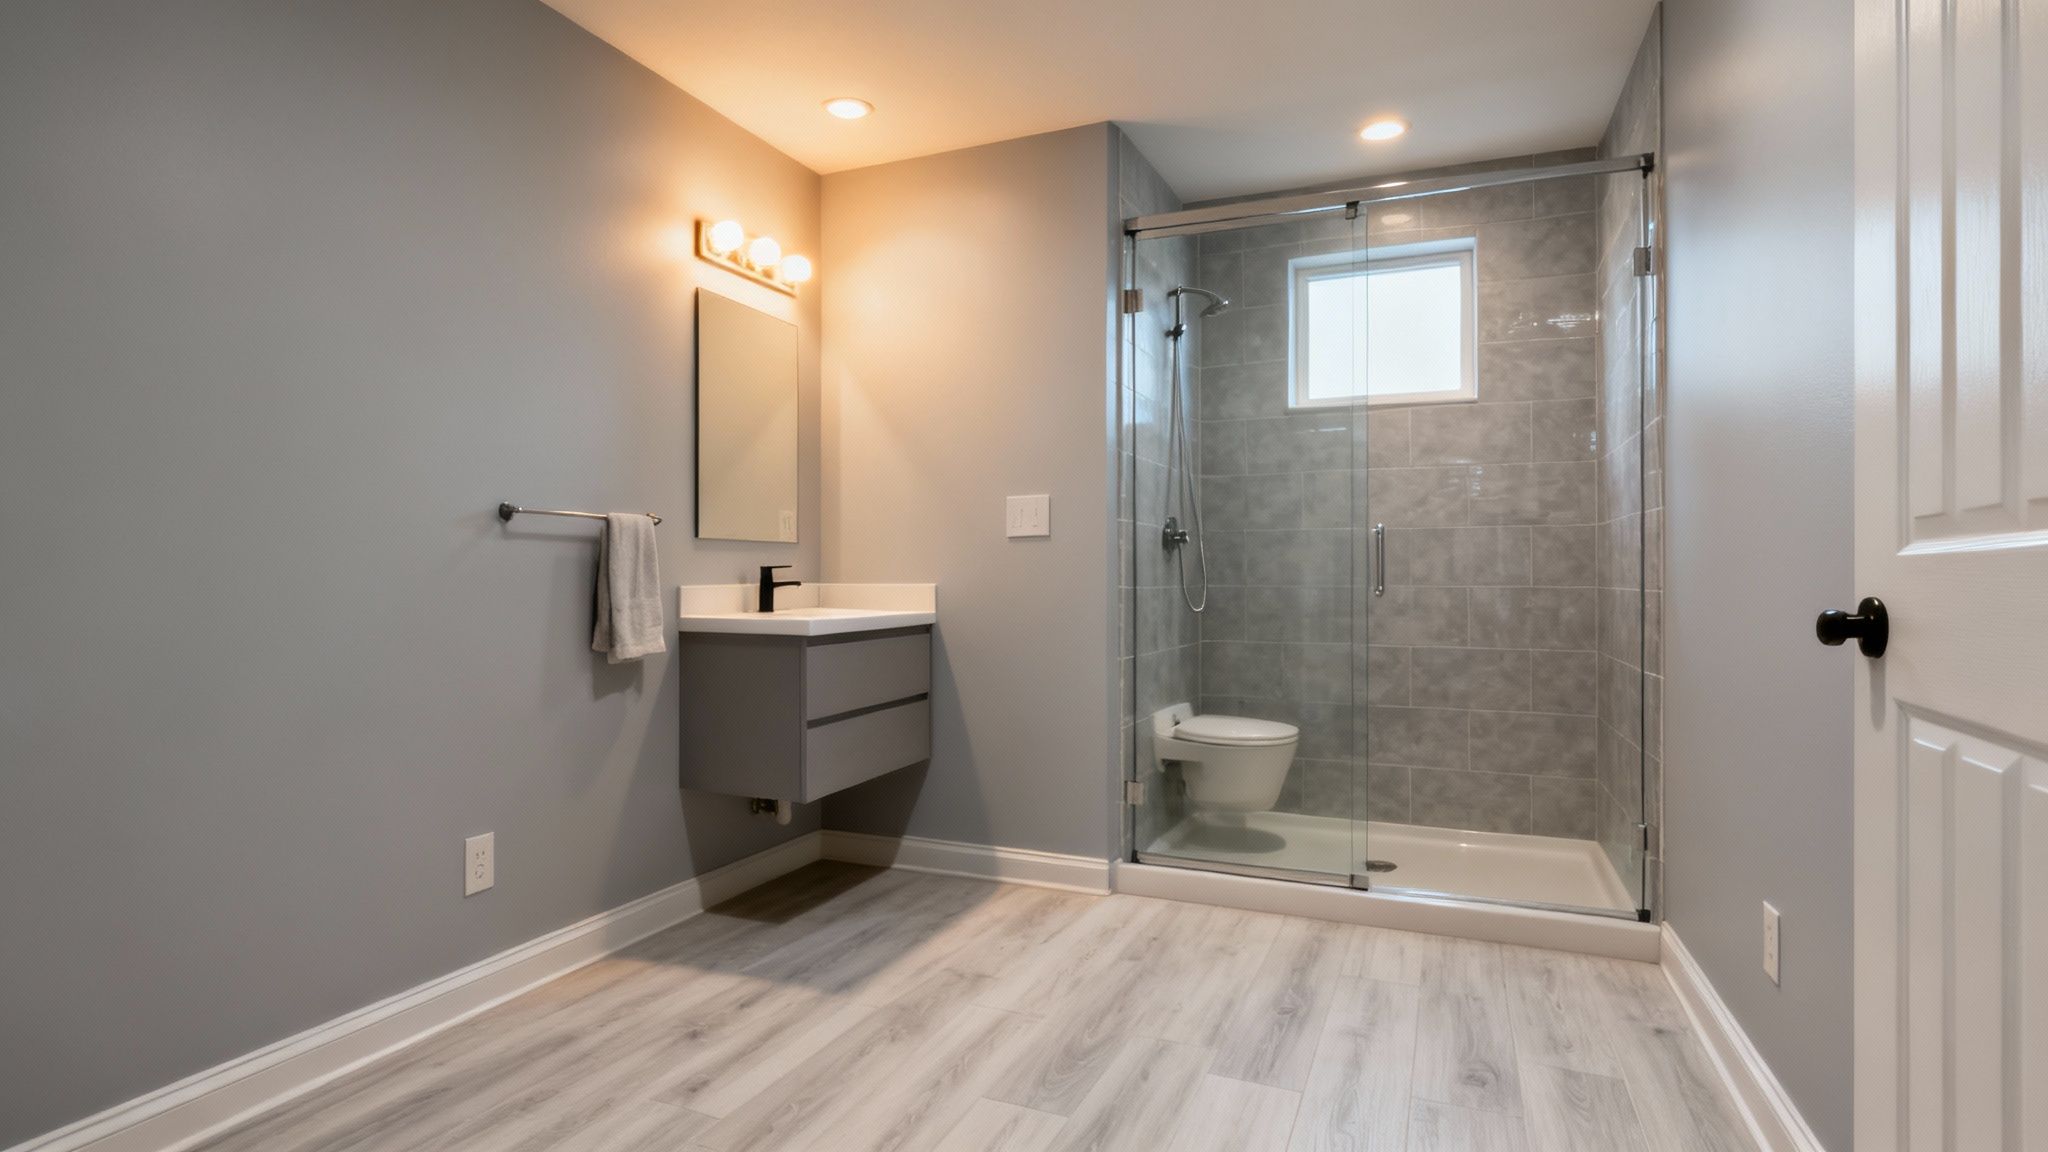
You’ve made it through the tough stuff—the plumbing, framing, and electrical are all roughed in. Now comes the fun part: turning that skeleton of a room into a beautiful, functional bathroom. These finishing touches are what bring the vision to life, but down here in the basement, they're also your final defense against moisture.
Every material you choose from here on out has to be picked with the unique challenges of a below-grade space in mind. Starting with the walls, you’ll want to hang moisture-resistant drywall, often called "green board." It’s not a full-on waterproof solution, but its treated core and paper stand up to humidity far better than standard drywall. For a room with a shower, it’s a must-have.
Waterproofing Before You Tile
Before a single tile goes up, the wet areas need a serious waterproofing barrier. This is absolutely critical in the shower enclosure. Forget just relying on the tile and grout; you need a system like a liquid-applied membrane (which you paint on like thick paint) or a sheet membrane that gets installed over the cement board. Either way, you're creating a seamless, rubbery shield.
Don't even think about skipping this. This step ensures that any water that inevitably gets behind your tile won’t rot the studs or feed a hidden mold colony. It’s what protects all that hard work you just did. The same goes for the floor, especially if you have a custom-tiled shower pan.
Flooring and Fixture Installation
Choosing the right flooring is a huge deal for a basement bathroom. Since concrete slabs can transmit moisture, you need a material that is 100% waterproof. You’ve got some great options:
- Luxury Vinyl Plank (LVP) or Tile (LVT): This stuff is fantastic. It’s completely impervious to water, feels warmer underfoot than tile, and the wood and stone looks are incredibly realistic these days.
- Porcelain or Ceramic Tile: The classic choice for a reason. It's bulletproof, totally waterproof, and will last forever if installed correctly.
Once your floor is in, the room starts to feel real. Setting the vanity and toilet is a major milestone. A quick pro tip: always use a brand-new wax ring when you set the toilet. It’s a cheap part, but it’s the only thing creating that watertight seal at the floor flange—don’t risk a leak by reusing the old one.
A common mistake I see is people treating the finishing stage as purely cosmetic. In a basement, your paint, grout, and even caulk are all crucial parts of your moisture management system. Don't cheap out on these materials. Spending a little extra now will save you from gut-wrenching, costly repairs down the road.
Brightening a Windowless Space
Let’s be honest, most basement bathrooms are windowless caves. But with a smart approach to lighting and color, you can make the space feel bright and airy, not dark and cramped. The trick is to layer your lighting to kill all the shadows.
Start with a good, moisture-rated main light in the ceiling. Next, add a dedicated vanity light over the mirror for task lighting—no one wants to get ready in the dark. For a real touch of class that’s also incredibly practical, put a waterproof recessed light right inside the shower. It makes a huge difference.
When it comes to paint, grab a high-quality paint-and-primer-in-one with a satin or semi-gloss finish. These sheens handle moisture much better than flat paint and are a breeze to wipe down. Stick with light, bright colors—think off-whites, soft grays, or pale blues—to bounce light around and make the room feel bigger.
If you need some inspiration for making a small space shine, check out these pictures of remodeled small bathrooms. Seeing how the pros do it can spark some great ideas. It’s these final details that transform a basic bathroom into a genuine asset for your home.
Got Questions About Your Basement Bathroom? Let's Talk.
Even the most well-thought-out basement project hits a few snags. It’s only natural to have questions pop up, from whether the investment will pay off to the nitty-gritty of choosing the right toilet. Here are some of the most common questions I hear from homeowners, with straightforward answers to help you move forward with confidence.
What’s the Real ROI on a Basement Bathroom?
This is the big one, isn't it? Is all this work actually worth it? The short answer is yes. In my experience, adding a bathroom to your basement gives you a solid return on investment (ROI). You can typically expect to recoup 50% to 70% of what you spend when it comes time to sell.
Of course, that number isn't set in stone. It really hinges on your local market, the quality of the work, and how the new bathroom fits into the rest of your finished basement.
Here in the Orem area, a finished basement is a huge selling point. A well-done bathroom can be the feature that seals the deal, turning a simple rec room into a full-on guest suite or a more functional family space. It makes your home stand out.
A well-executed basement bathroom isn't just an expense; it's a smart investment in your home's value. It turns unused square footage into a highly desirable feature that Utah buyers are actively looking for.
Do I Need a Special Kind of Toilet for a Basement?
More than likely, yes. Your standard toilet is a simple machine that relies on gravity to do its job. But in most basements, the main sewer line is higher than the floor, which means gravity is working against you.
You could tear up a lot of concrete to fix that, but thankfully, there are two much better solutions:
Macerating (Upflush) Toilet: This is a really clever piece of engineering. The toilet has a grinder and a pump built right in. It turns waste into a slurry and then actively pumps it up to the main drain line through a small pipe. It’s far less invasive and often the more budget-friendly option.
Sewage Ejector Pump: Think of this as the heavy-duty option. It involves installing a sealed basin in the floor with a powerful pump inside. This system can handle waste from the toilet, sink, and shower, pumping everything up to the sewer line in one go.
Which one is right for you? It really comes down to your budget, how your plumbing is currently set up, and whether you're just installing a toilet or a full bathroom with a shower.
What Are the Biggest Mistakes People Make?
Knowing what not to do can save you a world of headaches and money. I've seen a few projects go sideways, and it almost always comes down to one of these three things.
- Skimping on Ventilation: A cheap, weak exhaust fan is a recipe for disaster in a basement. Without good airflow, you're just inviting mold, mildew, and that permanent damp smell. You need a properly sized fan that vents all the way to the outside—no shortcuts.
- Ignoring Waterproofing: Basements are naturally damp. If you don't waterproof the walls and floors correctly before you put in the pretty stuff, you're setting yourself up for water damage, rot, and having to tear everything out later.
- Bad Layout Planning: Don't rush the design. I've seen bathrooms where the door barely clears the toilet or the vanity is so cramped it's useless. A poor layout makes the space frustrating, no matter how much you spent on tile. Measure twice, build once.
What's the Best Flooring for a Basement Bathroom?
Down here, your flooring has one primary job: it absolutely must be 100% waterproof. This isn't the place for materials that can absorb moisture.
Your best bets are options that are completely unfazed by water, easy to clean, and built to last.
My top recommendations are usually:
- Luxury Vinyl Tile (LVT) or Plank (LVP): Honestly, this is the king of basement flooring. It’s completely waterproof, feels warmer underfoot than tile, and the new designs that look like wood or stone are incredibly convincing.
- Ceramic or Porcelain Tile: You can't go wrong with this classic. It's tough as nails and, when installed properly over a waterproof membrane, creates a bulletproof surface that will easily outlast the rest of the house.
Whatever you do, stay away from hardwood, carpet, or standard laminate. They will eventually soak up moisture, warp, and become a breeding ground for mold.
Ready to transform your basement with a beautiful and functional new bathroom? The expert team at Northpoint Construction has the experience to handle everything from planning and permits to plumbing and finishing touches. We proudly serve homeowners in Orem, Provo, and across Utah County, ensuring your project is completed to the highest standards.