
how to finish basement cheap: budget makeover ideas
Finishing your basement is one of the smartest ways to add livable square footage to your home, and it doesn't have to drain your savings. So, what’s the secret to doing it on the cheap? It really comes down to a strategic blend of meticulous planning, smart material choices, and knowing which jobs you can confidently tackle yourself.
By starting with a clear blueprint, you can transform that underused space into a high-value area without breaking the bank.
Your Blueprint for a High-Value Low-Cost Basement
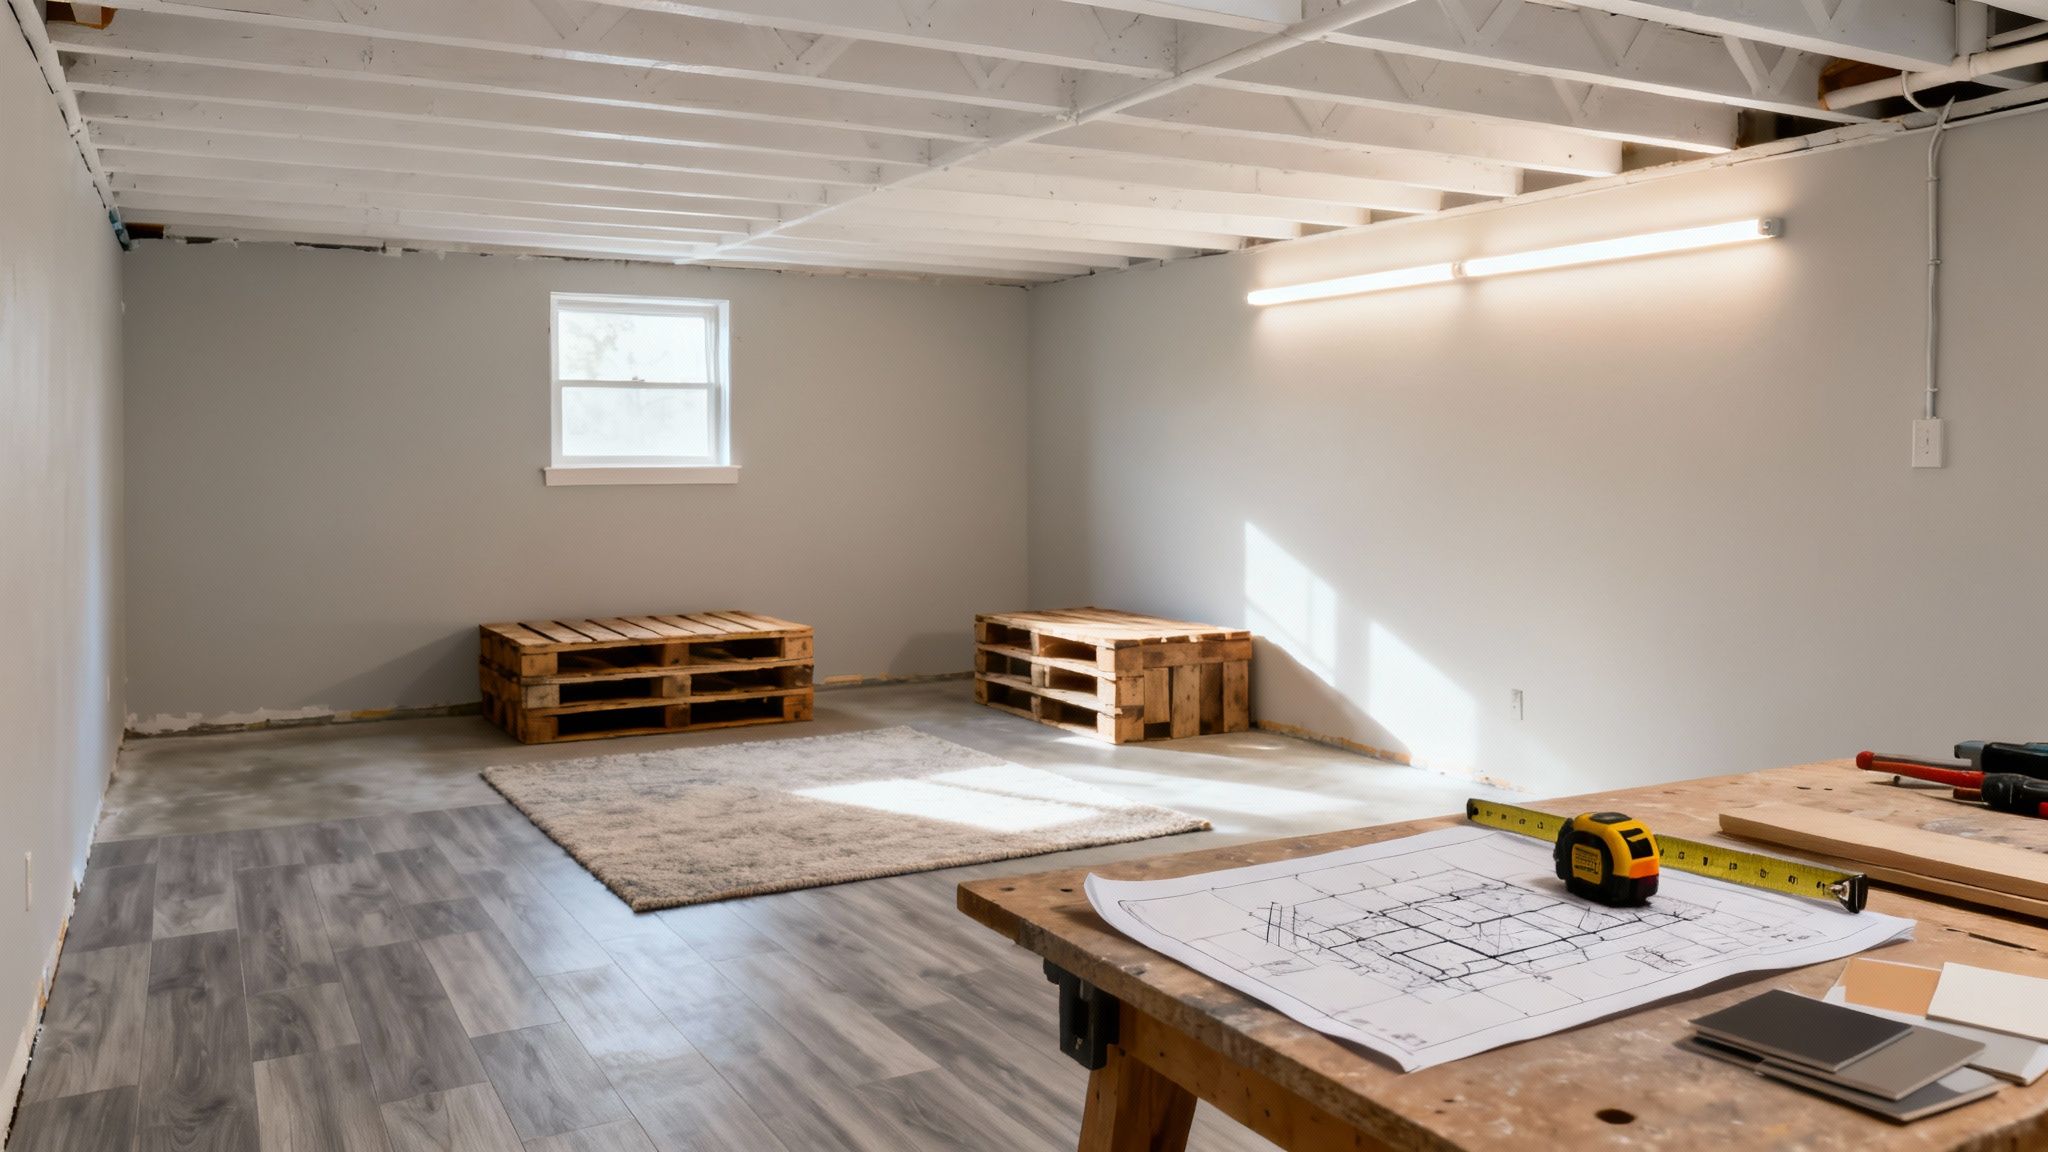
A successful and affordable basement renovation starts long before you pick up a hammer. It all begins with a solid plan that balances your vision with your wallet. The goal is to create a functional, inviting space that adds value to your home and your life, all while keeping costs firmly in check.
A well-thought-out project minimizes those dreaded surprise costs and prevents the budget creep that can quickly turn an exciting upgrade into a source of stress. The very first step? Hammering out a realistic budget. This isn't just a single number; it's a detailed breakdown of expected costs for every single phase of the project.
To do this right, you need to understand the main cost drivers:
- Labor: Hiring pros for every little thing is the fastest way to inflate your budget.
- Materials: High-end flooring, custom cabinetry, and designer fixtures add up in a hurry.
- Layout Complexity: An open-concept design is far cheaper than adding multiple rooms with new walls, doors, and electrical circuits.
- Plumbing: Adding a bathroom or a wet bar involves significant plumbing work, which is always a major expense.
Setting a Realistic Project Budget
Implementing effective construction budget management from day one is the cornerstone of an affordable project. Don't just pull numbers out of thin air. Spend a weekend researching material prices at local stores and get at least a few quotes for any professional work you're considering.
A crucial pro-tip: always add a 10-15% contingency fund to your total budget. This buffer is your safety net for those unexpected issues, like discovering a foundation crack that needs sealing or running short on drywall.
Historically, finishing a basement in the United States has ranged from about $7 to $23 per square foot, depending heavily on the scope and materials. For a typical 1,000-square-foot basement, you're looking at a total cost between $7,000 and $23,000. Labor often eats up 20–40% of that total, so the more you can DIY, the more you save.
A detailed budget isn't a restriction; it's a tool for empowerment. It allows you to make informed decisions, prioritize spending on features that matter most to you, and confidently say "no" to upgrades that don't fit the plan.
Prioritizing for Maximum Impact
With a budget in hand, it’s time to prioritize. Not all upgrades are created equal. You have to focus your spending on the foundational elements that ensure the space is comfortable and built to last.
Non-negotiables should always include waterproofing, proper insulation, and safe electrical work. Get these right first. After those essentials are covered, you can allocate what's left to the fun stuff—the aesthetics. You can always upgrade light fixtures or add a feature wall down the road, but you can't easily go back and fix a leaky foundation.
To get a better handle on your potential expenses, play around with our detailed basement finishing cost calculator to model different scenarios.
To help you focus your efforts, here’s a breakdown of where you can find the biggest savings.
Cost-Saving Priorities for Your Basement Project
This table highlights key project areas and ranks them by their potential for cost savings, helping you focus your budget where it matters most.
| Flooring | High | Opt for Luxury Vinyl Plank (LVP), polished concrete, or quality carpet tiles. Avoid hardwood or high-end tile. |
| Ceiling | High | Choose a painted open-joist ceiling or a standard drop ceiling over a more expensive custom drywall installation. |
| Labor | High | DIY tasks like painting, installing flooring, and trim work. Leave complex electrical and plumbing jobs to licensed professionals. |
| Walls & Framing | Medium | Plan an open-concept layout to minimize the need for interior walls, saving on both lumber and drywall. |
| Lighting | Medium | Use affordable, high-quality recessed LED lights instead of numerous expensive designer fixtures. |
| Plumbing | Low to High | Avoid adding a bathroom or wet bar if possible. If you must, position it near existing plumbing lines to reduce costs. |
By tackling these areas strategically, you can make a huge dent in your overall project cost without sacrificing the quality and comfort of your new living space.
Mastering Budget-Friendly Material Selection
When you're trying to figure out how to finish a basement on a tight budget, your material choices will make or break your bottom line. This is where you can get really strategic and save thousands of dollars without ending up with a space that looks cheap. A little bit of smart shopping and an open mind are your two best friends here.
Don't just head straight for the big-box home improvement stores. While they're convenient, some of the absolute best deals are hiding in plain sight elsewhere. Check out building material reuse centers, like a local Habitat for Humanity ReStore. It’s a bit of a treasure hunt, but you can find incredible deals on high-quality surplus materials—from brand-new flooring to light fixtures—at a fraction of what they’d cost new.
This chart really drives home how much you can save by doing the work yourself and being smart about where you get your materials.
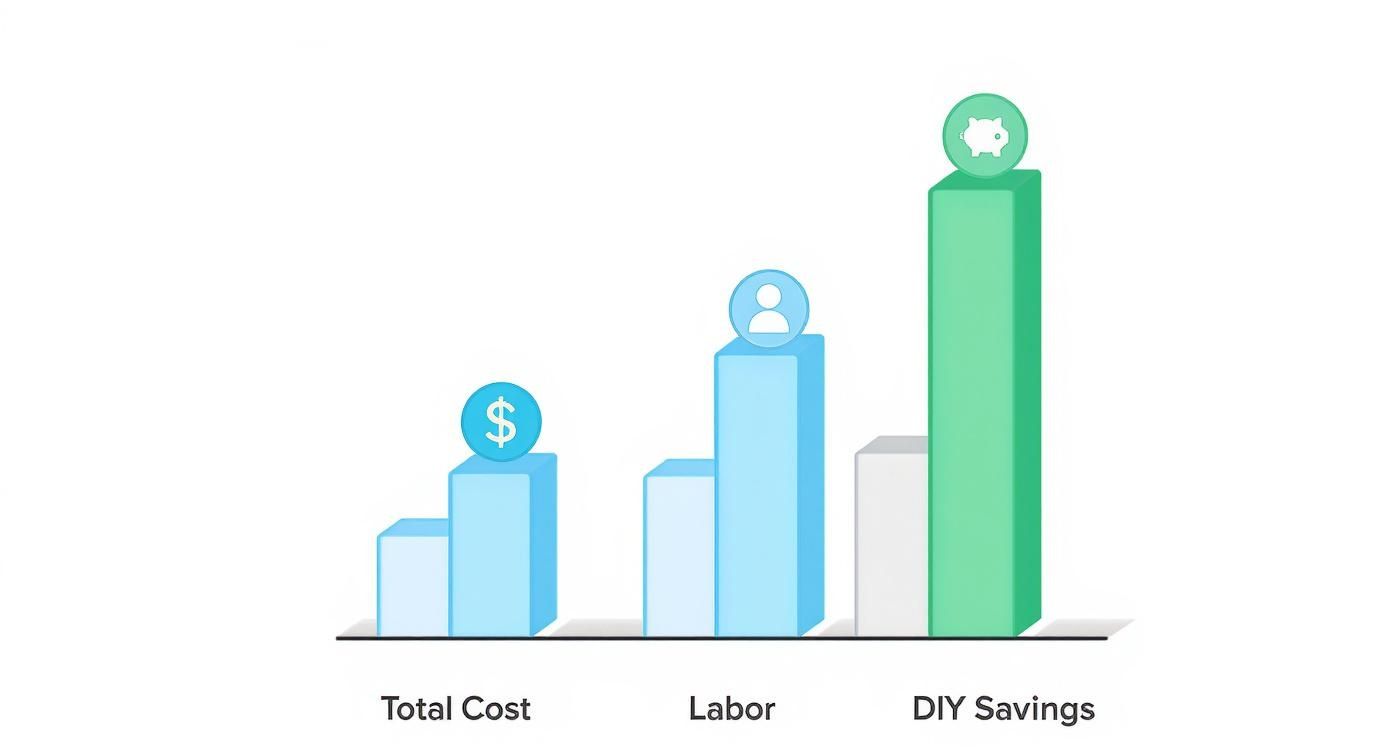
As you can see, simply supplying your own labor can slash the total cost by nearly half. Your sweat equity is easily one of the most valuable resources you have.
Choosing Cost-Effective Basement Flooring
Flooring is almost always the single biggest material expense in a basement project. That means it's also your biggest opportunity to find serious savings.
The cost difference between flooring types is massive. For instance, basic carpet might run you $2–$8 per square foot installed, but a high-end tile could easily top $24 per square foot. In a 1,000-square-foot basement, that single decision could be the difference between spending $8,000 and $24,000. That’s a $16,000 swing.
Here are a few budget-friendly (and stylish) options that work great in basements:
- Luxury Vinyl Plank (LVP): There's a reason LVP is so popular. It's 100% waterproof, tough as nails, and most modern versions have a simple click-lock installation system that’s a dream for any DIYer.
- Polished or Painted Concrete: The cheapest route is often to work with what you already have. Sealing and painting your existing concrete slab can create a clean, modern, industrial look. It's perfect for a home gym, workshop, or game room.
- Carpet Tiles: These aren't the bland office squares you're picturing. Today's carpet tiles come in a huge range of colors and patterns. They're warm, comfortable, and have a major advantage: if a tile gets stained or ruined, you just pop it out and replace that one square.
Smart Solutions for Walls and Ceilings
Your walls and ceiling make up a huge visual surface area, but they don't have to be a huge expense. Standard drywall is the classic choice for a reason—it's cheap and gets the job done. But you can get even more creative to save money and add style.
Want a killer accent wall that doesn't cost a fortune? Look into affordable natural thin stone veneer options. This can add amazing texture and a high-end feel behind a TV or a bar area without the expense of covering every wall.
For the ceiling, you have a few money-saving paths:
- The Industrial Look: Just embrace the exposed joists. Painting the entire ceiling—ductwork, pipes, and all—a single, uniform color like matte black or a crisp white is a very popular, modern, and incredibly cheap solution. It saves a ton on materials and makes the room feel taller.
- Standard Drywall: A simple drywall ceiling is almost always more affordable than a suspended or "drop" ceiling. A suspended ceiling can run up to $20 per square foot, while basic drywall is closer to $2-$4.
To give you a clearer picture, this table breaks down how different material choices can affect your budget across the board.
Basement Finishing Material Cost Comparison
| Flooring | Painted Concrete ($1-$3) | LVP ($4-$7) | Engineered Hardwood ($8-$14) |
| Walls | Paint Only ($0.50-$2) | Drywall & Paint ($2-$4) | Stone Veneer Accent ($11-$20) |
| Ceiling | Exposed & Painted ($1-$2) | Drywall & Paint ($2-$4) | Drop Ceiling Tiles ($5-$20) |
As you can see, consistently choosing budget-friendly options over high-end ones can lead to dramatic savings, easily shaving thousands off the final cost of your project.
Sourcing Materials Like a Pro
Beyond what you buy, how you buy it makes a big difference.
Keep an eye on the calendar. Major holiday weekends—think Memorial Day, Labor Day, and Black Friday—are when home improvement stores run their biggest sales on things like flooring, paint, and tools. If you can time your big purchases around these sales, the savings really add up.
And don't overlook the "scratch and dent" section. A box with a torn corner might hold perfectly good materials at a 20-50% discount. This is a goldmine for things like flooring, where you'll be cutting pieces to fit against the wall anyway. Who cares if a corner is dinged on a plank you were going to trim?
Pro Tip: When you're at the store buying things like drywall, lumber, or even paint, ask if they have a "contractor-grade" or "pro-grade" version. These products often have simpler packaging but offer the same performance as the consumer-branded stuff for a lower price.
Roll Up Your Sleeves: The Smart DIY Approach to Maximize Savings
Let's be honest: labor costs are the budget-killers in any renovation. It's not uncommon for labor to gobble up 40% or more of your total basement finishing budget. This is exactly why the single most powerful way to slash costs is to put in some of your own sweat equity.
But this isn't an all-or-nothing proposition. The real secret to a successful budget-friendly basement finish is knowing exactly where to draw the line. You need to identify the jobs a handy homeowner can tackle and—just as importantly—recognize which tasks demand a licensed professional. Get this balance right, and you're golden.
DIY-Friendly Basement Projects
If you've got the right tools and a bit of patience, there are several big-ticket items you can handle yourself. These are where you'll see the most significant savings for your effort.
- Demolition: Tearing out old, non-structural walls or dated fixtures is usually the first messy step. This is more about brute force than precision. Just be smart about it—always wear safety glasses, gloves, and a dust mask. And before you swing a single sledgehammer, make absolutely certain you've shut off any electrical circuits in the area.
- Non-Load-Bearing Framing: Building the interior walls that will define your new rooms is surprisingly manageable. A miter saw and a framing nailer make the job go fast. The biggest rookie mistake I see is not getting walls perfectly plumb (that's perfectly vertical). If your framing is off, everything that follows—from drywall to trim—will be a headache.
- Painting: This is the classic DIY win. Nothing transforms a space more dramatically for less money than a fresh coat of paint. My advice? Don't cheap out on your tools. Good brushes, rollers, and painter's tape are what separate a sloppy job from crisp, professional-looking lines. And never skip the primer, especially on new drywall.
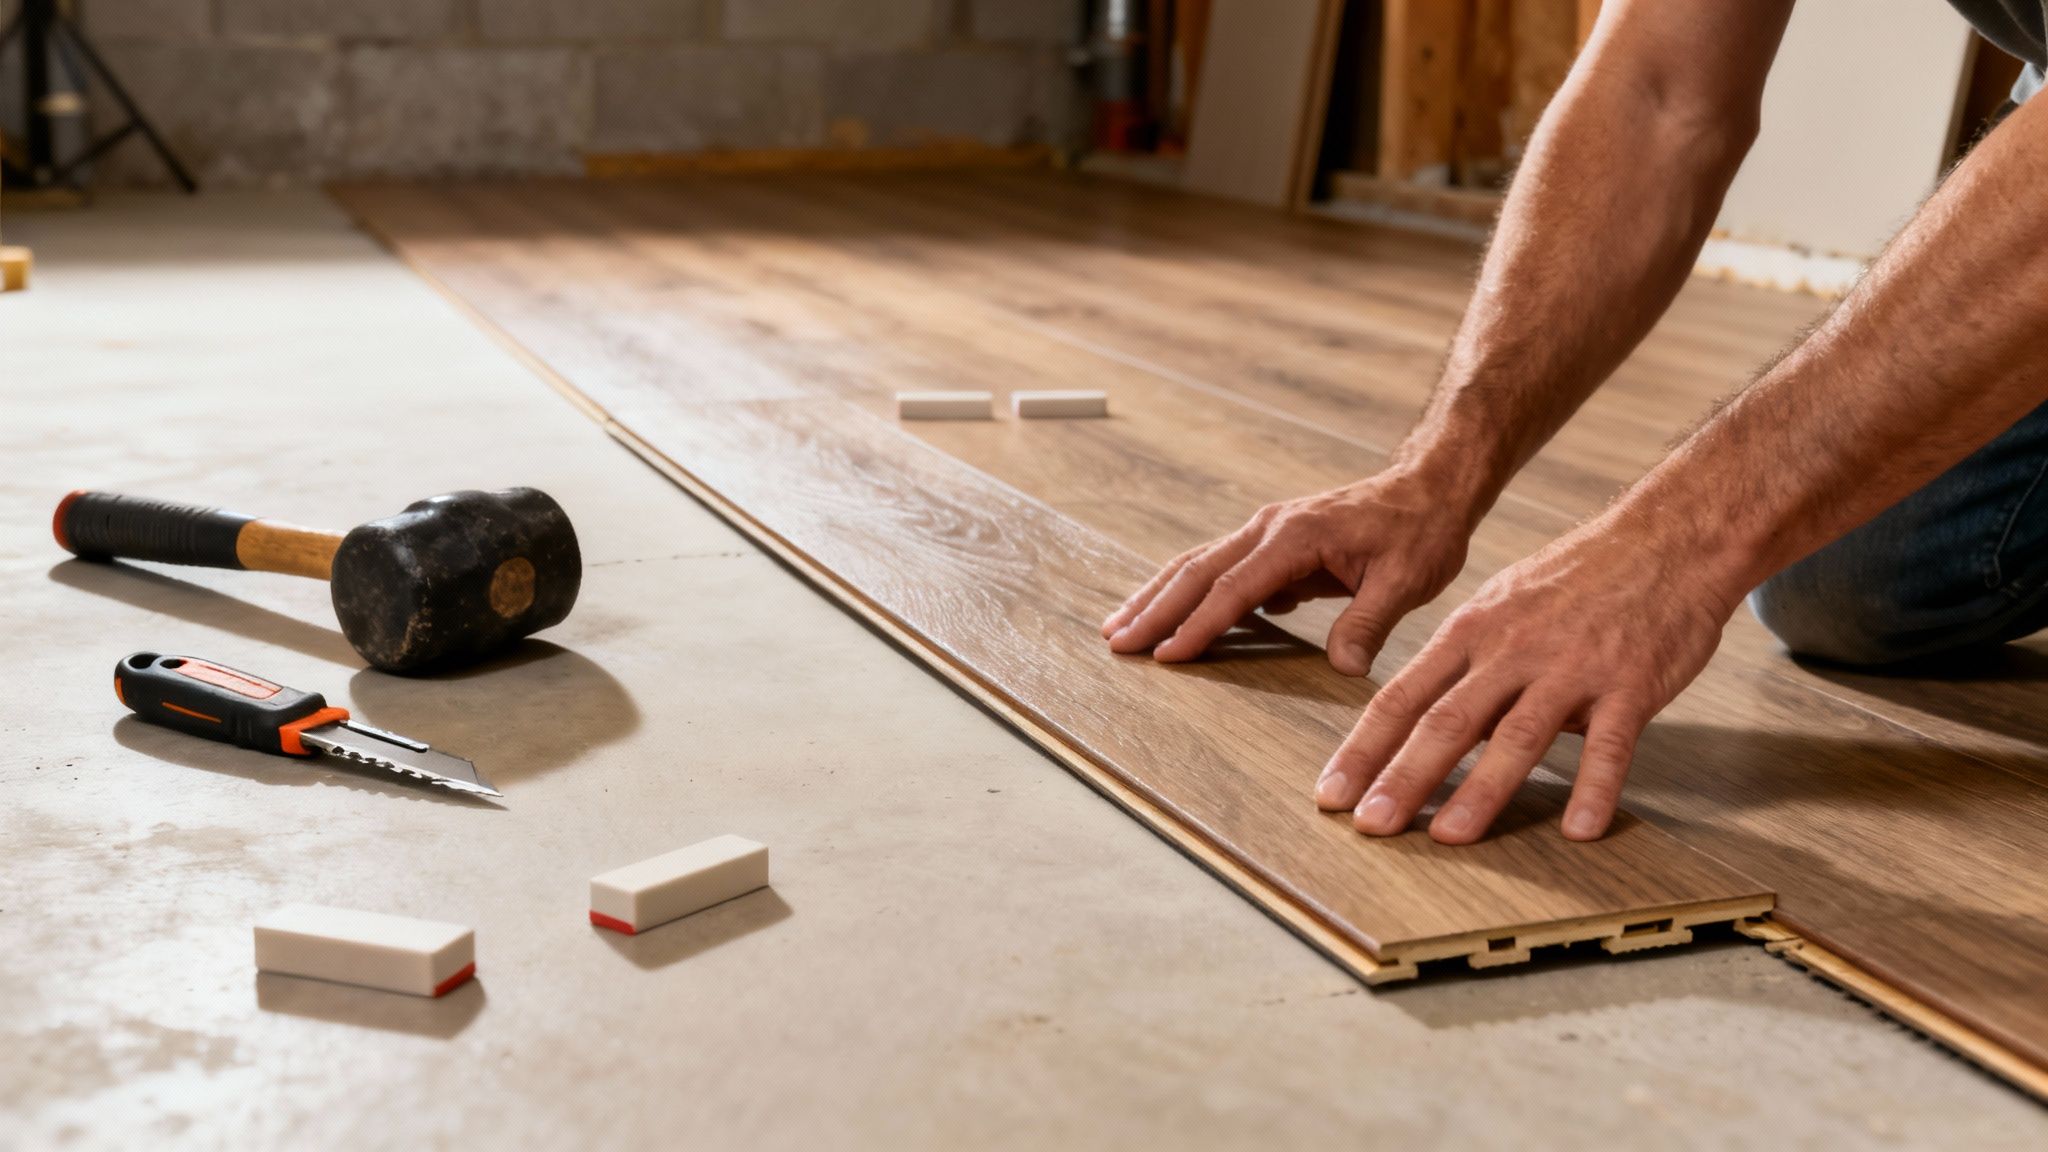
- Click-Lock Flooring Installation: Modern flooring like Luxury Vinyl Plank (LVP) is a game-changer for DIYers. These systems are designed to just snap together, no glue or nails required. The one thing you have to remember is to leave a small expansion gap around the edges of the room. If you don't, the floor can buckle as the temperature and humidity change.
If you want to see what's really possible with a little grit, check out some of these incredible DIY basement renovations for inspiration.
When to Call a Pro, No Questions Asked
Part of finishing a basement on the cheap is knowing when not to be cheap. Some jobs carry serious risks, and the money you might save isn't worth the potential disaster.
Your number one goal has to be creating a safe, legally compliant living space. Hiring licensed pros for the critical systems isn't just a suggestion—it's the non-negotiable cornerstone of a smart basement project.
These are the jobs you always, always leave to the experts:
- Electrical Work: This is at the very top of the "don't touch" list. Faulty wiring is one of the leading causes of house fires. A licensed electrician will ensure every outlet, switch, and light fixture is installed to code, keeping your family safe and guaranteeing you'll pass your inspections.
- Major Plumbing Changes: Sure, you can probably install a new sink faucet. But moving drain lines or tying into the main sewer stack? That's a different beast entirely. A small mistake can lead to catastrophic leaks, water damage, or even dangerous sewer gas backing up into your home.
- Structural Modifications: If your plans involve altering a load-bearing wall, cutting a new window into the foundation, or moving a support post, stop. This work requires an expert, and often an engineer's stamp of approval. Compromising your home's structural integrity is a risk you can't afford to take.
By splitting the labor this way, you get the best of both worlds. You save a ton of cash by handling the manageable tasks yourself, while investing your money where it counts most: in the safety and structural soundness of your home.
Designing a Functional and Inexpensive Layout
A great basement layout doesn't have to be complicated or expensive. When you're figuring out how to finish a basement on the cheap, simplicity is your secret weapon. The smartest design choices create a functional, inviting space without breaking the bank on heavy construction, ultimately saving you thousands on lumber, drywall, and electrical work.
The single best strategy? Go with an open-concept layout. This move instantly slashes the need for interior walls, which are a huge drain on both your budget and your time. Keeping the space wide open makes the most of any natural light and gives the whole basement a more expansive, versatile feel.
Of course, an open plan doesn't mean you can't have separate, defined areas. The trick is to create these "zones" without actually building anything.
Creating Zones Without Walls
It's surprisingly easy to carve out a media area, a home gym, or a kids' play space using some clever, non-structural tricks. You get all the function of separate rooms with none of the construction headaches or costs.
Here are a few ways I’ve seen this done beautifully:
- Strategic Furniture Placement: A well-placed sofa and a couple of chairs instantly create a cozy living room vibe. I often suggest using a large sectional to act as a natural "wall," separating the TV area from a workout space right behind it.
- Area Rugs: An area rug is one of the simplest and most effective ways to anchor a zone. A big, plush rug can define your media center, while a durable, low-pile one is perfect for marking out the kids' play area.
- Purposeful Lighting: You can use lighting to set different moods and define functions. Think about installing bright, focused track lighting over a craft table or workout spot, then use warmer, dimmer floor lamps in the lounge zone to make it feel relaxing.
This approach isn't just cheaper; it’s also incredibly flexible. As your family’s needs change, you can just move the furniture around to create a whole new layout. Try doing that with permanent walls!
An open-concept layout is the ultimate budget hack. You're not just saving money on materials; you're creating a larger, brighter, and more adaptable living area that feels more expensive than it is.
Embracing Existing Architecture
Most basements have what you might call "flaws"—support columns, low-hanging ductwork, or a web of exposed pipes. The budget-savvy move isn't to spend a fortune trying to hide them, but to work with them. Boxing in columns or building soffits is an expensive, labor-intensive job that often makes a space feel smaller and more cramped.
Instead, turn these structural necessities into intentional design features. I love seeing a support column painted in a bold accent color to make it a focal point. If you have several columns, use them as natural dividers. That little space between two columns? It's the perfect spot to tuck a small desk for a home office nook.
Likewise, that ugly ductwork doesn't have to be an eyesore. Give it a good cleaning and paint it the same color as the ceiling. If you’re leaving the joists exposed, this creates a cool, industrial-chic vibe that looks deliberate and stylish. By working with your basement's bones instead of fighting against them, you save a ton of money and add unique character to your space.
The Prep Work You Absolutely Cannot Skip
I get it. You're eager to start framing walls and picking out flooring. That's the fun part. But trust me on this—the single biggest mistake you can make when finishing a basement on a budget is skimping on the prep work. Putting a little money and effort in now will save you from gut-wrenching, budget-destroying repairs down the road.
Think of it this way: getting your foundation dry and sealed is the ultimate insurance policy for your entire project. A damp basement will absolutely ruin drywall, warp your beautiful new floors, and create a perfect home for mold. The American Society of Home Inspectors reports that over 60% of homes have problems with below-ground moisture. Your project's long-term success hinges on creating a completely dry, stable space before you do anything else.
Tackle Moisture Head-On
Your first mission is to become a moisture detective. Get down there and inspect every single inch of your foundation walls and floor for any signs of water. You’re hunting for dark spots, that white, chalky powder (it's called efflorescence), or any active trickles.
Be extra critical of these common trouble spots:
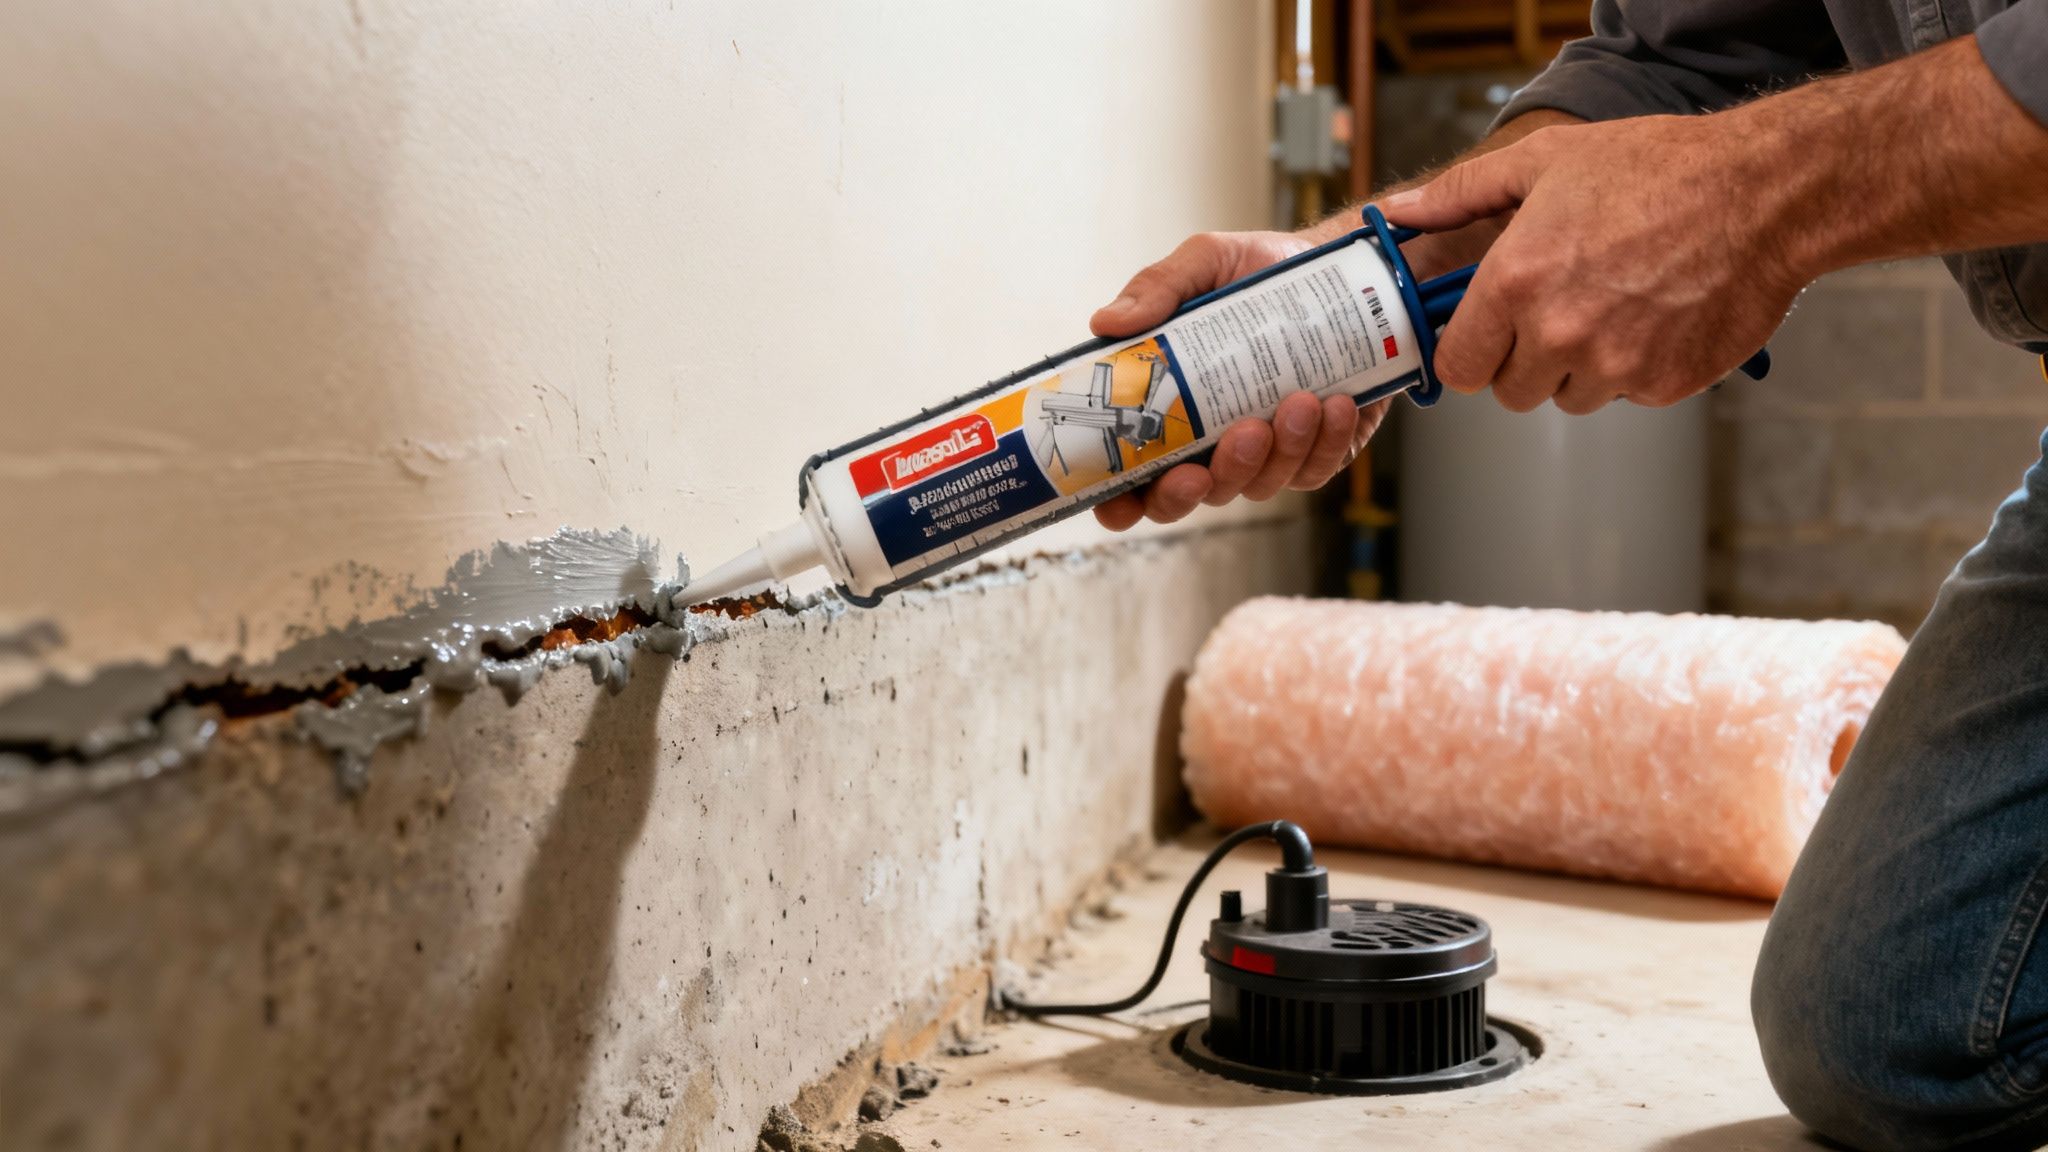
- Foundation Cracks: Even tiny hairline cracks are a superhighway for water. Grab a wire brush, clean them out thoroughly, and then fill them with a quality hydraulic cement or an epoxy injection kit.
- The Wall-Floor Seam: That joint where the walls meet the floor is a notoriously weak point. Make sure it's clean and sealed tight.
- Pipe Penetrations: Look closely where water lines or drain pipes pass through the foundation walls. These are prime candidates for leaks.
After you've plugged every visible hole, it's time to coat the interior walls with a real waterproof membrane. This is not the time for regular paint. You need a product specifically formulated to stop water vapor from passing through the concrete. A good cementitious sealant creates a powerful barrier that moisture can't penetrate.
Key Takeaway: There's a huge difference between "damp proofing" and "waterproofing." Damp proofing is a thin, weak coating. True waterproofing products are built to stop water even when it's actively pushing against your foundation. Don't settle for less.
Don't Forget the Sump Pump
If you have a sump pump, it's your last line of defense. Never, ever assume it’s working. Test it! Pour a few buckets of water into the pit and watch what happens. The pump should kick on automatically, shoot the water out, and then shut off. If it hesitates, makes a weird noise, or is just plain old, replace it now. A new pump is a tiny investment compared to the cost of cleaning up a flood.
Why Insulation is Non-Negotiable
With your moisture barriers locked in, you can move on to insulation. This isn't just about making the space feel cozy; it's a critical part of your moisture defense. When warm, humid air from your new living space hits a cold, bare concrete wall, you get condensation. That condensation can lead to mold and mildew growing inside your new walls.
Rigid foam board insulation is my go-to for basement walls. It doesn't absorb water and creates an unbroken thermal barrier, which is exactly what you need.
For a more detailed breakdown of the whole process, our guide on how to waterproof basement walls has you covered with specific steps and material recommendations. Getting this foundation work right is what ensures your budget-friendly renovation actually stays that way for years to come.
Common Questions About Finishing a Basement on a Budget
Even the best-laid plans can hit a few snags. Finishing a basement is a big undertaking, and it's totally normal to have questions pop up about permits, design choices, or how to furnish the new space without blowing your budget.
Let's walk through some of the questions I hear most often from homeowners. Getting these details sorted out now will save you a world of headaches and unexpected costs down the road.
What’s the Absolute Cheapest Way to Make a Basement Livable?
If you're looking for maximum impact with minimum cash, the "painted basement" approach is your best bet. It’s a minimalist strategy that completely skips the expensive framing and drywall, focusing instead on transforming the surfaces you already have. You'd be amazed at how effective this is.
Here’s the game plan:
- Tackle the Floor First: Give that concrete floor a serious cleaning and degreasing. Once it's prepped, roll on a quality two-part epoxy paint. This stuff is tough, creating a seamless, easy-to-clean surface that both looks sharp and seals the concrete.
- Seal and Brighten the Walls: Grab a high-quality waterproof paint, like a cementitious sealant, and apply it directly to the concrete walls. This does double duty—it provides a powerful moisture barrier and instantly makes the whole space feel brighter.
- Paint the Ceiling: Leave the joists, pipes, and ductwork exposed and spray everything with a single, uniform color. A crisp white can make the space feel huge and reflect a ton of light. For a more modern, industrial vibe, a dark gray or black looks incredibly sharp.
This route gives you a clean, bright, and genuinely usable space—perfect for a home gym, a workshop, or a kids' play area—for a tiny fraction of what a traditional renovation would cost.
Do I Really Need a Permit to Finish My Basement?
I get this one all the time, and the answer is almost always a resounding yes. I know it can feel like a bureaucratic hassle, but pulling a permit is a non-negotiable step for your own safety and financial protection.
Most local building codes demand a permit for any project involving new walls, electrical work, or plumbing modifications—all of which are standard parts of finishing a basement.
Trying to fly under the radar is a huge gamble. You could face hefty fines, run into major roadblocks when you decide to sell your home, or even have an insurance claim denied if it relates to the unpermitted work. The permit ensures everything is inspected and up to code, which is what really matters for your family’s well-being.
Think of a building permit not as an expense, but as cheap insurance. It guarantees that the electrical work is safe, the framing is sound, and your new living space is legally compliant.
How Can I Save Money on Furniture and Decor?
You've worked so hard to save money on the construction; don't let the finishing touches drain your bank account. The trick is to be resourceful and get a little creative.
First, "shop" your own house. Is there an armchair in the guest room that's just collecting dust? A side table in the attic? Repurposing what you already own is the ultimate budget hack.
Next, become a pro at navigating the secondhand market. Facebook Marketplace, local thrift stores, and consignment shops are goldmines for high-quality, pre-owned furniture. You can often find solid wood pieces that just need a little sanding and a fresh coat of paint to look incredible.
For decor, embrace your inner DIY-er. You don't have to be Picasso to create some cool, large-scale abstract art on a blank canvas. Build some simple, rustic shelves from reclaimed wood, or use stencils to create a stunning feature wall for next to nothing. Finish it all off with inexpensive area rugs and throw pillows to add warmth, color, and personality.
Is It Cheaper to Leave the Basement Ceiling Exposed?
Absolutely. Leaving the ceiling exposed is significantly cheaper than installing either drywall or a drop ceiling. It’s one of the most effective cost-cutting moves you can make, and when it’s done right, it looks fantastic.
You save a ton on materials—no drywall, tape, mud, or pricey grid systems—and you slash the labor involved.
The most popular technique is to simply paint everything overhead—joists, pipes, ductwork, and all—in a single, uniform color. This creates a clean, cohesive, and intentional look. As a bonus, it also makes the ceiling feel much higher than it is, which is a huge win in any basement.
At Northpoint Construction, we believe a beautiful, functional basement shouldn't have to break the bank. If you’re ready to transform your space with a team that values quality and smart, budget-friendly solutions, we’re here to help.
Find out how we can turn your basement dreams into reality by visiting us at https://buildnp.com.