
How to Hide Ductwork in Basement: Quick, Clean Design Tricks
Let's face it, that big, clunky ductwork snaking across your basement ceiling is the main thing standing between you and a truly finished space. Most people go one of three ways: build custom bulkheads (also called soffits) for a seamless look, install a drop ceiling for easy access, or just paint everything for a cool, industrial vibe.
We'll walk through each of these options so you can figure out what works best for your home, your budget, and your design ideas.
Taking Back Your Basement From Bulky Ductwork
Exposed ducts, pipes, and wires are the hallmarks of an unfinished basement. They can make the space feel cluttered and chaotic, killing any chance of creating that cozy family room, home office, or guest suite you’ve been dreaming of.
Hiding the ductwork is more than just a cosmetic fix—it’s a critical step in transforming that raw utility area into a polished, usable part of your home. When you conceal all that mechanical clutter, you create clean lines, make the ceiling feel higher, and can seriously boost your home's value.
It's also a smart move for your wallet. A surprising amount of a home's air infiltration, often 45-50%, happens through the basement. When your ducts are exposed down there, a study found that about 74% of your total duct leakage can come from that area alone. That means your HVAC system is constantly fighting to heat or cool unconditioned air, driving up your energy bills.
What to Figure Out Before You Start
Before you grab a hammer or a paintbrush, take a minute to think through a few key things. Every basement is different.
- How much headroom can you spare? A drop ceiling brings the whole ceiling down, which might be an issue in a basement with low clearance. Soffits, on the other hand, only box in the ducts themselves, preserving height in the rest of the room.
- What does your duct layout look like? If you have a few simple, straight runs, building a DIY soffit is pretty straightforward. But if you're dealing with a complex web of ducts crisscrossing the ceiling, a drop ceiling might be the path of least resistance.
- Do you need to get to anything later? Think about plumbing shut-off valves, electrical junction boxes, or cleanouts. If they're tucked up near the ducts, a drop ceiling with removable tiles is your best bet for easy access.
- What’s your budget and skill level? Your decision will definitely be shaped by how much you want to spend and how comfortable you are with a framing square and a saw. The options range from a simple weekend paint job to a fully framed-out, professional-looking enclosure.
A smart plan does more than just hide some sheet metal. It makes the solution feel like a natural part of your basement's design—something intentional, not just a workaround.
To really get this right, it helps to have a basic understanding of your home’s Ductwork & Ducting system. Knowing a little about how it works will help you make choices that are not just beautiful but also functional for the long haul.
Quick Guide to Hiding Basement Ductwork
To help you get a quick overview, here's a simple comparison of the most popular methods for dealing with basement ducts. This table breaks down what you can expect in terms of cost, effort, and the main benefits of each approach.
| Bulkheads/Soffits | $2-$5 per sq. ft. | Intermediate | Creating a seamless, built-in look while maximizing ceiling height. |
| Drop Ceiling | $3-$7 per sq. ft. | Beginner | Easy access to pipes and wiring; great for hiding complex ductwork. |
| Paint (Exposed) | $1-$2 per sq. ft. | Beginner | Industrial or modern aesthetics on a tight budget; preserves all headroom. |
| Decorative Covers | $5-$15+ per linear ft. | Beginner/Intermediate | Adding a unique design element, like faux beams or fabric wraps. |
Choosing the right method really comes down to balancing your aesthetic goals with the practical realities of your space, budget, and DIY ambition.
Building Soffits for a Seamless Look
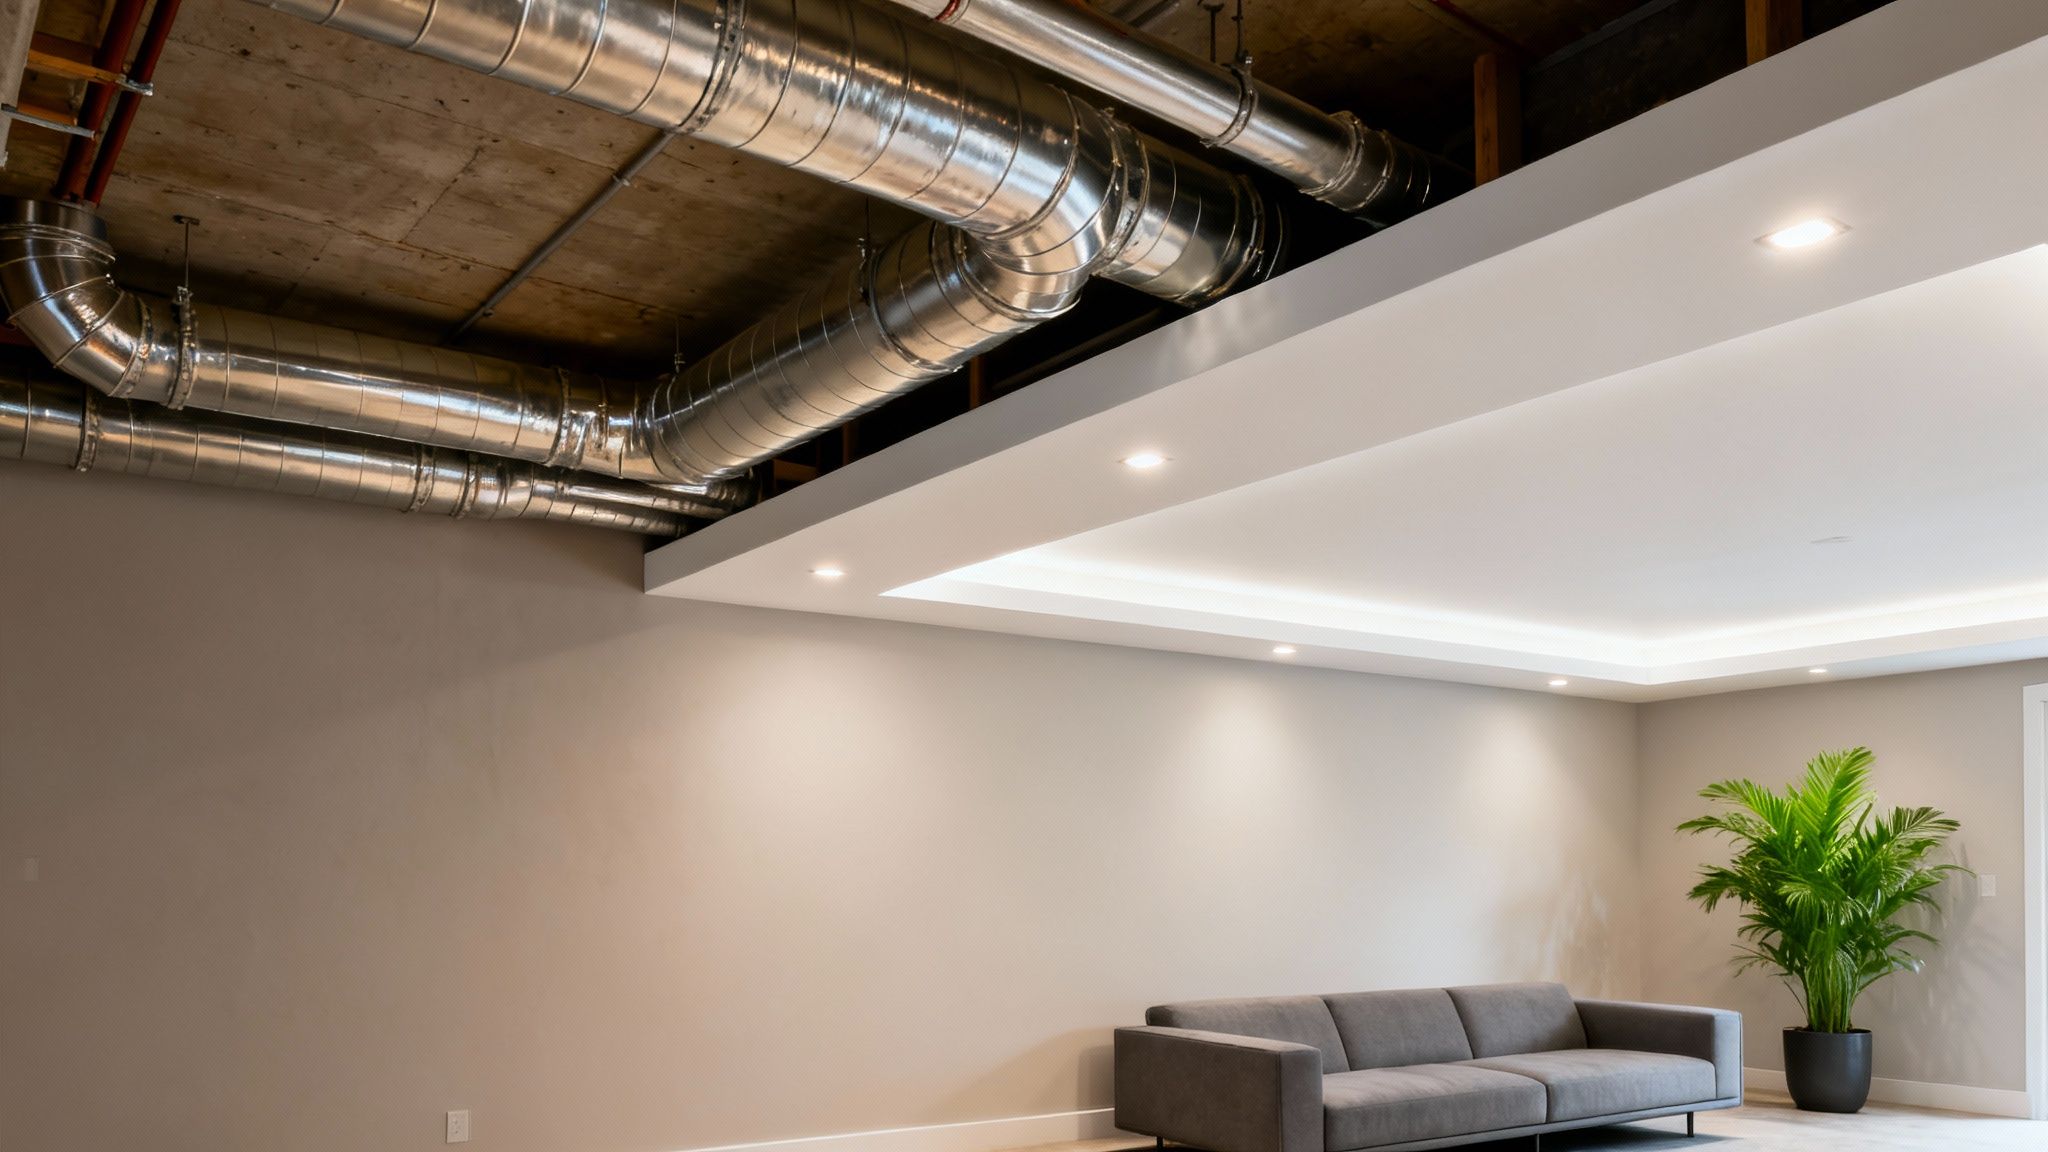
If you're after a truly custom, built-in finish for your basement, nothing beats a well-constructed soffit, sometimes called a bulkhead. This is where you frame around the ductwork with lumber and then wrap it in drywall. When it’s done right, it doesn't look like a cover-up at all—it looks like a deliberate architectural choice. This is hands-down the best way to hide ducts while keeping the ceiling as high as possible across the rest of the room.
Unlike a drop ceiling, which brings the entire ceiling down, a soffit just boxes in the specific duct runs. This gives you clean, sharp lines and even lets you add cool features like recessed lighting right into the soffit for a high-end, polished feel. It definitely takes more skill than just painting the ducts, but the professional result is almost always worth the extra sweat.
Gathering Your Tools and Materials
A great-looking soffit all comes down to the framing, and for that, you need the right gear. A wavy, uneven frame will stick out like a sore thumb once the drywall is up, so precision is everything here.
Make sure you have a solid set of tools ready to go for straight cuts and a level frame.
- Miter Saw: You absolutely need one for clean, accurate cuts on your lumber.
- Drill or Impact Driver: For driving all the screws to assemble the frame.
- Level: A 4-foot level is your best friend here. It’s critical for making sure the bottom of the soffit is perfectly horizontal.
- Tape Measure and Pencil: The classic duo for accurate measurements and markings.
- Stud Finder: Don’t guess where the joists are. Use this to find your solid anchor points in the ceiling.
As for materials, the shopping list is pretty simple. I usually recommend lightweight 2x2 lumber for this. It's much easier to handle than 2x4s and provides more than enough strength for a non-load-bearing soffit.
Pro Tip: Whatever your lumber calculation is, add 10-15% to it. This little buffer covers you for the inevitable miscut, a warped board you didn't notice at the store, or an odd framing situation. It'll save you a frustrating mid-project trip to the hardware store.
Before you start building, understanding effective ductwork casing solutions can give you a better grasp of how material choices will influence the final look and longevity of your project.
This infographic lays out the typical workflow for tackling basement ductwork.
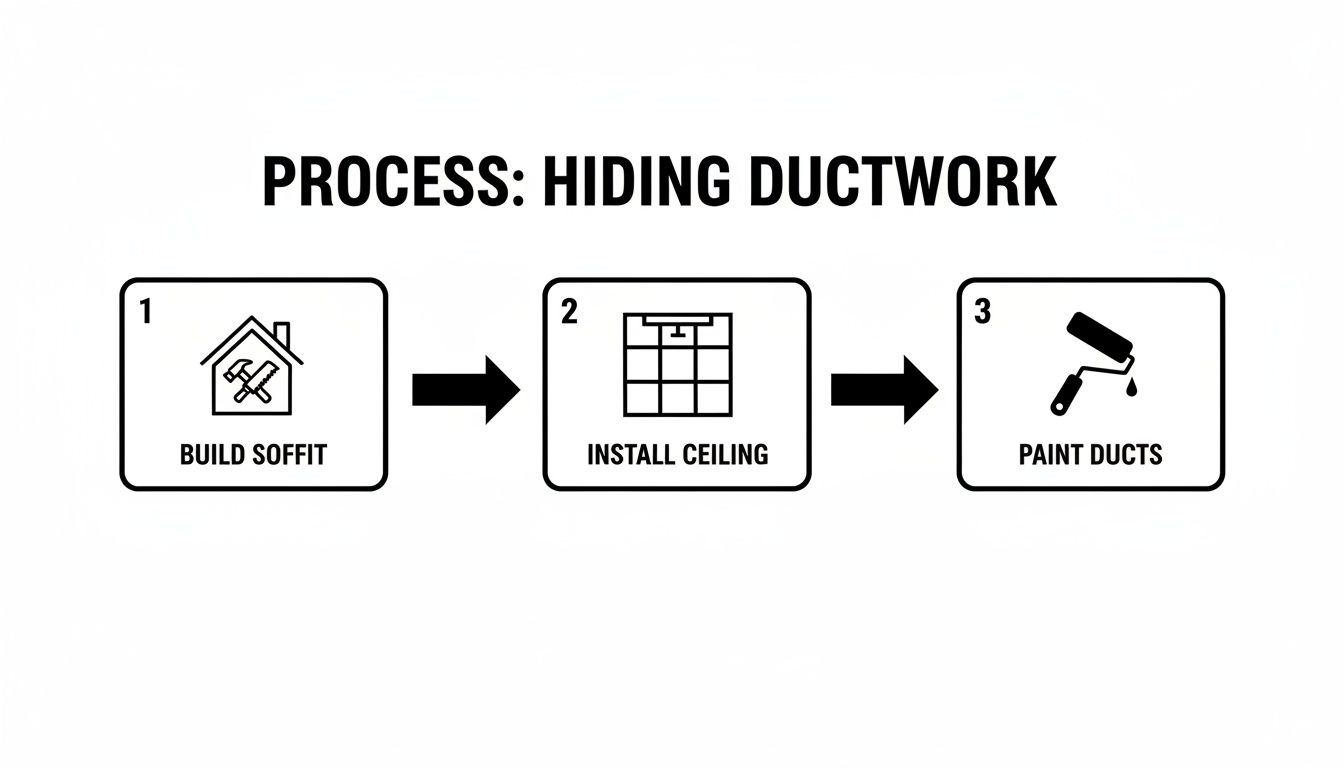
As you can see, building the soffit is often the foundational step that dictates how the rest of the finishing work, like installing the ceiling or painting, will proceed.
Mapping Out and Building the Frame
First things first, you need to lay out the frame. Find the lowest point of your ductwork and measure down from the ceiling joists. Give yourself at least an inch of wiggle room, then add the thickness of the wood you're using for the bottom of the frame (which is 1.5 inches for a 2x2). Mark this final height on the wall at several points along the duct run.
Now, grab your level and a chalk line and snap a perfectly straight line connecting those marks. This line is your guide.
You'll screw your first piece of lumber—the ledger board—right along that chalk line, making sure to hit the wall studs. Next, you'll attach a parallel board directly to the ceiling joists, positioned just far enough from the wall to clear the width of the ducts.
Once those two main supports are solid, you can build the "ladder" that will form the bottom of the soffit. This is made of short vertical pieces (called cripples) and a bottom plate. It’s way easier to assemble these ladder sections on the floor and then lift them into place, screwing them securely between your wall ledger and the ceiling support.
Handling Corners and Intersections
Let's be real, basements are rarely straightforward. You’re almost guaranteed to run into corners where ducts make a 90-degree turn or where different runs intersect. This is where a little planning goes a long way.
When you have a corner, you're essentially framing two separate soffit boxes that have to meet perfectly. The trick is to make sure the bottom frames of both sections line up seamlessly. I find it easiest to build one side completely first, then build the second section to meet it, using that finished side as your guide.
If you’ve got pipes or a tangle of wires running alongside the ducts, don't sweat it. Just build your soffit frame a bit wider or deeper to hide everything together. The goal is one clean, unified enclosure, not a bunch of small, awkward boxes. And one last thing: plan for any access panels you might need for things like plumbing cleanouts or electrical junction boxes before you hang the drywall. Framing an opening now is a thousand times easier than cutting into a finished, painted wall later.
Using a Drop Ceiling for Total Concealment
When you look up at your basement ceiling and see a chaotic jumble of ducts, pipes, and wires, boxing everything in individually feels like an impossible task. This is where a drop ceiling, often called a suspended ceiling, really shines. It's a clean, efficient, and surprisingly stylish way to hide everything at once, creating a brand new, perfectly level ceiling plane below the mess.
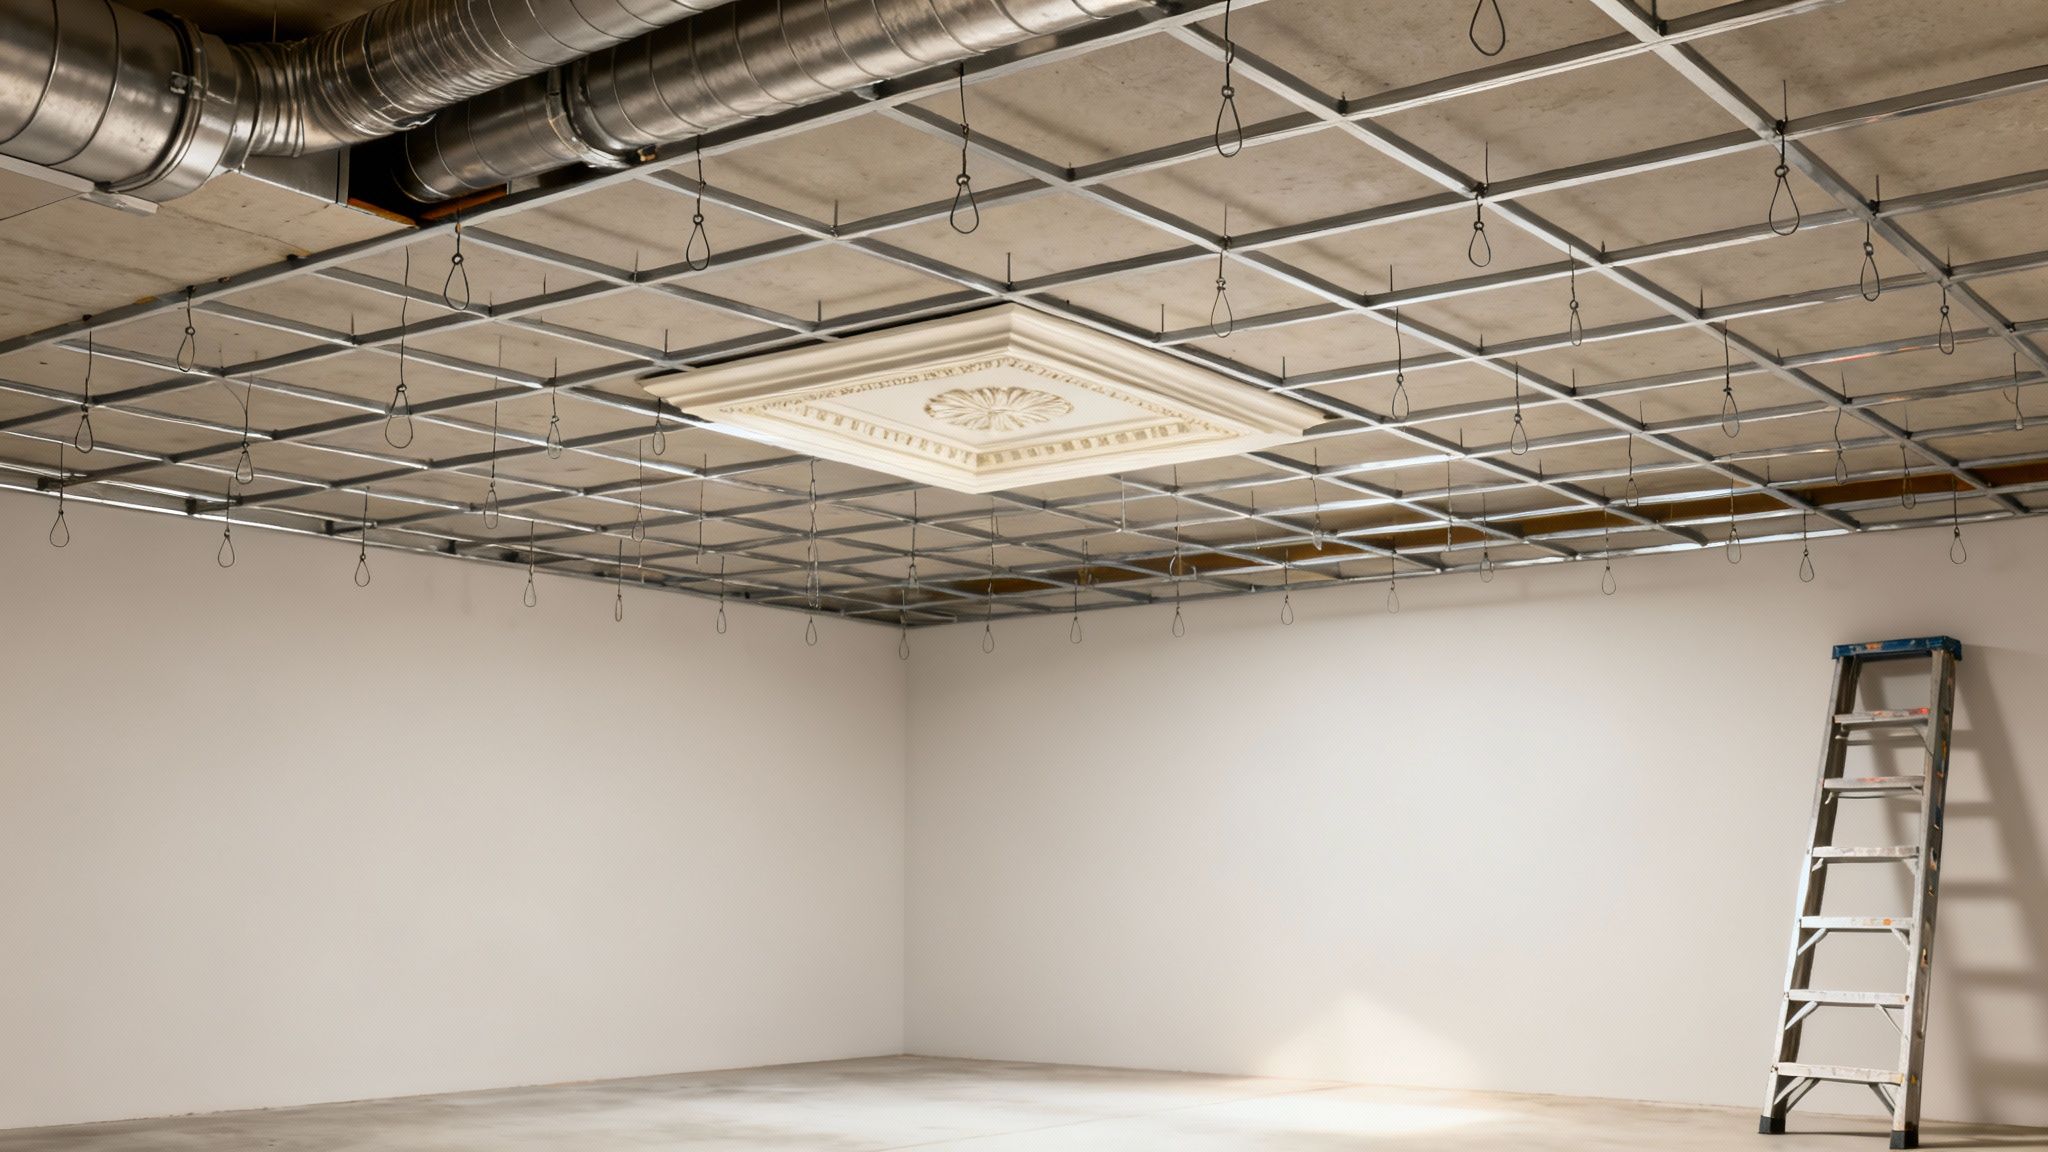
The whole system is pretty straightforward. A lightweight metal grid hangs from the overhead joists on a series of wires. Once the grid is up, you simply drop specially-sized ceiling panels or "tiles" into place. The main trade-off, of course, is headroom—you're going to lose at least a few inches across the entire room. But for a really complicated basement, the benefits almost always outweigh that loss of space.
Why Choose a Drop Ceiling?
The single biggest reason people go with a drop ceiling is unbeatable access. If a pipe ever decides to spring a leak or you want to run new speaker wire, you don't need a drywall saw and a crowbar. You just pop a tile out of the grid, do your work, and pop it back in. Future repairs and upgrades become incredibly simple.
Forget the old-school, drab fiberboard tiles you remember from office buildings. Today's market is packed with options to match any style you're going for.
- Coffered Panels: These give you a high-end, architectural look that mimics expensive custom woodwork.
- Acoustic Tiles: If you're building a home theater or a music room, these are a must-have. They’re designed specifically to absorb sound and kill echoes.
- Moisture-Resistant Tiles: Made from materials like PVC or fiberglass, these are the perfect choice for basements that might get a little damp.
Think of a drop ceiling as the "reset button" for a complex basement. Instead of trying to work around every single pipe and duct, you just create a clean slate underneath it all. It simplifies everything from installing lights to any maintenance you'll have to do down the road.
This approach is one of the most popular ways to handle a complete basement ceiling finish because it perfectly balances looks with long-term practicality.
Understanding the Installation Process
Installing a drop ceiling is a fantastic DIY project for a handy homeowner. It’s less about complex carpentry and more about careful measurement and getting things level.
You'll start by installing wall angle molding around the entire room. This L-shaped metal track sets the final height of your new ceiling and supports the grid's outer edges.
Next up are the main "tees," the long metal runners that create the backbone of the grid. These are hung from the joists with hanger wires, which you can adjust up or down to get everything perfectly level. This is the most critical part of the job. If you have a laser level, now is the time to use it—it will make this step infinitely faster and more accurate.
Finally, you'll snap shorter "cross tees" between the main runners to create the 2x2 or 2x4 foot openings for your tiles. Once the grid is complete, square, and solid, you can add your light fixtures and start dropping the ceiling tiles in. It's a really satisfying last step that completely transforms the room.
Key Considerations for a Successful Installation
Before you cut a single piece, think through your layout. The last thing you want is a row of awkward, paper-thin slivers of tile along one wall. Plan the grid so that the border tiles on opposite sides of the room are roughly the same size. It makes the whole installation look deliberate and professional.
Lighting is another huge piece of the puzzle. Recessed can lights made specifically for suspended ceilings are a great choice and look fantastic. Just be sure to run all your wiring before the grid is fully assembled.
Lastly, do a quick check on your local building codes here in Utah County. Whether you're in Orem, Provo, or Saratoga Springs, there are minimum ceiling height requirements. Most codes mandate at least 7 feet of clearance in living spaces. Measure from the floor to the lowest-hanging pipe or duct to make sure your finished drop ceiling will be compliant.
Creative Camouflage on a Budget
Not every solution for hiding ductwork needs to involve a full construction crew and a huge budget. In fact, some of the most effective and stylish approaches are also the most affordable. It's all about getting creative and either making your ductwork a deliberate design feature or cleverly distracting the eye.
If you're a fan of the industrial-chic, urban loft, or even a modern farmhouse vibe, your exposed ducts can be a major asset. Working with your basement’s existing structure instead of fighting it not only saves a ton of money but also keeps every last inch of precious ceiling height.
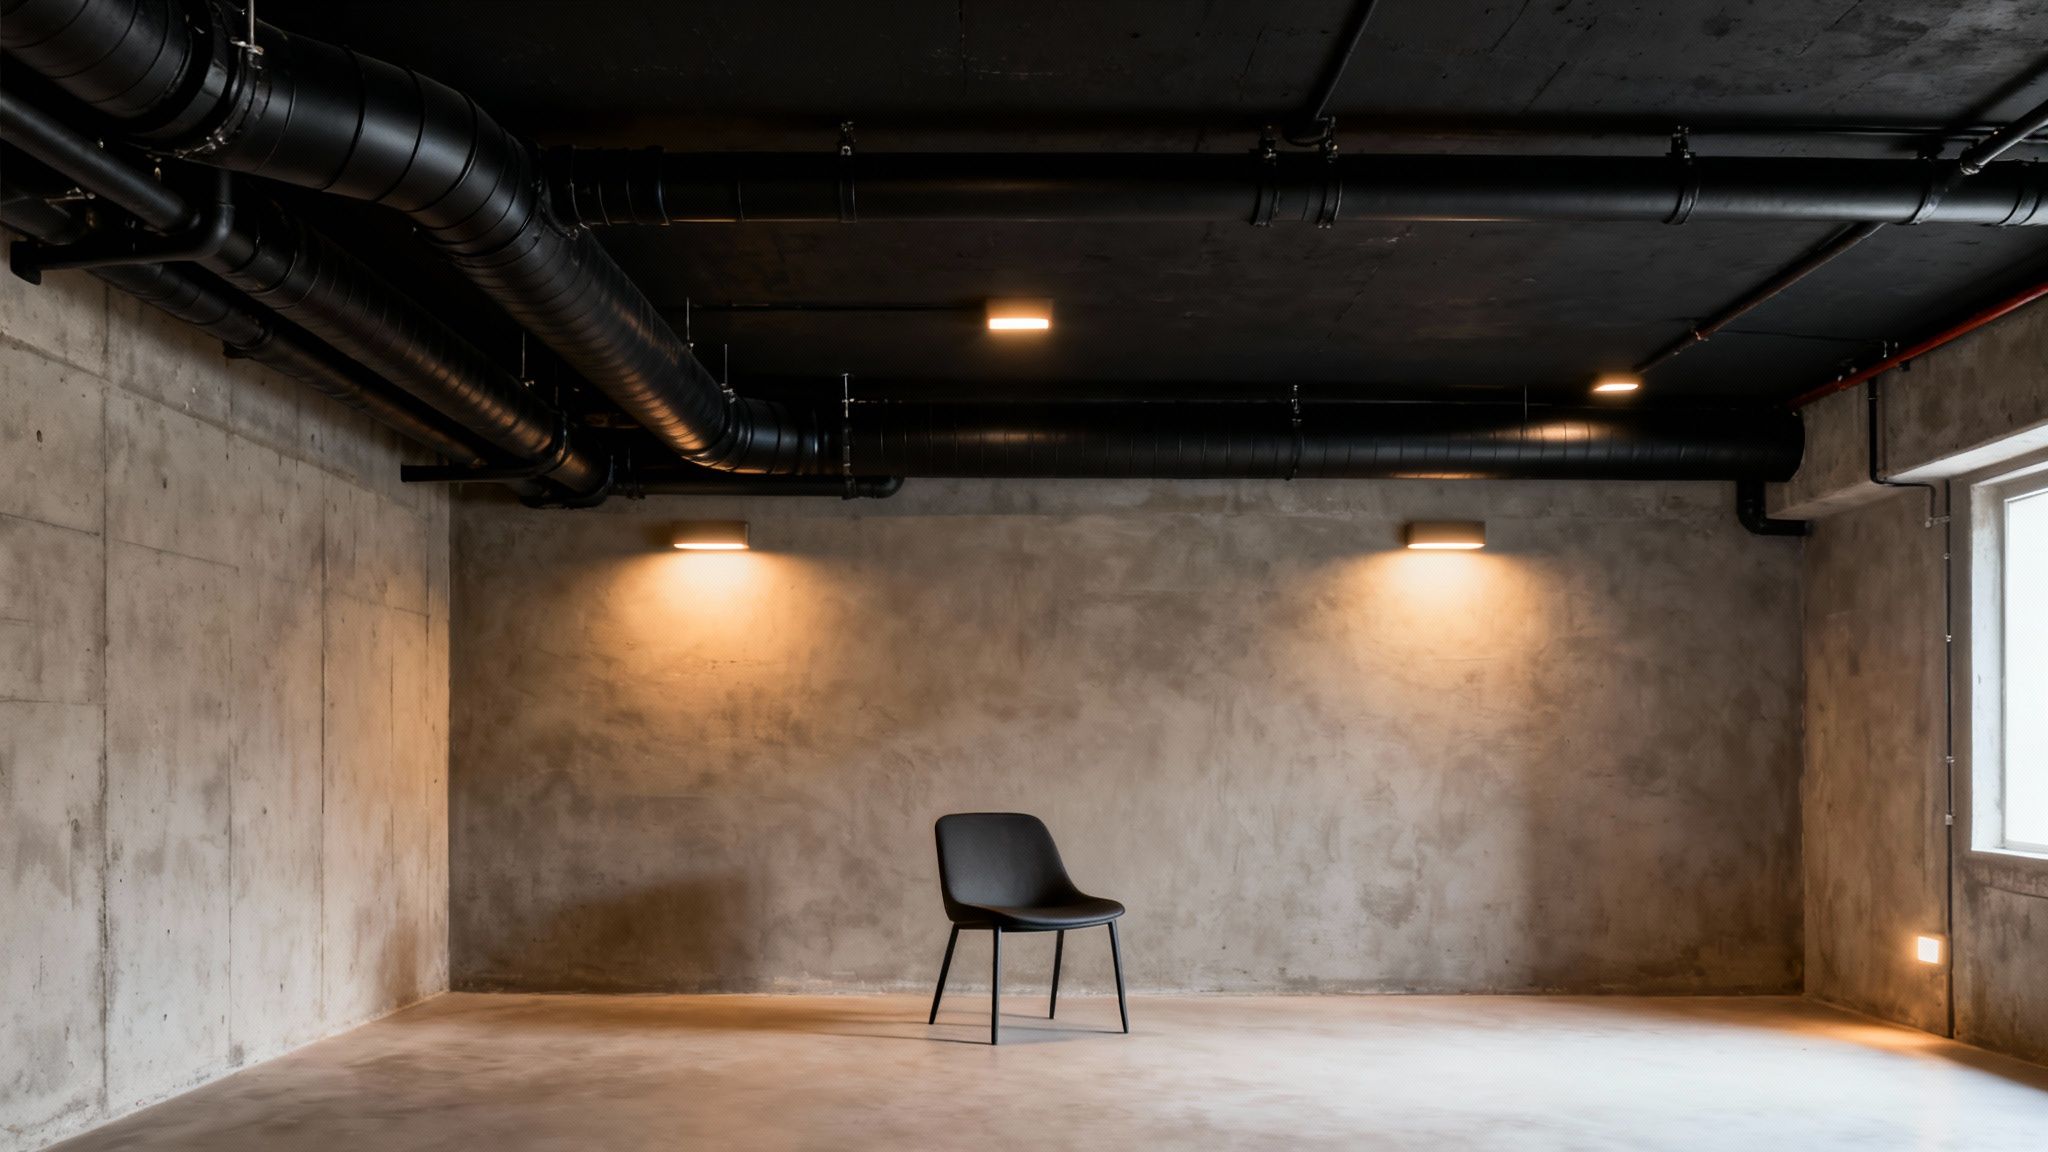
Embrace the Industrial Look with Paint
One of the most popular and impactful methods is to simply paint everything—the joists, pipes, wiring, and ductwork. This approach transforms a chaotic, unfinished ceiling into a unified, intentional, and surprisingly clean look.
The secret here is the color. A matte black or dark charcoal gray is the go-to for a reason. These dark, non-reflective colors make the ceiling visually recede, fooling your brain into thinking the room is taller than it is. The ducts stop being an eyesore and just melt into the background. While a stark white can work if you’re aiming for a brighter, more airy feel, be aware that it will make the ducts stand out more.
Before you even think about picking up a paint sprayer, remember that prep work is everything.
- Clean Meticulously: Basements are notorious for dust and cobwebs. You'll need to thoroughly wipe down every surface, especially the metal ducts, with a good degreasing cleaner.
- Prime the Metal: Don't skip this step. A high-quality metal primer is crucial for getting the paint to stick to the slick ductwork and preventing it from peeling off later.
- A Paint Sprayer is Your Best Friend: You could tackle this with brushes and rollers, but trust me, a paint sprayer will save you an incredible amount of time and give you a far more professional, even finish.
This isn't just about looks. Research has shown that when ducts are located within a home's conditioned space, the system achieves 96% distribution efficiency. While painting doesn't fully enclose them, finishing the basement around them helps condition that air, improving performance compared to leaving them in a raw, uninsulated area.
Ingenious Disguises and Diversions
If the full-on exposed look isn't for you, there are still plenty of ways to camouflage ductwork without building a full bulkhead. These solutions can add a ton of character and even some extra function to your basement.
A brilliant trick is to wrap the ducts to look like rustic wooden beams. You can build a simple three-sided box out of lightweight plywood or, for a more authentic feel, reclaimed barn wood. Fit it snugly around the duct, stain it, and suddenly you have a warm architectural feature that looks completely at home in a farmhouse or rustic-style space.
Another great strategy is to build around the ductwork. Let's say you have a low-hanging duct running along a wall. Instead of a clunky box, why not build custom bookshelves or a media center where the duct becomes the top of the unit? It integrates perfectly, and the built-in looks like it was planned from the very beginning.
For even more clever ideas, check out our guide on basement finishing ideas on a budget.
Using Light to Your Advantage
Sometimes, the best way to hide something in plain sight is to draw attention somewhere else. Strategic lighting is a powerful tool for making ductwork fade into the background.
The key is to avoid bright overhead fixtures that flood the ceiling with light. Instead, focus on layering light downwards.
- Wall Sconces: These cast a beautiful, warm glow on the walls, making the room feel cozier and keeping the eye level down, away from the ceiling.
- Track Lighting: Use track lights to spotlight artwork, a feature wall, or a specific activity zone. You create interesting focal points, leaving the ceiling in relative shadow.
- Lamps: A few well-placed floor and table lamps create inviting pools of light that make a large basement feel much more intimate and comfortable.
By carefully planning your lighting, you control what people notice. The ducts don't disappear, but they become an unimportant background element that the eye naturally skims right over. It’s a simple but remarkably effective design trick.
Planning Your Project Before You Start
Any successful project starts with a solid plan. Before you even think about buying lumber or opening a can of paint, taking some time to map everything out will save you from major headaches down the road. This groundwork ensures your finished basement is safe, comfortable, and up to code. It might feel like the boring part, but it’s arguably the most important.
Your first move should be a quick check-in with your local building department. Whether you’re in Orem, Provo, or Saratoga Springs, there are specific rules you have to follow. These aren't just suggestions; they're legal requirements designed to keep you and your family safe.
Understanding Local Codes and Regulations
Think of local building codes as the rulebook for your project. The most common one you'll run into deals with ceiling height. Most cities require a finished ceiling to be at least 7 feet high in living areas. The good news is they often allow for things like beams or soffits to hang as low as 6 feet 4 inches. Knowing this exact number is critical when you're weighing the pros and cons of a drop ceiling versus a series of soffits.
Also, if your plan includes adding new lighting—like recessed cans inside a soffit—you're officially doing electrical work. Any new wiring almost always requires a permit and an inspection to make sure it’s done safely. Don't even think about skipping this step; faulty electrical work is one of the leading causes of house fires.
The Most Important Step Before You Build
Here’s a crucial tip that too many people miss, and it can make a massive difference in your home's comfort and energy bills: seal your ductwork before you enclose it. Over time, the seams and joints in your HVAC ducts can develop tiny air leaks. Once you hide them behind drywall, those small leaks are practically impossible to fix.
Before you build a single frame, go over every joint and seam with mastic sealant. It's a gooey, paint-on substance made specifically for this job. Steer clear of that flimsy foil tape you see at hardware stores—it tends to dry out and fail over time. Mastic creates a permanent, flexible seal that stops your expensive heated or cooled air from escaping into the joist bays.
Decades of research from the Department of Energy confirm that this step is non-negotiable for energy performance. The Building America program found that for concealed ductwork to be effective, leakage must test at or below 1.5 cubic feet per minute (cfm) per 100 square feet of conditioned area. This is only possible by thoroughly sealing every connection before you build. Read the full research on building code compliance to understand why this is a cornerstone of modern energy efficiency.
DIY vs. Hiring a Professional
Now for the big question: should you do this yourself? Hiding ductwork can be a fantastic DIY project, but you need to be honest about your skills, the tools you have, and how much time you can realistically commit.
Making the call to DIY or hire a pro often comes down to a few key factors. This table breaks down what you can expect from each approach.
| Skill & Complexity | Best for simple, straight runs. Complex intersections or curved soffits can be tricky for a novice. | Experts handle any layout with ease, ensuring clean lines and a polished look. |
| Tools & Equipment | You'll need to own or rent a miter saw, level, drill, and potentially a drywall lift. | Professionals arrive with a full suite of high-quality, specialized tools for the job. |
| Time Commitment | Can take several weekends, working around your schedule. Progress can be slow. | A dedicated crew can often complete the job in just a few days, dramatically speeding up your project. |
| Code & Permits | Your responsibility to research local codes, pull permits, and schedule inspections. | The contractor manages all permits and ensures the entire project is code-compliant from start to finish. |
| Cost | Lower upfront cost, primarily for materials. Your time is the hidden expense. | Higher upfront cost covering labor, materials, and expertise. Offers peace of mind and a warranty. |
| Problem Solving | Unexpected issues (like pipes in the way or uneven joists) are yours to solve on the fly. | Experienced pros have seen it all and can quickly adapt to challenges without derailing the project. |
Ultimately, hiring a professional contractor like Northpoint Construction & Design removes the guesswork. We handle all the permits, guarantee everything is built to code, and have the experience to solve the unexpected problems that always seem to pop up in basements. While the DIY route can save money upfront, a pro ensures the job is done right the first time, protecting your home's value and safety.
For a deeper dive into this initial stage, you might be interested in our guide on planning a basement renovation.
Got Questions About Hiding That Ductwork? We've Got Answers.
When you're staring at a maze of basement ducts, a lot of questions come to mind. It’s one of those projects where the details really matter—from cost and codes to the little things that make the final result look truly professional. Let's tackle some of the most common questions we hear from homeowners around here.
What’s the Real Cost to Hide Basement Ductwork?
Honestly, it's all over the map. The final price tag depends entirely on what you do and who does it. There’s no single answer, but I can give you a pretty good idea of the budget you’ll be looking at.
If you're going the DIY route, just painting everything is by far the cheapest option. You can grab primer, paint, and all your supplies and completely change the look for under $200. Thinking about building your own drywall soffits? The materials—lumber, drywall, tape, mud—for a typical basement will probably set you back somewhere between $500 and $1,500.
Now, if you bring in the pros, the numbers change. A professionally installed drop ceiling, depending on the tile you choose and the size of your space, usually lands in the $2,000 to $5,000 range. For custom framing and finishing by a contractor, you can expect to start around $3,000, with the price climbing based on how complex the job gets. The key is to get a detailed quote for your specific basement.
Will I Need a Permit to Build Soffits or a Drop Ceiling?
This is a big one, and the answer is almost always: "It depends on where you live." Here in Utah County—whether you're in Orem, Provo, Lehi, American Fork, or Saratoga Springs—the rules are fairly similar, but you should always double-check with your city's building department.
Painting your ducts? No permit needed. That’s just a cosmetic update. But the second you start building new structures or running wires, you’re in permit territory.
- Building Soffits: This can be a bit of a gray area. If you're just building a simple box to cover ducts and not touching any wiring, some cities might not require a permit. But it's always smarter and safer to make a quick call and ask.
- Adding Lights: The moment you plan to install can lights or any other fixtures in your new soffit or ceiling, you absolutely need an electrical permit. This is non-negotiable for safety.
- Drop Ceilings: The grid itself might not need a permit, but just like with soffits, any electrical work for new lighting definitely will.
Pro Tip: Just assume you might need a permit and call your local building official. When you work with a contractor like Northpoint Construction, we handle all the permitting for you. It's part of the job and ensures everything is done safely and to code right from the start.
What's the Minimum Ceiling Height for a Finished Basement?
Headroom is everything in a basement, and the building codes are very clear on this. Most regulations, which are based on the International Residential Code (IRC), have strict minimums for a "habitable space."
The magic number for a finished basement ceiling is a minimum height of 7 feet. But, there's a little wiggle room. The code allows for obstructions like beams and ducts—or the soffits you build to hide them—to hang a bit lower. The clearance under those elements can go down to 6 feet 4 inches. Keep that number in your back pocket as you plan; it’s crucial for making sure your finished space is both legal and comfortable.
Should I Bother Insulating the Soffits Around My Ductwork?
Yes. 100% yes. This is a small, cheap step that makes a huge difference in both comfort and energy efficiency down the road.
Sure, sealing your duct joints with mastic is the top priority for stopping air leaks. But adding insulation inside the soffit box does two great things. First, it helps keep the conditioned air inside the ducts at the right temperature as it travels. That means your HVAC system runs a little less, which can save you money.
Second, insulation is a fantastic sound dampener. It will quiet down the "whoosh" of air moving through the system, making your new living space that much more peaceful. A few rolls of fiberglass batt insulation or some rigid foam board is a simple upgrade that adds a ton of value.
Ready to turn that basement from a utility space into a beautiful, livable part of your home? The team at Northpoint Construction has tackled every ductwork challenge you can imagine, and we know how to deliver a polished, professional finish that really elevates your home. We're proud to serve homeowners in Orem, Provo, Lehi, American Fork, and Saratoga Springs, handling the entire process from permits to the final coat of paint. Let's start planning your project today—get in touch at https://buildnp.com.