
How to Install a Bathroom in the Basement Your Complete DIY Guide
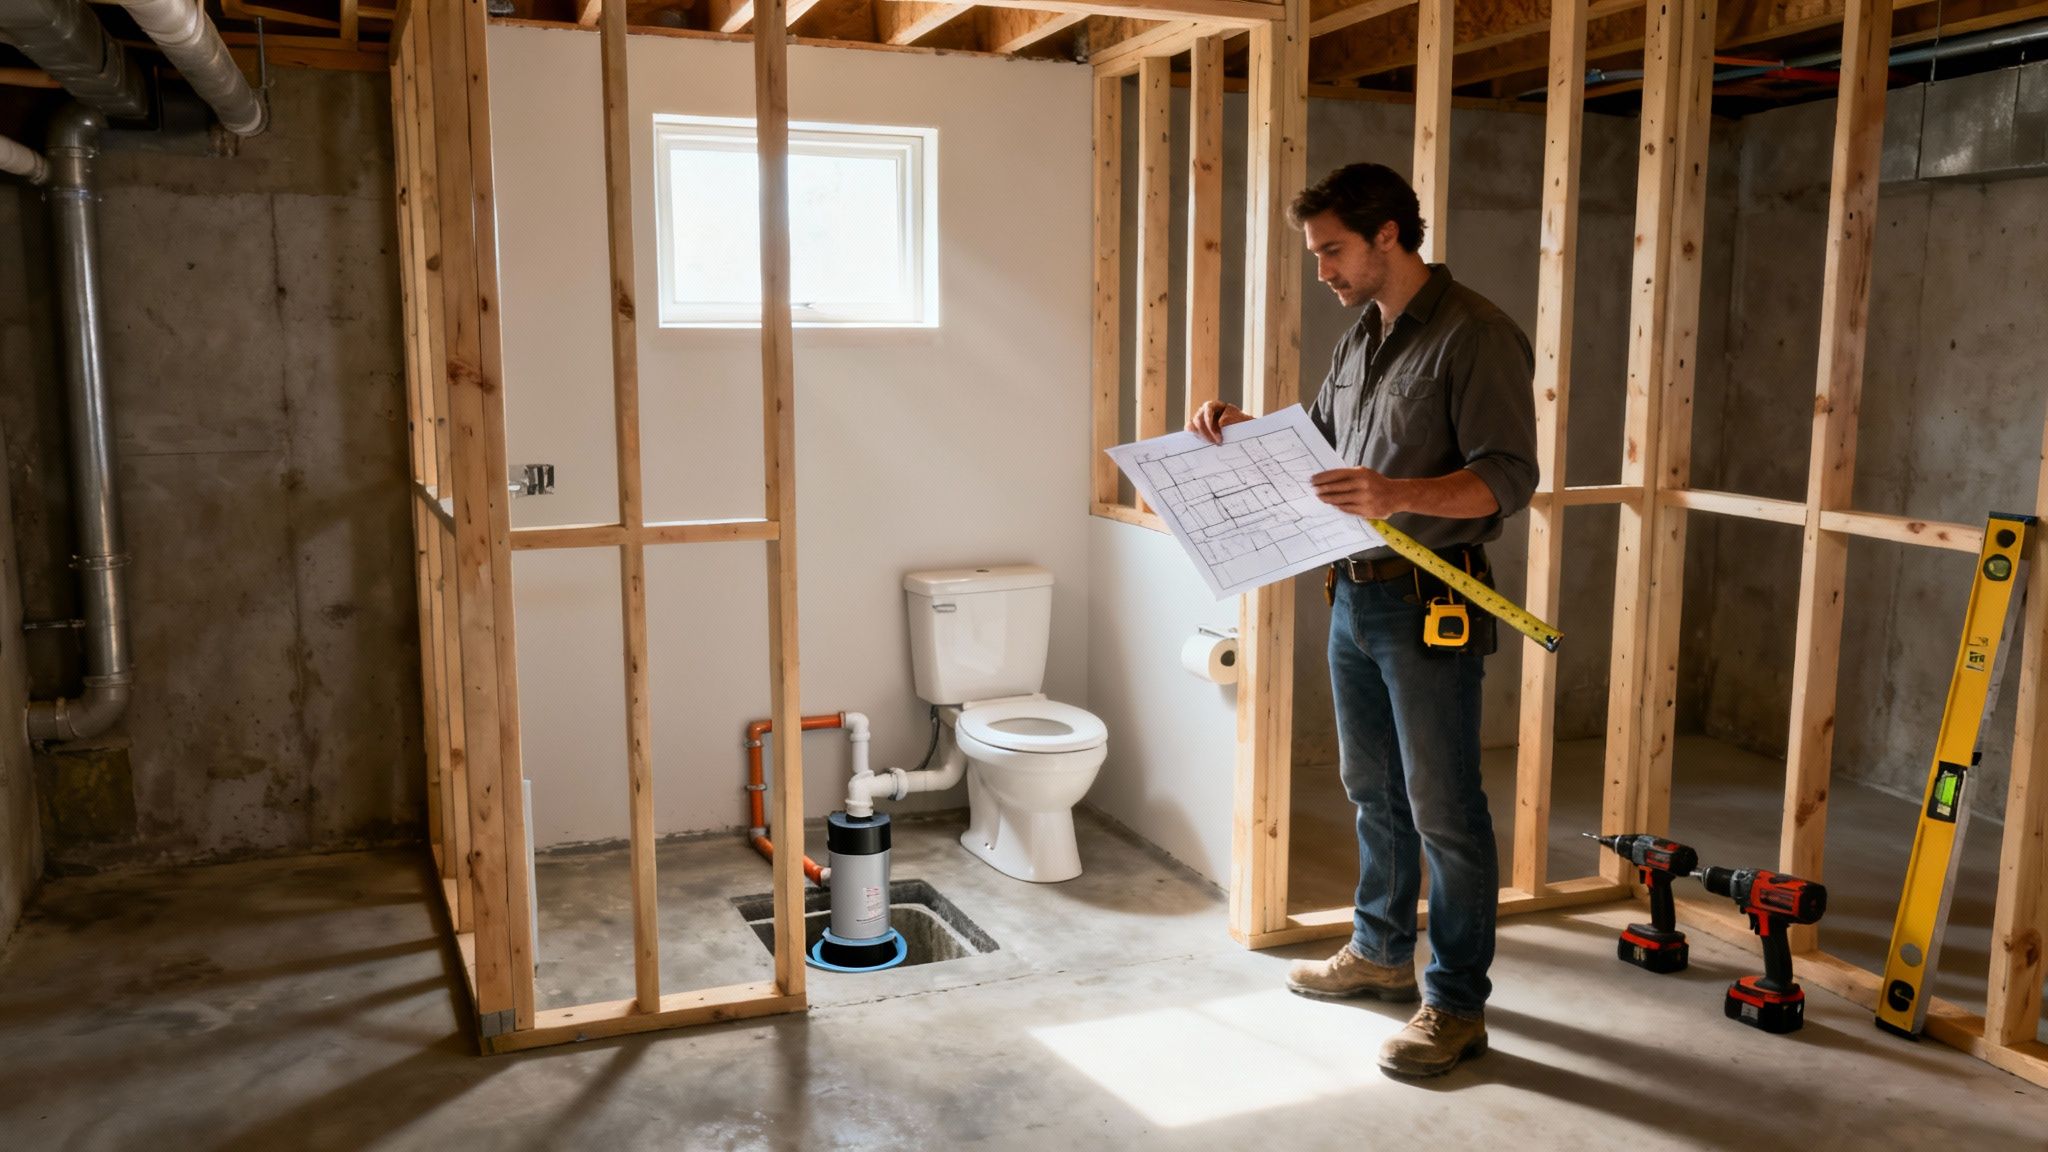
Adding a bathroom in your basement starts with a solid game plan. You need to find the best location near existing plumbing, get the right permits, and then draw up a floor plan that actually works. Getting this foundation right is crucial—it's what separates a smooth project from a costly nightmare. From there, it's all about tackling the unique challenges that come with below-ground plumbing and moisture control.
Your Basement Bathroom Blueprint: From Plan to Permit
Before you even think about picking up a hammer, the success of your basement bathroom is decided on paper. This is the stage where you head off budget blowouts, code violations, and the kind of rework that makes you want to pull your hair out. It's about thinking through every single detail, from where the toilet will sit to what this is all going to cost you.
A well-thought-out plan turns a hugely complex project into a series of manageable, bite-sized tasks. It's your best insurance against making bad assumptions about your home's plumbing or structural limits.
Scout the Ideal Location
Here's the golden rule for basement bathrooms: work smarter, not harder. The easiest and most affordable spot is almost always directly below an existing main-floor bathroom or kitchen.
Why? Because your main plumbing drain and vent stacks are already right there. Tying into these existing lines is infinitely easier than trenching across your entire basement to run new ones. Look for that big vertical pipe—usually 3 or 4 inches in diameter, made of PVC or cast iron. The closer you can place your new toilet to this stack, the less concrete you'll have to bust up. While you're at it, keep an eye out for nearby electrical circuits and HVAC ductwork you can tap into for your lights and exhaust fan.
Navigating Building Codes and Permits
Trying to skip the permit process is one of the most expensive shortcuts a homeowner can take. Pretty much every city or county requires a permit for a new bathroom. It’s a big job involving major plumbing, electrical, and sometimes structural changes.
"A building permit isn't just red tape; it's your assurance that the work is inspected and deemed safe. It protects your family, your home's value, and ensures you won't have to tear out finished work later."
Start by visiting your local municipality's building department website or just give them a call. They'll give you a checklist of what you need, which almost always includes:
- A detailed floor plan: This drawing needs to show where every fixture goes, along with all the key dimensions and clearances.
- Plumbing schematics: You'll need a basic diagram showing how your new drains and vents will connect to the existing system.
- Electrical plan: This shows the location of GFCI outlets, lighting, and the circuit for the exhaust fan.
Getting your permit squared away upfront keeps the project legal and ensures it meets critical safety standards. If you're trying to figure out how this bathroom fits into a larger basement finishing project, it can be helpful to look at professional house plans with a basement to see how the pros lay things out.
Mapping a Functional Floor Plan
Once you've picked a spot, it's time to design the layout. Grab a tape measure and some graph paper (or fire up some simple design software) and start sketching. The most important thing is to account for the minimum clearances required by building codes, like having enough space in front of the toilet and sink.
A standard 5x8 foot layout is a classic for a reason—it works great for a full bathroom. But don't worry if you have less space; you can still fit a perfectly functional half-bath in a smaller footprint. Think about how you'll move around in the room. Does the door swing open and block the vanity? Can you get into the shower easily? These small details make a massive difference in how usable the bathroom feels every day.
Building a Realistic Budget
Budgeting for a basement bathroom means looking closely at both materials and labor. It's a fantastic addition to your home, but the costs can swing wildly.
Based on 2025 data, a full basement bathroom can run anywhere from $10,000 to $50,000. The unique plumbing challenges you find in a basement—like needing to break up a lot of concrete for drain lines—can easily inflate that cost by 25-40%. For a deeper dive into what things cost, check out our guide on the cost to install a bathroom in the basement. This kind of project is part of a growing trend, with bathroom installation services expected to grow as more people upgrade their homes. Understanding these remodeling statistics and market trends can help you put together a much more accurate budget.
Solving The Basement Plumbing Puzzle
Let's be honest: plumbing is the single biggest headache when you're figuring out how to add a bathroom to a basement. It all comes down to a simple problem—gravity. Your basement floor sits below your home's main sewer line, which means wastewater has nowhere to go on its own. Everything from the toilet, sink, and shower needs a powered assist to get up and out.
Luckily, you've got two solid solutions: a traditional sewage ejector pump or a more modern upflush system. The path you choose here will have a huge impact on your project's budget, timeline, and how much dust you kick up.
This decision tree gives you a great visual starting point, walking you through the key questions around location, local codes, and your budget.
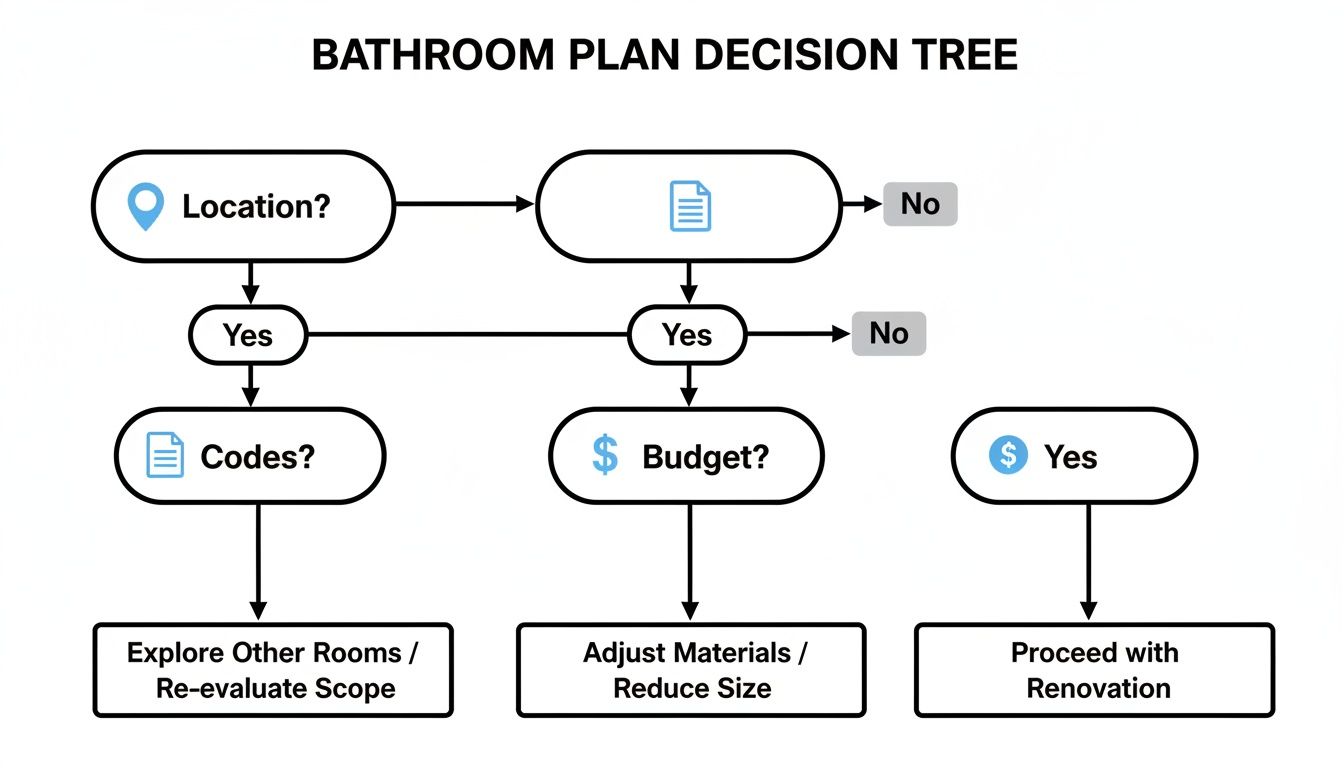
As you can see, your plumbing strategy isn't an isolated decision. It's tied directly to your initial layout and permitting, so it's one of the first things you need to lock down.
The Two Main Basement Plumbing Solutions
Choosing your plumbing system is the first major fork in the road. One option involves breaking up your concrete floor, while the other offers a much less invasive, surface-level installation.
- Sewage Ejector Pump: This is the old-school, heavy-duty workhorse. The job involves jackhammering a hole in your concrete slab, digging out a pit, and dropping in a sealed basin that holds a submersible pump. All your new bathroom fixtures will drain into this basin. When the wastewater hits a certain level, a float switch kicks the pump on, and it powerfully sends everything up into your home’s main sewer line.
- Upflush System (Macerator): Think of this as the modern, less-messy alternative. An upflush toilet has a special grinding unit (the macerator) in a box behind it or even built right into the base. When you flush, powerful steel blades turn solid waste and paper into a fine slurry. This slurry is then easily pumped out through a small-diameter pipe that can be run up a wall and over to your main drain. The sink and shower can often be tied into the same unit.
Sewage Ejector Pumps: The Heavy-Duty Option
If you’re dreaming of a full bathroom that will see a lot of use—especially one with a shower or bathtub—a sewage ejector pump is almost always the most bulletproof choice. It works just like a standard toilet system and has no problem handling a high volume of water from multiple fixtures at once.
The trade-off? The installation is a serious construction project. It means bringing in a jackhammer, digging, and pouring fresh concrete. It's loud, dusty work, and frankly, it's where most DIYers decide to call in a professional plumber. On the plus side, the pump itself is tucked away in the pit, so its operation is much quieter within the actual bathroom.
An ejector pump is the definition of "set it and forget it." It’s built to last and can handle just about anything, but you have to be prepared for the significant upfront installation work.
Once that pit is in, you’ll run standard 3-inch drain pipes from the toilet, sink, and shower to the basin. Getting the slope right is critical; you need a consistent downward pitch of ¼ inch per foot to keep things flowing smoothly. Proper venting is also non-negotiable. The system requires its own dedicated vent pipe that connects into your home's main vent stack, which prevents dangerous sewer gases from backing up into your new space.
Upflush Systems: The Concrete-Free Alternative
For many homeowners, an upflush, or macerating, toilet system is a total game-changer. The biggest selling point is that it sits right on your existing floor. No breaking concrete is required, which drastically cuts down on the mess, labor, and overall complexity of the job.
This makes it a fantastic solution for a confident DIYer or for basements where digging simply isn't an option. The discharge pipe is only about ¾ to 1 inch in diameter, making it incredibly easy to hide inside a wall on its way to the main drain stack.
Of course, there are some compromises. Because the pump is located right there in the bathroom, you'll hear it run for a few seconds after each flush. These systems are also a bit more sensitive—they’re designed for human waste and toilet paper only. Flushing anything else, like wet wipes or sanitary products, is a recipe for a clog that can be a real pain to fix.
To help you decide, here’s a head-to-head comparison.
Basement Drainage Solutions: Upflush vs. Sewage Ejector Pump
This table breaks down the key differences between the two main plumbing systems for basement bathrooms. Use it to weigh the pros and cons based on your project's scope, budget, and whether you plan to DIY or hire out the work.
| Installation | Sits on the floor; no concrete breaking. | Requires cutting concrete and digging a pit. |
| Best For | DIY projects, half baths, low-traffic areas. | High-traffic full bathrooms with showers. |
| Cost | Lower upfront installation cost. | Higher installation cost due to concrete work. |
| Noise Level | Audible pump noise in the bathroom. | Quieter operation; pump is in a sealed pit. |
| Maintenance | Clogs can be difficult to access and repair. | Easier access to pump in the basin for service. |
Ultimately, both are proven technologies that get the job done. An upflush system prioritizes ease of installation, while an ejector pump prioritizes raw power and durability.
Whichever system you land on, protecting those new pipes is crucial. To keep your new basement plumbing safe, it’s worth learning some basics on how to prevent pipe freezing, particularly if you live in a colder climate. A burst pipe in a freshly finished basement is a nightmare you don’t want to experience.
Framing the Walls and Running Utilities
With your plumbing plan figured out, the idea of a basement bathroom finally starts to feel real. This is where the room takes physical shape. We're building the bones—the walls that will define the vanity, the shower, and the toilet area. Mess this up, and you'll be kicking yourself later, because fixing mistakes behind drywall is a massive headache.
First things first, let's talk about moisture. Your concrete floor is a constant source of it, even if it feels dry to the touch. That’s why any wood that sits directly on the concrete needs to be pressure-treated lumber. This stuff is your first line of defense against rot. Use it for the bottom plate of every wall, no exceptions. It's a small detail that makes a huge difference in the longevity of your work.
For the rest of the wall studs and the top plates, regular kiln-dried lumber is all you need. Just remember the carpenter's golden rule: "measure twice, cut once." A wall that isn't plumb and square will cause problems all the way down the line, from hanging drywall to installing a vanity.
Building Strong and Square Frames
Think of your wall frames as simple ladders built from 2x4s. The vertical "studs" should be spaced 16 inches on-center. This isn't an arbitrary number; it's the standard for a reason. Drywall sheets are four feet wide, so this spacing ensures the edges of each sheet land squarely in the middle of a stud, giving you a solid surface to screw into.
The easiest way to build these frames is to assemble them flat on the floor first.
Cut your top and bottom plates to the exact length of the wall.
Lay them out parallel to each other and carefully mark your stud locations.
Cut all your vertical studs to length. The magic number here is your final ceiling height minus the thickness of both plates (which is usually 3 inches).
Nail it all together. Once assembled, you can tilt the entire wall up into position. Secure the bottom plate to the concrete with proper anchors, then fasten the top plate directly into the ceiling joists above.
This process is a fundamental part of any basement project. If you want a broader look at how this fits into the bigger picture, our complete guide on the basement finishing step-by-step process is a great resource.
Planning Electrical and Ventilation
With the wall studs exposed like a skeleton, now is the absolute best time to run your electrical wiring and ventilation ducting. It's a breeze—you just drill holes through the center of the studs and feed everything through. Waiting until after the drywall is up turns a simple task into a frustrating one.
When you map out the electrical, safety is everything.
- GFCI Outlets: Any outlet in a bathroom has to be Ground Fault Circuit Interrupter (GFCI) protected. This is a non-negotiable code requirement that can literally save a life in a wet environment. Plan on at least one near the vanity.
- Lighting: You'll want a mix of lighting. A main overhead light provides general illumination, but dedicated task lighting over the vanity is crucial. I also recommend putting a separate, waterproof light fixture right inside the shower stall.
- Exhaust Fan: Don't even think of skipping this. A powerful exhaust fan is your best defense against mold and mildew. It has to be ducted to vent directly outside your house—not into an attic, a crawlspace, or another part of the basement.
A properly sized and vented exhaust fan isn't a bonus feature; it's the most critical mechanical system in your new bathroom. It actively yanks moisture out of the air before it has a chance to settle in and cause rot, mildew, and peeling paint.
Choosing the Right Wall Covering
Okay, your framing is solid, and the plumbing, electrical, and ventilation have passed inspection. Now you can finally start closing up the walls. While you might use standard drywall in other parts of the basement, the bathroom demands something better.
For the main bathroom walls and ceiling, grab some moisture-resistant drywall (you'll often see it called "green board"). But for the wet areas—inside the shower or around the tub—you have to step it up to a cement backer board. This material is completely waterproof and gives your tile a rock-solid, stable foundation to adhere to.
Spending a little extra on these materials is a tiny fraction of the total project cost but provides major protection for your investment. Adding a full bathroom is a significant undertaking, contributing to the booming $68 billion U.S. bathroom remodel market. While every basement finish has its own budget, a project with this much plumbing work will naturally be on the higher end of the scale. You can discover more insights about the bathroom remodeling market to see how these projects fit into the bigger financial picture.
From Concrete Box to Waterproof Oasis
Okay, the framing is up and the plumbing and electrical are roughed in. Now comes the single most important phase of a basement bathroom project: defending it against moisture. Basements are naturally damp, so building a waterproof, mold-resistant shell isn't just a suggestion—it's the only way to protect your investment.
Think of it as building a sealed "room within a room." We’ll work from the outside in, starting with the concrete itself. Skipping these steps is a recipe for musty smells, peeling paint, and rot down the line. It's a gamble that almost never pays off.
Seal the Foundation First
Before you even think about flooring or drywall, you have to deal with the bare concrete. It might look and feel dry to the touch, but concrete is porous. It constantly pulls moisture from the surrounding soil through a process called wicking. If you trap that moisture behind your new walls and floors, you're essentially building a five-star resort for mold and mildew.
The fix is to apply a high-quality waterproofing product directly to the concrete. You've got options, from specialized paints to roll-on elastomeric membranes. For a bathroom, I always recommend a roll-on membrane. It creates a thick, flexible, and continuous barrier that's incredibly effective at blocking moisture vapor. You’ll want to apply this to the floor and at least a foot or two up the foundation walls to create a seamless, waterproof tub. If you want to dive deeper into this topic, understanding how to waterproof basement walls is a great place to start.
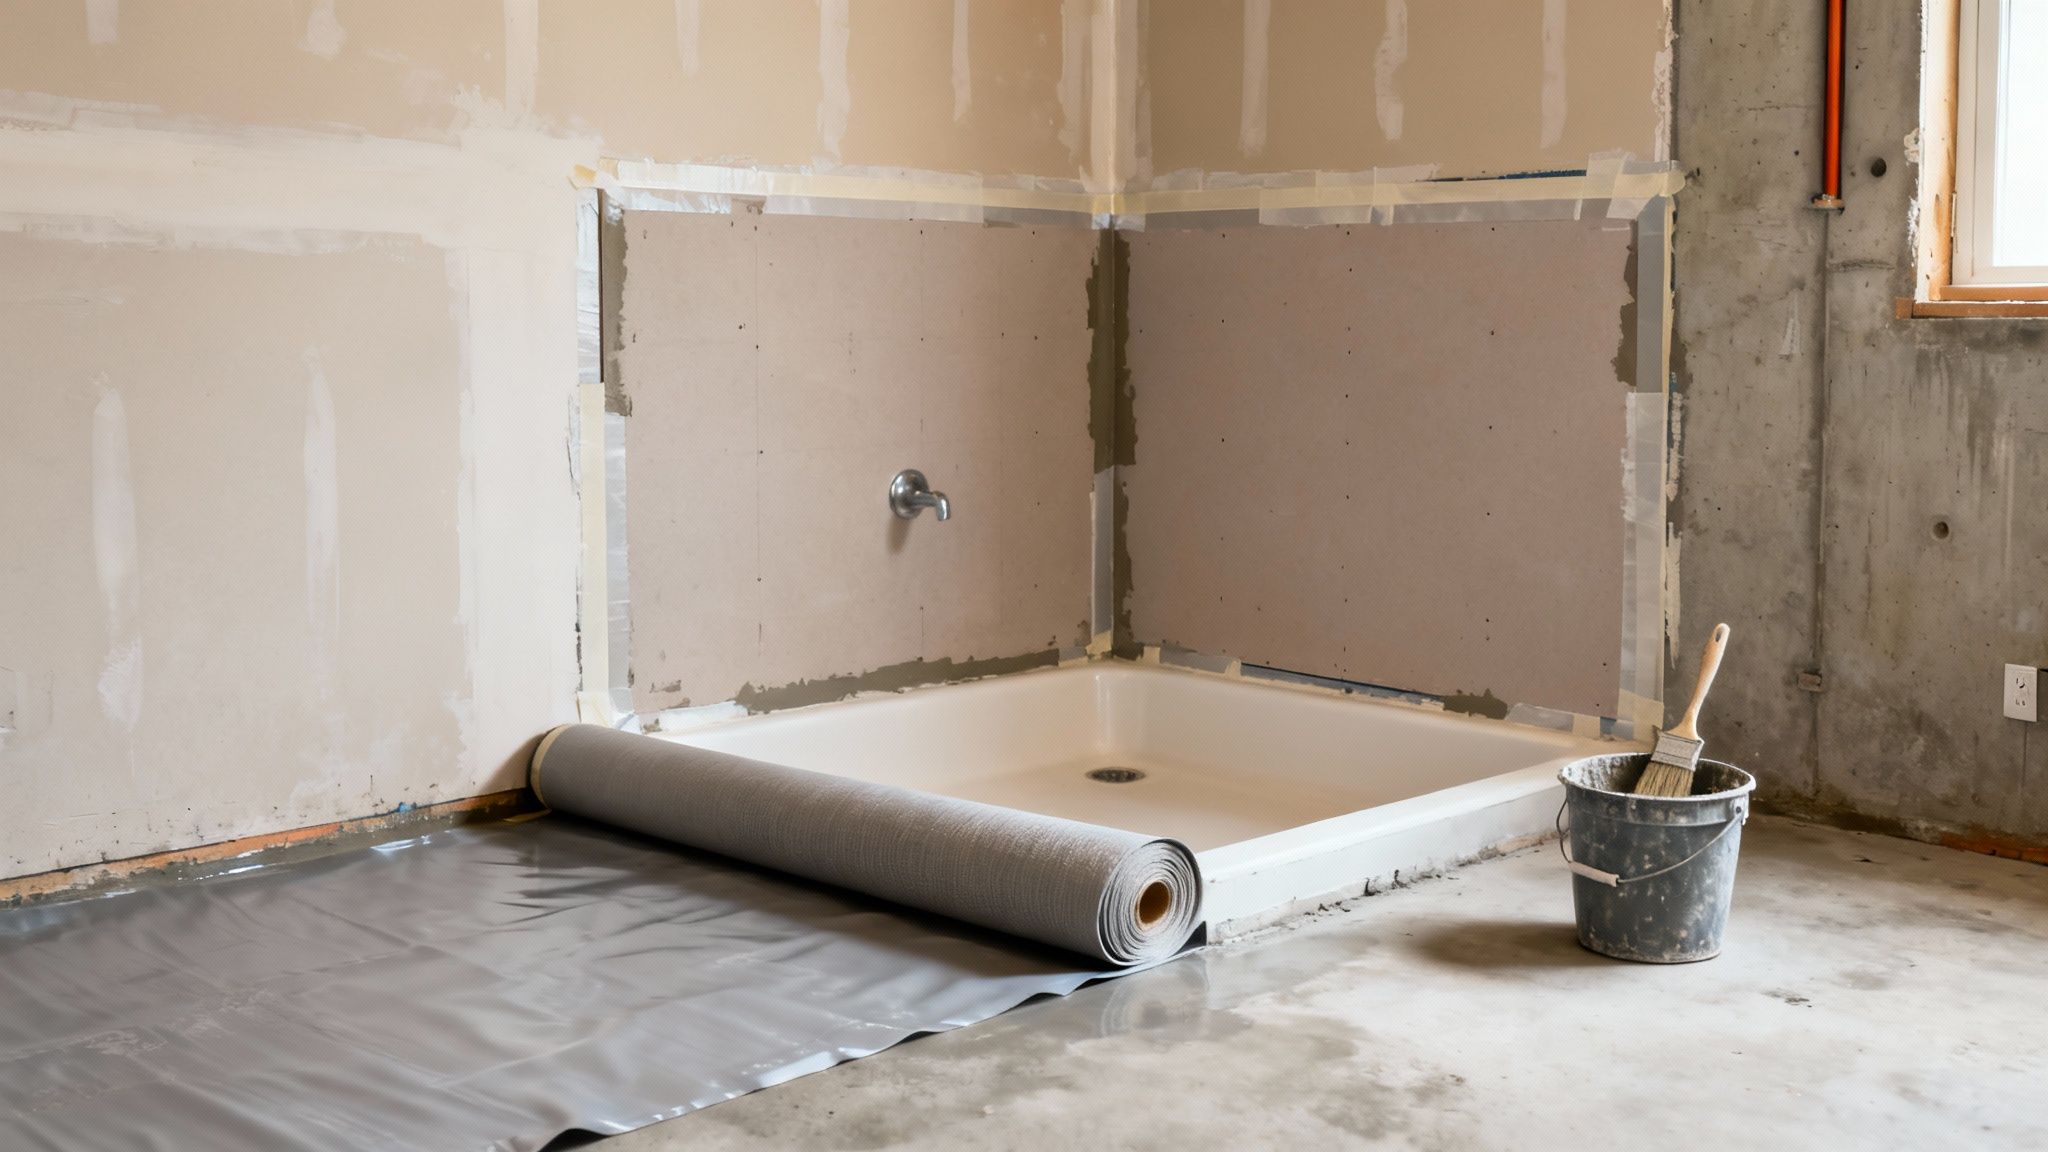
Bulletproof the Shower
The shower is the epicenter of water in any bathroom, and this is where you absolutely cannot cut corners. Moisture-resistant drywall (often called "green board") is fine for the rest of the bathroom, but inside the shower stall, you must use cement backer board.
Cement board is totally inert to water; it won't swell, crumble, or disintegrate when it gets wet. After you’ve screwed the boards firmly to the studs, the real waterproofing work begins.
- Tape the Seams: Use alkaline-resistant fiberglass mesh tape, embedding it in thin-set mortar. This creates a strong, solid joint between the boards.
- Apply a Liquid Membrane: Once the mortar at the seams is cured, you’ll roll on a liquid waterproofing membrane over the entire surface of the cement board—every square inch, including screw heads and corners. Plan on applying at least two or three coats, following the manufacturer's instructions to the letter.
When you’re finished, the inside of your shower should look like a monolithic, rubber-like box. This is your true waterproofing layer. The tile and grout you'll add later are purely decorative; they don't stop water.
Choose Finishes That Last
With the heavy-duty waterproofing locked in, you can finally turn your attention to the fun part: the finishes that make the space look great. But even here, every choice should be guided by durability and moisture resistance.
When it comes to flooring, Luxury Vinyl Plank (LVP) is the undisputed champion for basements. It’s 100% waterproof, forgiving to install over a concrete slab, and comes in styles that look shockingly like real wood. If your bathroom connects to a carpeted area, you might consider a luxury vinyl tile (LVT) that mimics stone or ceramic for a more classic, clean transition.
For the walls and ceiling, don’t just grab any can of paint. A high-quality, mold-resistant paint is a must. These formulas contain mildewcides that actively inhibit mold growth. Since steam rises, make sure you use it on the ceiling, too.
Nail the Final Details
The finishing touches are what separate a good job from a great one. As you install the tile, vanity, and toilet, your focus should be on sealing every last gap where water could get in.
Your Critical Sealing Checklist:
Around the Shower/Tub: This is the most important one. Use a high-quality, 100% silicone caulk to seal the joint where the tile meets the shower pan or tub.
At the Floor: Run a clean bead of caulk around the base of the toilet and along the bottom of your baseboards where they meet the floor.
Vanity and Backsplash: Seal where the vanity countertop meets the wall and along the top and bottom of any backsplash.
These final sealant lines are your last line of defense, stopping splashes and surface water from ever reaching the structure you worked so hard to protect. Take your time here—a neat, well-applied caulk line not only looks professional but also performs better for years to come.
Installing Fixtures and Final Touches
Alright, you've made it through the heavy lifting. The waterproofing is done, the tile is set, and the paint is dry. Now comes the rewarding part: transforming that well-built box into a functional, stylish bathroom.
This is where the space really starts to take shape. Installing the fixtures is all about patience and precision. Every choice you make, from the toilet to the vanity lights, defines the room's final look and feel. It’s your chance to pick smart pieces that complement all the hard work you’ve already put in.
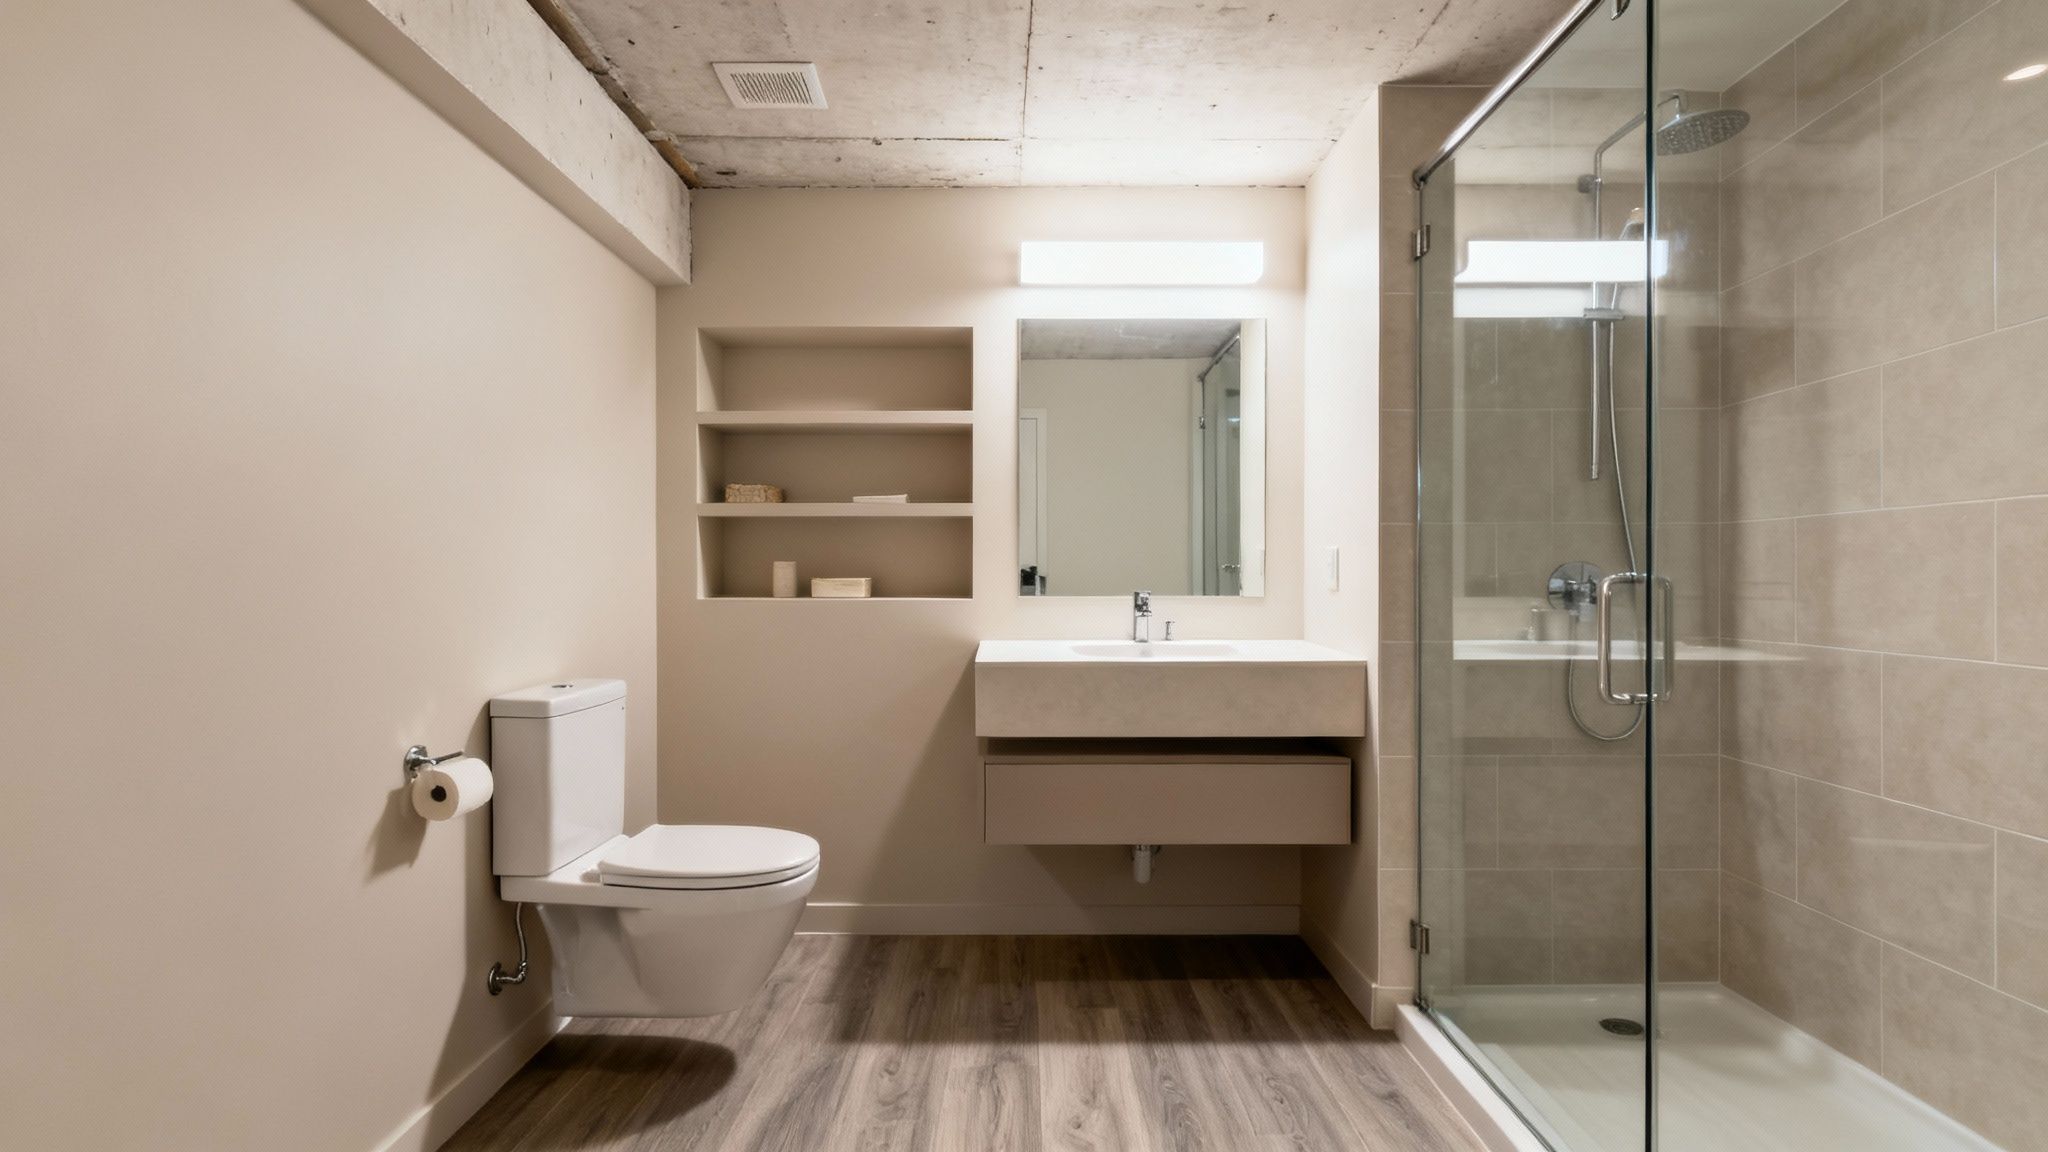
Selecting Space-Saving Fixtures
Let’s be honest, most basement bathrooms aren't palatial. You’re usually working with a tight footprint, so every inch counts. Your fixture selection needs to be strategic.
- Wall-Mounted Toilets and Vanities: There’s a reason designers love these. Getting the toilet and vanity up off the floor creates an uninterrupted view of the flooring, which tricks the eye into seeing a much bigger space. The easy cleaning underneath is a huge bonus.
- Corner Sinks or Vanities: A corner unit can be a lifesaver in an awkward layout. It tucks neatly into a spot that’s often wasted, freeing up precious wall space for a towel rack or extra storage.
- Compact or Round-Front Toilets: An elongated toilet bowl might feel luxurious, but a round-front model can save you several crucial inches of clearance. That small difference can be what gets you a passing grade on your final inspection.
Don't forget, this isn't just an expense; it's an investment. Adding a bathroom is a proven way to boost your home’s utility and resale value. In fact, bathroom additions often recoup up to 60-70% of their cost, making them a wise move in the massive $68 billion U.S. bathroom remodel market. Discover more insights on the global bathroom services market to see how these projects deliver real returns.
A Guide to Setting the Toilet
Installing a toilet feels more intimidating than it is. Your entire goal is to create a perfect, watertight seal between the toilet's base and the drainpipe in the floor, which is called the toilet flange.
The key to success is a fresh wax ring—never, ever reuse an old one. You can place the new ring on the bottom of the toilet itself or directly onto the flange. Then, carefully line up the toilet over the mounting bolts and lower it straight down. Use your body weight to press down firmly; you'll feel it compress the wax to create that critical seal.
Once it's seated, tighten the nuts on the bolts, alternating from one side to the other for even pressure. Just be careful: do not overtighten, or you risk cracking the porcelain base.
Connecting Supply Lines and Shower Trim
With the big pieces in place, it’s time to hook up the water. This usually means connecting flexible, braided steel supply lines from the wall's shutoff valves to the toilet and sink. Hand-tighten the nuts first, then give them a gentle quarter-turn with a wrench. That's all it takes to get a solid seal without stripping the threads.
Finishing the shower trim—the handle, spout, and showerhead—is the last piece of the plumbing puzzle. These parts usually slide on and are secured with small set screws. The most important step here is to apply a bead of plumber's putty or silicone around the base of the tub spout and the main valve cover plate (the escutcheon). This simple step keeps stray water from getting behind the wall.
Pro Tip: Once everything is hooked up, turn the main water supply on slowly. Go to every single connection point—at the wall, at the fixture—and check for drips. The best way is to wipe each joint with a dry paper towel; it will show even the tiniest bead of moisture instantly.
Lighting and Mirrors That Enlarge the Space
In a basement, lighting and mirrors are your secret weapons against that classic underground gloom. When used together, they can completely transform the feel of the space.
A layered approach to lighting works best. Start with a bright overhead fixture for general illumination, then add vanity lights above or on the sides of the mirror to kill shadows on your face.
And when it comes to the mirror, go big. A large mirror does double duty: it reflects all that light you just installed and creates a powerful illusion of depth, making the whole room feel brighter and more open. It’s a simple trick, but the effect is dramatic.
Answering Your Top Basement Bathroom Questions
When homeowners start thinking about adding a bathroom to their basement, the same few questions always pop up. Getting these figured out early saves a ton of headaches—and money—down the road.
Let's dive into the practical hurdles you'll face, from picking the right toilet to making sure your new bathroom stays bone-dry for years.
Do I Really Have to Use an Upflush Toilet?
Not necessarily, but it’s often the path of least resistance. Since most basements sit below the home's main sewer line, you have to find a way to get waste up to that line. An upflush toilet, with its built-in macerator and pump, grinds everything up and sends it on its way through a small pipe. The biggest selling point? You don't have to break up your concrete floor.
Your other option is a more traditional sewage ejector pump. These are heavy-duty systems that sit in a pit below the floor, but that means bringing in a jackhammer to create that pit. For most people tackling this themselves, the upflush system is a much more approachable and budget-friendly choice.
How Can I Stop Mold From Taking Over?
In a basement, you have to be relentless about moisture control. This isn’t a single step; it's a system you build into the project from the very beginning.
- Serious Ventilation: Don't skimp here. Get a quality exhaust fan and make sure it vents all the way outside—not into the attic or between floor joists. Make it a rule to run it during every shower and for at least 30 minutes after.
- The Right Materials: Build for a wet environment. Use cement board behind the shower tile and choose mold-resistant paint for every wall and ceiling surface.
- Seal the Foundation: Before a single stud goes up, seal the concrete walls and floor with a quality waterproofing product. This creates a barrier against moisture seeping in from the ground.
Keeping a small dehumidifier running in the larger basement area also works wonders for managing overall humidity.
A huge mistake I see is people thinking a good fan is all they need. Real mold prevention is baked in during construction with proper sealing and materials, long before anyone turns on the water.
Can I DIY This, or Do I Need to Hire a Pro?
This is the perfect project to split the difference. If you're a confident DIYer, you can absolutely tackle the framing, waterproofing, drywall, and all the finishing touches like tile and painting. That’s where you’ll see some serious savings.
However, plumbing and electrical work are non-negotiable for the pros. A bad plumbing job can cause catastrophic leaks or let dangerous sewer gas into your home. Faulty wiring is one of the leading causes of house fires. I always tell people to hire licensed, insured professionals for these critical parts. You get the pride of building the room yourself while knowing the most important systems are safe, reliable, and up to code.
Ready to turn that underused space into a beautiful, functional bathroom? The team at Northpoint Construction specializes in high-quality basement finishing projects, from initial design to the final polish. Let us handle the complexities so you can enjoy the results. Contact us today to get started