
How to Install Bathroom in Basement: A Complete Step-by-Step Guide
Thinking about adding a bathroom to your basement? It’s a smart move that breaks down into four key stages: planning and permits, tackling the unique plumbing, framing and running utilities, and finally, finishing the space. Honestly, the most important decision you'll make is how to handle the plumbing—specifically, whether you need a sewage ejector pump or an upflushing system to get waste up to your main sewer line. Get that right, and you're well on your way.
Your Project Blueprint for a Basement Bathroom
Adding a full or half bath downstairs is one of the best home improvements you can tackle, especially in areas where families need more functional living space. Based on what we're seeing in the field, the cost to convert existing basement space into a bathroom typically runs between $200 to $250 per square foot. For a standard 15 to 50-square-foot bathroom, that puts the total project cost somewhere between $3,000 and $12,500. This estimate covers all the essentials: new plumbing, electrical, and the interior finishes that pull it all together.
Think of this guide as your complete project map, taking you from the initial idea to the final towel rack. When you understand the entire process from the get-go, you can sidestep common pitfalls, build a realistic budget, and know exactly when it’s time to call in a pro.
Let's walk through the major phases of the project.
The Four Major Project Phases
Every basement bathroom project, no matter the size, follows a pretty logical sequence. While your home’s specific layout might throw a curveball or two, these core stages are universal. Knowing how to install a bathroom in a basement means respecting this order and giving each step the focus it needs.
Here's a look at what you can expect:
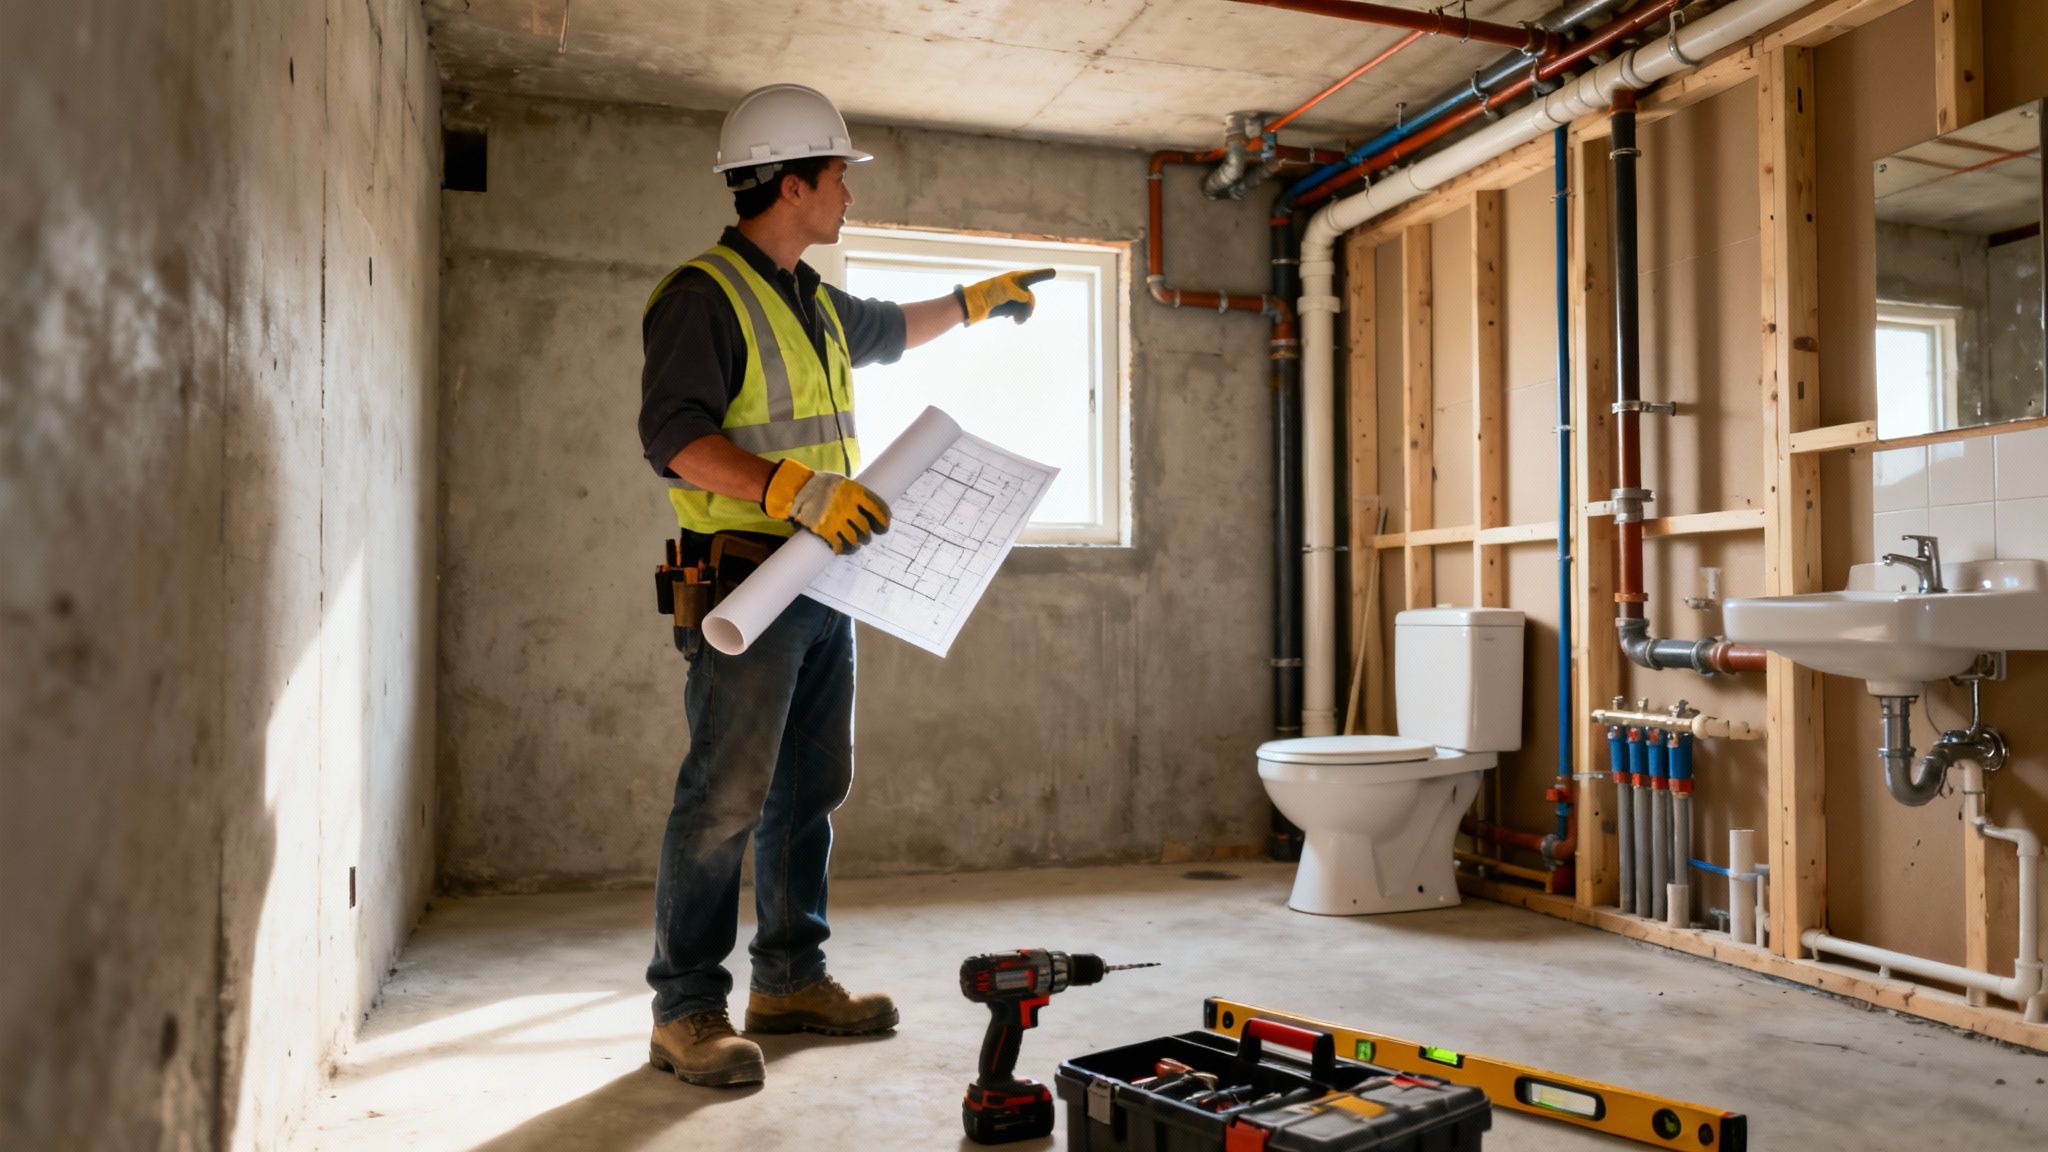
- Strategic Planning and Permits: This is your homework phase. It starts with measuring your space and creating a layout that cleverly works around existing obstacles like support posts or HVAC ductwork. Then comes picking your fixtures. Most importantly, this is when you’ll need to navigate the local building permit process—a step that is absolutely non-negotiable for a safe, legal, and insurable addition.
- Tackling Basement Plumbing: This is where things get serious and often, it's the most complex part of the entire job. You’ll need to figure out your sewer line’s depth and choose between a traditional sewage ejector pump or a less invasive upflushing toilet system. A mistake here can be messy and expensive, which is why we almost always recommend hiring a licensed plumber for this stage.
- Framing, Electrical, and Mechanical Work: With the plumbing roughed in, it’s time to build the bathroom's skeleton. This means framing the walls (usually with moisture-resistant materials), running all the electrical wiring for lights, GFCI outlets, and a good ventilation fan, and finally, installing the hot and cold water supply lines inside the new walls.
- Finishing and Fixture Installation: Now for the fun part! This is where your vision truly comes to life. It involves hanging moisture-resistant drywall, meticulously waterproofing the shower area, laying down your flooring, and painting. The last step is setting the toilet, vanity, and shower fixtures. A major focus here is ensuring proper ventilation to head off any future mold or mildew problems.
A well-thought-out plan is more than just a to-do list; it's your best defense against unexpected costs and delays. Rushing the planning stage is the most common mistake homeowners make, often leading to code violations or a dysfunctional layout that's expensive to fix later.
To help you visualize the journey, we've broken down the project into a high-level overview. This table outlines the key activities, estimated timelines, and common hurdles you might encounter in each phase of your basement bathroom installation.
Basement Bathroom Project Phases at a Glance
| 1. Planning & Permits | Layout design, fixture selection, material procurement, applying for building permits. | 1-4 weeks | Permit delays, discovering unforeseen structural or plumbing limitations. |
| 2. Plumbing Rough-in | Breaking concrete (if needed), installing drain lines, setting up sewage ejector pump or upflush system, running water supply lines. | 3-7 days | Incorrect drain slope, hitting rebar or rock when cutting concrete, pump sizing issues. |
| 3. Framing & Utilities | Building walls, installing electrical wiring (outlets, switches, lighting), installing ventilation fan and ductwork. | 3-5 days | Working around existing ductwork or pipes, passing electrical inspection. |
| 4. Finishing & Fixtures | Drywall, waterproofing, tiling, flooring, painting, installing vanity, toilet, and shower fixtures. | 1-2 weeks | Achieving proper waterproofing, leveling floors, fitting fixtures in tight spaces. |
Each of these phases builds upon the last, so getting the sequence right is crucial for a smooth and successful project.
DIY vs. Hiring a Professional
The big question: how much of this can you do yourself? While you might be perfectly comfortable framing walls or painting, the highly skilled tasks—especially plumbing and electrical work—are almost always best left to licensed tradespeople. It's not just about getting it done right; it's about safety, code compliance, and protecting your home from potential disasters.
A great place to start assessing your own skills is our comprehensive guide on the entire basement finishing step by step process. It can help you see where you can save money with sweat equity and where it’s smartest to call in a team like Northpoint Construction. As you're putting together your design, don't forget to look for inspiration from different bathroom remodel shower ideas to help define your style.
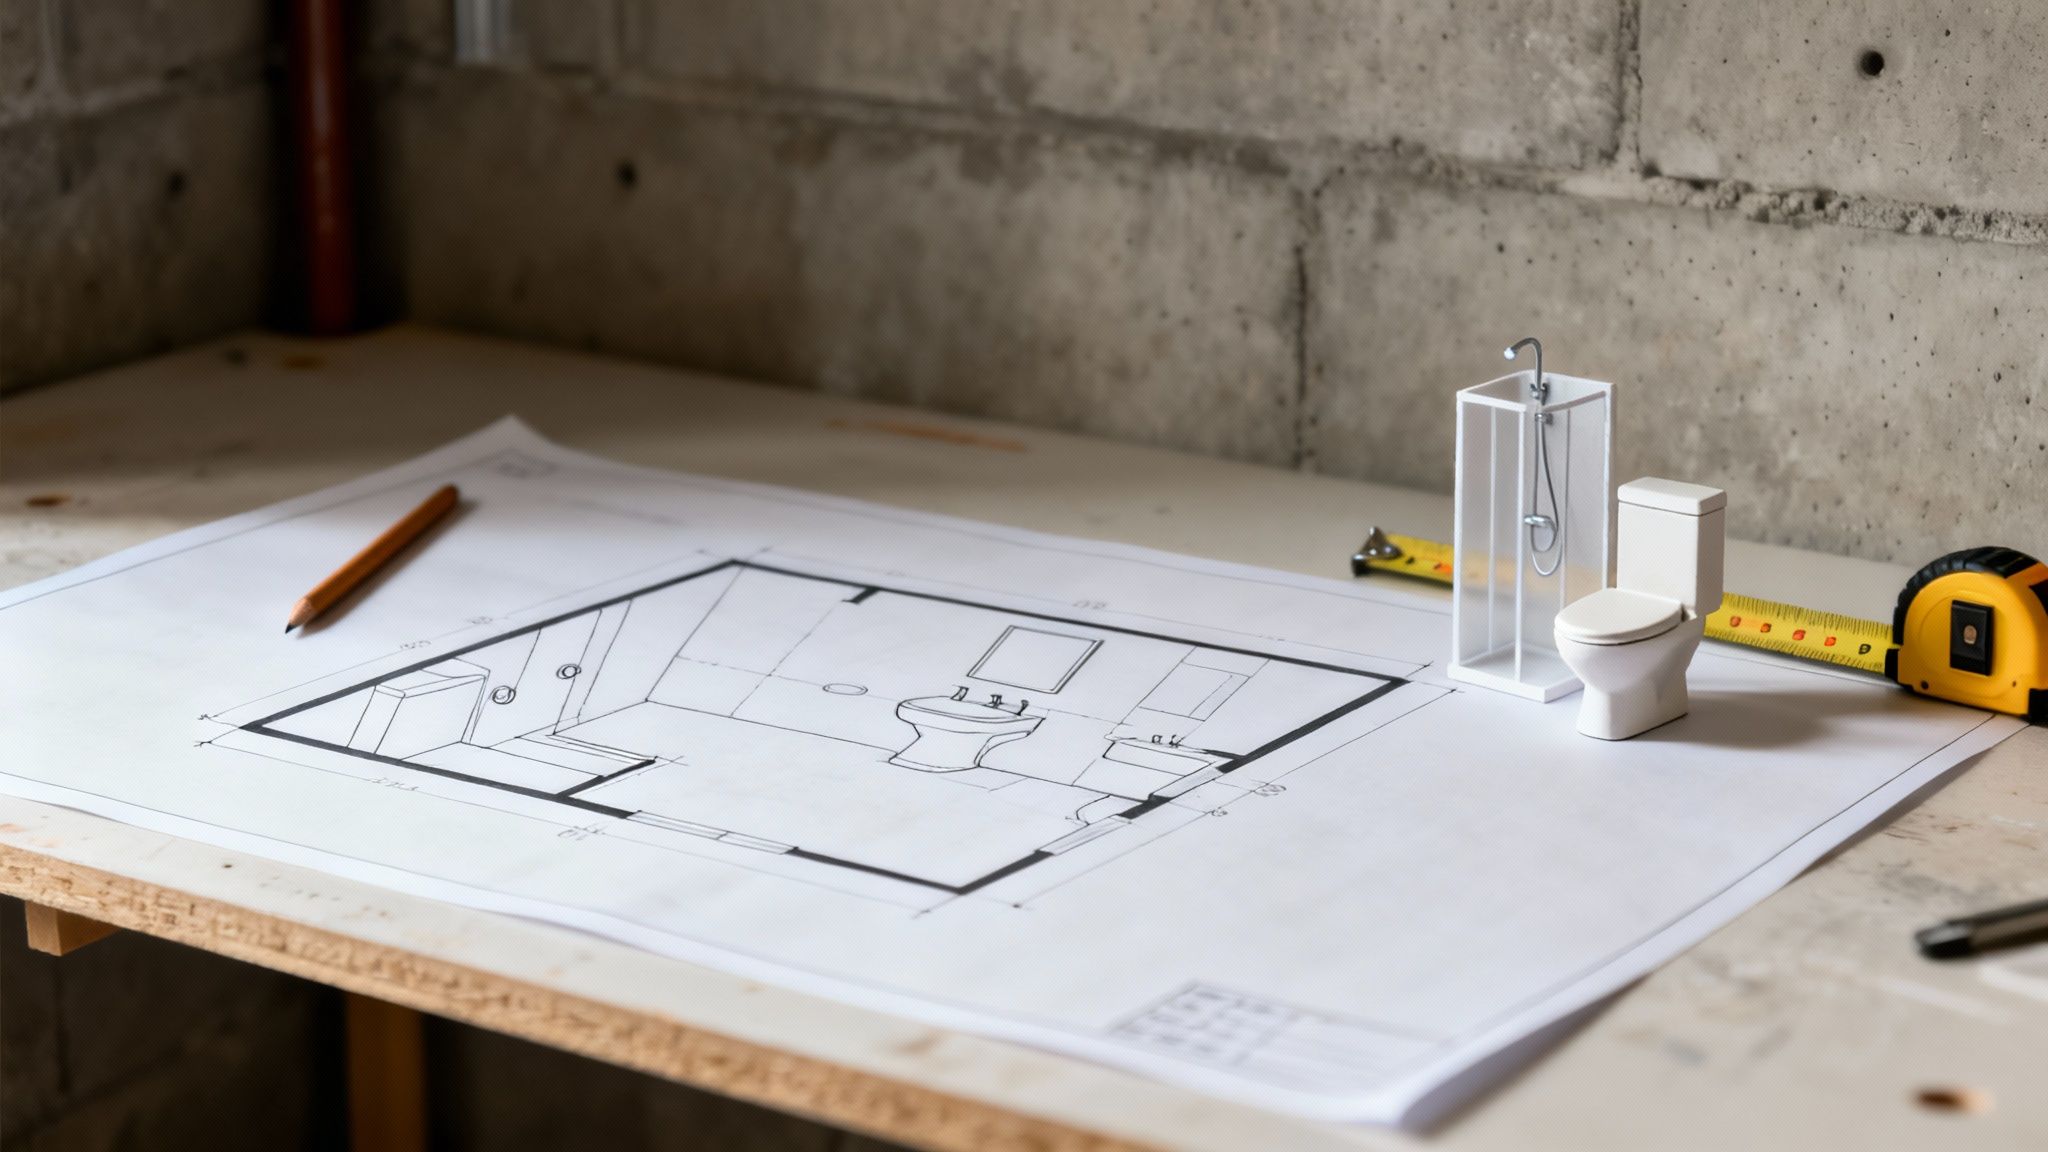
Smart Layouts and Navigating the Permit Maze
Before you even think about swinging a hammer, the real work of a basement bathroom project happens on paper. A smart layout is more than just aesthetics; it's the blueprint for a functional, comfortable space that sails through inspections. Getting this right from the start makes the entire installation smoother and keeps your budget in check.
One of the first, and most important, decisions is where to put the bathroom. The ideal spot is always as close as you can get to your home's existing plumbing and electrical lines. This one choice can literally save you thousands of dollars by cutting down on the materials and labor needed to extend those utilities across the basement.
Designing Around Your Basement's Quirks
Basements are notorious for their design challenges, but I've always found these "problems" are just opportunities for a clever solution.
- Embrace the Obstacles: Got a support column right where you want your shower? Or maybe a low-hanging HVAC duct? Don't fight it, work with it. That column can become a natural corner for a custom shower enclosure. You can frame a vanity or build recessed shelving between two posts. A duct can define the edge of a lowered ceiling section over the toilet, creating a cozy nook.
- Watch Your Head: Headroom is a big deal. Most building codes demand at least 6 feet 8 inches of finished ceiling height in a bathroom. You have to keep this in mind when you're framing, especially under pipes or ductwork. Sometimes, you have to shift the whole layout a few feet to maintain that clearance.
- Fixture Placement is Everything: Where you put the toilet, sink, and shower determines your entire plumbing plan. The toilet is the king here because it has the largest drain. Your goal should be to give it the straightest, shortest shot possible to the main sewer line or the ejector pump. This simple rule of thumb drastically reduces the chance of future clogs.
Don't Skip the Permit—It's Non-Negotiable
I can't stress this enough: pulling a permit is not optional. It’s one of the biggest and most expensive mistakes you can make. A permit isn't just a piece of paper; it’s your assurance that all the plumbing, electrical, and structural work is done safely and to code. It protects you, your family, and your home's value.
I've seen the fallout from unpermitted work firsthand. When it comes time to sell, it's a nightmare. It can kill a deal, force you to rip out beautiful, finished work for inspections, and ultimately cost you far more than the permit ever would have. The peace of mind is worth every penny.
So, what does the permit office need to see? Usually, a detailed set of plans that includes:
A floor plan with exact dimensions and fixture locations.
A plumbing diagram showing all the drain, waste, vent (DWV), and water supply lines.
An electrical plan showing where every outlet, switch, light, and the critical exhaust fan will go.
You'll also need to be familiar with the specific building regulations for a downstairs toilet, as these rules dictate everything from ventilation to fixture spacing. For example, you almost always need at least 21 inches of clear space in front of the toilet and 15 inches from its center to any wall or vanity.
This can all feel a bit overwhelming, which is where bringing in a seasoned pro like Northpoint Construction really pays off. An experienced contractor knows the local codes like the back of their hand and can handle the entire permitting process for you. We make sure the plans are right the first time, so you get a beautiful, functional, and perfectly safe new bathroom without the bureaucratic headaches.
Solving the Basement Plumbing Puzzle
Let's talk about the heart of any bathroom project: the plumbing. When you're working below ground, getting the plumbing right isn't just important—it's everything. The success of your new basement bathroom really boils down to one simple, unchangeable force: gravity.
Your home's plumbing system is designed to let wastewater flow downhill to the main sewer line. In a basement, you're often starting at the lowest point in the house, which can put you in an uphill battle.
First things first, you need to play detective. Find out where your main sewer line exits your house. Look for a cleanout access pipe along the foundation wall in your basement. If that pipe is below the level of your concrete floor, you've hit the jackpot. This means you can use standard, gravity-fed plumbing, which is the simplest and most cost-effective route.
But for most homes, that’s not the reality. If the sewer line is above the basement floor, gravity is officially working against you. This one detail changes the entire game and means you'll need a specialized pump system to get wastewater up and out.
Your Drainage System: Ejector Pump vs. Upflushing Toilet
When gravity isn't on your side, you have two solid options: a sewage ejector pump or an upflushing toilet system. Both solve the same core problem of moving waste upward, but they do it in completely different ways. The right choice for you will come down to your budget, how much disruption you're willing to handle, and what you're looking for long-term.
An upflushing toilet, often called a macerating toilet, is the less invasive of the two. The toilet sits right on your existing floor. Behind it is a sealed box containing a macerator and pump. When you flush, it liquefies waste and then pumps it up to the main sewer line through a small-diameter pipe. No concrete breaking required.
The other route is a sewage ejector pump, which is the more traditional and heavy-duty solution. This involves cutting a hole in your concrete floor to install a sealed basin (a sump pit). The toilet, sink, and shower all drain into this pit. When the waste inside reaches a certain level, a float switch kicks on a powerful pump that grinds and ejects the waste up to the main line.
From experience, I can tell you that while an ejector pump involves more upfront work and mess, it’s a more permanent and bulletproof solution. It can easily handle a full bathroom—shower, sink, and all. Upflushing systems are a fantastic workaround for a simple half-bath or in situations where breaking up the concrete floor is completely off the table.
Making the Call on Your Plumbing Solution
Choosing the right plumbing setup is a big decision that impacts your budget, project timeline, and how your bathroom functions day-to-day. The financial piece is often the biggest hurdle. Industry data shows that a complete basement bathroom installation can run from $8,000 to $25,000, with plumbing being a huge slice of that pie.
Needing a pump system will add $3,000 to $8,000 to the total, a necessary cost for the estimated 60% of basements that sit below the main sewer line. To get a better handle on these numbers, it's worth exploring the cost to add a new bathroom in your area.
Before any tools come out, however, you need to deal with permits. This decision tree shows just how critical it is to check in with your local building department first.
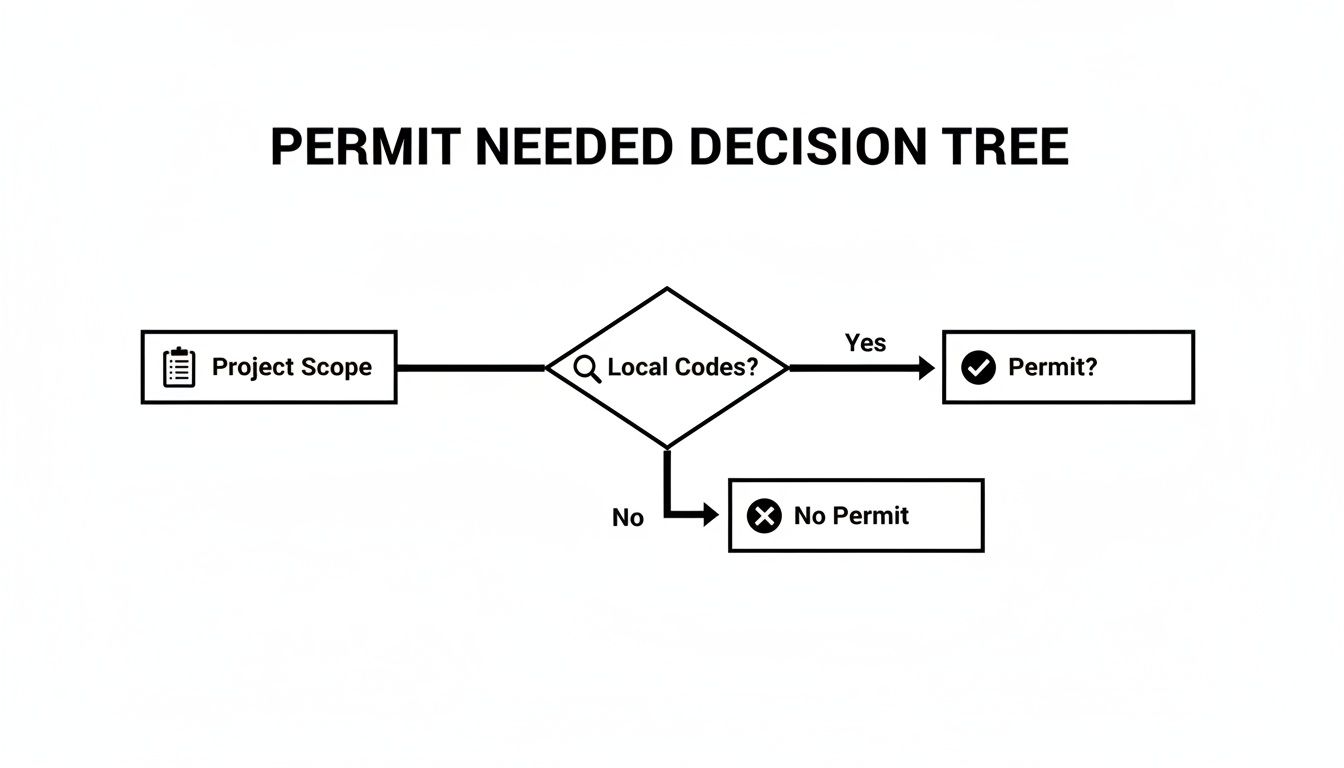
As the chart illustrates, understanding your project's scope and what your city requires is the first step toward a safe and legal installation.
To help you decide which pump system is right for your home, here’s a straightforward comparison of your options.
Basement Drainage Solutions Compared
A comparison of the three main plumbing options for a basement bathroom, helping you choose the best fit for your home and budget.
| Gravity-Fed | Homes where the main drain is below the basement floor. | $1,500 - $4,000 | Quiet, low maintenance, most reliable, no moving parts. | Requires breaking concrete; only works if conditions are perfect. |
| Sewage Ejector Pump | Full bathrooms with a shower/tub; long-term, heavy-use applications. | $4,000 - $8,000 | Very durable, handles solid waste well, hidden under the floor. | Invasive installation (requires concrete work), higher upfront cost. |
| Upflushing Toilet | Half-baths, areas where breaking concrete is not possible (e.g., rentals). | $3,000 - $6,000 | Less invasive installation, lower initial cost, can be installed almost anywhere. | Noisier operation, pump is visible, more sensitive to clogs. |
Ultimately, if you're building a full bathroom that will see regular use, the sewage ejector pump is the superior long-term investment. But for a simple powder room or in a situation where you just can't jackhammer the floor, an upflushing toilet is a brilliant and practical alternative.
Framing the Walls and Running Utilities
With the plumbing drains roughed in, you can finally see the bathroom start to take shape. This is where your paper plans become a physical reality. You're building the skeleton of the room and running its veins and arteries—the water lines and electrical wiring—transforming a patch of concrete into a defined space.
Laying Out and Building the Walls
The very first, and most critical, decision is what to use for the wall's sole plate. This is the piece of lumber that sits directly on the concrete floor. You absolutely must use pressure-treated lumber here. No exceptions. Basements are damp environments, and standard wood will wick moisture right out of the concrete, leading to rot and compromising the entire wall.
Your first move is to transfer your layout from the blueprint to the basement floor. A chalk line is your best friend for snapping perfectly straight guidelines where the walls will stand. Measure everything twice. Make sure your layout is square and, importantly, that you’ve accounted for the wall thickness itself, which is 3.5 inches when using standard 2x4s.
Once your layout is marked, you can start building the wall frames right on the floor.
- Cut Your Plates: Start by cutting the pressure-treated sole plate and a matching top plate for each wall section.
- Mark Stud Locations: Lay the two plates side-by-side and mark where each stud will go. The standard is 16 inches on center. Sticking to this spacing makes hanging standard-sized drywall sheets much, much easier down the road.
- Frame the Doorway: Remember to frame the rough opening for your door. This involves adding a sturdy header across the top and shorter "jack" studs to support it. A good rule of thumb for a standard rough opening is the door's width plus 2 inches and its height plus 2.5 inches.
After you've nailed a wall frame together on the floor, tilt it up into position. You'll need to secure that pressure-treated sole plate to the concrete floor, either with a powder-actuated nailer or specialized concrete screws. Before you lock it in, grab a level and make sure the wall is perfectly plumb (that’s perfectly vertical). Then, you can fasten the top plate to the overhead floor joists.
Running Electrical and Water Supply Lines
With the skeleton of the walls up, it's time for the "rough-in" phase for your utilities. You have to do this before a single sheet of drywall goes up. Careful planning here is key—think through the exact location of every single fixture.
On the electrical side, you'll be running wire for a few key things:
- GFCI Outlets: Building code mandates Ground Fault Circuit Interrupter outlets anywhere near a water source, like your sink. This is a crucial safety feature.
- Lighting: You’ll need wiring for the main overhead light, the vanity light above the mirror, and the light switch.
- Exhaust Fan: A fan vented to the outside isn't just a nice-to-have; it's essential for fighting moisture. The wiring and the ductwork for the fan need to be installed now.
At the same time, you or your plumber will run the PEX or copper supply lines for hot and cold water to the sink, toilet, and shower. Make sure these lines are strapped securely to the studs. Loose pipes will rattle and knock inside the walls later, and it's an incredibly annoying sound. This is where bringing in a licensed electrician and plumber pays for itself—they’ll get it done right and ensure everything is up to code.
This is truly the point of no return for your walls. Once they're covered, fixing a misplaced electrical box or a leaky pipe fitting becomes a messy demolition project. Take your time, measure three times, and don't hesitate to call in a pro if you feel even slightly out of your depth.
Once the walls are framed and the utilities are run, you're ready for your rough-in inspection. After that, it's time to close things up. While standard drywall is a common choice, it's worth looking into drywall alternatives for basement walls that offer better moisture and mold resistance—a smart upgrade for any below-grade project.
Making It Watertight, Breathable, and Beautiful
Once your plumbing and framing are locked in, it's time to shift gears. Now, the goal is to build a space that can stand up to the unique challenges of a basement environment—namely, moisture. This stage is where you win the battle against dampness, mold, and mildew before it even starts.
It's about more than just looks. Every choice you make, from the backer board behind the shower tile to the exhaust fan you install, is critical. This is where a framed-out box starts to feel like a real, finished bathroom.
Building a Moisture-Proof Shell
Before a single tile is laid or a vanity is placed, you have to create a waterproof barrier. This process starts at the floor and works its way up the walls, focusing intently on the areas that will get wet.
First up, the concrete floor. You absolutely must apply a waterproofing sealer or membrane directly onto the slab. Think of it as an invisible shield. It stops moisture from the ground from slowly seeping up through the concrete and getting trapped under your new flooring, which is a classic recipe for musty odors and rot.
For the walls, forget about using standard drywall in the wet zones. It just won't hold up.
- Cement Backer Board: In the shower or tub area, this is the only way to go. It’s completely inorganic, so water doesn't faze it. This gives your tile a rock-solid, waterproof foundation to adhere to.
- Moisture-Resistant Drywall: For the rest of the bathroom, use "green board" or "purple board." They're designed to resist humidity and mold far better than regular drywall.
- Waterproofing the Seams: After the cement board is up, paint a liquid waterproofing membrane over the entire surface. Get it into every seam and cover every screw head. This turns the whole shower stall into a monolithic, seamless waterproof box behind the tile.
Here's a hard-earned tip: tile and grout are not waterproof. It’s a common misconception that costs people thousands in repairs down the line. Water inevitably finds its way through grout lines. Your real defense is the bulletproof barrier you build before the first tile goes up.
To really get this right, check out our comprehensive guide on how to waterproof basement walls. It's a foundational skill for any below-grade project.
Why Powerful Ventilation Is Non-Negotiable
A good exhaust fan isn't a luxury; it's the most important tool you have for fighting airborne moisture and stopping mold in its tracks. A wimpy fan simply won't cut it.
The power of an exhaust fan is measured in Cubic Feet per Minute (CFM). You need enough power to completely cycle the air in the room effectively. The rule of thumb is 1 CFM for every square foot of floor space. So, for a 5x8 bathroom (40 square feet), you need a fan rated for at least 40 CFM. Honestly, I always recommend going a little bigger—50 or 60 CFM in this case—to be safe.
Where that humid air goes is just as important. Never, ever vent a bathroom fan into a ceiling joist bay or attic. That's just moving the moisture problem to another part of your house. It has to be ducted directly to the outside through a proper vent cap.
Installing the Finishes and Fixtures
With the behind-the-scenes work done, you can finally get to the fun part—making the bathroom look great. The order you do things in matters if you want a clean, professional result.
Drywall and Paint First: Hang and finish your moisture-resistant drywall. Tape, mud, and sand your seams until they're perfectly smooth, then prime everything. After that, lay down a couple of coats of quality bathroom paint with a satin or semi-gloss finish for durability and moisture resistance.
Lay the Flooring: With the painting done, it's time for the floor. Luxury Vinyl Tile (LVT) and porcelain tile are my top recommendations for basements. They are 100% waterproof and tough as nails.
Set the Big Fixtures: Now you can bring in the main pieces. Install the vanity and countertop first, then set the toilet. If you're installing a glass shower door, that goes in after all the tile work is fully cured.
Make the Final Connections: The last steps involve hooking up the faucet and drain lines, installing the light fixture and mirror, and mounting the hardware like the towel bar and toilet paper holder.
This is where patience pays off. Taking your time to make sure everything is level, every paint line is crisp, and every screw is secure is what separates an okay job from a fantastic one. This attention to detail is the final step in bringing your basement bathroom to life.
Got Questions About Your Basement Bathroom Project?
Even the most detailed guide can't cover every question that pops up during a big project like this. Adding a bathroom to a basement has a lot of unique challenges, and it's completely normal to have a few "what ifs" before you pick up a single tool.
Let's walk through some of the most common questions I hear from homeowners, so you can go into this with your eyes wide open.
Will a Basement Bathroom Actually Add Value to My Home?
This is the big one, right? You want to know if the investment will pay off. The short answer is yes, but the numbers depend on how you approach it.
A mid-range bathroom addition typically recoups about 54% of what you spend on it at resale. If you go for a more high-end, spa-like bathroom, that return is closer to 32.6%.
Cost-wise, you can expect to spend anywhere from $200 to $550 per square foot. So, for a small but functional 50-square-foot bathroom, you're looking at a ballpark figure of $14,273. A more spacious 100-square-foot setup could be closer to $19,969. For a deeper dive into these numbers, you can read the full breakdown of project costs on MarksBuilding.com.
What's the Cheapest Way to Get This Done?
If you're trying to keep the budget tight, your strategy should be simple: avoid breaking up concrete and minimize new plumbing runs. Those are the two biggest cost drivers by a mile.
Here’s how you do it:
- Look Up, Not Out: The smartest move you can make is to build your new bathroom directly underneath an existing one on the main floor. This lets you tap right into the existing water and drain lines, saving a fortune in plumbing labor and materials.
- Embrace the Upflush: Instead of jackhammering your floor for traditional below-grade plumbing, look into an upflushing toilet system. These units sit on top of the concrete and handle all the waste, saving you thousands on demolition and concrete work.
Combine these two strategies, and you’ll have the most budget-friendly basement bathroom possible.
So, You Can Really Do This Without Breaking Concrete?
Yes, absolutely! I get this question all the time, and it's a huge relief for homeowners who dread the thought of jackhammers and dust everywhere. The technology is fantastic and has made basement bathrooms accessible to so many more people.
The magic is in what’s called an upflushing or macerating toilet system.
It’s a clever setup. The toilet flushes into a special pump unit that sits discreetly behind it. Inside, a macerator grinds up waste into a fine slurry, and then a pump sends it up through a small pipe to your home's main sewer line. Many of these units also have ports for a sink and shower, so one pump can manage the whole bathroom.
This is a true game-changer. It sidesteps the cost, mess, and structural risk of trenching your foundation, making a basement bathroom a realistic project for almost anyone.
What’s the Best Flooring for a Basement Bathroom?
Down here, you're fighting a battle on two fronts: water from the shower and potential moisture from the concrete slab itself. Your flooring choice has to be tough enough for both. You need something that is 100% waterproof, period.
These are my go-to recommendations:
- Luxury Vinyl Tile (LVT) or Planks (LVP): Honestly, this is almost always my top pick. It's completely waterproof, feels warmer underfoot than tile, and the new designs that mimic wood and stone are incredibly realistic.
- Porcelain or Ceramic Tile: The classic choice for a reason. It’s rock-solid, impervious to water, and will last forever. The key is to use a quality grout and seal it properly to keep mildew at bay.
- Sheet Vinyl: If you're on a tight budget, modern sheet vinyl is a great waterproof solution. It's come a long way aesthetically and creates a seamless floor with nowhere for water to seep through.
No matter what you choose, always put down a good waterproof underlayment or vapor barrier first. It’s a non-negotiable step that protects your floor from any moisture coming up from the concrete.
Tackling a basement bathroom can feel overwhelming, but you don’t have to figure it all out on your own. The expert team at Northpoint Construction has seen it all and can manage your project from the initial permits to the final coat of paint, guaranteeing it’s done right. If you’re ready to add this valuable space to your home, visit us online and let’s talk about your project.