
A Homeowner’s Guide on How to Maintain Hardwood Floors
The real secret to keeping hardwood floors looking fantastic isn't some magic product—it's just a consistent, gentle routine. You don't need to spend your whole weekend on it. It really just comes down to a simple rhythm: a quick sweep every day, a proper damp mop once a week, and a closer look once a month to catch any little problems before they get big.
Your Essential Hardwood Floor Maintenance Schedule
Getting into a good rhythm with your floor care is what turns it from a major chore into a simple habit. When you're proactive, you're not just reacting to spills and scuffs; you're actively protecting the finish and keeping your floors as the beautiful centerpiece of your home. A solid maintenance plan is all about consistency, not hours of back-breaking work.
Think of it like this simple flow:

This just shows how those small, frequent actions really add up, giving your floors the long-term protection they need.
Daily Tasks: Your First Line of Defense
Here's something I see all the time: people worry about heavy furniture, but the biggest threat to a hardwood floor’s finish is actually the tiny grit and dust tracked in every single day. Especially here in Utah, that fine dust acts just like sandpaper under every footstep, creating thousands of tiny scratches that slowly dull the surface.
Your best weapon is a quick daily sweep. Grab a microfiber dust mop or a broom with soft bristles and give high-traffic areas a once-over. It only takes a few minutes, but it gets rid of that abrasive grit before it can be ground into the finish. Honestly, this is the single most important habit for keeping that beautiful sheen.
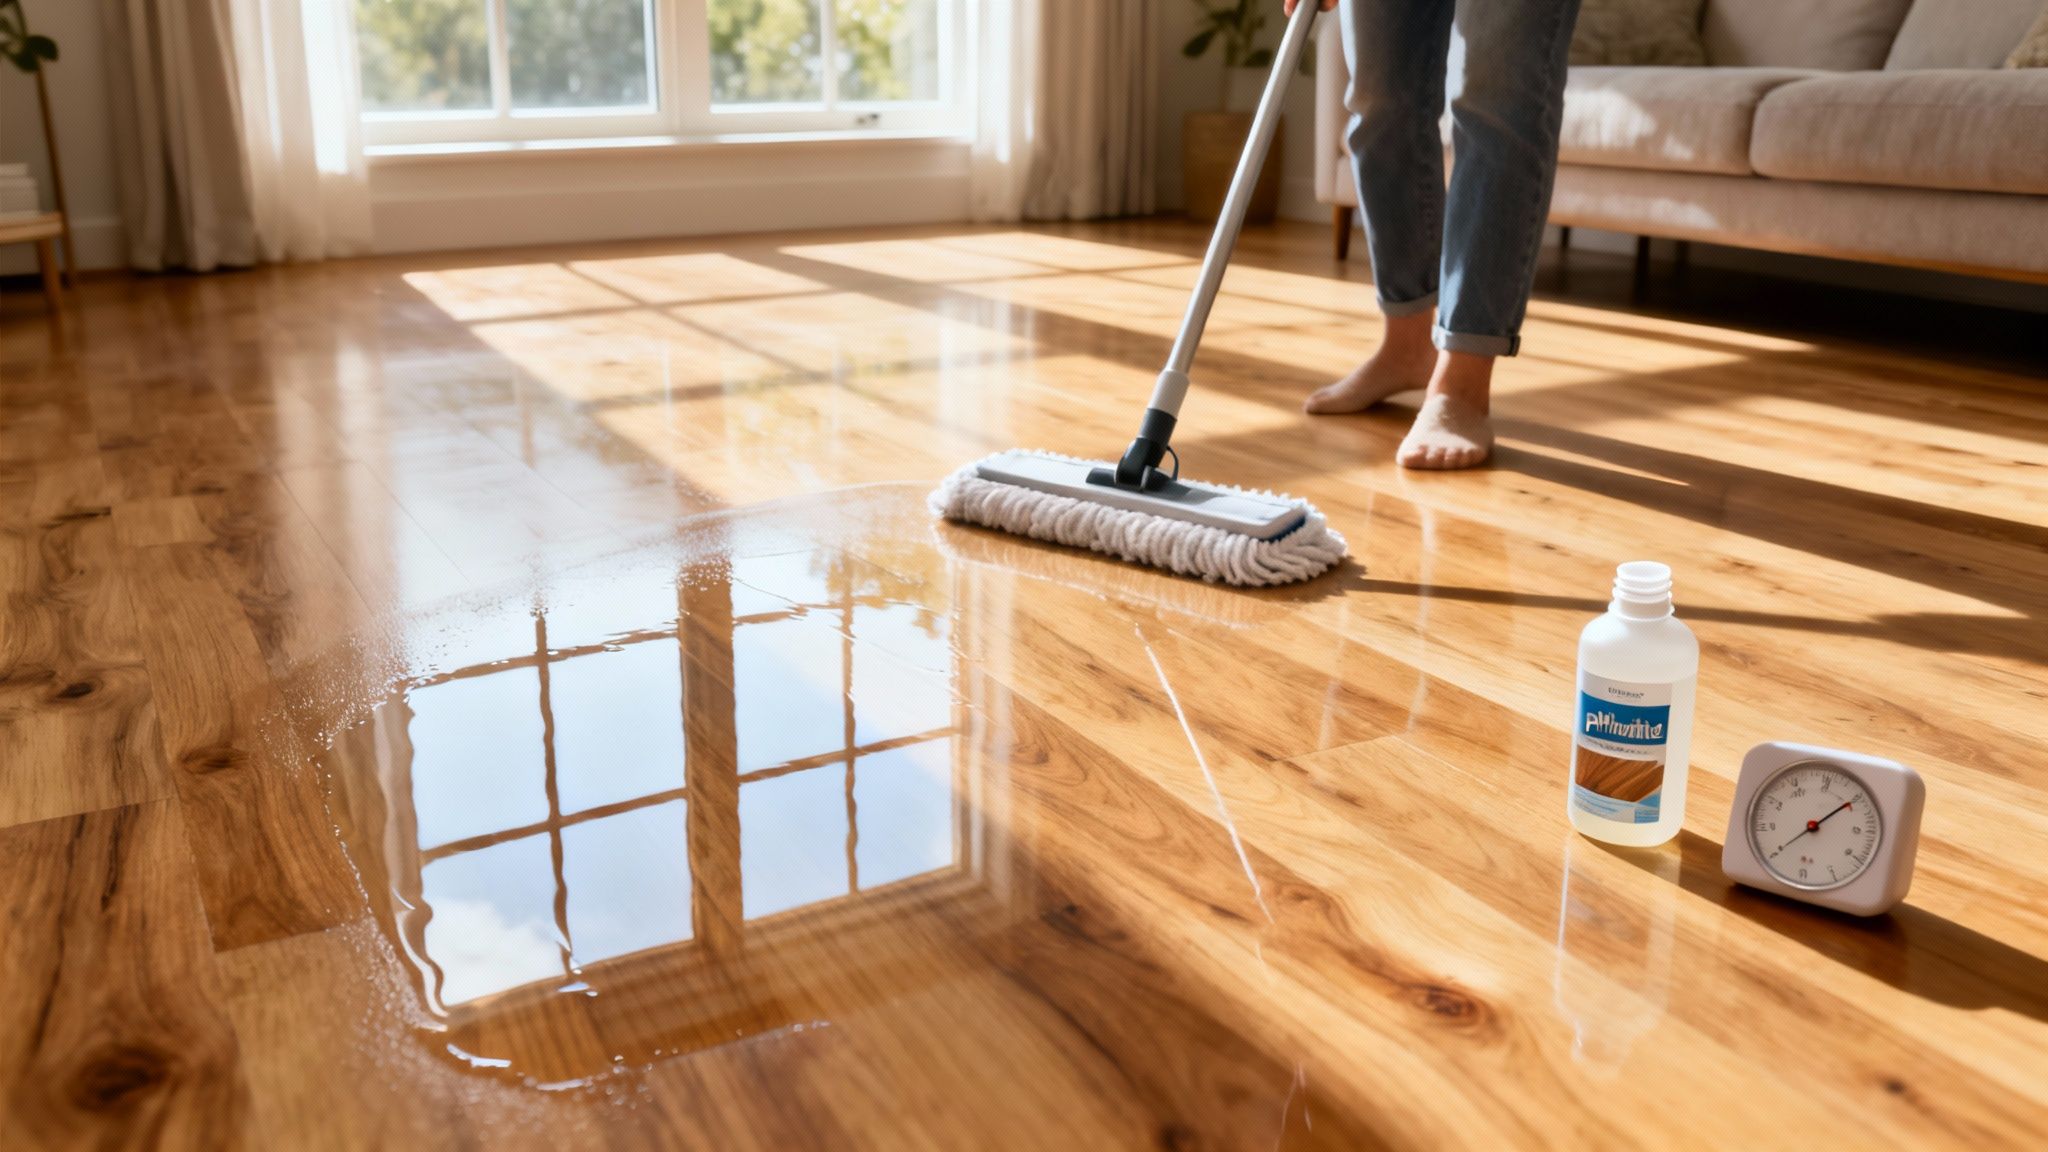
Weekly Cleaning: Hitting the Reset Button
Daily sweeping is great for loose debris, but a weekly cleaning is what removes the grime and oils that build up over time. This is where a lot of people go wrong, either by using way too much water or reaching for the wrong cleaner.
The right way is to use a microfiber mop that's just lightly dampened with a pH-neutral hardwood floor cleaner. You should never, ever saturate the wood. The mop head should feel almost dry to the touch—just damp enough to lift the dirt without leaving puddles or excess moisture. This weekly reset prevents that hazy film from forming and keeps your floors looking rich and clean. If you want to dive deeper, check out this comprehensive guide on hardwood floor maintenance.
Monthly Inspections: Catching Problems Early
Set aside a few minutes once a month to give your floors a closer look. Get down and check for new scratches, notice any wear patterns in the hallways or in front of the sofa, and look for any potential issues near the dishwasher, sinks, or exterior doors. This quick check-up lets you fix minor problems before they become major headaches.
This proactive mindset is crucial. The global hardwood flooring market is valued at over USD 51.4 billion, with residential upkeep representing the largest segment. This shows that maintaining your floors is not just about aesthetics—it's about preserving a significant financial asset in your home.
This monthly review is also the perfect time to check the felt pads on your furniture legs and see if any area rugs need to be shifted around to prevent uneven fading. To keep everything straight, you can incorporate these tasks into a larger home care plan using a preventive maintenance schedule template.
To make it even simpler, here's how that routine breaks down.
A Practical Hardwood Maintenance Routine
Sticking to a schedule is the easiest way to make floor care second nature. Here’s a simple table that lays out the what, when, and why for keeping your hardwood in top condition.
| Daily | Sweep or dust mop high-traffic areas. | Removes abrasive grit and dust that act like sandpaper on the finish. |
| Weekly | Damp-mop with a pH-neutral cleaner. | Cleans away accumulated grime and prevents a dull, hazy buildup. |
| Monthly | Inspect for scratches, wear, and moisture. | Catches small issues before they require expensive repairs or refinishing. |
By turning these steps into a habit, you're not just cleaning your floors—you're actively extending their life and beauty for years to come.
Choosing the Right Tools and Cleaning Solutions
Walking down the cleaning aisle can feel like a high-stakes decision when you've got hardwood floors. The wrong product won’t just leave a few streaks; it can permanently dull the finish or cause damage that’s a nightmare to fix. The secret is simple: gentle, effective tools and the right cleaning chemistry.
So many homeowners I've talked to reach for pantry staples like vinegar or their trusty all-purpose cleaner, but this is one of the biggest mistakes you can make. These products are often too acidic or alkaline for a delicate wood finish.
They literally strip away the protective polyurethane layer, leaving the raw wood vulnerable to moisture, dirt, and daily wear. This is why knowing what’s in your cleaner is non-negotiable for keeping your floors looking great long-term.
What Does "pH-Neutral" Actually Mean for Your Floors?
You’ll see the term "pH-neutral" on products, and it's not just marketing fluff. It means the cleaner has a pH level around 7, just like pure water. This balance is absolutely crucial because it won’t trigger a chemical reaction with your floor's finish.
Think of your floor's finish as a thin, clear shield. Acidic cleaners (vinegar) and alkaline ones (ammonia, bleach) are like chemical sandpaper, slowly eroding that shield every single time you clean. After a while, that erosion leads to a dull, hazy look that no amount of mopping can fix.
Expert Tip: My rule of thumb is this: if it wasn't made specifically for hardwood floors, don't let it touch them. The best products are pH-neutral and won't contain oils, waxes, or silicones that leave behind a sticky residue that just attracts more dirt.
This kind of material-specific care is important all over the house. For example, it’s a key factor when looking at the best basement flooring options, where moisture resistance is everything.
Building Your Essential Cleaning Toolkit
It’s not just about the liquid in the bottle. The tools you use are just as important for preventing scratches and water damage. The goal is to get the grime up with as little water and zero abrasion as possible.
Here’s what every hardwood floor owner absolutely needs:
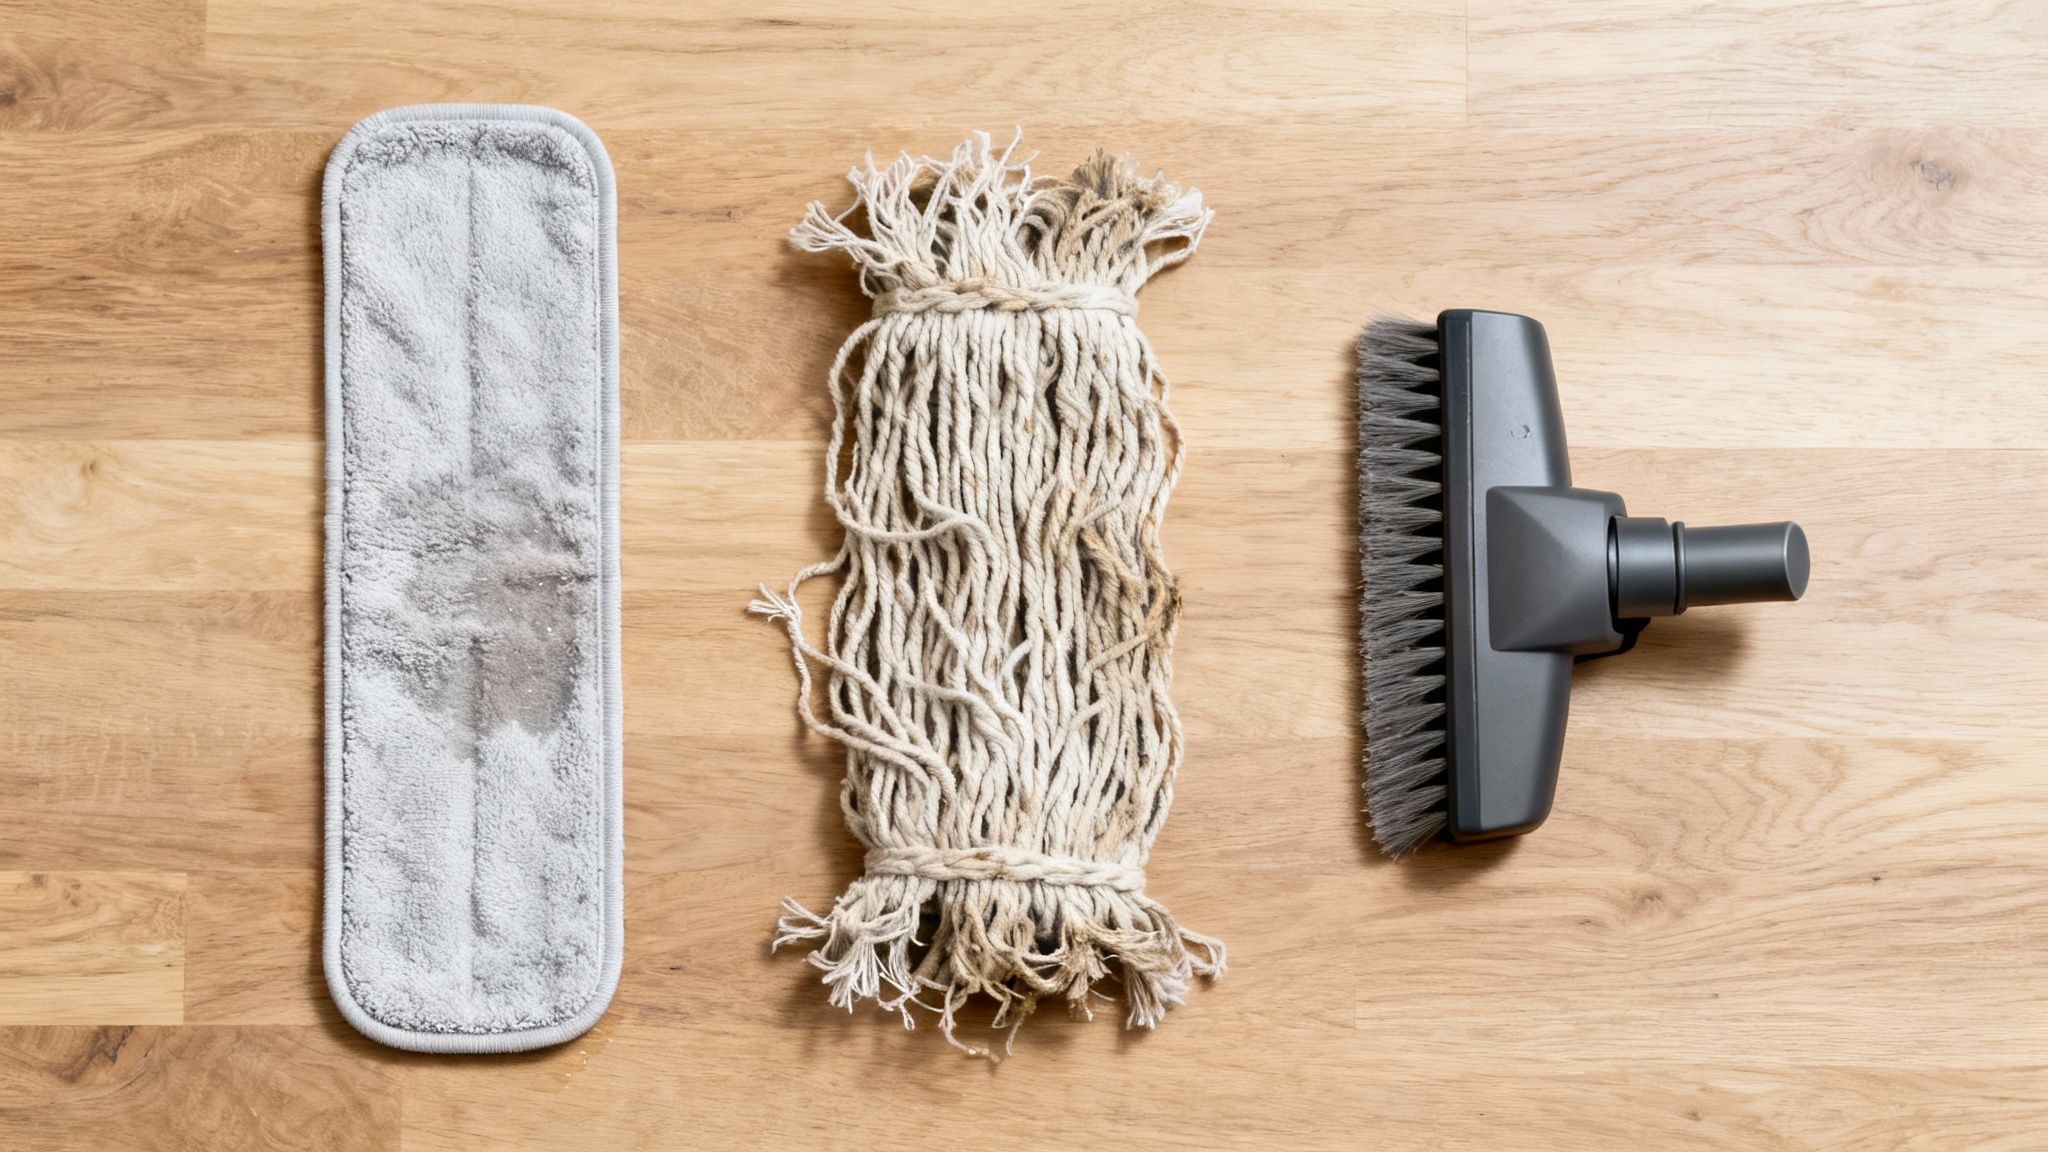
- A Microfiber Mop: This is your MVP. Forget old-school cotton string mops that just slosh dirty water everywhere. Microfiber pads use static electricity to grab dust and are designed to clean effectively while being just barely damp. That control is what keeps water from seeping between the planks and causing them to swell or warp.
- A Soft-Bristle Vacuum Attachment: For getting up more than just surface dust, a vacuum is great—but only if you use the right attachment. Never use a vacuum with a beater bar (the spinning, stiff-bristled brush). It’s designed to pound dirt out of carpets and will absolutely scratch and scuff your wood’s finish. Always use a soft-bristle head made for hard surfaces.
Comparing Cleaning Tools for Hardwood
Picking the right tool can be the difference between a floor that looks new for 20 years and one that needs refinishing in five.
| Microfiber Mop | Gives you total moisture control; traps dirt instead of pushing it around; washable and reusable. | You need to rinse the pad or swap it out often on big jobs to avoid spreading dirt. | Highly Recommended |
| Cotton String Mop | They’re cheap and easy to find. | It’s almost impossible to wring out enough water, leaving floors saturated and at risk of damage. | Avoid at All Costs |
| Steam Mop | Cleans and sanitizes using just heat and water. | It forces hot steam deep into the seams of your floor, causing warping, cupping, and finish failure. | Never Use on Wood |
| Broom | Great for a quick sweep of bigger debris like crumbs after dinner. | Can easily push fine, gritty dirt around, causing tiny micro-scratches over time. | Good for Quick Sweeps |
At the end of the day, spending a little on a quality microfiber mop and the right vacuum head is a tiny investment to protect a very big one. With those tools and a proper pH-neutral cleaner, you have the perfect defense to keep your hardwood beautiful for decades.
Proactive Strategies to Prevent Floor Damage
When it comes to keeping hardwood floors looking great for the long haul, the best offense is a good defense. It's less about the cleaning you do and more about the damage you prevent from ever happening. A few smart, simple habits will save you more time, money, and frustration than any fancy cleaner on the market.
Think of your floor's finish as a shield. While regular sweeping keeps that shield clean, proactive measures stop it from getting dented and scratched in the first place. This is where you really get to protect your investment and keep your floors looking beautiful for decades.
Creating Physical Barriers Against Damage
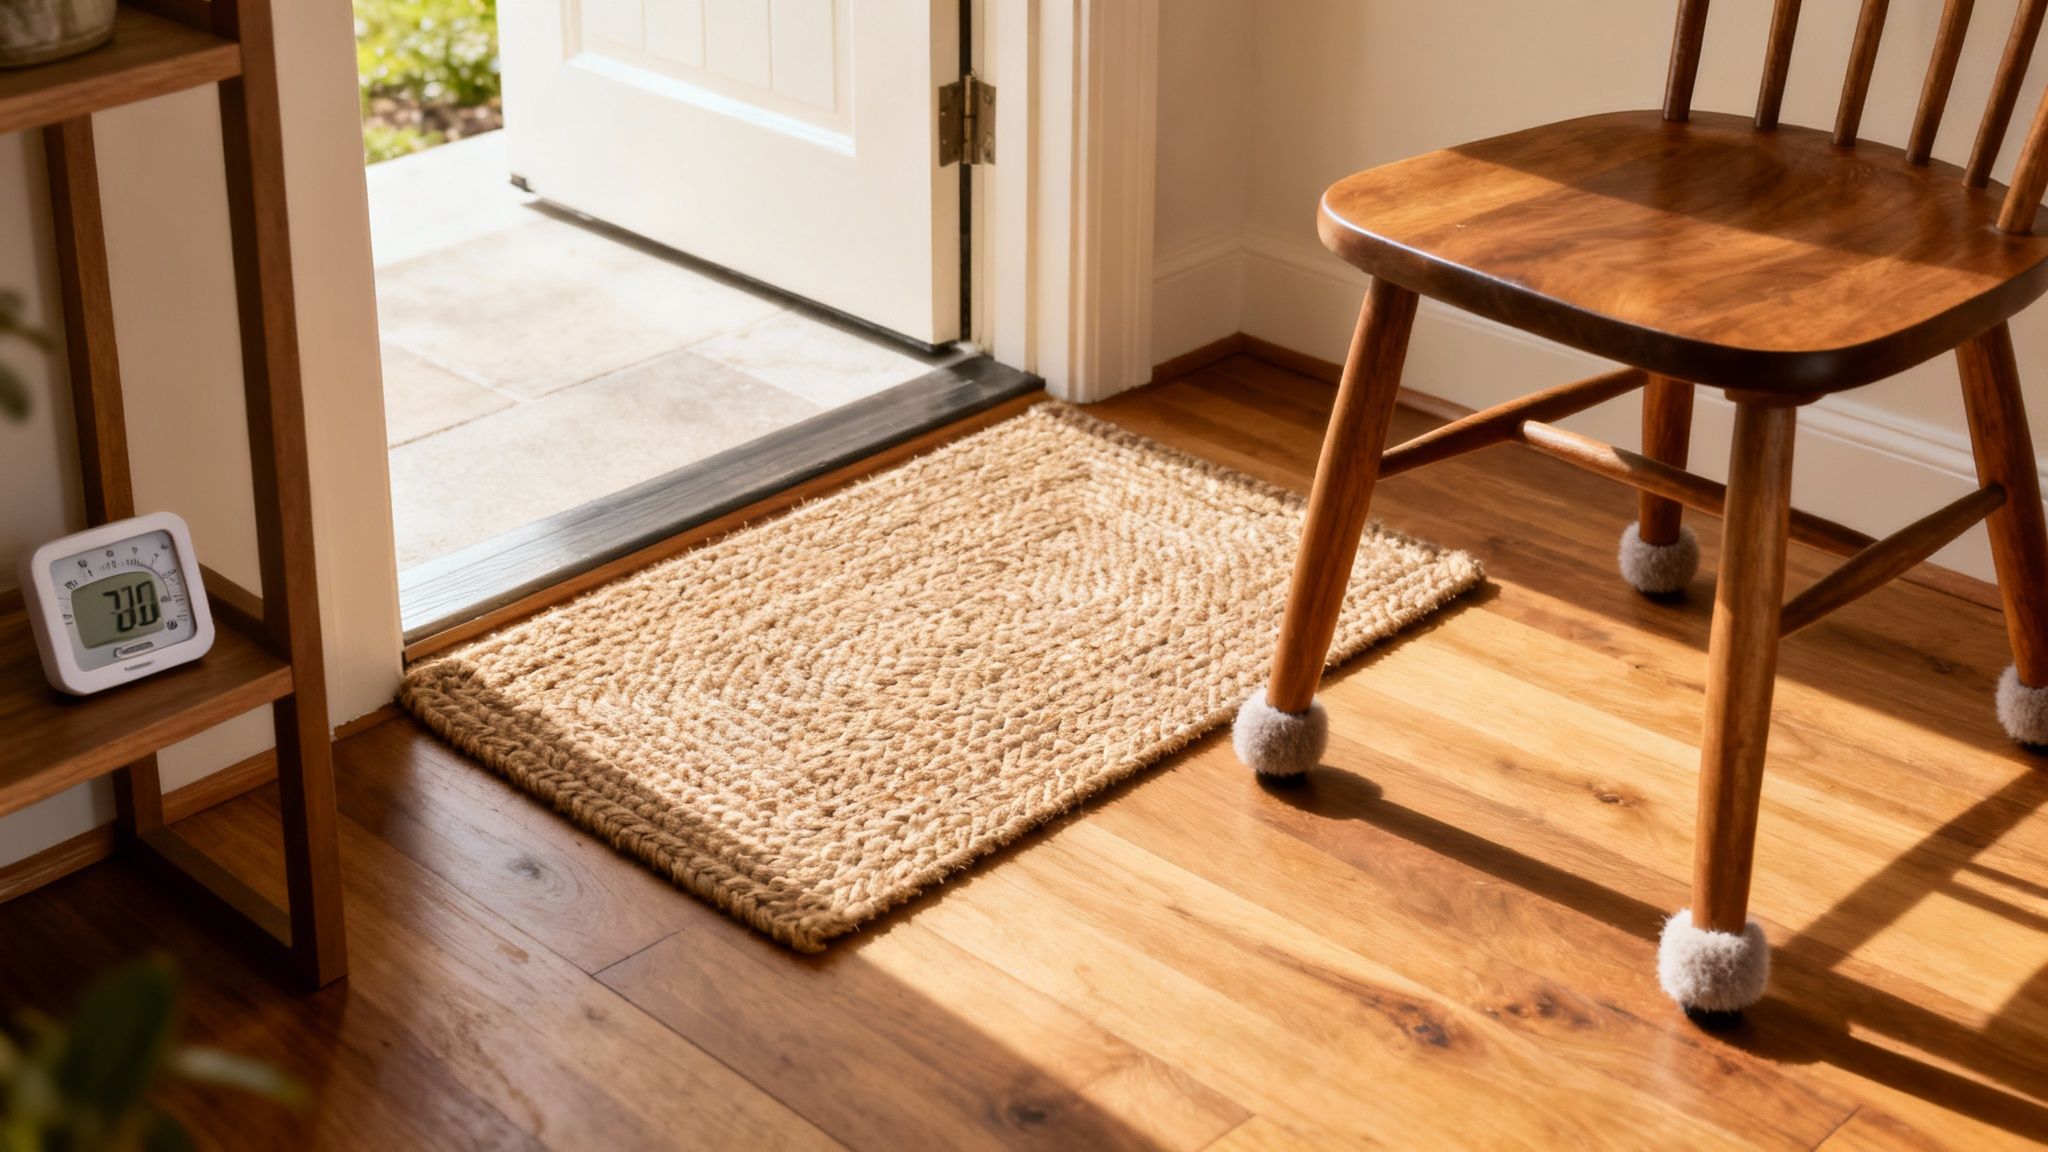
Most of the daily threats to your floors are surprisingly simple: grit tracked in on shoes, sliding furniture, and just plain old foot traffic. The good news is that these are also the easiest problems to solve with a little foresight. Your first line of defense should be right at the door.
A good-quality entry mat isn't just for show; it's a workhorse that grabs all the dirt, sand, and moisture from shoes before they even get a chance to scuff up your wood. I always recommend using two: one rugged mat outside to catch the big stuff and a softer one just inside to handle whatever is left.
After dirt from outside, the next biggest culprit is your own furniture. Every time a chair scoots or a table gets bumped, it can grind tiny particles into your floor's finish.
Here's how to create a protective buffer:
- Put Felt Pads on Everything: Don't stop at the dining chairs. Stick thick, high-quality felt pads on the legs of your sofa, coffee table, entertainment center—anything that rests on the wood.
- Check Them Regularly: These little pads wear out or can pick up grit. I make it a habit to check them every few months and swap them out when they look thin or feel dirty.
- Use Rugs in High-Traffic Zones: Area rugs are your best friend in hallways, living rooms, and right in front of the kitchen sink. They take the beating from daily foot traffic while adding a bit of style. Just be sure to use a quality rug pad underneath to prevent slipping and add an extra layer of cushion.
Master Your Home's Environment for Floor Stability
Wood is a natural, living material, which means it reacts to its surroundings—especially humidity. This is a huge factor for us here in Orem, Utah, where the climate can swing from bone-dry winters to more humid summers. Those shifts cause wood to expand and contract.
If left unchecked, this constant movement can lead to real problems:
- Gapping: In the dry winter air, wood loses moisture and shrinks. Before you know it, you’ll see ugly gaps forming between the planks.
- Cupping: When humidity rises in the summer, wood soaks up that moisture and expands. The edges of the boards can swell up, creating a wavy, "cupped" look.
The sweet spot for hardwood floors is an indoor humidity level between 30% and 50%. A simple digital hygrometer is a cheap and easy way to keep an eye on your home's levels. In the winter, you may need a humidifier to add moisture back into the air. In the summer, your AC or a dehumidifier will be key to pulling that excess moisture out.
Smart Strategies for Homes with Pets
We love our pets, but let's be honest—their claws and little accidents can be brutal on hardwood. A few pet-specific habits are absolutely essential if you want to keep your floors looking good.
First and foremost, keep those nails trimmed. If you can hear your dog's nails clicking on the floor when they walk, they’re too long. That sound is literally the nail striking and scratching the finish with every single step.
Properly cared-for floors are a true long-term asset. A solid hardwood floor can easily last 50–100 years, but its lifespan is directly tied to this kind of preventative care. Investing a little in humidity control and good rugs can save you from a very expensive refinishing job down the road and preserve your home’s value.
It's also a great idea to place waterproof mats under their food and water bowls. Even tiny splashes can go unnoticed and seep between the boards, eventually causing dark stains and finish damage. These kinds of proactive steps are a core part of any good annual home maintenance checklist.
Handling Minor Scratches and Everyday Repairs
Let's be realistic—even if you're incredibly careful, your floors will eventually show signs of life. A toy gets dropped, a chair scoots back a little too fast, or a pet's claws leave a faint trail. It happens. The good news is that not every little mark warrants a call to a professional. Knowing how to handle these small imperfections yourself can save you some cash and keep your floors looking fantastic between major tune-ups.
Think of this as floor first-aid, not major surgery. We're talking about those light, surface-level scratches—the kind that only scuff the top layer of finish. You can often see them as faint white lines, but you can't really feel them when you run your fingernail over them.
Addressing Light Surface Scratches
Before you try to fix anything, you have to work with a clean slate. Grab a soft cloth and a little of your go-to pH-neutral wood cleaner and gently wipe the scratched area. The last thing you want to do is grind existing dirt and grit deeper into the finish.
Once the spot is clean and totally dry, you have a couple of surprisingly effective tricks up your sleeve:
- Finish-Restoring Markers: These are made for exactly this situation and come in a whole range of wood tones. The secret is to start light. Just color in the scratch, wipe away any excess with a clean cloth, and let it dry. You can always add another layer if you need to, but it's much harder to take it away.
- The Walnut Trick: This old-school method is no joke—it actually works on minor scuffs. Just take a raw walnut (out of the shell, of course) and rub it gently along the scratch. The natural oils in the nut do a great job of blending in and camouflaging the mark.
What you're really doing with these methods is filling or coloring the tiny abrasion in the polyurethane. It's a simple visual trick that makes the scratch practically disappear.
It’s easy to think of a scratch as just a cosmetic issue, but it’s more than that. A break in your floor’s finish is an open invitation for dirt and moisture to get in, which can lead to much bigger problems down the road. A quick fix now protects your investment.
Fixing Small Dings and Dents
So, what about that little dent left by a dropped can of soup? If the wood fibers aren't actually broken, you might be able to coax them back into place with a little bit of science. A word of caution: this technique uses steam, so proceed carefully and only use it on solid hardwood, not engineered floors.
First, put just a few drops of water right in the dent. You want the wood to absorb it. Next, lay a damp cloth over the spot and press a hot iron on it for just a few seconds at a time. The steam helps the compressed wood fibers swell back to their original height. Go easy here—too much heat or water can do more harm than good to the finish.
Knowing When to Step Back
The most crucial part of any DIY project is knowing your own limits. Trying to fix a major issue without the right experience can quickly turn a small problem into a disaster. It's time to put down the tools and call a professional if you spot any of these red flags:
- Deep Gouges Showing Raw Wood: If you can easily feel the scratch and see the pale, unfinished wood underneath, a marker or a walnut isn't going to cut it.
- Widespread Dullness or Wear: Your floors look hazy and tired all over, even right after you’ve cleaned them? That’s a sign the finish itself is worn out and needs a professional screen and recoat.
- Gray or Black Boards: This is the tell-tale sign of water damage. That dark discoloration means moisture has soaked deep into the wood itself, and the board will likely need to be replaced.
- Significant Cupping or Crowning: If you're seeing widespread warping across the boards, that points to a much bigger problem—usually humidity-related—that a simple fix won't solve.
Being able to tell the difference between a quick cosmetic fix and a symptom of a deeper issue is the real secret to great floor maintenance. For the little stuff, these DIY tricks are perfect. For anything more serious, bringing in an expert is always the smartest, safest bet.
Knowing When to Call a Professional
DIY fixes are a lifesaver for the little scuffs and scratches of daily life. But here’s the thing about hardwood floors: part of taking care of them is knowing when you’re out of your depth. Sometimes, what looks like a simple fix is actually a symptom of a much bigger problem. Trying to be a hero with the wrong tools can easily turn a small repair into a full-blown, expensive replacement.
Knowing your limits is just as important as knowing which cleaner to use. There are a few tell-tale signs that your floors are crying out for more than just a touch-up pen.
Red Flags That Demand an Expert Eye
It's time to put down the DIY kit and call in a pro when you notice problems that are more than skin-deep. Widespread damage or issues that affect the actual shape and stability of the wood are clear signals that you need a professional’s diagnosis and skill set.
Here are the most common situations where you absolutely need an expert opinion:
- Deep Gouges and Widespread Scratches: We're not talking about minor surface marks. If you have scratches that have broken through the finish and dug into the raw wood, they’re more than just ugly. They become open invitations for dirt and moisture to get in and cause real damage. Likewise, if huge patches of your floor look like a skating rink, a professional sanding and refinishing is the only way to get back that smooth, protective seal.
- Significant Water Damage: A little spill you clean up right away is no big deal. But a slow leak from the dishwasher, a burst pipe, or any kind of minor flood is a different story. Once water has had time to sit, you'll see those dark black or gray stains appear. That’s a sign the wood fibers themselves are breaking down. This almost always means replacing boards, which is a tricky job to get right without it looking like patchwork.
- Cupping or Crowning Boards: Take a look at your floors from a low angle. If the boards aren't flat anymore—either dipping in the middle (cupping) or puffing up (crowning)—that's a major warning. It points to a serious moisture problem, usually coming from underneath in the subfloor or crawlspace. This is especially true here in Orem, where Utah's dry climate can make wood shrink, and any sudden moisture will cause it to warp dramatically. A pro needs to find the source of that moisture, or any repair will just fail again.
An Investment, Not an Expense
Bringing in a professional isn't admitting defeat; it's making a smart investment in your home. A proper refinishing job does more than just make your floors look incredible—it restores the crucial protective layer that keeps them going for the long haul. This single process can add decades to your floor's life and give your home's value a serious boost.
A professional assessment can uncover issues you'd never spot. For example, what you see as one warped board might be their clue to a slow leak in the subfloor. Finding that early saves you from a massive structural repair later.
Experts come with the heavy-duty equipment—industrial sanders, dust containment systems, and commercial-grade finishes—that you simply can’t rent at a big-box store. For anything more complicated, like fixing subfloor problems, weaving in new planks, or tackling structural damage, you might need to look into professional carpentry services for floor repair. They have the specialized skills to handle problems that go far beyond the surface, making sure the very foundation of your floor is solid.
At the end of the day, hiring an expert is about peace of mind. It ensures the job is done right, protecting your investment and keeping your home beautiful for years to come.
Common Questions (and Expert Answers) About Hardwood Floor Care
Even with a solid routine, questions are bound to pop up. When it comes to hardwood, knowing the right answer can be the difference between a beautiful floor and a costly mistake. I've heard just about every question in the book from homeowners over the years, so I've put together answers to the ones that come up most often.
Think of this as your go-to guide for those "what if" moments that inevitably happen.
Can I Use a Steam Mop on My Sealed Hardwood Floors?
I get this question all the time, and my answer is always a firm, unequivocal no. Please, don't ever use a steam mop on your hardwood, no matter how new or perfectly sealed it seems. The idea of sanitizing with pure steam is tempting, I get it, but it's one of the most damaging things you can do to a wood floor.
Steam cleaners work by blasting hot, pressurized moisture deep into surfaces. Your floor's finish is water-resistant, not waterproof. That intense steam will inevitably find its way into the microscopic gaps between boards and into any tiny, invisible fissures in the finish itself.
When that happens, you’re looking at serious trouble:
- Warping and Cupping: The wood fibers soak up that moisture and swell, causing the boards to lift at the edges and lose their flat, uniform appearance.
- Damaged Finish: The combination of heat and moisture can chemically break down the polyurethane finish. This often shows up as a hazy, milky, or cloudy look that you just can't clean away.
- Long-Term Harm: Each time you steam the floor, you're weakening the wood and its protective coat, setting it up for future failure.
My Professional Advice: Stick with a quality microfiber mop. Get it slightly damp—not wet—with a recommended pH-neutral cleaner. This gives you total control, cleaning the floor effectively without forcing water where it doesn't belong.
How Often Should I Have My Floors Professionally Refinished?
There’s no magic number here; it really comes down to how you live on your floors. The timeline for refinishing depends entirely on foot traffic, pets, kids, and how well you've kept up with daily maintenance. It’s also important to know the difference between a "recoat" and a full "refinish."
A screen and recoat is more of a maintenance procedure than a full-blown restoration. We lightly abrade (or screen) the very top layer of the finish to rough it up, then apply a fresh top coat. It's a fantastic way to erase light surface scuffs and restore that protective sheen. For a typical family home, doing this every 3-5 years can dramatically extend the life of your floors.
A full sand and refinish is the major leagues. This is where we bring in the big sanders and take the floor all the way down to bare, raw wood. This removes everything—the old finish, deep scratches, discolorations, and graying. From there, we can apply a new stain and build up several new coats of finish. You should only need this every 10-20 years, or when the damage is too deep for a simple recoat to fix.
Are Robot Vacuums Okay for Hardwood?
Absolutely! Most modern robot vacuums are a fantastic tool for hardwood floor care, but you have to pick the right one. The biggest thing to watch out for is the beater bar, or brush roll. Many are designed for carpets, with stiff, aggressive bristles meant to dig into fibers. On a wood floor, that same brush can, over time, dull the finish or even leave behind a network of fine scratches.
When you're shopping for a robot vacuum, here’s what to look for:
- A model with a soft-bristle brush made specifically for hard surfaces.
- The ability to switch to a "hard floor mode" which often uses suction-only or a gentler brush action.
- Wheels made of soft rubber or plastic that won't scuff or scrape the finish.
A good robot vac is your best friend for daily upkeep. It constantly removes the fine grit and dust that acts like sandpaper under your feet, which is one of the biggest culprits of wear and tear.
What's the Best Way to Clean Up a Spill?
With spills, speed is everything. The faster you act, the better your chances of preventing a permanent stain or moisture damage. This is a moment where you literally want to drop what you're doing and run for a cloth.
The second a spill happens, grab a clean, absorbent cloth. Blot, don't wipe. Wiping just spreads the mess around and can force liquid down into the seams between the floorboards. Keep blotting with a dry part of the cloth until you’ve soaked up every bit of the liquid.
If it was something sticky like wine, juice, or soda, there’s one more step. Lightly spritz a fresh cloth with your pH-neutral wood floor cleaner and gently wipe the sticky residue away. Then, and this part is crucial, take a third, completely dry cloth and buff the area until it’s perfectly dry to the touch. The goal is to leave zero moisture behind.
Keeping your hardwood floors in top shape can feel like a lot, but once you know the fundamentals, it just becomes a simple, satisfying routine. Of course, some jobs go beyond routine care and require a professional touch.
At Northpoint Construction, we're experts in everything from complex floor repairs to major home remodels here in the Orem area. When you're facing a challenge that needs more than just a cleaning cloth, our team is here to help. Visit us online at Northpoint Construction to see how we can protect and enhance your home's most beautiful asset.