
How to Plan Bathroom Remodel: A Clear, Stress-Free Guide
Before you even think about picking out tile, every successful bathroom remodel starts with two things: a clear vision and a hard budget. This is the foundational work that separates a dream project from a renovation nightmare. It’s about getting real with yourself, figuring out what you absolutely need versus what you really want, and understanding the true costs before you get started.
Setting Your Foundation: Vision and Budget
The success of your project is decided long before the first hammer swings. It’s all in the planning. This is where you ground your Pinterest-fueled dreams in financial reality, creating a roadmap that will guide every single decision from here on out. It’s an exciting stage, but it's also the time for some honest talk about your goals and what you can actually afford. The global bathroom remodeling market is a massive industry, which tells you just how many homeowners are investing in these crucial spaces. For a broader look at market trends, futuremarketinsights.com offers some great analysis.
Differentiating Needs From Wants
I always tell my clients to start by making two lists. This isn't about crushing your dreams; it's about setting priorities so you can make smart decisions when it matters most.
- Needs: These are your non-negotiables. We're talking about fixing that constantly dripping shower, replacing cracked floor tiles that are a safety hazard, or installing proper ventilation to finally get rid of that mold problem. A "need" is anything that affects the function, safety, or basic integrity of your bathroom.
- Wants: This is the fun list! It’s where you put the freestanding soaking tub, the luxurious double vanity, the cozy heated floors, or that stunning designer light fixture you've had your eye on.
Once these two lists are on paper, your path becomes much clearer. If you find your budget is getting squeezed later on, you'll know exactly where to look for cuts (the "wants" list) without sacrificing the essential "needs."
Building a Realistic Remodel Budget
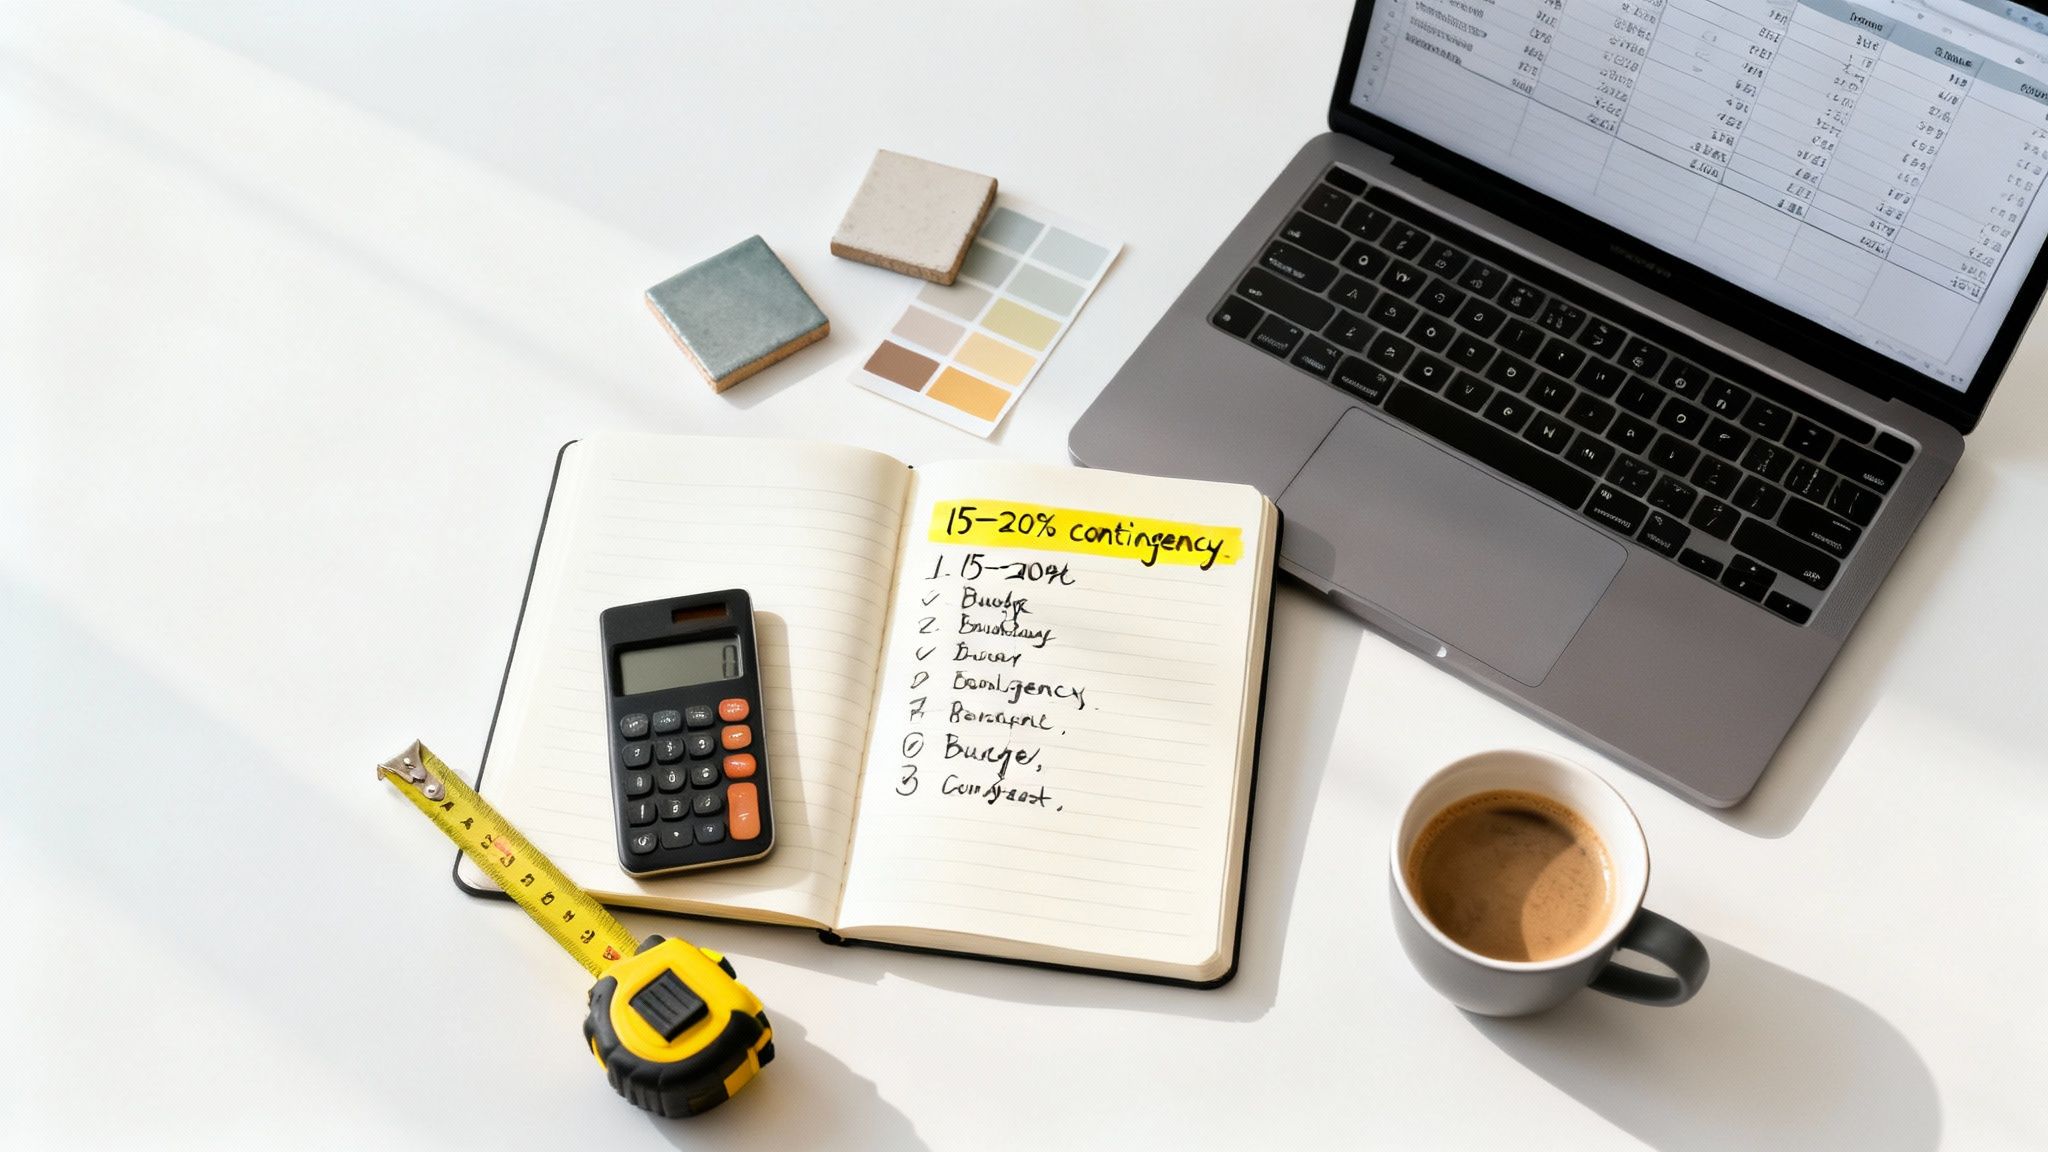
Picking a number out of thin air isn't a budget; it's a guess. A real budget comes from a bit of research and foresight. One of the biggest mistakes homeowners make is underestimating labor costs, which can easily eat up 40-60% of your total project spend. You have to account for materials, fixtures, and the professionals who will install everything correctly.
A smart renovation budget always includes a contingency fund. I can't stress this enough. Plan on setting aside an extra 15-20% of your total estimated cost. This is your safety net for the inevitable surprises, like discovering hidden water damage behind the drywall or learning your plumbing needs to be rerouted.
This fund isn't a sign of bad planning—it’s the hallmark of a savvy homeowner. Without it, one unexpected issue can derail your entire project or force you to compromise on quality later. For a deeper dive into where all that money goes, our guide on the complete bathroom renovation cost breakdown is a must-read.
To help visualize how your funds might be allocated, here’s a look at a typical mid-range project.
Sample Bathroom Remodel Budget Breakdown
This table provides a general framework to help you see where your money will likely go. Percentages can shift based on your specific project, material choices, and labor costs in your area.
| Labor | 40% - 60% | The most significant cost. Varies by location and project complexity. |
| Plumbing & Fixtures | 10% - 15% | Includes toilet, sink, faucets, showerhead. Quality here prevents future headaches. |
| Cabinetry & Vanity | 10% - 15% | Custom work costs more than stock vanities. Hardware can be a budget-friendly upgrade. |
| Tile & Flooring | 7% - 10% | Material cost plus intricate installation patterns can increase this figure. |
| Countertops | 5% - 7% | Wide range of costs from laminate to natural stone. |
| Lighting & Electrical | 5% - 7% | Includes fixtures, exhaust fan, and any necessary rewiring. |
| Doors & Windows | 3% - 5% | Often overlooked but can impact both light and ventilation. |
| Paint & Finishes | 2% - 3% | A relatively low-cost way to make a big visual impact. |
| Contingency Fund | 15% - 20% | Your non-negotiable buffer for unexpected issues. Add this on top of estimates. |
Remember, this is a guide. Your numbers will be unique, but this gives you a solid starting point for your own planning.
Where to Splurge and Where to Save
A smart budget isn't about being cheap; it's about being strategic. Knowing where to invest for longevity and where you can cut back without sacrificing quality is the secret to getting the most for your money.
Areas worth the splurge:
- Fixtures: Think about it—faucets, showerheads, and toilets are used every single day. High-quality fixtures from reputable brands are far less likely to leak or fail, saving you a ton on repairs down the road.
- Waterproofing: This is non-negotiable. Pay for a professional to properly waterproof your shower and any wet areas. Skimping here is a recipe for disaster, potentially leading to thousands in water damage repairs.
- Ventilation: A quiet, powerful, and properly sized exhaust fan is your best defense against moisture. It protects your entire investment from mold, mildew, and peeling paint.
Areas to strategically save:
- Decorative Lighting: You can find gorgeous sconces and vanity lights at big box stores or online without the designer price tag.
- Standard-Sized Tile: Oversized or unconventionally shaped tiles look great but drive up both material and labor costs. A classic, affordable subway tile can look just as stunning and will never go out of style.
- Vanity: A stock, ready-made vanity from a reputable supplier can save you thousands compared to a fully custom piece. You can easily give it a high-end look by swapping out the hardware or adding a remnant stone countertop.
Designing a Functional and Stylish Space
Okay, with a budget in hand, we get to the fun part. This is where you start turning all those ideas swirling in your head into a tangible plan. You're trying to strike that perfect balance between how the bathroom works for your morning rush and how it feels when you want to relax. It needs to be a workhorse, but it should also feel like a personal sanctuary.
Your first major crossroads is the layout. Are you keeping the existing footprint, or are you tearing down walls and moving fixtures? This single decision will have the biggest ripple effect on your budget and the project's timeline.
To Reconfigure or Not to Reconfigure
Sticking with your current layout—where the toilet, sink, and shower all stay put—is by far the most budget-friendly option. It keeps the complex (and expensive) plumbing and electrical work to a minimum. If the current flow of the room isn't broken, this is a smart way to focus your dollars on cosmetic upgrades that make a big visual impact.
A full reconfiguration, on the other hand, is where you can truly transform the space. This is how you fix an awkward floor plan, carve out room for that double vanity you've always wanted, or build a much larger, more luxurious shower. Be warned, though: moving plumbing, even just a few feet, can easily add thousands of dollars to your project. I always tell my clients to get a detailed quote from a licensed plumber before they fall in love with a new floor plan.
Pro Tip: Check if your "wet wall"—the one with all the main pipes—backs onto a closet or utility room. If it does, your plumber might be able to install an access panel. It's a small detail now that can save you from having to demolish beautiful tile work if you ever need a plumbing repair down the road.
Defining Your Bathroom Style
With the layout locked in, it’s time to nail down the aesthetic. Choosing a cohesive style early on makes every other decision—from the faucet finish to the grout color—so much easier. It's the filter you'll run everything through to keep the final look from feeling disjointed.
If you're not sure where to start, here are a few timeless styles that always work:
- Modern: All about clean lines, simple shapes, and a calm, neutral color scheme. Think floating vanities, frameless glass shower doors, and sleek, minimalist hardware.
- Farmhouse: This one feels warm, inviting, and a little rustic. You'll often see elements like shiplap, natural wood tones, vintage-looking fixtures, and maybe even a trough-style sink.
- Traditional: Elegant and classic. This style leans into details like furniture-style vanities, more ornate fixtures, and natural stones like marble or travertine.
And remember, you don't have to pick one and stick to it rigidly. Some of the most interesting designs come from mixing elements, like putting a sleek, modern faucet on a traditional vanity for an updated transitional vibe.
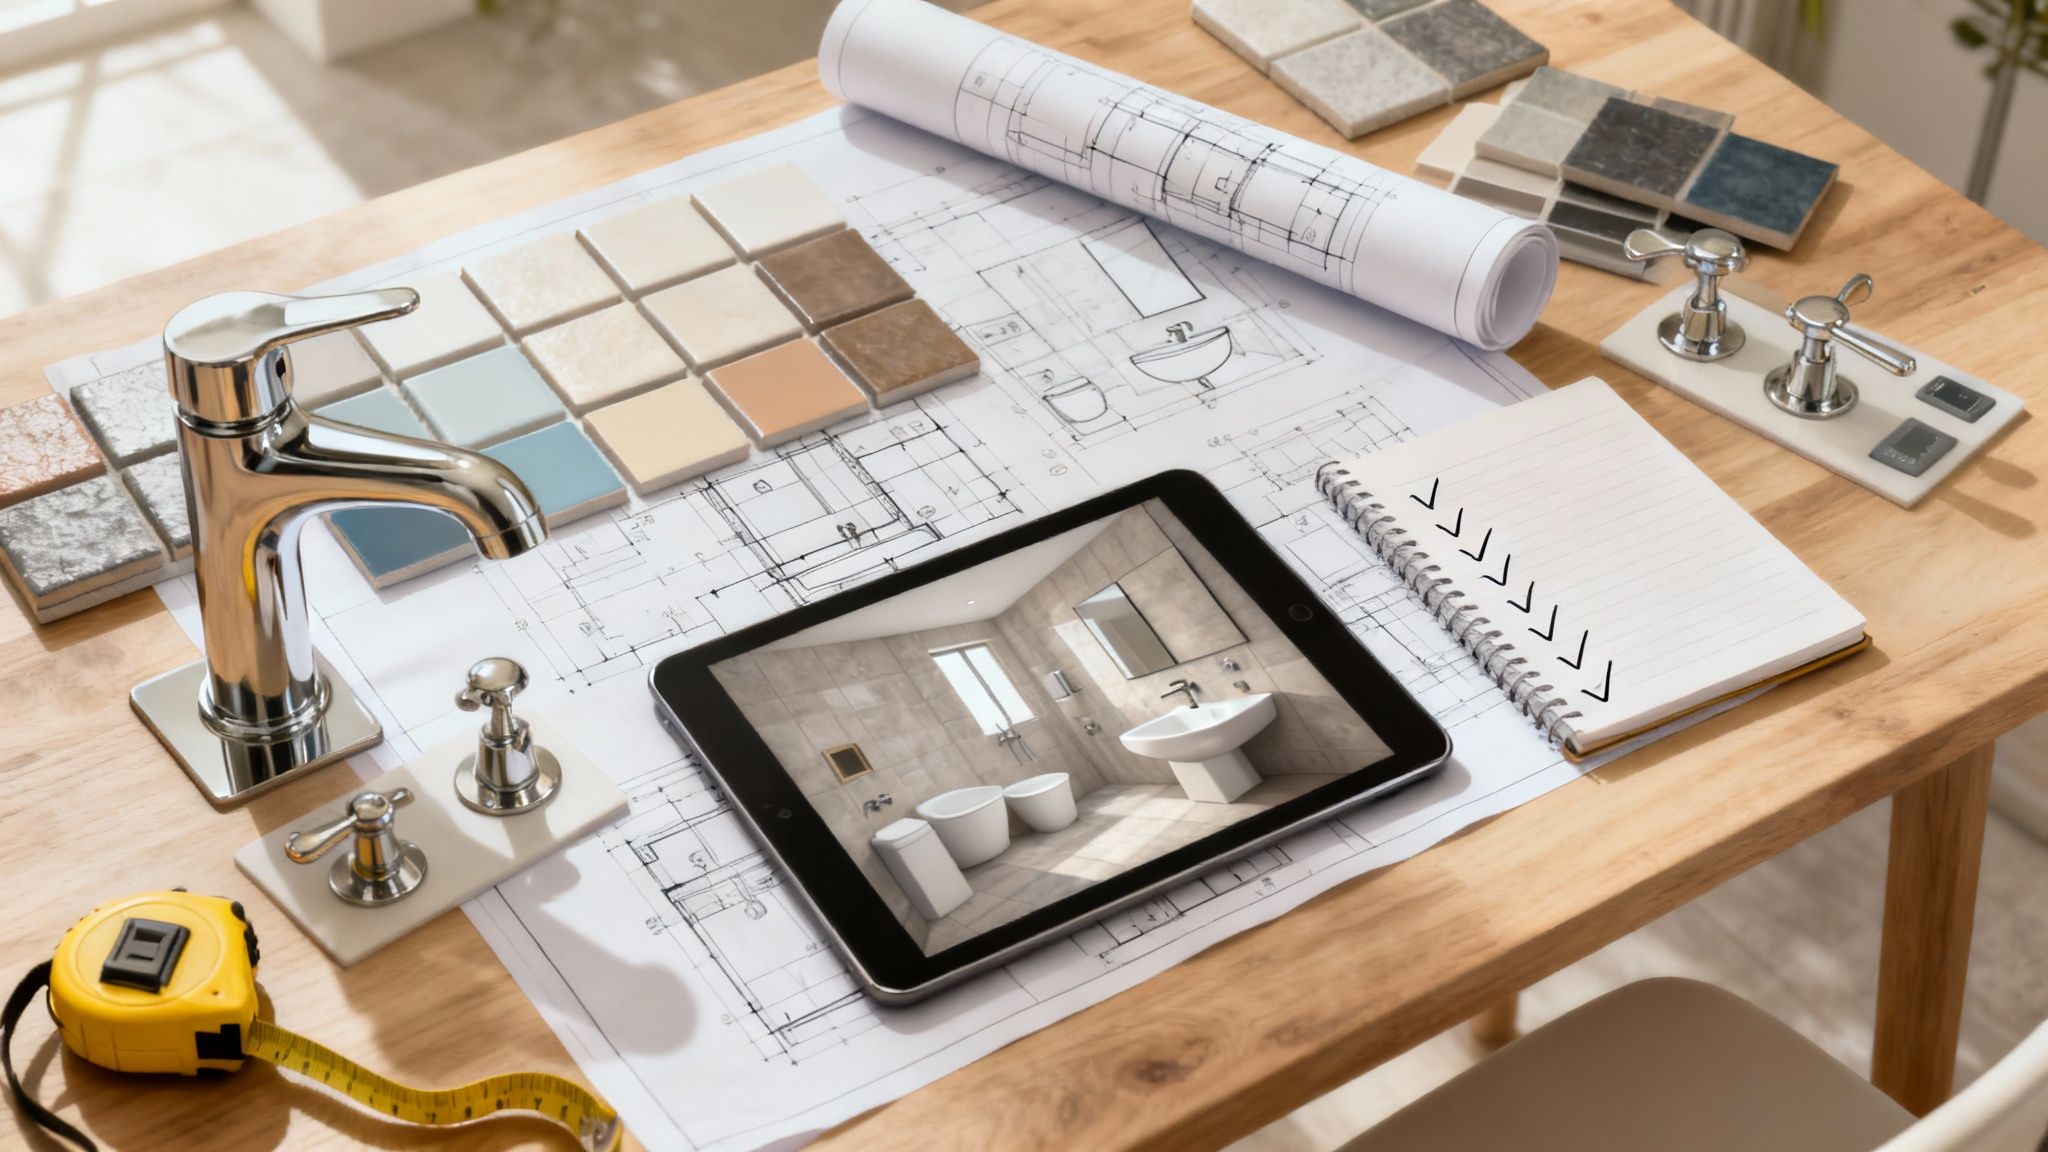
Bringing Your Vision to Life with a Mood Board
A mood board is your design compass—don't skip this step! It's simply a collection, either physical or digital, of images, colors, and textures that captures the exact look and feel you're going for. I’ve seen it save countless projects from going off the rails because it ensures all your different choices actually work together.
Your mood board should have a little bit of everything:
Inspiration Images: Photos of bathrooms you've saved and love.
Color Palette: Paint chips are a must.
Material Samples: Get actual samples of your tile, countertop, and flooring.
Fixture Photos: Pictures of the sink, faucet, and lighting you've picked out.
Getting physical samples is non-negotiable. A tile can look one way under the harsh fluorescent lights of a showroom and completely different in the natural light of your own home. Bring them home and live with them for a few days to see how they look in the morning versus the evening.
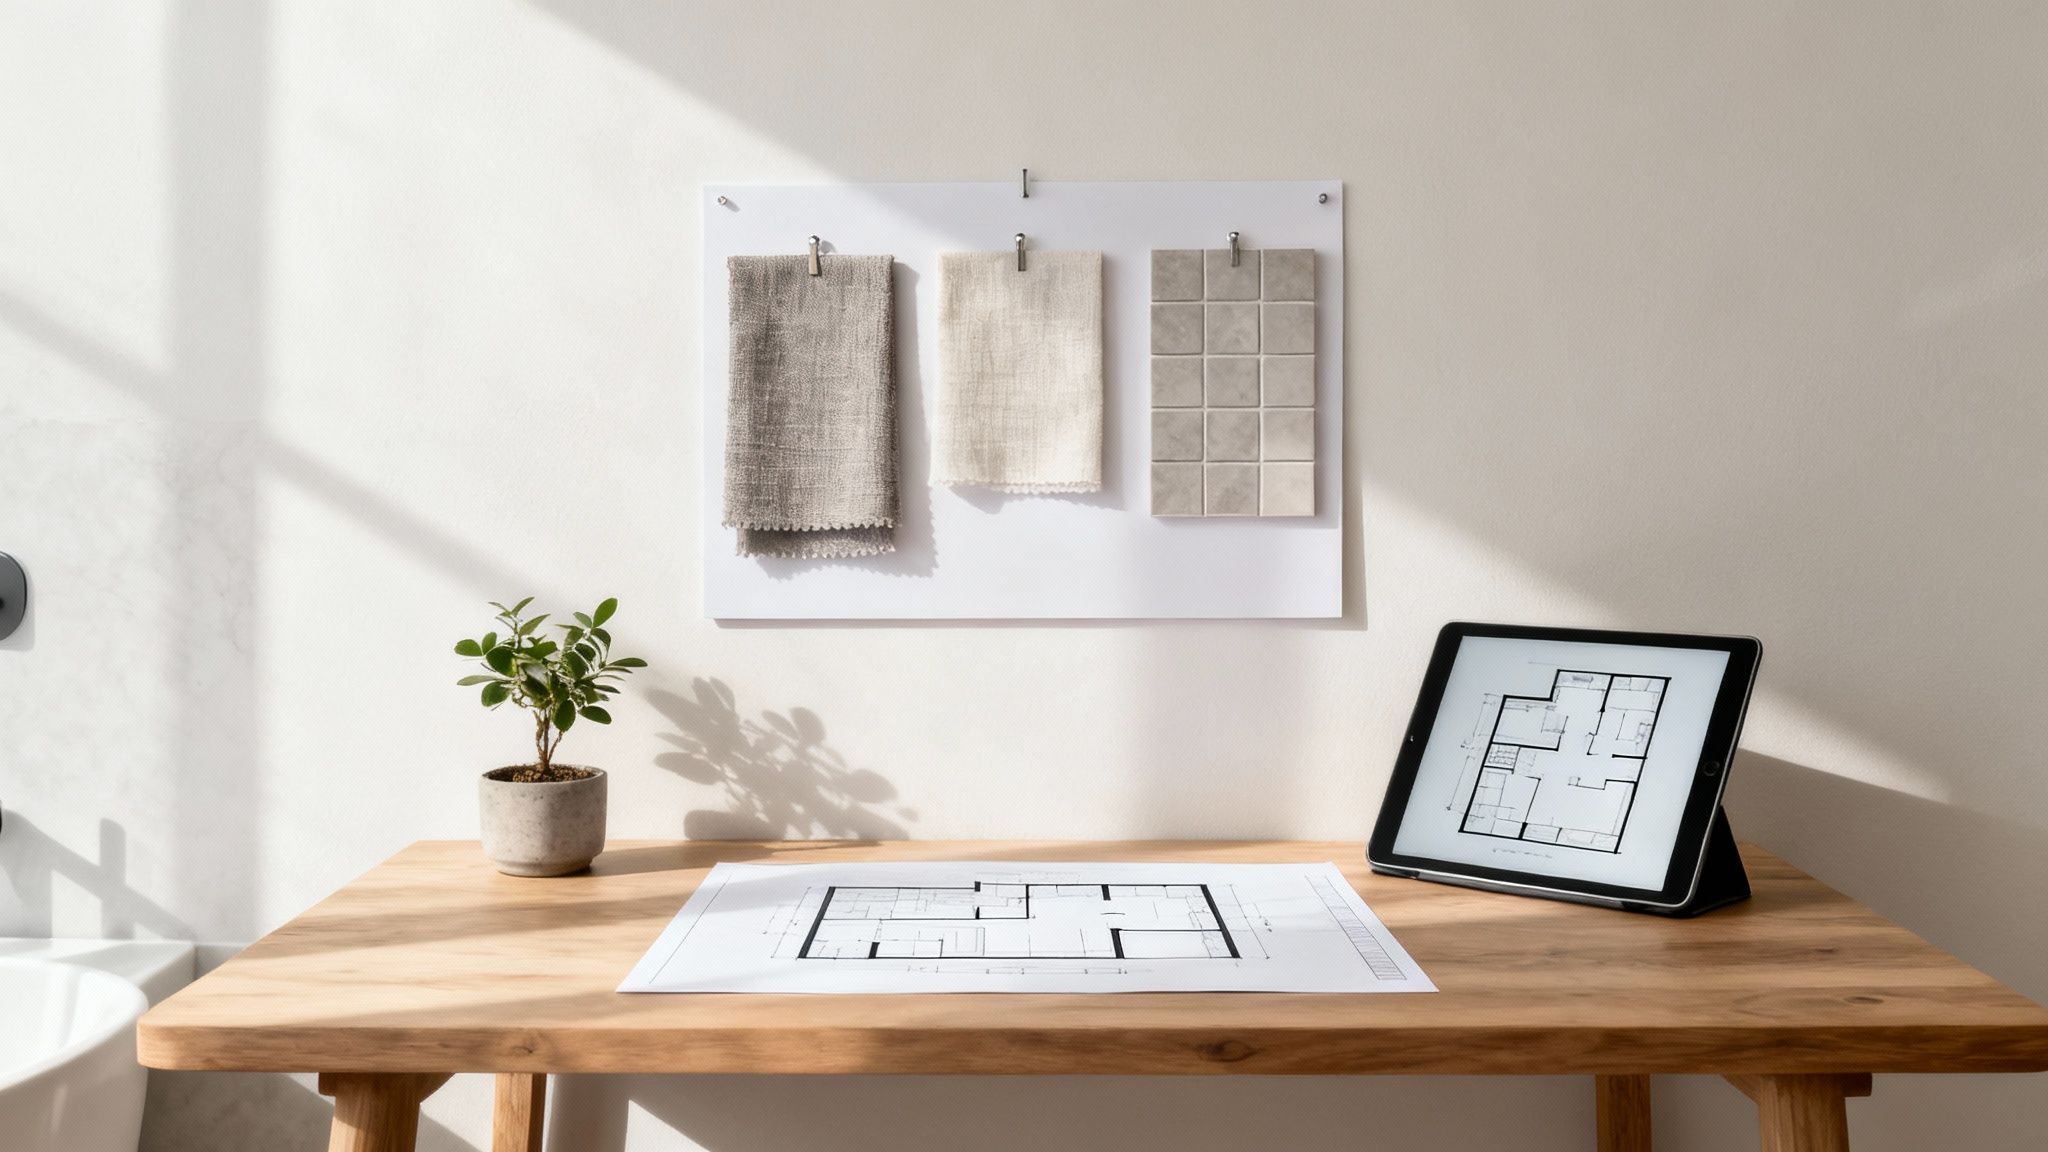
Visualizing Your Floor Plan
You don't need to be an architect to map out your space. Simple online tools or even a sheet of grid paper and a pencil can help you create a basic floor plan. This exercise is invaluable for getting a real sense of scale and flow before a single wall is touched.
Start by measuring your bathroom’s dimensions—and be precise! Then, make little to-scale cutouts for the big items: vanity, toilet, and shower or tub. Move them around until the arrangement feels right. The most important thing here is to account for clearance space. You have to leave enough room to open vanity doors and drawers, stand comfortably at the sink, and just generally move around without feeling boxed in. Trust me, this simple step is a core part of how you plan your bathroom remodel and can prevent some very expensive layout mistakes.
Choosing Materials and Fixtures That Last
This is where your vision really starts to take shape. The materials and fixtures you select are the parts of the bathroom you'll see and touch every single day. They need to look fantastic, obviously, but they also have to stand up to a lot of wear and tear. Getting the balance right between aesthetics, durability, and cost is what separates a good remodel from a great one that you'll love for years.
We're not just picking pretty tile here; we're making long-term investments in your home. Think about how the room will be used. A main bathroom for a family with kids has completely different demands than a guest powder room, and that reality should guide everything from your flooring choice to the finish on your faucets.
Building a Durable Foundation with Flooring
Your bathroom floor is probably the hardest-working surface in the entire room. It has to deal with constant water, high humidity, and daily foot traffic without warping, staining, or becoming a slip-and-slide. A big part of getting this right is understanding what flooring is best for bathrooms to ensure your space is both tough and moisture-proof.
Here are a few of the best options I’ve seen work time and again:
- Porcelain Tile: This is the undisputed champion for a reason. Porcelain is incredibly dense, making it waterproof and exceptionally durable. And thanks to modern printing, it can mimic the look of natural stone or wood with uncanny realism.
- Luxury Vinyl Plank (LVP): If you love the warm look of wood but not the risk of water damage, LVP is a fantastic choice. It’s comfortable to walk on, 100% waterproof, and generally a bit friendlier on the budget than tile.
- Natural Stone: There's no denying the high-end look of materials like travertine or slate. Just know they come with some homework—they are naturally porous and need to be sealed regularly to keep water and stains out.
My biggest piece of advice on flooring? Don't forget the grout! Seriously, opt for a darker or mid-tone grout, especially for the floor. White or light grout is a nightmare to keep clean and can make a brand-new bathroom look old and dingy in no time.
Selecting Countertops for Style and Substance
The vanity countertop is another surface that takes a daily beating from water, soap, toothpaste, and cosmetics. You need something that’s as tough as it is beautiful.
Quartz is what I recommend for most projects, and for good reason. It's an engineered stone, which means it’s non-porous. In plain English, that means it shrugs off stains, scratches, and bacteria without ever needing to be sealed. Plus, it comes in a dizzying array of colors and patterns.
Granite is another solid choice, a natural stone loved for its unique, one-of-a-kind patterns. It’s very heat-resistant but does need to be sealed every so often to keep it from absorbing stains.
Marble delivers that timeless, elegant look, but it’s easily the most high-maintenance of the bunch. It's a softer, more porous stone, which makes it prone to scratching and staining if you aren't meticulous with its care.
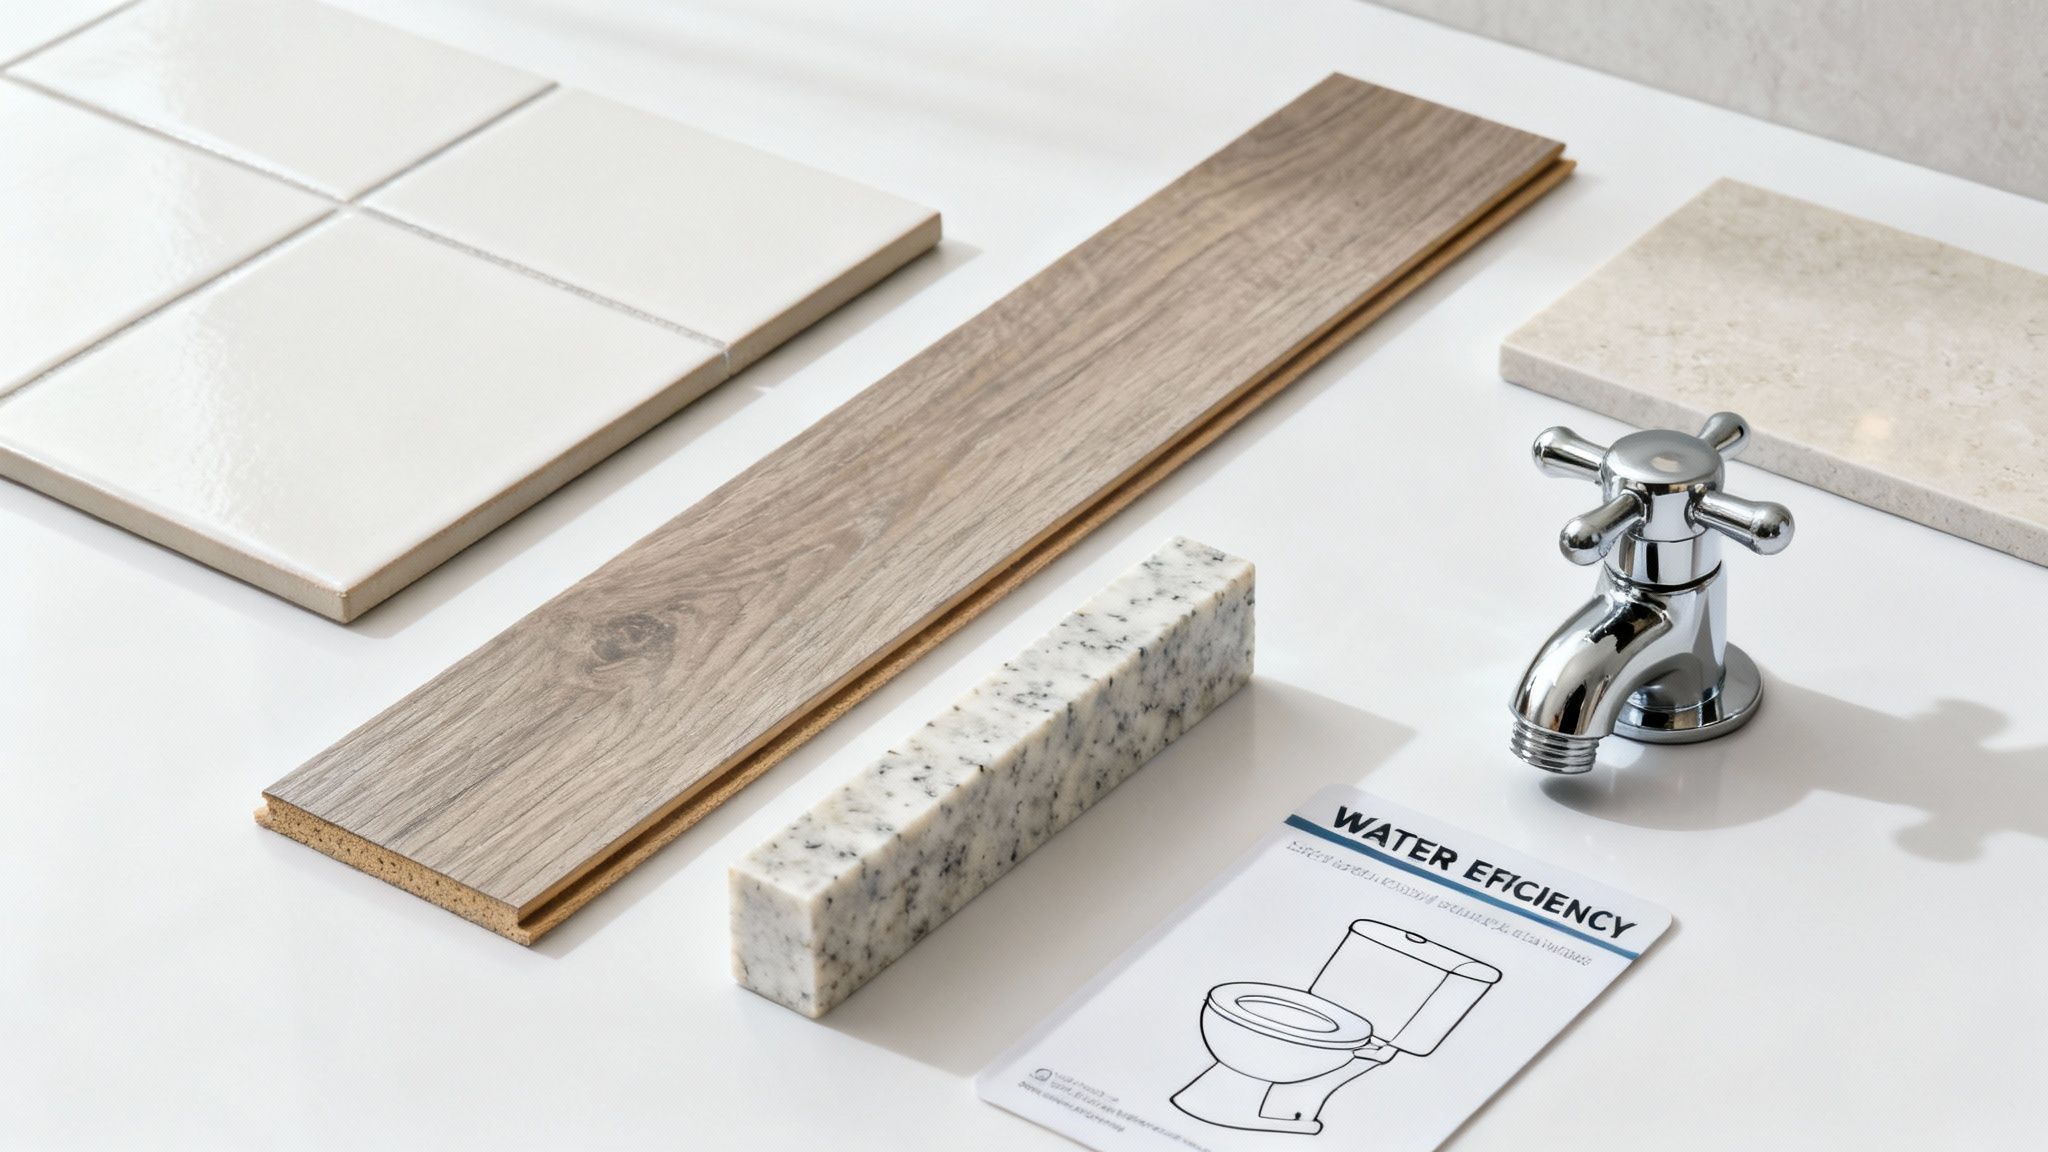
Choosing Fixtures That Offer Real Value
Think of your fixtures as the jewelry of the bathroom—they provide the finishing touch, but they also have to be total workhorses. This is one area where spending a little more on quality really pays off down the line.
There’s a big push toward sustainability in remodeling right now, which is great to see. Water-efficient fixtures don't just help the planet; they directly lower your utility bills. This kind of smart thinking is why the global market for bathroom remodeling services is expected to hit about USD 3.36 billion between 2025 and 2033. It's about adding long-term value, not just a quick facelift.
Here are a few fixture upgrades I always suggest for their lasting benefits:
Water-Saving Toilets: A modern dual-flush or low-flow toilet uses a fraction of the water of older models. For a family of four, that can add up to thousands of gallons saved each year.
Thermostatic Shower Valves: This is a game-changer. It lets you set an exact water temperature and keeps it there. No more getting scalded or frozen when someone flushes a toilet elsewhere in the house.
Layered Lighting: Good lighting can completely transform a space. I plan for at least three layers: a general overhead light, task lighting at the vanity (like wall sconces), and a dedicated waterproof light in the shower. Putting them all on dimmers gives you total control over the mood.
When you carefully think through each of these elements, you're not just picking parts—you're crafting a cohesive, durable, and beautiful room that will look and function great for years.
Bringing in the Pros and Tackling the Paperwork
Unless you’re a seasoned DIYer doing a simple cosmetic facelift, a successful remodel really comes down to having a skilled and trustworthy team. This might be the single most important decision you make. The right pros bring your vision to life, while the wrong ones can turn your dream bathroom into a costly, drawn-out nightmare.
Let's walk through how to find, vet, and hire the best people for the job and navigate the often-confusing world of permits.
This part of the process is more critical than ever. Bathroom remodels are wildly popular, making up a massive 26% of all home renovation projects—second only to kitchens. With the entire remodeling market expected to grow by 5% in 2025, finding a great pro is competitive, but it's also your best investment.
Finding and Vetting Your General Contractor
Think of a general contractor (GC) as the quarterback of your project. They're the one managing all the other trades—plumbers, electricians, tilers—and keeping the whole operation on schedule. They are your single point of contact, which is why finding a good one is everything.
Start by asking for referrals. Talk to friends, family, or neighbors who’ve had work done recently. Local hardware stores or building supply shops are another great resource; they know who the reputable contractors are because they work with them every day.
Once you have a shortlist of three or four candidates, it's time to interview them. You're not just shopping for the lowest price; you're looking for a partner you can trust in your home for weeks, sometimes even months.
A detailed, written contract isn't a sign of mistrust—it's your single best tool for clarity and protection. It should explicitly outline the scope of work, payment schedule, material allowances, and a projected timeline. Never start a project on a verbal agreement alone.
Essential Questions for Potential Contractors
When you sit down with each contractor, come prepared with a list of questions. Their answers, and just as importantly, how they answer, will tell you a lot. A true professional will welcome the questions. For a deeper dive, our guide on how to choose a general contractor has even more detailed advice.
Here are the non-negotiables you need to ask:
- License and Insurance: Ask for their contractor's license number and proof of both liability insurance and workers' compensation. This isn't just a formality—it protects you if someone gets hurt on your property. Make sure you verify that they're current.
- Past Projects and References: Ask to see a portfolio of their recent bathroom remodels. Even better, ask for at least three references from recent clients and actually call them. Ask about their communication, if the project stayed on budget, and how they handled any unexpected issues.
- Their Team: Do they work with a consistent team of subcontractors? A contractor who uses the same plumber and electrician for every job is a good sign. It usually means a smoother workflow and better quality control.
- Project Timeline: Get them to walk you through a realistic timeline. An experienced contractor should be able to give you a solid estimate of how long each phase will take, from demolition day to the final touches.
Making Sense of Building Permits
The word "permits" can sound intimidating, but think of it as a critical safety net for your project. A building permit is simply the official green light from your local government, ensuring all the work is done safely and up to current building codes.
So, when do you actually need one? The rules can vary a bit by city or county, but you will almost certainly need a permit if your remodel involves:
Moving or adding walls: Any changes to your home's structure require a permit.
Changing the plumbing layout: Moving a toilet, sink, or shower drain isn't a simple swap—it involves major plumbing work that needs to be inspected.
Altering electrical wiring: Adding new outlets, running a new circuit for a fancy heated floor, or moving light fixtures all fall under this category.
Trying to skip a required permit is a huge gamble. If you get caught, you could face hefty fines and be forced to tear out perfectly good work. Worse, unpermitted work can create serious safety hazards and become a major headache when you try to sell your home down the road. Your general contractor should handle pulling all the necessary permits, but it's your job to make sure it gets done.
Managing the Project Timeline and Process
Think of your project timeline as the roadmap for your renovation. Once the budget is nailed down, the design is locked in, and your contractor is on board, your job shifts to managing the day-to-day chaos of construction. Knowing the typical flow of events—from the loud, dusty demolition to the final, gleaming reveal—is the single best way to keep the project on track and your sanity intact.
When you know what’s supposed to happen and when, you can time your material deliveries perfectly, prep the rest of your house for the disruption, and have productive conversations with your crew. It’s this kind of proactive oversight that keeps a remodel humming along instead of stalling out.
The Typical Sequence of a Bathroom Remodel
While no two projects are ever exactly the same, most bathroom remodels follow a well-trodden path. Getting a handle on this sequence helps you see what's coming next and understand why certain things have to happen before others can begin.
Here’s a rough sketch of what you can expect:
- Prep and Demo: This is where things get messy, but it’s a necessary first step. Your contractor will seal off the area to contain dust and protect your floors before they start tearing out all the old fixtures, tile, vanity, and sometimes even the drywall.
- The "Rough-In" Phase: With the room stripped down to the studs, the real work begins behind the walls. Plumbers will run new water lines and drains, and electricians will position new wiring for outlets, switches, and lights. It’s called a "rough-in" because none of the final fixtures are connected yet.
- Inspections: Before a single wall gets closed up, a city inspector often needs to sign off on the new plumbing and electrical work. This is a critical checkpoint to ensure everything is safe and up to code.
- Closing Walls and Waterproofing: Once you've got the green light from the inspector, it's time to hang new drywall or cement backer board. After that comes one of the most important steps: applying a waterproofing membrane in the shower and any other area that will see a lot of water.
- Tile and Flooring: Now for the fun part. The tile installer lays the floor and shower tile, and this is where you really start to see your design vision take shape. Be patient—good tile work takes time.
- Cabinets and Countertops: The vanity gets installed, followed by the countertop and any other custom storage.
- Finishing Touches: This is the home stretch! It includes painting, installing the toilet and sink, connecting all the faucets and shower fixtures, and finally, hanging the lights, mirrors, and hardware.
This handy visual lays out those crucial early steps, from vetting your pros to getting permits in hand, which all happen before the first hammer swings.
Getting these preliminary stages right is what sets you up for a smooth construction phase and helps you sidestep those frustrating, costly delays.
Navigating the Daily Realities of Renovation
Managing a remodel is as much about the daily grind as it is about the big-picture plan. You'll need to get creative. For instance, you might want to look into strategies for home renovations and remodeling projects that discuss using temporary storage to keep your home from being completely overrun with boxes and materials.
Clear, consistent communication with your contractor is everything. Decide on the best way to stay in touch—maybe it's a quick text at the end of each day, a scheduled weekly phone call, or on-site meetings. This open line ensures you're always in the know and can answer questions without holding up the work. If you're tackling more than just the bathroom, our https://buildnp.com/blogs/whole-house-remodel-checklist/ has some great universal tips that apply to projects of any size.
My Two Cents: Check in regularly, but trust your contractor to manage their crew. Your role is to be an informed overseer and decisive decision-maker, not a micromanager. A good pro will respect your input and appreciate the space to do their job well.
The Final Walkthrough and Punch List
As the last of the dust settles, it's time for the final walkthrough. This is your chance to go over every square inch of the new bathroom with your contractor and create a "punch list"—a detailed list of every little thing that needs fixing or finishing.
Be methodical. Open and close every drawer. Turn on the shower and check the water pressure and drainage. Look for paint drips, scuffs on the new vanity, or a loose tile. Don't be shy; this is your last chance to get it perfect.
Never, ever make that final payment until you are 100% satisfied and every last item on that punch list has been checked off.
Common Questions About Planning a Bathroom Remodel
Even the most meticulously planned project comes with a few nagging questions. Getting solid answers to these common concerns ahead of time can make all the difference, helping you navigate the final stages of your renovation with a lot less stress. Let's tackle some of the things homeowners are almost always wondering about.
How Long Will a Bathroom Remodel Really Take?
This is the big one, isn't it? The honest, straight-from-the-field answer is... it depends. If you're doing a simple cosmetic refresh—think a new coat of paint, swapping out fixtures, and dropping in a new vanity—you could be looking at a quick 5 to 10 days.
But for a full-gut renovation where you're moving walls or rerouting plumbing? That’s a different story entirely. A realistic timeline for a complete overhaul is usually somewhere in the 4 to 8-week range, from the first swing of the sledgehammer to the final polish. That buffer accounts for the real-world stuff: backordered materials, a subcontractor's packed schedule, or waiting on a city inspector to sign off.
Can I Actually Live in My House During the Renovation?
For most bathroom projects, yes, you can absolutely stay put. But you'll need a game plan. The biggest factor is whether you have another bathroom you can use. If you're remodeling your only full bath, things get tricky, and you’ll need to figure out a solution for daily showers.
Also, be ready for the realities of living in a construction zone:
- Dust and Debris: Pros will seal off the area, but dust has a way of getting everywhere. Expect a little extra cleaning.
- Noise: Remodeling is loud. If you work from home, you might want to plan on a few days at a coffee shop or a friend's place.
- Utility Shutoffs: Your crew will need to temporarily turn off the water or electricity at certain points.
This is where clear communication with your contractor is non-negotiable. They should always give you a heads-up before shutting off any utilities and do their best to schedule it at a time that disrupts your life the least.
What’s the Most Common (and Costly) Remodeling Mistake?
I've seen this one trip up so many projects: not having all the materials on-site before work begins. It’s so tempting to jump right into demolition the moment you've hired your team. But what happens when that custom tile you ordered gets stuck in shipping for six weeks? Your entire project grinds to a halt. The bathroom sits torn apart and unusable, and your contractor might have to pull their crew for another job, which makes rescheduling a nightmare.
Here’s how to sidestep that disaster: create a master list of every single item. I’m talking about everything from the bathtub down to the cabinet knobs and grout color. Confirm every single piece is either in your garage or has a guaranteed delivery date before demo day. It’s the single most effective thing you can do to keep your project on schedule and on budget.
Are Heated Floors Really Worth the Extra Cost?
Heated floors might feel like an over-the-top luxury, but they're one of those upgrades that homeowners almost universally say was worth every single penny. There's just nothing like stepping out of the shower onto a warm tile floor, especially on a chilly morning.
It's not just about comfort, either. They provide a gentle, efficient radiant heat that actually helps warm the entire room. While it does add to the initial investment, it's a feature that delivers daily joy and can be a fantastic selling point down the road.
Ready to turn your bathroom renovation plans into a beautiful reality without the stress? The team at Northpoint Construction has the expertise to guide you through every step, from design to the final walkthrough. Contact us today to start planning your dream bathroom.