
How to Remodel a Bathroom: A Complete Guide to Renovation
A successful bathroom remodel really comes down to four major stages: smart planning, careful demolition, the professional "rough-in" for plumbing and electrical, and finally, bringing it all together with finishes and fixtures. But if I've learned anything over the years, it's that spending extra time on that first stage—the planning—is what separates a smooth project from a stressful one. You have to create a detailed plan and a realistic budget before a single hammer swings.
Your Bathroom Remodel Roadmap: Planning for Success
Before the first bit of dust flies, a great bathroom remodel begins with a clear vision. This is the part where you turn your daydreams into an actual, actionable strategy. Think of it as drawing a detailed map for your project; without one, you're almost guaranteed to get lost, hit costly detours, and face frustrating delays.
Honestly, this planning phase is the most critical part of the entire renovation. It’s about so much more than just picking out pretty tile. It’s about defining your goals and understanding how this space needs to work for you and your family every single day.
To kickstart this process, let's break down the key questions you need to answer. This checklist will help you focus your thoughts and build a solid foundation for the rest of your project.
Initial Bathroom Remodel Planning Checklist
| Project Goal | Why are we remodeling? Are we fixing a problem, updating the style, improving accessibility, or adding value? | Write a single sentence that defines your primary goal. This becomes your "North Star" for every decision. |
| Functionality | What drives us crazy about the current bathroom? What would make our daily routine easier? (e.g., more storage, better lighting) | Spend a week actively noting every frustration. Is the vanity too low? Is there nowhere to put toiletries in the shower? |
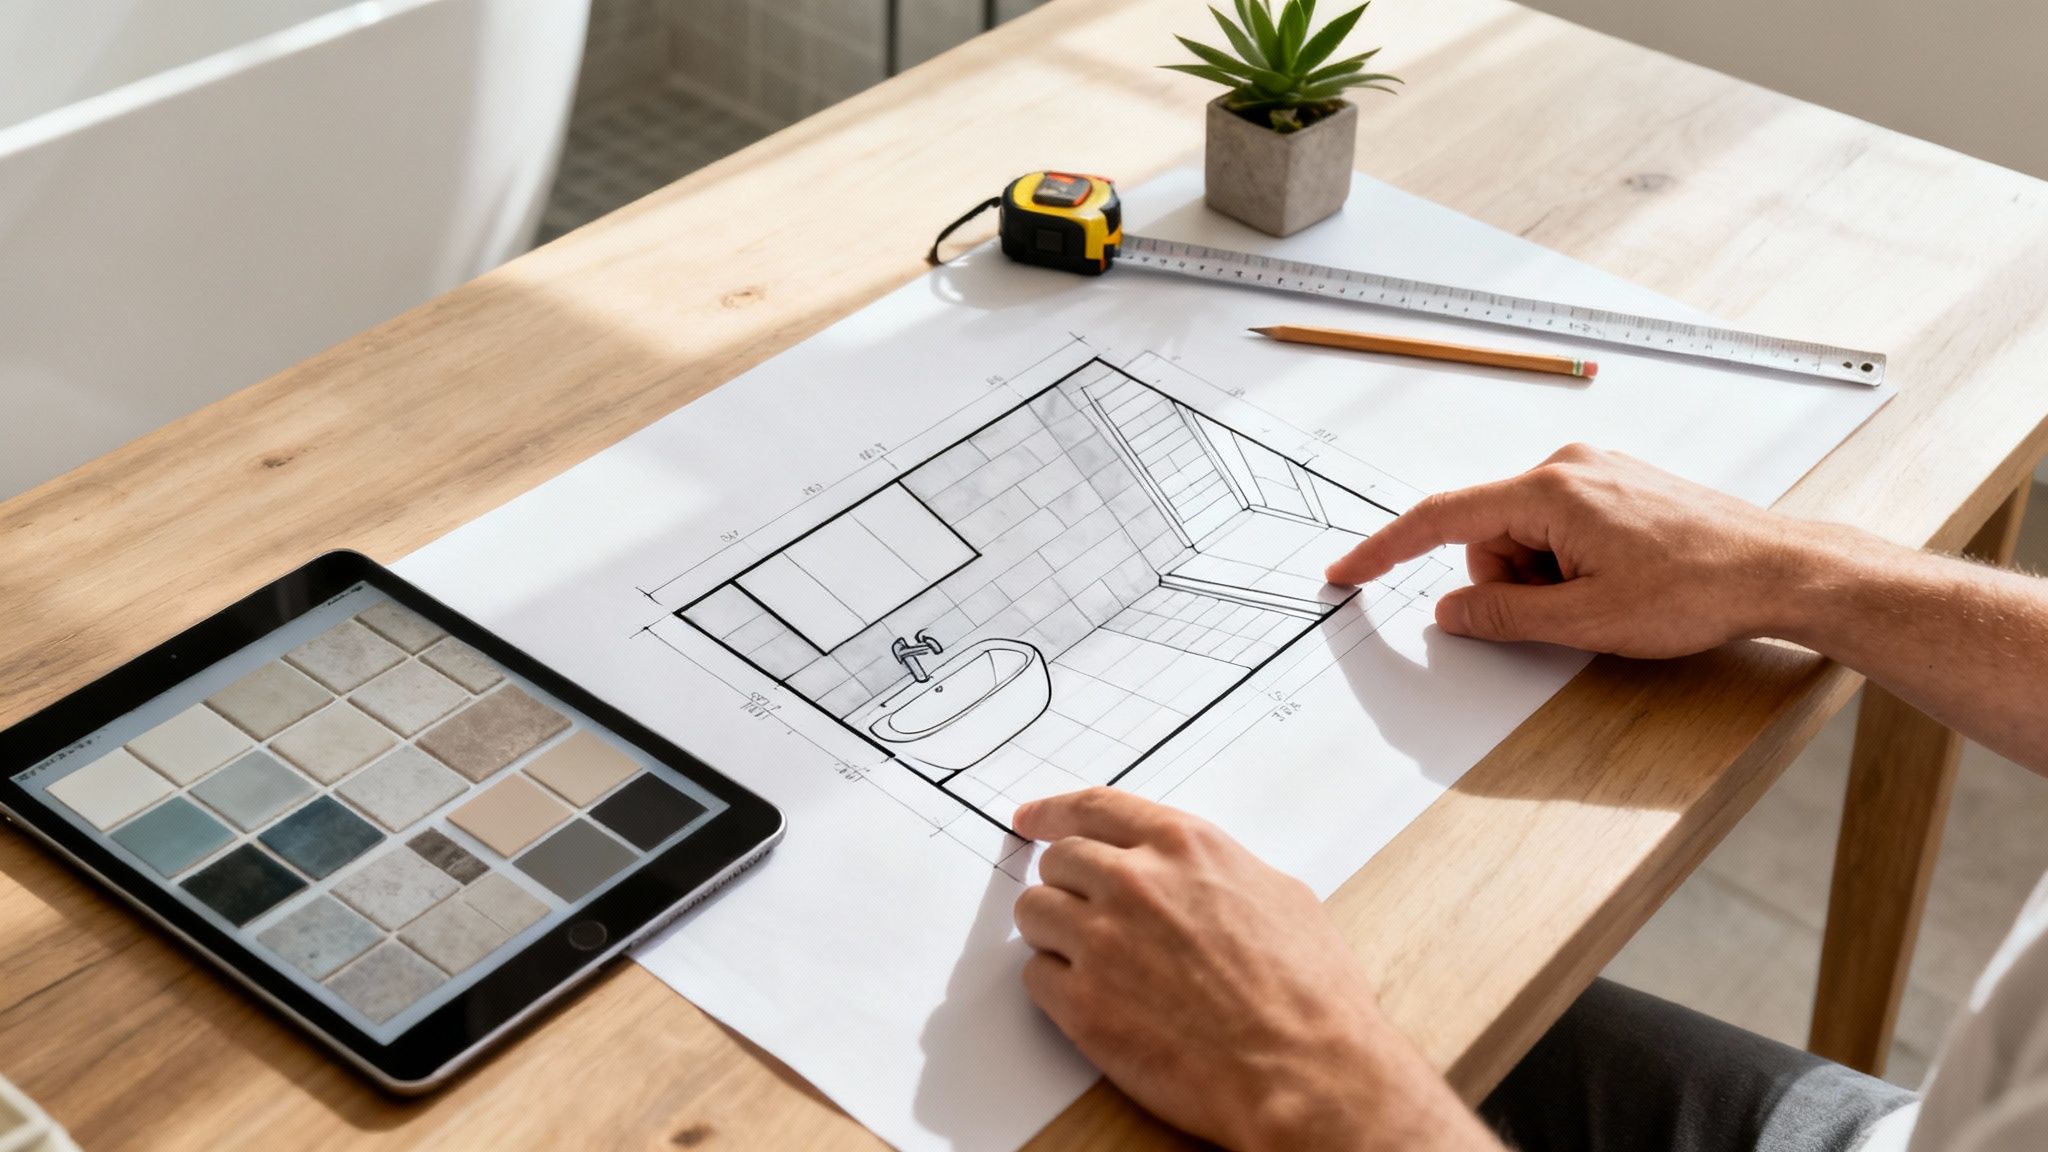
| Layout | Does the current layout work? Do we need to move the toilet, shower, or vanity? | Sketch your current layout on graph paper, then draw a few "dream" layouts. Even rough sketches help visualize possibilities. |
| Aesthetics | What's the "vibe" we want? Spa-like retreat, modern and clean, classic and timeless? | Create a Pinterest board or a physical mood board. Gather images of vanities, tiles, and fixtures you love. |
| Budget | What is our absolute maximum budget? Do we have a contingency fund (15-20%) for surprises? | Start getting rough costs for "big ticket" items like the vanity, tub/shower, and tile. This will quickly ground your budget in reality. |
Once you've worked through these initial thoughts, you'll have a much clearer picture of what you want to achieve, making the next steps in the planning process far more productive.
Define Your Remodel's Purpose And Scope
First things first, get crystal clear on why you're doing this. Is the main goal to finally create that spa-like escape you've been dreaming of? Are you adding accessibility features to age in place comfortably? Or is it simply about maximizing storage in a cramped powder room? Your core objective will steer every decision you make from here on out.
Here are a few common reasons people decide to remodel:
- Modernizing an outdated look: Tearing out that old 70s vanity, peeling vinyl flooring, and tired fixtures.
- Improving functionality: Reworking a terrible layout to create better flow or finally adding that second sink.
- Increasing home value: A bathroom remodel consistently offers one of the highest returns on investment, with homeowners often recouping 55-70% of the cost at resale.
- Addressing problems: You've got to fix a persistent leak, deal with mold, or solve a ventilation issue that's become unavoidable.
Once you know your "why," you can define the scope. Is this a cosmetic refresh with just new paint, hardware, and lighting? Or are you planning a full gut renovation—taking the room down to the studs and moving plumbing and electrical? The difference in cost, complexity, and timeline is massive.
A well-defined scope is your best defense against "scope creep," the notorious project-killer where small additions gradually inflate your budget and extend your timeline. Stick to your plan.
Assess Your Current Bathroom Layout
Now it's time to get brutally honest about your current bathroom. What actually works, and what absolutely doesn't? Walk through your morning routine in that space and make a list of every single frustration. This real-world assessment is the key to designing a new layout that truly solves your problems.
Zero in on these specific areas:
- Storage: Do you have enough room for towels, toiletries, and cleaning supplies? Think about options like recessed medicine cabinets, a taller vanity with drawers, or open shelving.
- Lighting: Is the vanity lighting too dim or harsh? A layered approach with overhead, task (by the mirror), and even accent lighting can completely change how the room feels and functions.
- Ventilation: Does your fan actually pull moisture out of the room, or does it just make noise? Proper ventilation is non-negotiable for preventing mold and mildew growth.
- Flow and Space: Is the toilet crammed right next to the door? Does the shower door swing out and block the walkway? Sometimes, shifting a fixture just a few inches can make a world of difference.
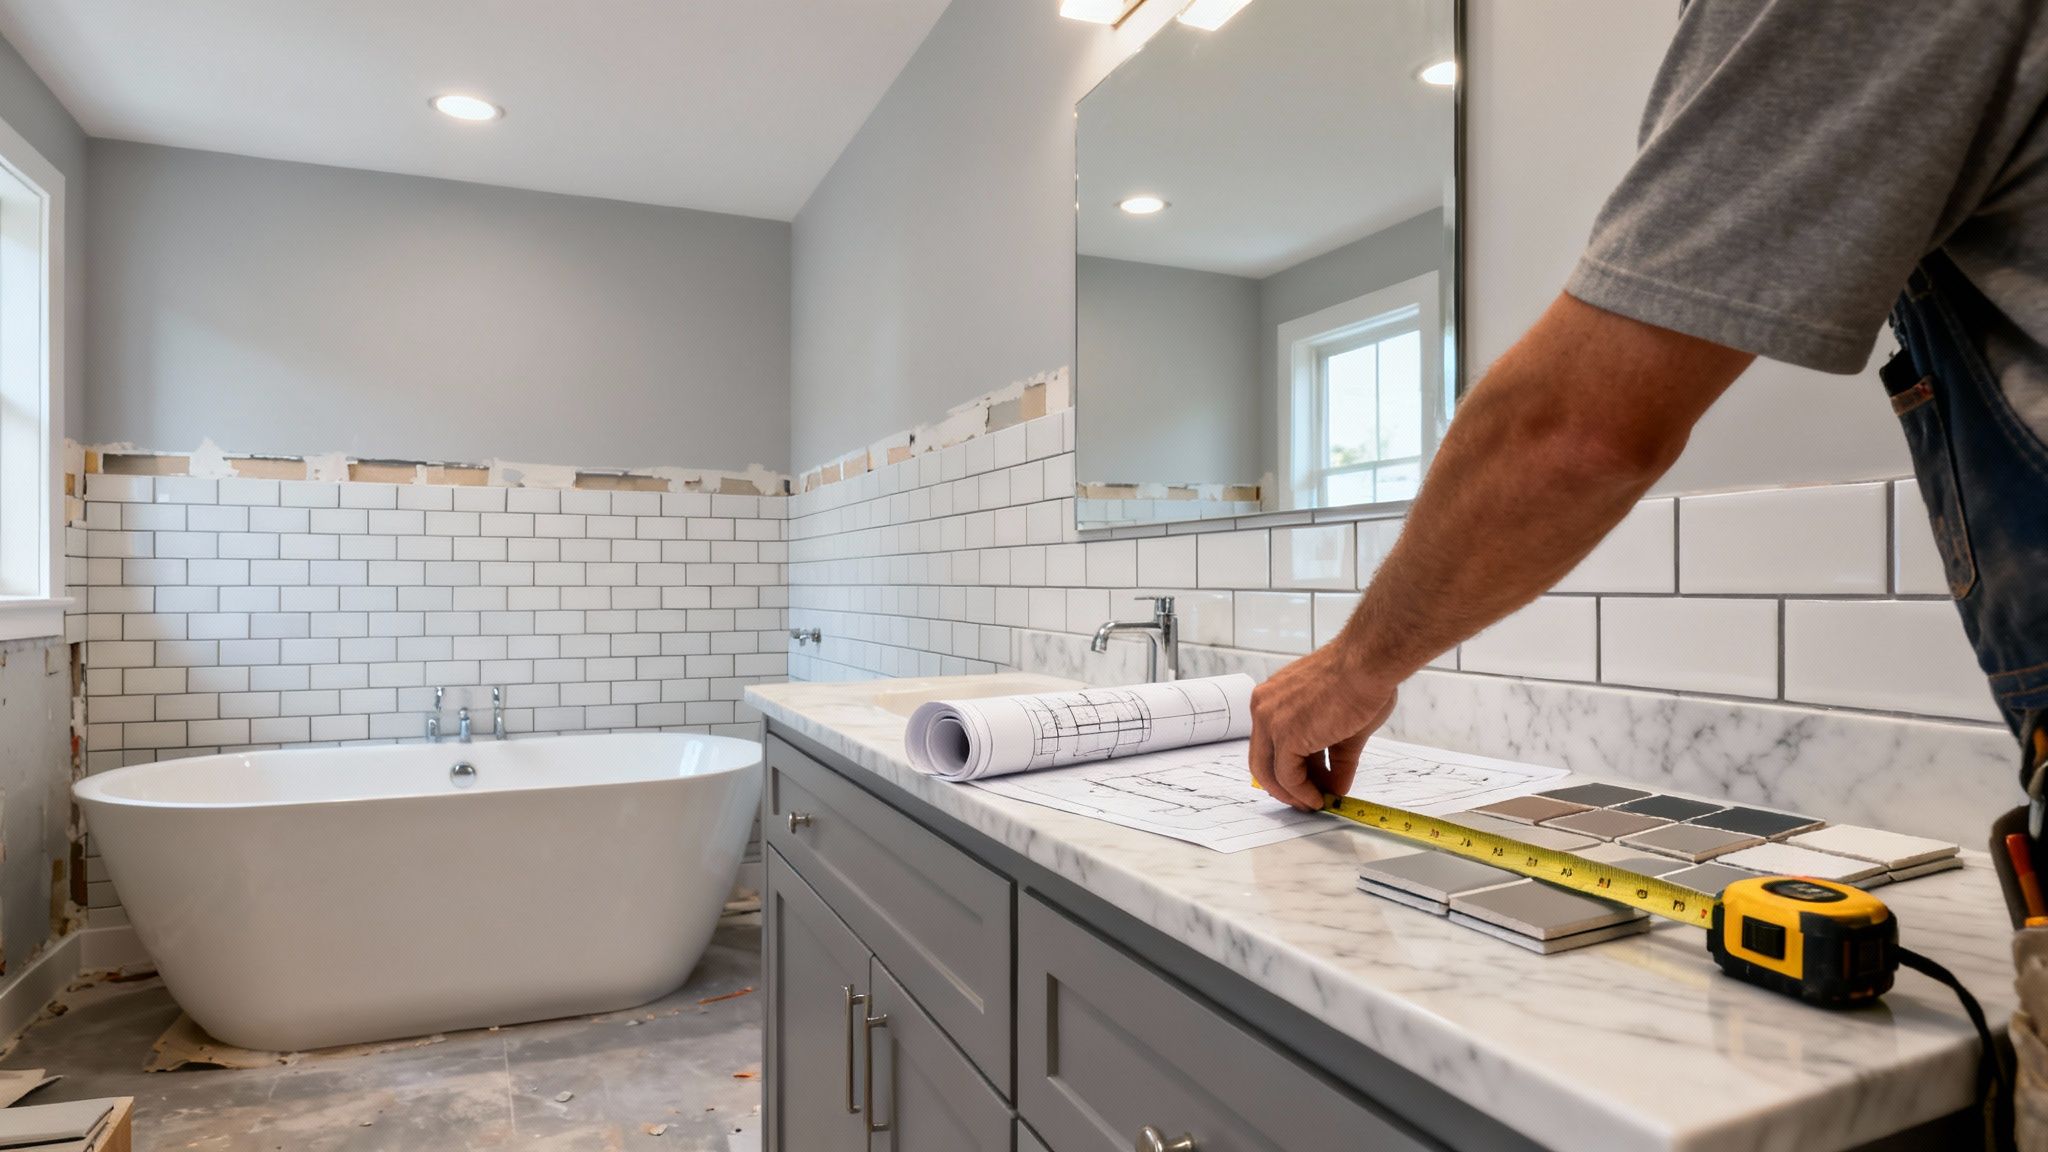
Don't be afraid to dream big, but keep your ideas grounded in the reality of your space. Grab a tape measure and get the exact dimensions of everything. This is also the perfect time to collect those inspiration photos you've been saving. A visual guide ensures you and any contractor you hire are always on the same page. This early homework is what sets the stage for a project that meets both your practical needs and your design vision.
Budgeting Your Bathroom Remodel: What to Expect
Let's talk numbers. Setting a realistic budget is, without a doubt, the most critical part of a successful bathroom remodel. Think of it as the foundation for your entire project. Every single decision—from the tile you pick to whether you can spring for that heated flooring—hinges on your budget. Without one, you're just asking for stress and disappointment.
The first step is understanding where your money is actually going. A remodel budget isn't just for the shiny fixtures and pretty finishes you see at the end. The real costs are spread across several areas, and you might be surprised to learn that labor often eats up the biggest chunk.
Where Does The Money Actually Go?
Imagine your budget is a pie. The size of each slice can change a bit depending on how complex your project is and the materials you choose, but the general breakdown is pretty consistent. Knowing this helps you plan smarter and spot potential areas to save.
For a typical mid-range bathroom renovation, here's how things usually shake out:
- Labor: This is the big one, often eating up 40-60% of your total budget. It covers the plumbers, electricians, tile setters, and other pros who make sure the job is done right and, most importantly, safely.
- Fixtures: Your toilet, sink, tub, and shower will account for roughly 15%.
- Cabinetry & Hardware: Vanities and medicine cabinets usually take another 15%.
- Tile & Flooring: Plan for about 10% here, but be warned—this number can skyrocket if you fall in love with high-end marble or custom mosaics.
- Countertops: This slice is usually around 5-7% of the total.
- Lighting & Ventilation: A smaller but vital piece of the puzzle at 3-5%.
These numbers really highlight why hiring a skilled, licensed team is an investment, not just an expense. The temptation to DIY is real, but a botched plumbing job will cost you far more to fix than it would have to just hire a professional from the start.
Cosmetic Refresh vs. Full Gut Renovation
The single biggest factor driving your final cost is the scope of the project. A simple cosmetic refresh—think new paint, a modern vanity, updated light fixtures, and a new faucet—is worlds away from a full gut renovation.
A "gut job" means tearing everything out, right down to the wall studs. You'll go this route if you’re moving walls, reconfiguring the plumbing for a totally new layout, or have to update ancient, unsafe electrical wiring. The costs climb fast here because of the sheer amount of labor, the need for permits, and all the new materials like drywall and insulation.
Key Takeaway: The moment you decide to move plumbing or electrical lines, your budget takes a major leap. If you can keep your existing layout, you can easily save thousands of dollars.
The All-Important Contingency Fund
Here's a piece of advice from years in the field: no remodel ever goes exactly as planned. As soon as you open up walls, you can find anything from hidden water damage and rotted subfloors to old plumbing that just won't work with new fixtures. This is what a contingency fund is for.
Plan on setting aside an extra 15-20% of your total estimated budget. If your project is budgeted at $15,000, that means having $2,250 to $3,000 ready for the unexpected. This isn't "fun money" for upgrades; it's a safety net that prevents a nasty surprise from derailing your entire project. Best case scenario? You don't need it, and you’ve got a nice surplus at the end.
For a more granular look at financial planning, take a look at our complete bathroom renovation cost breakdown.
This kind of proactive financial planning is more important than ever. Homeowners are pouring serious money into their bathrooms—the global market hit a staggering USD 398.1 billion in 2024 and is on track to reach USD 574.1 billion by 2034. It’s clear people are seeing the value in making these spaces more functional and beautiful.
Navigating Permits and Building Codes in Utah County
Let's talk about the least glamorous part of any remodel: paperwork. I know, it’s a headache, but getting your permits and understanding local building codes is absolutely non-negotiable. Trying to tackle a bathroom remodel in Utah County without the right permits is a surefire way to create a much bigger problem down the road. For anyone living in Orem, Provo, or the surrounding areas, this step protects your investment, your home's value, and most importantly, your family.
Skipping the permit process isn't just a minor oversight—it's a massive risk. We’ve seen it happen: homeowners get hit with steep fines or, even worse, are ordered to tear out beautiful, brand-new work. It also creates a huge red flag when you eventually sell your home. But beyond the financial sting, these codes are in place for a reason. They prevent serious hazards like house fires from faulty wiring or slow-leaking pipes that cause structural rot.
When Do You Actually Need a Permit?
So, how do you know if your project needs a permit? It’s actually pretty straightforward. If you're just doing a simple cosmetic update—think painting the walls, swapping out a faucet, or replacing a light fixture in the same spot—you're usually in the clear.
However, the game changes the second you start messing with the stuff behind the walls. You will absolutely need a permit if your remodel includes any of the following:
- Moving or adding plumbing: Any time you relocate a toilet, change a tub to a shower, or add a new sink, you're altering the plumbing system. That requires a permit and an inspection.
- Altering electrical wiring: This is a big one. Adding a new outlet for a vanity, running a dedicated circuit for a jetted tub, or installing heated floors all fall into this category.
- Changing the structure: If you're taking down a wall (even if you think it's not load-bearing) or building a new one to create a water closet, you'll need a permit.
A good rule of thumb is this: if the work gets covered up by drywall, tile, or flooring, an inspector needs to see it first to make sure it’s safe.
Key Utah County Codes to Know
While there might be slight variations from Lehi to American Fork, a handful of critical building codes are standard across Utah County. These are especially important in a bathroom, where water and electricity are in such close quarters.
Here are a few you can't ignore:
- GFCI Protection: Every single outlet in your bathroom must have Ground Fault Circuit Interrupter (GFCI) protection. It's a lifesaver, literally. This device detects any imbalance in the electrical current and shuts the power off in milliseconds, preventing a serious shock.
- Proper Ventilation: If your bathroom doesn't have a window you can open, you are required to have an exhaust fan. And it has to be vented outside of your home—not into the attic, where all that moisture will just lead to mold and rot.
- Waterproofing Standards: This is one we see done wrong all the time by DIYers. Your shower walls and floor need a continuous waterproofing membrane behind the tile or surround. This is your last line of defense against water getting into your walls and causing thousands in damage.
This is exactly where a seasoned local contractor makes all the difference. Someone like Northpoint Construction lives and breathes the specific codes for Orem and Provo. We handle the entire permitting process, from submitting the plans to scheduling every inspection, so you don’t have to. It's the only way to guarantee your new bathroom is not just beautiful, but completely safe and up to code.
The Remodeling Process From Demolition to Done
Once the design is locked in and your permits are in hand, it's time for the real fun to begin. This is where your vision starts taking shape, moving from a blueprint to a brand-new space. Every remodel follows a specific sequence for a reason—it’s all about efficiency and protecting the work that’s already been done.
We always work from the inside out, starting with the messiest, most foundational jobs before moving on to the final details and finishes. Understanding this flow helps you know what to expect and when.
Kicking Things Off: The Demolition Phase
The first real step is demolition. And no, it’s not just about taking a sledgehammer to the walls (though that can be part of it). It’s actually a methodical deconstruction. Our first priority is always to contain the mess. We’ll seal off the work area with plastic sheeting and set up fans to keep dust from migrating through the rest of your home.
During demo, everything you’re replacing gets torn out—the vanity, toilet, tub, tile, flooring, and sometimes drywall. It's loud and dusty, but it’s the essential first move to create a clean slate.
We also handle all the debris. Depending on the scale of your remodel, this could mean a small trailer for a cosmetic refresh or a full-size dumpster for a complete gut job. Either way, we get it off your property promptly.
The Hidden Foundation: Rough-In Work
With the room stripped to the studs, we move into the "rough-in" stage. This is hands-down one of the most critical parts of the project because it deals with all the important systems that will eventually be hidden behind the walls. This is where licensed plumbers and electricians work their magic.
Here’s what happens during the rough-in:
- Plumbing lines are relocated for a new shower or toilet position.
- New pipes and shower valves are installed for your new fixtures.
- Fresh electrical wiring is run for new outlets, fancy lighting, or a powerful ventilation fan.
- Junction boxes and switches are installed exactly where the new design calls for them.
This work absolutely has to be done correctly and inspected before a single sheet of drywall goes up. For complex electrical needs, we always bring in specialists in residential remodeling electrician services to guarantee everything is safe and fully compliant with Orem and Provo codes.
Walls, Waterproofing, and Tile
After the rough-in work passes inspection, your bathroom starts to look like a room again. We hang new, moisture-resistant drywall (often called "green board") to handle the humidity.
Next comes a step we never skip: waterproofing. In the shower and around the tub, we apply a waterproof membrane over the backer board. This creates a completely sealed barrier that prevents water from ever reaching the studs. Taking a shortcut here is a guaranteed recipe for leaks, mold, and costly structural damage down the road.
Once the waterproofing is complete, the tile work begins. This is where the personality of the room really starts to shine through as the floors and shower walls get their final beautiful finish.
Expert Tip: Don't buy your tile months in advance. If you run short and have to reorder, you might get a box from a different dye lot, which can lead to a subtle but noticeable color mismatch. We recommend ordering it right before installation and always adding 10-15% extra to account for cuts, waste, and any potential breakage.
Installing Major Fixtures and Finishes
Now the heavy lifting happens. We carefully bring in and install the larger pieces that make your bathroom functional. This is when the new vanity and countertop are set, the toilet is installed, and the bathtub is put in place (if it wasn't already part of the rough-in).
The infographic below highlights why this phase, along with the rough-in, often requires permits—any changes to structural, plumbing, or electrical systems need official oversight.
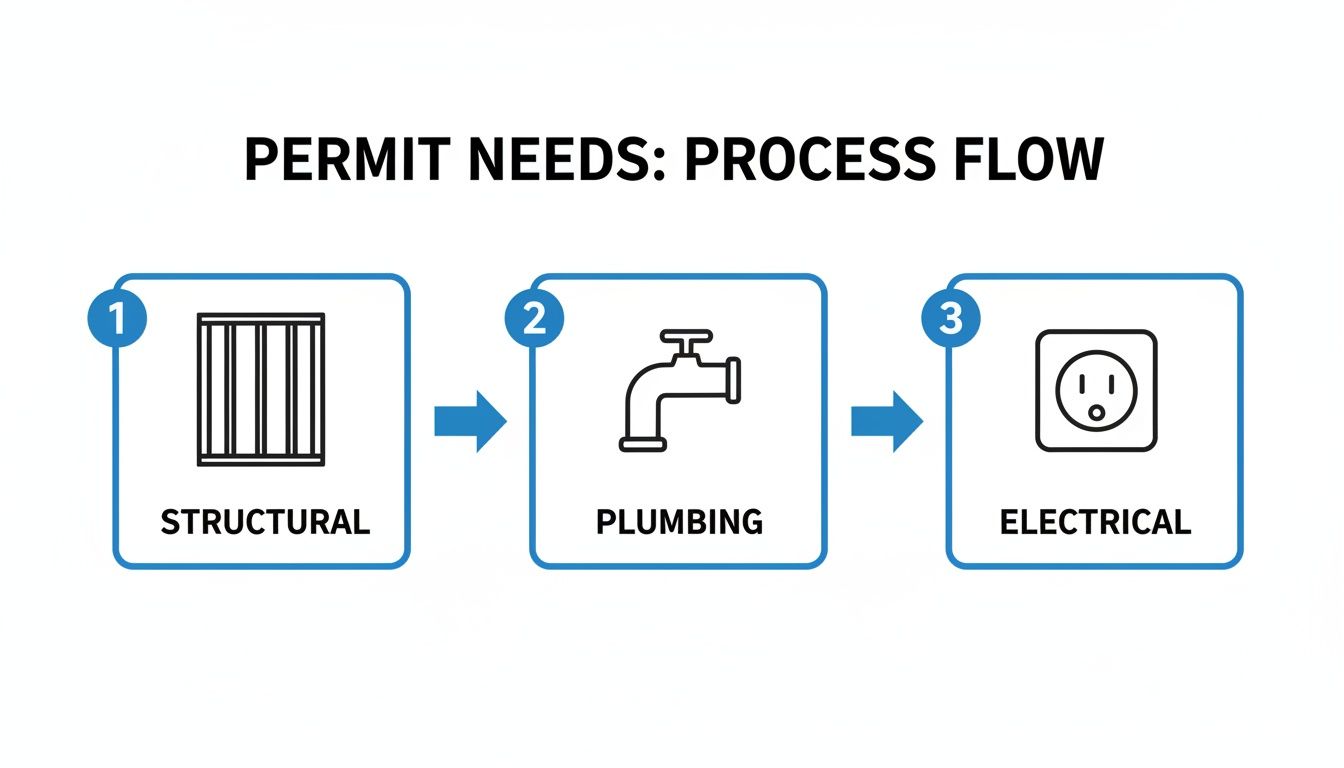
This just goes to show that any time you're altering the core systems of a room, you need a professional to ensure it’s done right and approved before covering it all up.
With the big pieces in, the painters arrive to apply primer and the final coats of your chosen color to the walls, ceiling, and trim. Once that paint is dry, we're on the home stretch.
DIY vs Hiring a Pro Task Breakdown
Thinking about tackling some tasks yourself to save money? It's a common thought, but it's crucial to know where you can realistically save and where you absolutely need a professional. Here’s a quick breakdown to help you decide.
| Demolition | Maybe | Professionals do it faster, safer, and handle debris disposal. We know what's structural and what's not. |
| Painting | Yes | A great place to save money if you're patient and detail-oriented. |
| Plumbing/Electrical Rough-in | No | This work requires licenses, permits, and inspections. Mistakes are dangerous, costly, and can fail inspection. |
| Installing a Vanity | Yes | If you're handy, setting a pre-assembled vanity is a manageable DIY task. |
| Waterproofing/Tiling | No | Improper waterproofing guarantees future leaks and mold. Tiling is an art—professionals ensure perfect lines and durability. |
| Installing Fixtures | Maybe | Attaching faucets or a toilet can be DIY-friendly, but one wrong move can cause a major leak. |
Ultimately, while a few tasks are suited for a weekend warrior, the core of a bathroom remodel relies on the expertise and coordination of a licensed general contractor to ensure it's done right, on time, and up to code.
The Final Touches: Finish Work
The last phase is all about the details that pull the entire room together. This is where we install all the smaller fixtures and accessories that make the space both beautiful and functional. It's the satisfying final lap.
The finish work checklist includes:
Installing Faucets and Shower Trim: The final plumbing connections are made to the sink, tub, and shower.
Mounting Light Fixtures: We wire and install your new vanity lights, sconces, and overhead lighting.
Hanging Mirrors and Medicine Cabinets: These are carefully mounted on the freshly painted walls.
Attaching Hardware: Finally, the towel bars, robe hooks, and toilet paper holder get installed.
Navigating this entire process, from demolition to the final towel hook, requires a ton of coordination between different trades. It’s a complex dance, which is why figuring out how to choose a general contractor is one of the single most important decisions you'll make for your project.
Choosing Fixtures and Finishes for Lasting Style
This is where your bathroom's personality really starts to shine. The fixtures and finishes are what you'll see, touch, and interact with every single day, so making smart choices here is a big deal. The goal is to create a space that’s not just beautiful today, but also durable and functional for years to come.
I always advise clients to balance timeless design with current trends. It's easy to get swept up in the latest design craze, but classic materials and well-made fixtures give you a solid foundation. You can always bring in trendy touches with accessories like towels or soap dispensers later on.
Selecting Durable and Stylish Flooring
Let's be honest, the bathroom floor takes a beating. It has to stand up to constant moisture and foot traffic, so your choice needs to be both waterproof and tough. The good news is you don’t have to sacrifice style for performance anymore.
- Porcelain Tile: This is the industry gold standard, and for good reason. Porcelain is incredibly dense, which makes it highly resistant to water, stains, and scratches. With so many styles available—from realistic wood looks to classic marble patterns—it's a workhorse that fits any design.
- Luxury Vinyl Plank (LVP): If you're looking for a warmer, softer feel underfoot, LVP is an excellent choice. It's 100% waterproof, generally simple to install, and often a bit more budget-friendly than tile. Modern LVP offers remarkably convincing wood and stone visuals.
- Natural Stone: Nothing beats the high-end feel of materials like marble, travertine, or slate. Just know what you're getting into—they are porous and need regular sealing to prevent staining and water damage. They also tend to be the priciest option on the block.
For a deeper dive, our guide on https://buildnp.com/blogs/how-to-choose-bathroom-tiles/ has a ton of information to help you nail this critical decision.
The right flooring sets the entire tone for your bathroom remodel. Think about maintenance from the start. For example, large-format tiles with rectified edges mean fewer, thinner grout lines, which translates to significantly less scrubbing over the long run.
Vanities and Countertops That Work for You
Your vanity is usually the largest piece of furniture in the bathroom, and it needs to be a workhorse. Before you fall in love with a particular look, think hard about how you'll use it. Do you need maximum drawer storage to hide all the clutter, or does a minimalist floating vanity with open shelving fit your lifestyle better?
Countertop material is another key decision. Quartz has become incredibly popular because it's non-porous and fights off stains from makeup or toothpaste. Granite offers that classic durability with unique natural patterns, while cultured marble can give you a seamless sink-and-counter combo that’s a breeze to clean.
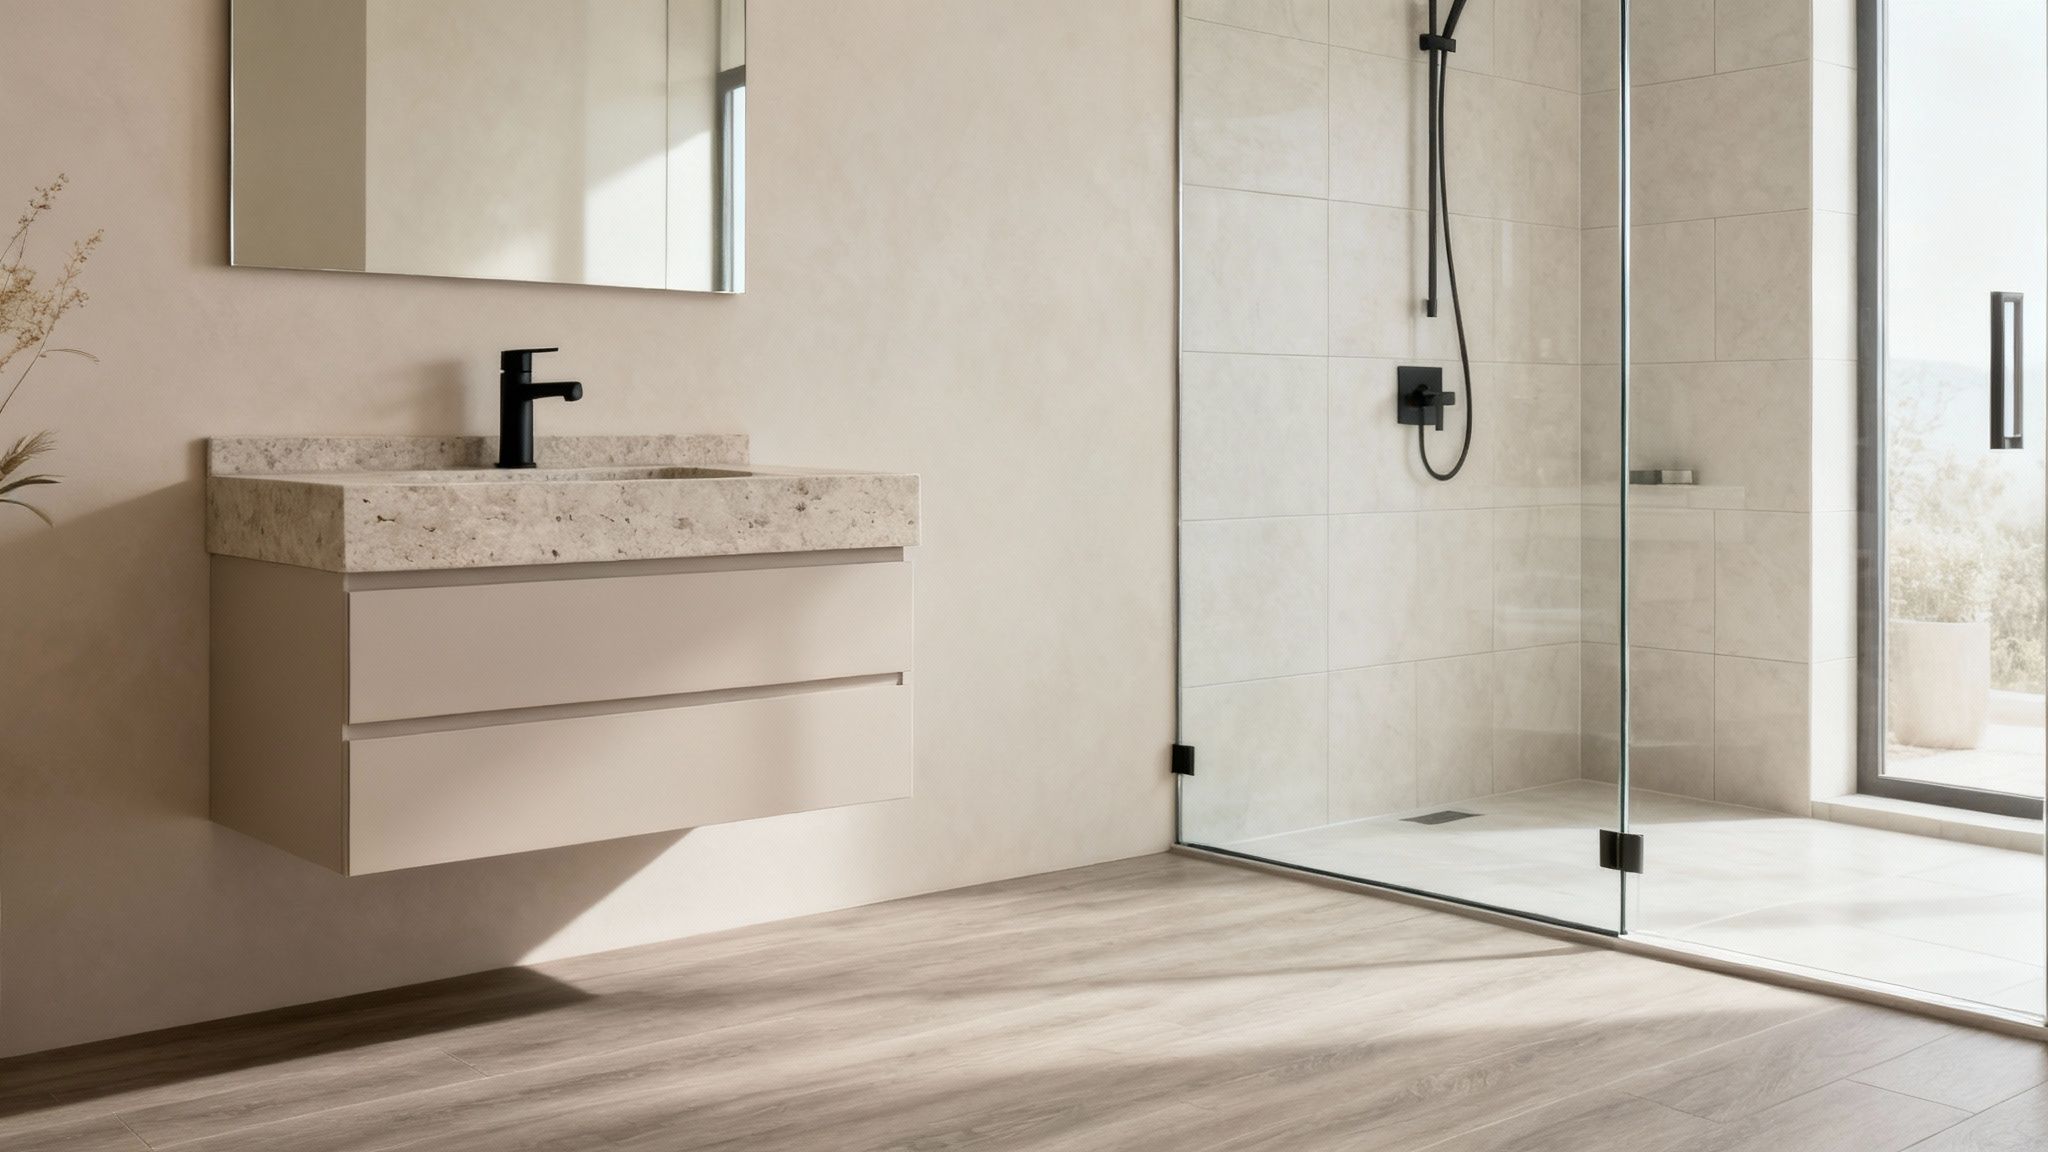
The recent surge in bathroom remodeling shows just how much people want functional, spa-like spaces. It's now a top home improvement project, with 26% of homeowners planning updates as part of a massive $1.2 trillion residential renovation boom. This trend is driving features like the 'super shower,' where a whopping 58% of renovators are ditching their tubs for larger, more luxurious shower experiences.
Tying It All Together with Hardware and Fixtures
The small details are what separate a good bathroom from a great one. Your faucets, showerheads, cabinet pulls, and lighting should all feel connected. Finishes like matte black, brushed gold, and polished nickel each create a completely different mood.
Don't be afraid to mix metals, but make sure you do it with a plan. A common strategy I like is to keep all the main plumbing fixtures (faucet, shower trim) in one finish and then use a contrasting metal for the lighting and cabinet hardware. As you select new components, explore all the options for essential bathroom fixtures like sinks, tubs, toilets, and faucets to find the perfect blend of function and style.
Remember, trends come and go, but quality is forever. Investing in a well-made faucet or solid hardware doesn't just look better—it will stand up to daily abuse without chipping or failing. These are the finishing touches that truly complete your vision.
We’ve Heard it All: Your Top Bathroom Remodeling Questions, Answered
If you’re thinking about a bathroom remodel, your head is probably swimming with questions. That's completely normal. After years of guiding homeowners through this exact process, we’ve pretty much heard every question in the book. Let's tackle some of the most common ones right now.
Getting clear answers upfront is the single best way to avoid a lot of stress and costly surprises down the road.
How Long Does a Bathroom Remodel Actually Take?
This is always the first question, and the honest answer is: it depends entirely on what you’re doing. If you're just swapping out a vanity, painting, and updating fixtures, you could be done in a week or two. But if you're gutting the space, moving plumbing, and dealing with permits and custom tile, you're looking at a much longer project.
For a full-scale remodel here in the Orem/Provo area, you should realistically plan for four to nine weeks. That buffer accounts for real-world scenarios like waiting on city inspections, a delay in a custom order, or discovering some old, unexpected plumbing issues once the walls are open.
Be very wary of any contractor who promises an unbelievably fast timeline for a major renovation. Rushing almost always means cutting corners, and that leads to headaches you'll be dealing with for years. Always insist on a detailed project schedule.
Is It a Mistake to Put a Bathtub in a Small Bathroom?
Not at all, but you have to be strategic about it. If having a tub is a non-negotiable for your family (especially with little kids), a standard 60-inch alcove tub is specifically designed to fit into tight spaces. These almost always serve as a shower combo, giving you the best of both worlds.
On the other hand, if you can’t remember the last time you took a bath, converting that space into a walk-in shower is a brilliant move. It instantly makes a cramped bathroom feel more open and modern. My advice? Prioritize how you actually live over some vague idea of resale value. The best bathroom is the one that works for your daily routine.
What Are Some Common (and Avoidable) Mistakes?
We see the same few missteps pop up time and time again. Knowing what they are from the get-go is the best way to steer clear of them.
- Skimping on Ventilation: A cheap, undersized exhaust fan is a direct invitation for mold and mildew. Always install a quality fan that’s rated for your bathroom's square footage and, critically, vents all the way outside, not just into the attic.
- Forgetting About Storage: It’s so easy to get caught up in picking beautiful tile and a fancy sink that you completely forget where you’ll put the toilet paper and towels. Plan for practical storage—vanity drawers, a recessed medicine cabinet, shower niches—right from the start.
- Poor Lighting Design: One lonely light in the middle of the ceiling just doesn't cut it. A well-lit bathroom needs layers: bright, direct task lighting at the vanity (so you can actually see what you're doing), and softer, dimmable ambient light for a more relaxed mood.
- Chasing Trends on Permanent Items: That super bold, geometric tile might be all over Pinterest today, but how will you feel about it in five years? It's much smarter to choose classic, timeless styles for expensive and difficult-to-change things like tile and tubs. You can always bring in trendy colors and patterns with paint, towels, and accessories that are easy to swap out later.
Can I Save Money by Buying My Own Materials?
It sounds like a good idea on paper, but this approach often backfires. First, contractors get trade discounts that you just can't access as a retail customer.
More importantly, though, is the issue of accountability. When we supply the materials, we are responsible for them, period. If the vanity shows up with a crack or the wrong tile gets delivered, that's our problem to solve. We handle the returns, the reordering, and the schedule adjustments. If you buy the materials yourself, that entire headache—and the project delays that come with it—lands squarely on your shoulders.
Planning a bathroom remodel is a big undertaking, but you don’t have to figure it all out on your own. The expert team at Northpoint Construction is here to guide you through every decision, ensuring your project is done right. Ready to get started? Visit us online and schedule your consultation today.