
Install a Bathroom in a Basement: A Homeowner's Guide
Putting a bathroom in your basement is a brilliant move. It adds a ton of utility for your family and can seriously boost your home's resale value. The whole project really breaks down into a few key phases: mapping out a smart layout, dealing with permits, figuring out the right below-grade plumbing, and then all the finishing work.
Honestly, the most critical decisions happen long before you pick up a single tool. Getting the location and plumbing strategy right from the start is the secret to a successful project.
Your Strategic Starting Point for a Basement Bathroom
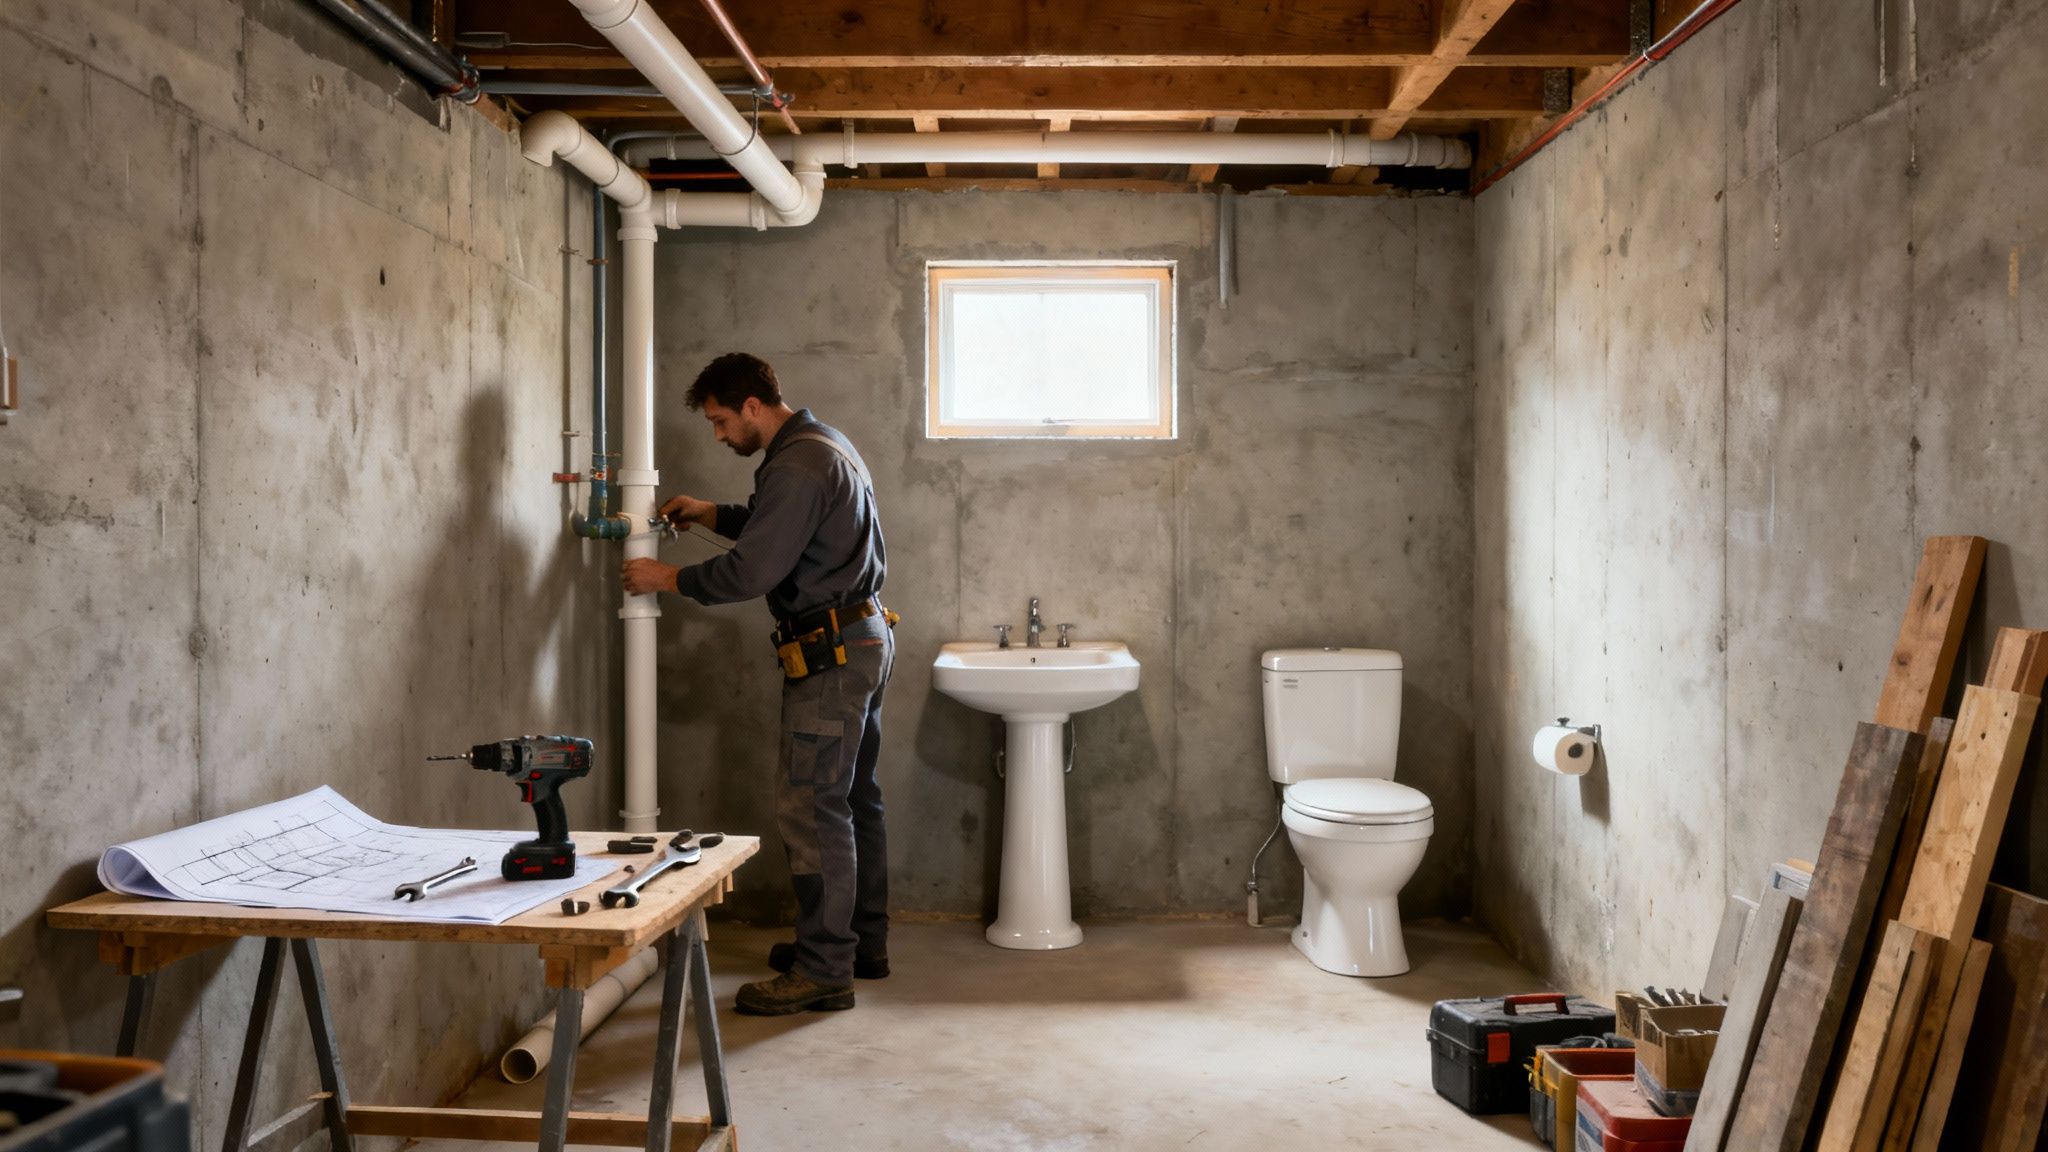
Before you start pinning your dream tile on Pinterest, you need to play detective in your own basement. This first phase is all about finding the path of least resistance, which almost always means following the infrastructure you already have.
The most practical—and cost-effective—spot for a new bathroom is almost always directly underneath an existing bathroom on the floor above. Why? Because it makes tying into your home's main drain and water supply lines infinitely easier. We're talking about a move that can save you thousands in plumbing work alone. So, grab a notepad and start mapping out where all the visible pipes, vents, and ductwork are running.
Evaluating Your Space and Potential Challenges
Every basement has its own set of quirks. You'll run into things like low ceilings, inconveniently placed support columns, or concrete floors that have seen better days. These are all common hurdles to plan around.
Start by measuring your ceiling height carefully. Most building codes have strict minimums. If you need the nitty-gritty on that, our article on basement ceiling height requirements lays out the exact numbers you'll need to hit.
Keep an eye out for other potential headaches, too:
- Moisture Levels: Are there any damp spots, water stains, or musty smells? You absolutely have to get these issues sorted out before any construction starts.
- Accessibility: How are you going to get drywall sheets and a new vanity down there? And how will you get construction debris out? A clear path is a must.
- Existing Utilities: Pinpoint the location of your electrical panel and HVAC system. Your new bathroom will need power for lights and an exhaust fan, and being close to these systems makes the electrician's job much simpler.
A well-planned basement bathroom feels like a natural extension of your home, not an afterthought. The best layouts work with the existing structure, turning potential obstacles like support columns into design features, such as a divider for a vanity area.
Mapping Your Fixture Layout
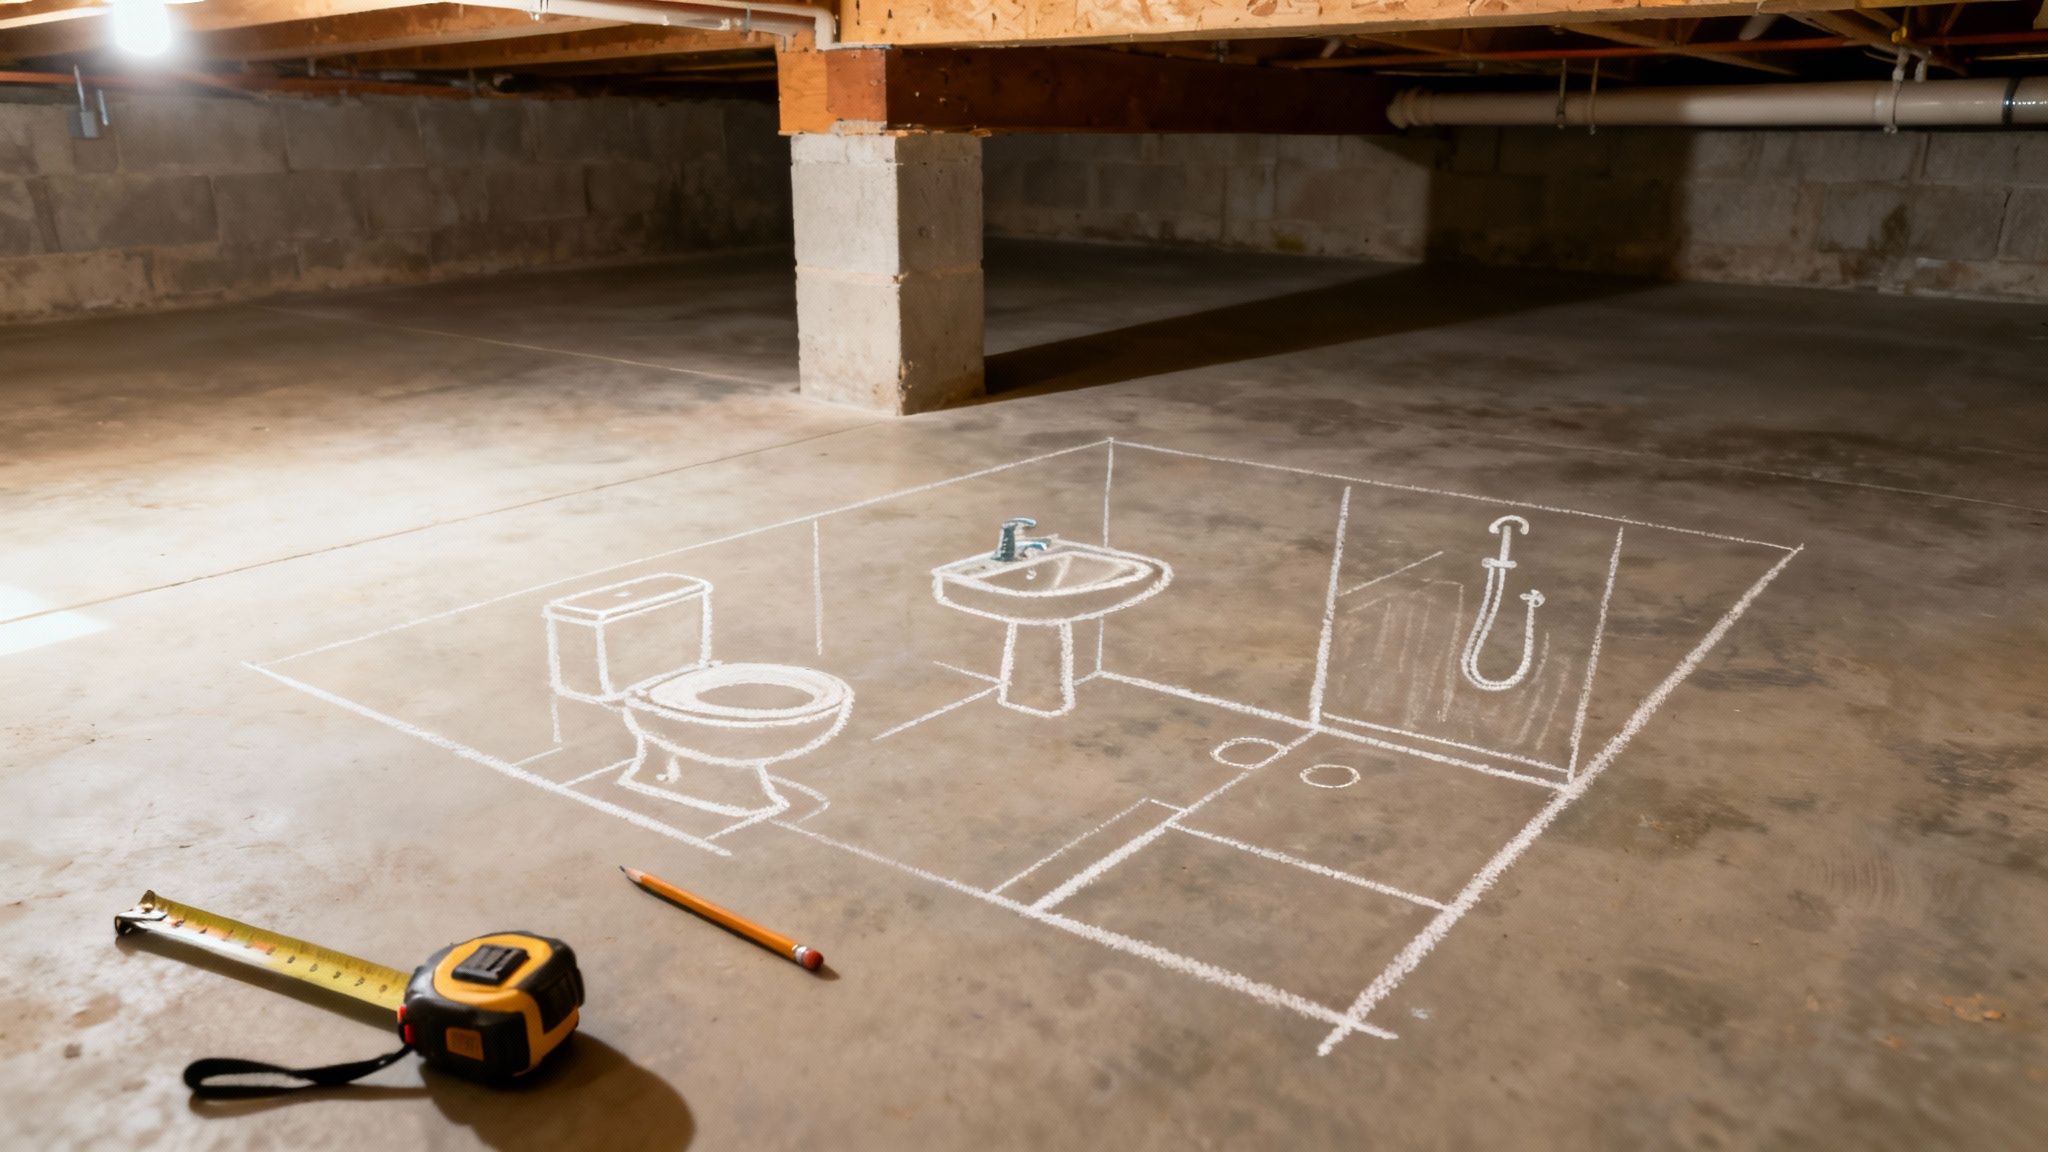
Once you've zeroed in on a location, it’s time to think about the layout itself. A standard full bathroom needs at least 35-40 square feet to feel comfortable, though a simple half-bath can be tucked into as little as 20 square feet.
Grab some chalk or painter's tape and physically mark out on the floor where the toilet, sink, and shower will go. This simple step is huge for visualizing the space and making sure you have enough room to move. For instance, codes typically require at least 21 inches of clear space in front of a toilet and sink. A classic rookie mistake is cramming fixtures too close together, creating a bathroom that's just plain awkward to use. Don't forget to think about which way the door will swing and how it might impact the fixtures.
Understanding Basement-Specific Plumbing Options
Here’s the biggest difference between an upstairs bathroom and a basement one: gravity isn't on your side. Since the basement is often below the home's main sewer line, waste needs a little help getting where it needs to go. This is the single biggest challenge when you install a bathroom in a basement.
Fortunately, there are a couple of tried-and-true technologies to solve this very problem:
Up-Flushing (Macerating) Toilets: These clever systems have a grinder and pump unit, usually tucked behind the toilet, that liquefies waste and actively pumps it up to the main drain line. The big win here is you don't have to break up your concrete floor.
Sewage Ejector Pumps: This is the more traditional approach. It involves cutting a hole in your slab for a sealed basin. All the fixtures drain into this pit, and when it fills to a certain level, a pump kicks on and sends the waste up and out.
Each system has its own pros and cons when it comes to cost, installation, and long-term maintenance, which we'll dive into later. But having a basic grasp of these options now will make your conversations with a plumber much more productive and help you choose the right path for your home.
Navigating Building Codes and Permit Requirements
Diving headfirst into a basement bathroom project without dealing with the local building department is one of the biggest mistakes I see homeowners make. It's tempting to skip what feels like a bureaucratic headache, but trust me, getting the right permits and following the codes is what protects your investment, your family's safety, and your home's future value.
Ignoring the rules can get ugly. Think stop-work orders, hefty fines, and the nightmare scenario of having to tear out a beautifully finished bathroom. It can also create huge problems when it's time to sell.
Think of building codes as a baseline for safety—they aren't just suggestions. They’re the law. When you’re putting a bathroom in a basement, you're mixing water, electricity, and ventilation in a confined space. Getting that combination wrong is a serious risk. A permit is your official green light to start the work, and it kicks off the inspection process that ensures everything is done correctly.
Key Code Requirements for Basement Bathrooms
Building codes can feel a little different from town to town, but there are some universal rules you'll run into just about everywhere. Getting these details right from the planning stage will save you from the gut-punch of a failed inspection.
Here are a few of the big ones you absolutely have to nail:
- Ceiling Height: You need headroom. Most codes require a finished ceiling height of at least 7 feet above the main fixtures (toilet, sink, and in the shower). This isn't just for comfort; it's a livability standard.
- Ventilation: A good exhaust fan isn't optional; it's mandatory. And it has to vent directly to the outside. Pushing moist air into a ceiling cavity is just asking for a mold disaster.
- Electrical Safety: This is non-negotiable. Every outlet in a bathroom must have GFCI (Ground Fault Circuit Interrupter) protection. In a wet environment, these are literal lifesavers that cut the power instantly if there’s a fault.
- Lighting: You need at least one permanent, switch-controlled light fixture. Fumbling around in a dark, wet room is a recipe for an accident.
"I tell every client the same thing: skipping the permit is the most expensive 'shortcut' you can take. A non-compliant bathroom can void your homeowner's insurance and will be a massive red flag for any potential buyer down the road."
Egress and Other Critical Considerations
Here's something that catches people by surprise: egress requirements. If your basement renovation includes adding a bedroom, you are legally required to have an emergency exit—a properly sized window or a door to the outside. A bathroom alone might not trigger this rule, but it's something to be aware of if your project scope is larger.
Before they hand over a permit, your local building department will want to see your plans. Be prepared to provide:
- A detailed floor plan showing the new layout and where every fixture will go.
- A plumbing diagram for all the drain, waste, and vent (DWV) lines.
- An electrical schematic showing all your outlets, switches, and lights.
This can feel like a lot to juggle, but don't be afraid to talk to the folks at your local building office. They're not there to make your life difficult; their job is to ensure projects are safe. Use them as a resource. A few questions upfront can ensure your new bathroom is beautiful, functional, and 100% legal.
Choosing the Right Basement Plumbing System
Plumbing is the real heart of any bathroom project, but it gets tricky when you head downstairs. Because a basement bathroom sits below your home's main sewer line, gravity isn't on your side anymore. You'll need a system that can actively push waste up and out.
This is one of the biggest decisions you'll make for the entire project. It directly affects your budget, how long the job takes, and what kind of maintenance to expect down the road. Luckily, there are three proven solutions for handling below-grade plumbing.
Conventional Gravity Fed Plumbing
The old-school method is to make gravity your friend, just like it is for the rest of your house. This means breaking up the concrete floor, digging trenches, and laying new drain pipes that have a steady downward slope. Eventually, these new pipes tie into your home's main sewer line.
While it sounds simple, this is easily the most disruptive and labor-intensive path. Jackhammering concrete is loud, dusty, and requires a precise touch—you're dealing with your home's foundation, after all. Still, it's often the best long-term solution because once it's in, it’s a totally passive system with zero moving parts that can fail.
But here's the catch: this only works if your main drain line is deep enough to allow for the proper slope, which is typically a minimum of 1/4 inch of fall per foot of pipe.
Sewage Ejector Pump Systems
A much more common approach for basements is the sewage ejector pump. Think of it as the muscle of your new bathroom. It's a workhorse system that collects waste from the toilet, sink, and shower and then forcefully pumps it up to the main sewer line.
It's a pretty slick setup:
- First, a hole is cut into the concrete to house a sealed basin (often called a sump pit).
- All the new bathroom drain lines are sloped to feed into this basin.
- Inside the pit is a powerful pump with a float switch. As the waste level rises, the float lifts and kicks the pump on.
- The pump then grinds and ejects the waste through a dedicated pipe that connects into your home's main drain line above.
This method is far less messy than trenching the entire floor. You only need to break up concrete for the pit itself and some short connecting drain lines. It’s a very reliable and powerful option that can easily handle a full bathroom.
Up Flushing or Macerating Toilet Systems
If the thought of breaking up any concrete makes you nervous, an up-flushing system could be exactly what you need. These systems are all about minimal disruption, which is why they're a huge hit with DIYers and in situations where you just can't mess with the slab.
A macerating toilet looks almost identical to a standard one, but it hides a secret: an internal grinder and pump. When you flush, the unit pulverizes waste into a fine slurry and then pumps it upward through a very small pipe—often just 3/4 or 1 inch in diameter. You can easily run this small pipe up a wall, across a ceiling, and over to your main drain line.
The real beauty of an up-flushing system is the flexibility. You can put a bathroom almost anywhere without major concrete work, slashing the installation time and mess. Many models even have extra ports to hook up wastewater lines from a sink and shower.
Deciding to tackle a basement bathroom and navigating the permit maze can feel overwhelming. This chart breaks down the initial decision-making process.

As you can see, trying to skip the permit process is a big gamble. The smart money is on consulting a professional to ensure your project is safe, compliant, and built to last.
Understanding the Drain Waste Vent System
No matter which plumbing option you land on, it has to be part of a complete Drain-Waste-Vent (DWV) system. That "vent" part is absolutely critical and something amateurs often miss. Vent pipes allow air into the drain lines, which prevents a vacuum from forming as water rushes out.
Without proper venting, you're in for a world of headaches:
- Sinks and showers that drain at a snail's pace.
- Weird gurgling sounds coming from your drains.
- Water getting siphoned out of the P-traps, which lets nasty (and dangerous) sewer gas seep into your home.
A successful basement bathroom really comes down to getting the plumbing right. It's often worth considering professional plumbing installations to make sure everything is installed correctly and meets local codes. Every single fixture needs its own vent, and all those smaller vent pipes have to eventually connect to your home's main vent stack that runs up through the roof.
Getting the Details Right: Waterproofing and Electrical
Once you’ve wrestled with the plumbing plan, the next stage is all about creating a safe, dry, and comfortable space. This is where the project really starts to take shape. Because basements are naturally prone to moisture, getting the waterproofing and electrical right isn't just a final step—it's foundational to building a bathroom that will last.
A damp bathroom is just asking for mold, mildew, and bigger structural headaches down the road. The fight against moisture begins at the concrete walls. Even if your basement feels bone-dry, you absolutely need a proper vapor barrier on the exterior foundation walls before you even think about framing. It’s a simple but critical step that stops moisture from seeping through the concrete and getting trapped behind your new drywall.
Building a Moisture-Proof Envelope
After the framing is complete, your choice of materials becomes your next line of defense. Standard drywall simply doesn't belong in a high-humidity zone like a bathroom, especially one that's below ground.
You need to use materials built for the job:
- Cement Board: For any area that will get wet, like the shower and tub surround, use a cement backer board. Products like DensShield or HardieBacker are completely waterproof and give you a stable, mold-proof base for your tile.
- Moisture-Resistant Drywall: For the rest of the bathroom walls, go with "green board" or "purple board." These are specifically treated to handle moisture far better than their standard paper-faced counterparts.
- Waterproof Flooring: When it comes to the floor, you can't go wrong with luxury vinyl plank (LVP) or ceramic tile. Both options are 100% waterproof, tough as nails, and a breeze to clean.
You have to think of it as a complete system. We cover this in more detail in our dedicated guide on the https://buildnp.com/blogs/best-waterproofing-for-basement/.
If you're going with tile, having a solid installation process is key to keeping things watertight for the long haul. This definitive guide to installing cement tiles is a fantastic resource for getting that lasting, professional finish.
Powering Up Your Bathroom Safely
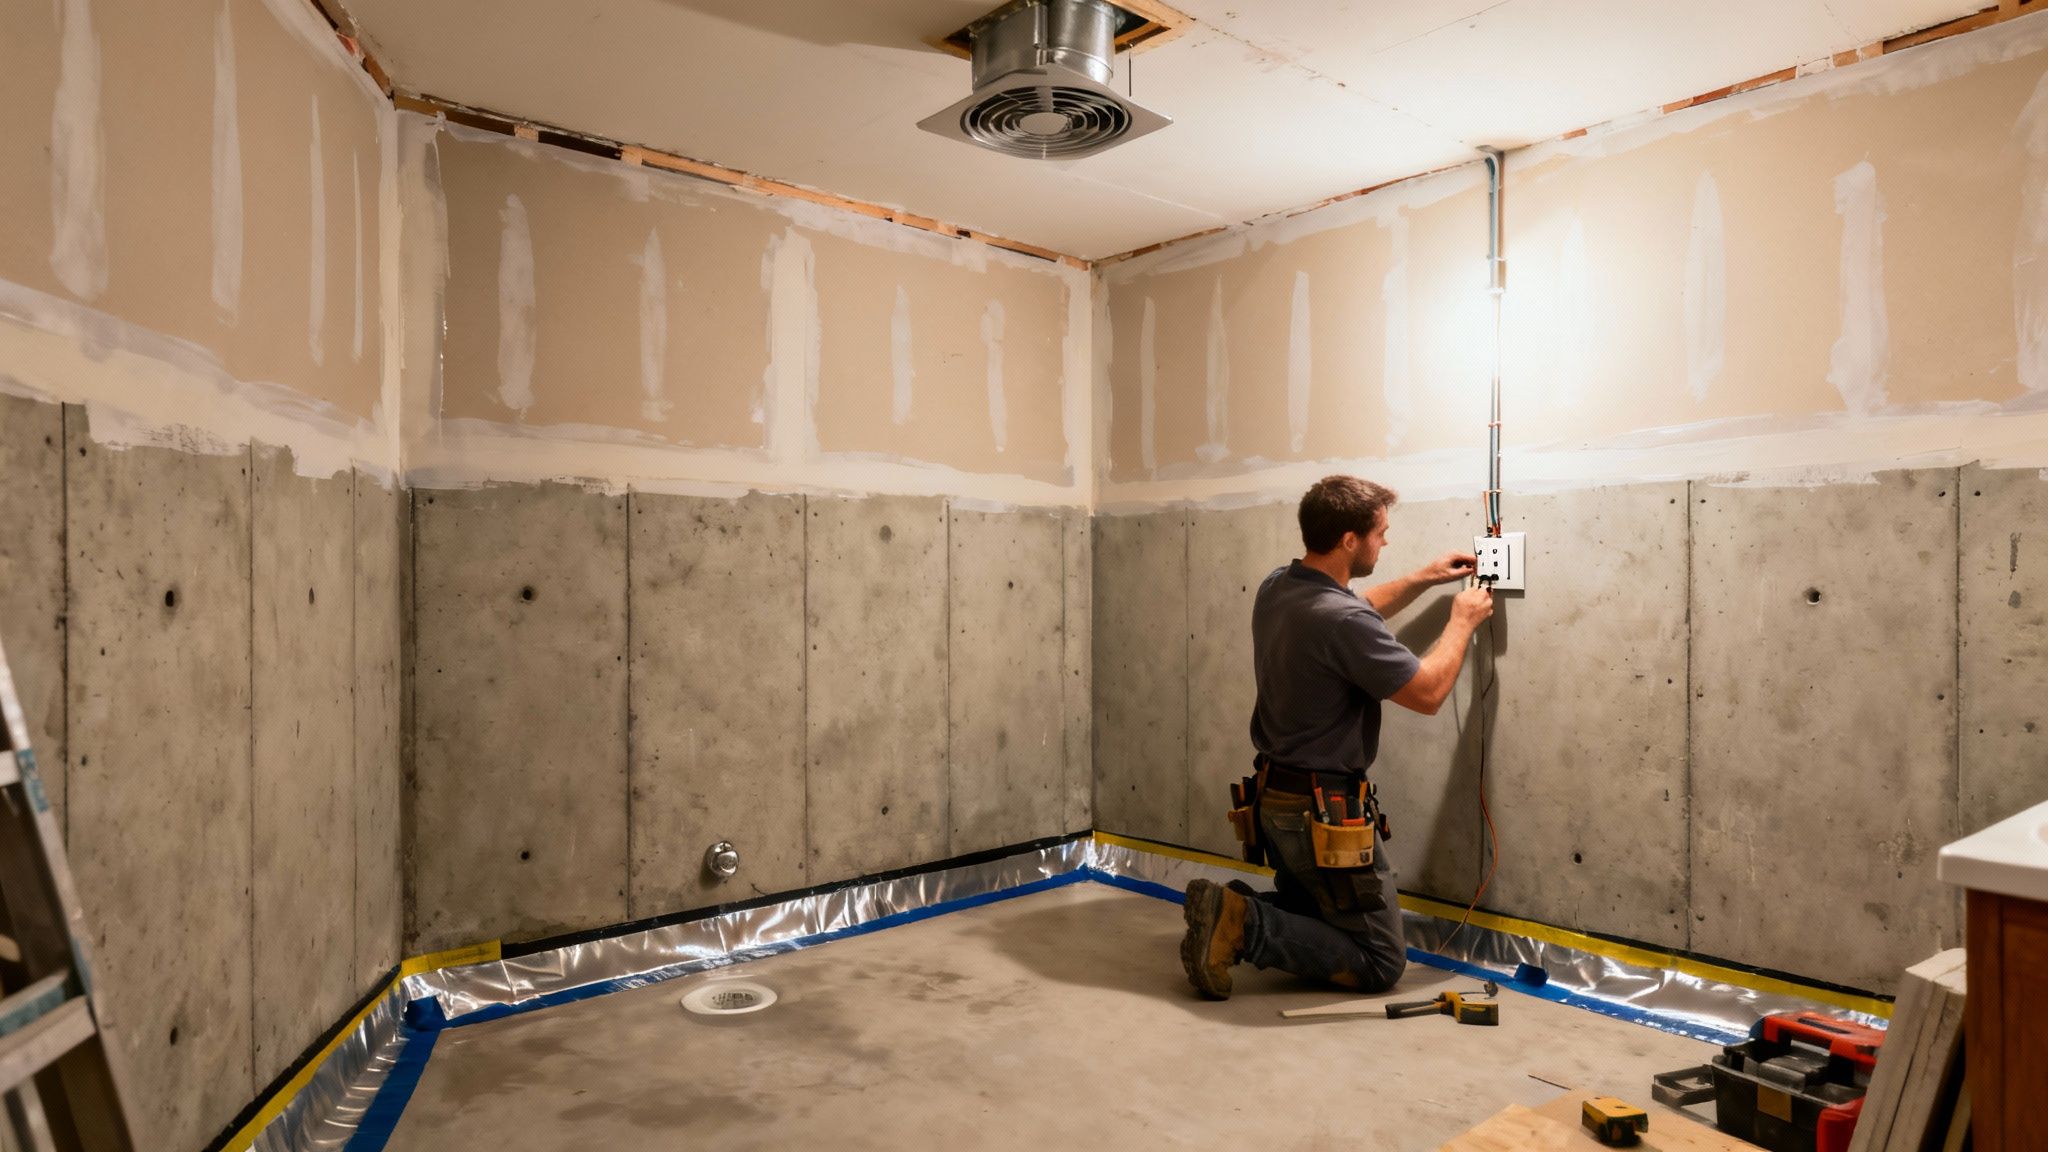
Electrical work in a bathroom demands careful planning, and the rules are even tighter when you install a bathroom in a basement. Safety is non-negotiable, and that means following every local electrical code to the letter.
The single most important safety feature is the Ground Fault Circuit Interrupter (GFCI). Any outlet located within six feet of a sink, tub, or shower must have GFCI protection. This smart device constantly monitors the flow of electricity and will instantly cut the power if it senses a problem, preventing a serious shock.
Beyond GFCIs, think about what you'll be plugging in. High-draw items like a heated floor system or a powerful vanity light bar often need their own dedicated circuit to avoid overloads, which are a major fire risk.
Pro Tip: Don't just stick a single light in the middle of the ceiling. That's a recipe for harsh shadows. Instead, layer your lighting: a main fixture for general light, task lighting over the mirror for getting ready, and a waterproof recessed light right inside the shower.
Clearing the Air: Ventilation is Key
Finally, don't skimp on ventilation. A basement bathroom without a good exhaust fan will quickly become a petri dish for mold. Building codes require a fan for a reason, and it must vent all the way to the outside of your house—not into an attic or crawl space.
Getting the fan size right matters, too. Fan power is measured in cubic feet per minute (CFM). A good rule of thumb is to have at least 1 CFM for every square foot of floor space. For an 8x10 foot bathroom (that's 80 square feet), you'll want a fan rated for at least 80 CFM.
Proper installation means running insulated ductwork from the fan, through the rim joist of your house, and out to a vent cap on the exterior. This ensures all that damp, stale air gets pulled completely out, keeping your new bathroom feeling fresh and dry for years to come.
Getting Real About Your Budget and Timeline
Adding a bathroom to your basement is a fantastic investment, but let's be honest: the two biggest points of stress are almost always money and time. If you don't nail down a realistic budget and a practical schedule from the get-go, what should be an exciting project can quickly turn into a source of frustration. Taking the time to plan these two elements is the single best thing you can do to ensure a smooth ride from demolition day to the final towel hook.
So, what does a project like this actually cost? The answer really depends on the path you take. If you’re a skilled DIYer and stick to basic, off-the-shelf fixtures, you might keep the total cost in the $8,000 to $15,000 ballpark. Most people, however, land somewhere in the middle, hiring pros for the tricky stuff and choosing mid-grade finishes. This typically puts the project in the $15,000 to $30,000 range. For those dreaming of a spa-like retreat with custom tile, high-end fixtures, and complex plumbing, the budget can easily climb north of $30,000.
Where Does the Money Go?
Your total budget is essentially a pie sliced into three main pieces: labor, materials, and fixtures. Be prepared for labor to be the biggest slice, often eating up 40-60% of your total spend. You simply can't cut corners here—hiring licensed plumbers and electricians is a must for safety, code compliance, and your own peace of mind.
The good news is you have a lot more say over the cost of materials and fixtures. This is where you can balance your wish list with your wallet. To get a really granular look at what things cost, our in-depth guide to the cost of a basement bathroom is a great resource.
To give you a starting point, here's a rough idea of what to expect for different components of the job.
Estimated Cost Breakdown for a Basement Bathroom Installation
| Plumbing System | $1,500 - $3,000 (Up-flush) | $3,000 - $6,000 (Ejector Pump) | $5,000 - $10,000+ (Trenching) |
| Fixtures (Toilet, Sink, Faucet) | $400 - $900 | $900 - $2,500 | $2,500+ |
| Shower/Tub Unit | $500 - $1,200 (Fiberglass) | $1,200 - $3,500 (Acrylic/Tile) | $3,500+ (Custom Tile) |
| Flooring (per sq. ft.) | $2 - $5 (Vinyl Plank) | $5 - $15 (Ceramic/Porcelain) | $15+ (Heated Floors) |
| Labor (Plumber, Electrician, etc.) | Varies (DIY) | $5,000 - $15,000 | $15,000+ |
This breakdown should help you see how quickly costs can add up, but also where you have opportunities to save.
Mapping Out a Practical Project Timeline
A new basement bathroom is not a weekend project. Even with a great crew, a professionally managed installation usually takes between 4 and 8 weeks from start to finish.
Several things can stretch that timeline out, and it's smart to be aware of them from day one:
- Permit Purgatory: Depending on your municipality, getting your plans approved can take a few days or, in some cases, a few weeks.
- The Contractor Shuffle: The best pros are always busy. You might need to book your dream contractor months in advance.
- Waiting on Materials: That perfect vanity or custom tile you fell in love with? It might have a long lead time. Order early!
- The Inspection Game: Work has to pause at key stages while you wait for the city inspector to sign off on plumbing, electrical, and framing.
My best advice? Build a buffer into both your budget and your timeline. A 15-20% cost contingency is a wise move. For the schedule, tacking on an extra week or two will feel like a gift when an unexpected plumbing problem or a delayed fixture delivery inevitably happens.
To give you an idea of the flow, here’s a common week-by-week sequence for a project like this:
- Week 1: Finalize the design, pull permits, and get all your long-lead-time materials ordered.
- Week 2: The fun begins with demolition. This is also when concrete cutting happens, followed by the plumbing and electrical rough-in.
- Week 3: Walls go up with framing, HVAC work is done, and you’ll have your first round of plumbing and electrical inspections.
- Week 4: Time for insulation and moisture-resistant drywall. The crew will also start the critical waterproofing process in the shower area.
- Weeks 5-6: The space starts to look finished! Drywall is finished and painted, and your flooring and tile go in.
- Weeks 7-8: It’s all about the finishing touches. Fixtures are installed, trim is added, final hookups are made, and you clear that all-important final inspection.
Answering Your Top Basement Bathroom Questions
Even the best-laid plans can leave you with a few nagging questions, especially for a project as complex as a basement bathroom. You're dealing with plumbing, electrical, and construction, all in a unique below-ground space. Getting your head around the common sticking points now will save you a world of headaches later on.
We get these questions all the time from homeowners. Here’s a rundown of the most frequent ones, with straight answers to help you move forward with confidence.
Do I Really Need a Special Toilet for a Basement?
Yes, almost certainly. Your home's main sewer line is likely higher than your basement floor, so a standard toilet that relies on gravity won't work. You're fighting against physics, which means you need a toilet system that can actively push waste up to the drain line.
You’ve got two main options here. The first is an up-flushing (or macerating) toilet. These units have a built-in grinder and pump right behind the bowl. The other approach is to install a separate sewage ejector pump in a pit below the floor, which a standard-looking toilet then drains into.
How Do I Keep Moisture and Mold from Taking Over?
In any basement project, moisture is the enemy. Winning this battle means creating a multi-layered defense that starts long before you even think about paint colors. It’s all about smart waterproofing on the outside and careful material choices on the inside.
- Start Outside: Your first line of defense is making sure water never gets to the foundation. Check that the ground slopes away from your house and that your gutters are clean and directing water far from the home.
- Seal the Inside: Before framing, install a high-quality vapor barrier directly against the concrete walls. This simple step is crucial for stopping moisture from seeping into your new bathroom.
- Ventilate, Ventilate, Ventilate: A powerful exhaust fan isn't a luxury; it's a requirement. Make sure it's rated for the size of your new bathroom and, most importantly, vents directly outside—not into the attic or a crawlspace.
- Build with the Right Stuff: Use cement backer board for all your tile work in the shower. For the walls, go with moisture-resistant drywall (often called "green board"). For flooring, stick with waterproof options like luxury vinyl plank (LVP) or porcelain tile.
Can I Just Install a Basement Bathroom Myself?
This is where you need to be really honest about your skillset. If you're a seasoned DIYer with legitimate plumbing, framing, and electrical experience, you might be able to tackle it. The all-in-one up-flushing toilet systems are even marketed to DIYers because they don't require you to break up the concrete floor.
But for most people, this is a job for the pros. The plumbing and electrical work, in particular, are governed by strict local codes that exist for a reason—to keep your family safe.
Our Pro Tip: Even if you feel confident handling the framing, drywall, and painting, we always recommend hiring licensed professionals for the plumbing and electrical rough-ins. The risk of a leak, flood, or electrical fire is just too high to gamble on.
What Kind of Value Does a Basement Bathroom Add?
Adding a bathroom is consistently one of the best home improvement projects for your money. While the market always shifts, homeowners can generally expect to recoup 50% to 70% of what they spend when it's time to sell. More than that, it adds a massive amount of functional value by turning a basic basement into a truly livable part of your home.
Think about it—it supports a guest suite, a family media room, or a home gym. That kind of convenience makes your home stand out to potential buyers and can help it sell much faster. A well-built basement bathroom is a smart investment in your home's value and your family's daily life.
Navigating the complexities of a basement remodel requires expertise. At Northpoint Construction, our team has the experience to manage every detail, from initial design to final inspection, ensuring your project is completed to the highest standards. Let's discuss how to bring your vision to life.