
A Utah Homeowner's Guide to Install a Bathroom in Basement
Thinking about adding a bathroom to your basement? It’s one of the best ways to reclaim unused space and seriously increase your home's functionality and value. But let's be honest, it's not as simple as a main-floor remodel. The whole project really comes down to a few key stages: getting the planning and design right, figuring out the plumbing and framing, handling the electrical and finishing touches, and, of course, navigating local Utah permits.
The two biggest hurdles you'll face from the get-go are below-grade drainage and moisture control. Solve those, and you're well on your way to a successful project.
Why a Basement Bathroom Is Such a Smart Upgrade
Turning that concrete-walled storage area into a genuinely useful part of your home is incredibly rewarding. When you install a bathroom down there, it’s more than just a convenience—it's a smart financial move. This guide is here to walk you through every step, from the first sketch to the final fixture.
We’ll get into the nitty-gritty of the tough stuff: the different types of below-grade plumbing, why ventilation is non-negotiable, and how to pick materials that won't fall apart in a damp environment. A properly finished basement bathroom delivers a huge payoff.
- It Boosts Your Property Value. Finished living space, especially with an added bathroom, is a massive draw for buyers. Most homeowners see a great return on their investment, often getting back a significant chunk of the project cost when they sell.
- It Makes Your Basement Livable. A downstairs bathroom is the essential piece that supports a guest bedroom, a home gym, or a family rec room. It makes the entire floor far more practical for everyone.
- It’s Just Plain Convenient. No more running upstairs in the middle of a movie or when the kids are playing. It’s a game-changer for overnight guests, too.
A Local Angle for Utah Homeowners
If you're in Orem, Provo, or anywhere else in Utah County, we’ve got you covered with specific advice for our area. Knowing the local building codes and how to find the right contractors here is half the battle. Getting this right from the start saves you a world of headaches and ensures your project is done legally and safely.
Our goal here is simple: to arm you with the knowledge to either tackle this project with confidence or hire a pro and know exactly what to ask for. A great basement bathroom can truly improve your home and your day-to-day life.
Whether you're planning a simple powder room or a full bath with all the bells and whistles, we'll cover what you need to know to get it done right.
Designing Your Basement Bathroom Layout
A great basement bathroom doesn't just happen. It’s the result of smart planning that starts long before you pick out tile or swing a hammer. The most critical decision you'll make right out of the gate is where to put it, as this choice dictates the cost, complexity, and overall success of the project.
When you're scouting locations, your number one priority is finding the path of least resistance to your home's main sewer drain line, sometimes called a soil stack. Take a walk around your basement and locate this wide vertical pipe. The closer you can build your bathroom to this existing plumbing, the less you'll spend on pipe, labor, and the brutal work of breaking up your concrete floor.
Working With Your Basement, Not Against It
Basements are notorious for their design quirks. You’re often dealing with low ceilings, a lack of natural light, and obstacles like support columns, ductwork, or a sump pump pit. A savvy design doesn't try to hide these things—it incorporates them.
That pesky support column? It could become a natural divider between your vanity and toilet. A low-hanging HVAC run could define the edge of your shower stall, saving you the headache and expense of rerouting it. Think of these obstacles as design guardrails that help shape the layout, not as problems that need costly solutions.
My Pro Tip: Don't fight your basement's bones. Instead of spending thousands to move a support post, design your bathroom around it. You'll save a huge chunk of your budget that can be better spent on things you'll actually notice, like a great shower fixture or better waterproofing.
Making the Space Feel Bright and Inviting
Once you've nailed down the location, it's time to think about the feel of the room. Basements can easily feel cold and cave-like, so your design choices are incredibly important for making the space feel like a true part of your home.
Here's what I always focus on:
- Lighting is King: Since you probably don't have a big, sunny window, you need to create your own light with a layered approach. Use recessed can lights for overall brightness, a dedicated vanity light for tasks like shaving or makeup, and a wet-rated light right inside the shower.
- Choose Materials Wisely: Everything in a basement bathroom has to stand up to moisture. For flooring, luxury vinyl plank (LVP) is a fantastic choice—it's 100% waterproof and much warmer on your feet than ceramic tile. For the walls, especially around the shower, you must use a moisture-resistant material like green board or, even better, a cement backer board.
- Don't Skimp on Ventilation: A powerful exhaust fan isn't just a nice-to-have; it's essential. Look for a fan rated for at least 50 cubic feet per minute (CFM), though I always recommend going higher if you can. This is your single best defense against mold and mildew growth.
For some fantastic visual inspiration on how to make the most of your space, check out these 8 Basement Shower Ideas You Should Know.
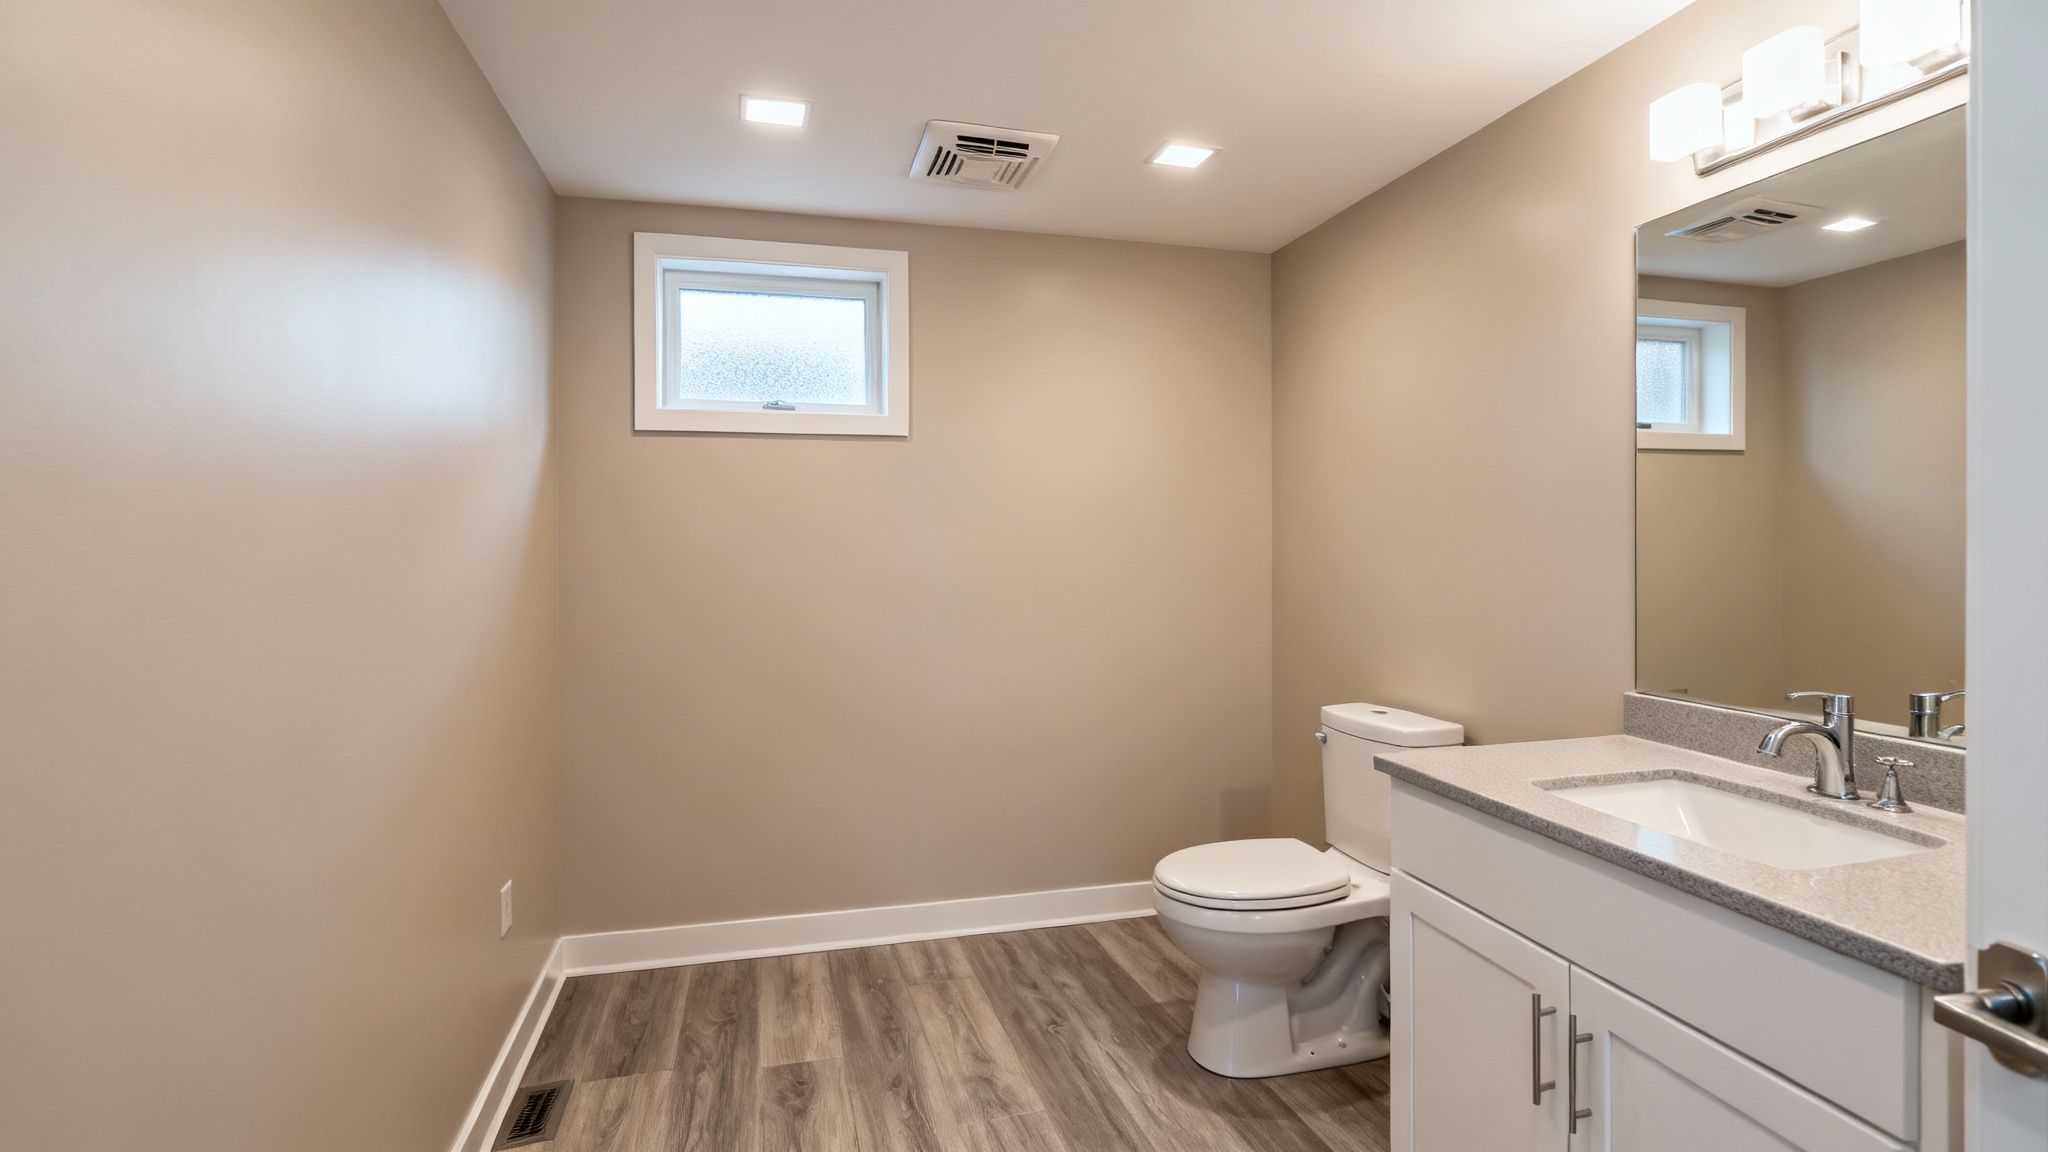
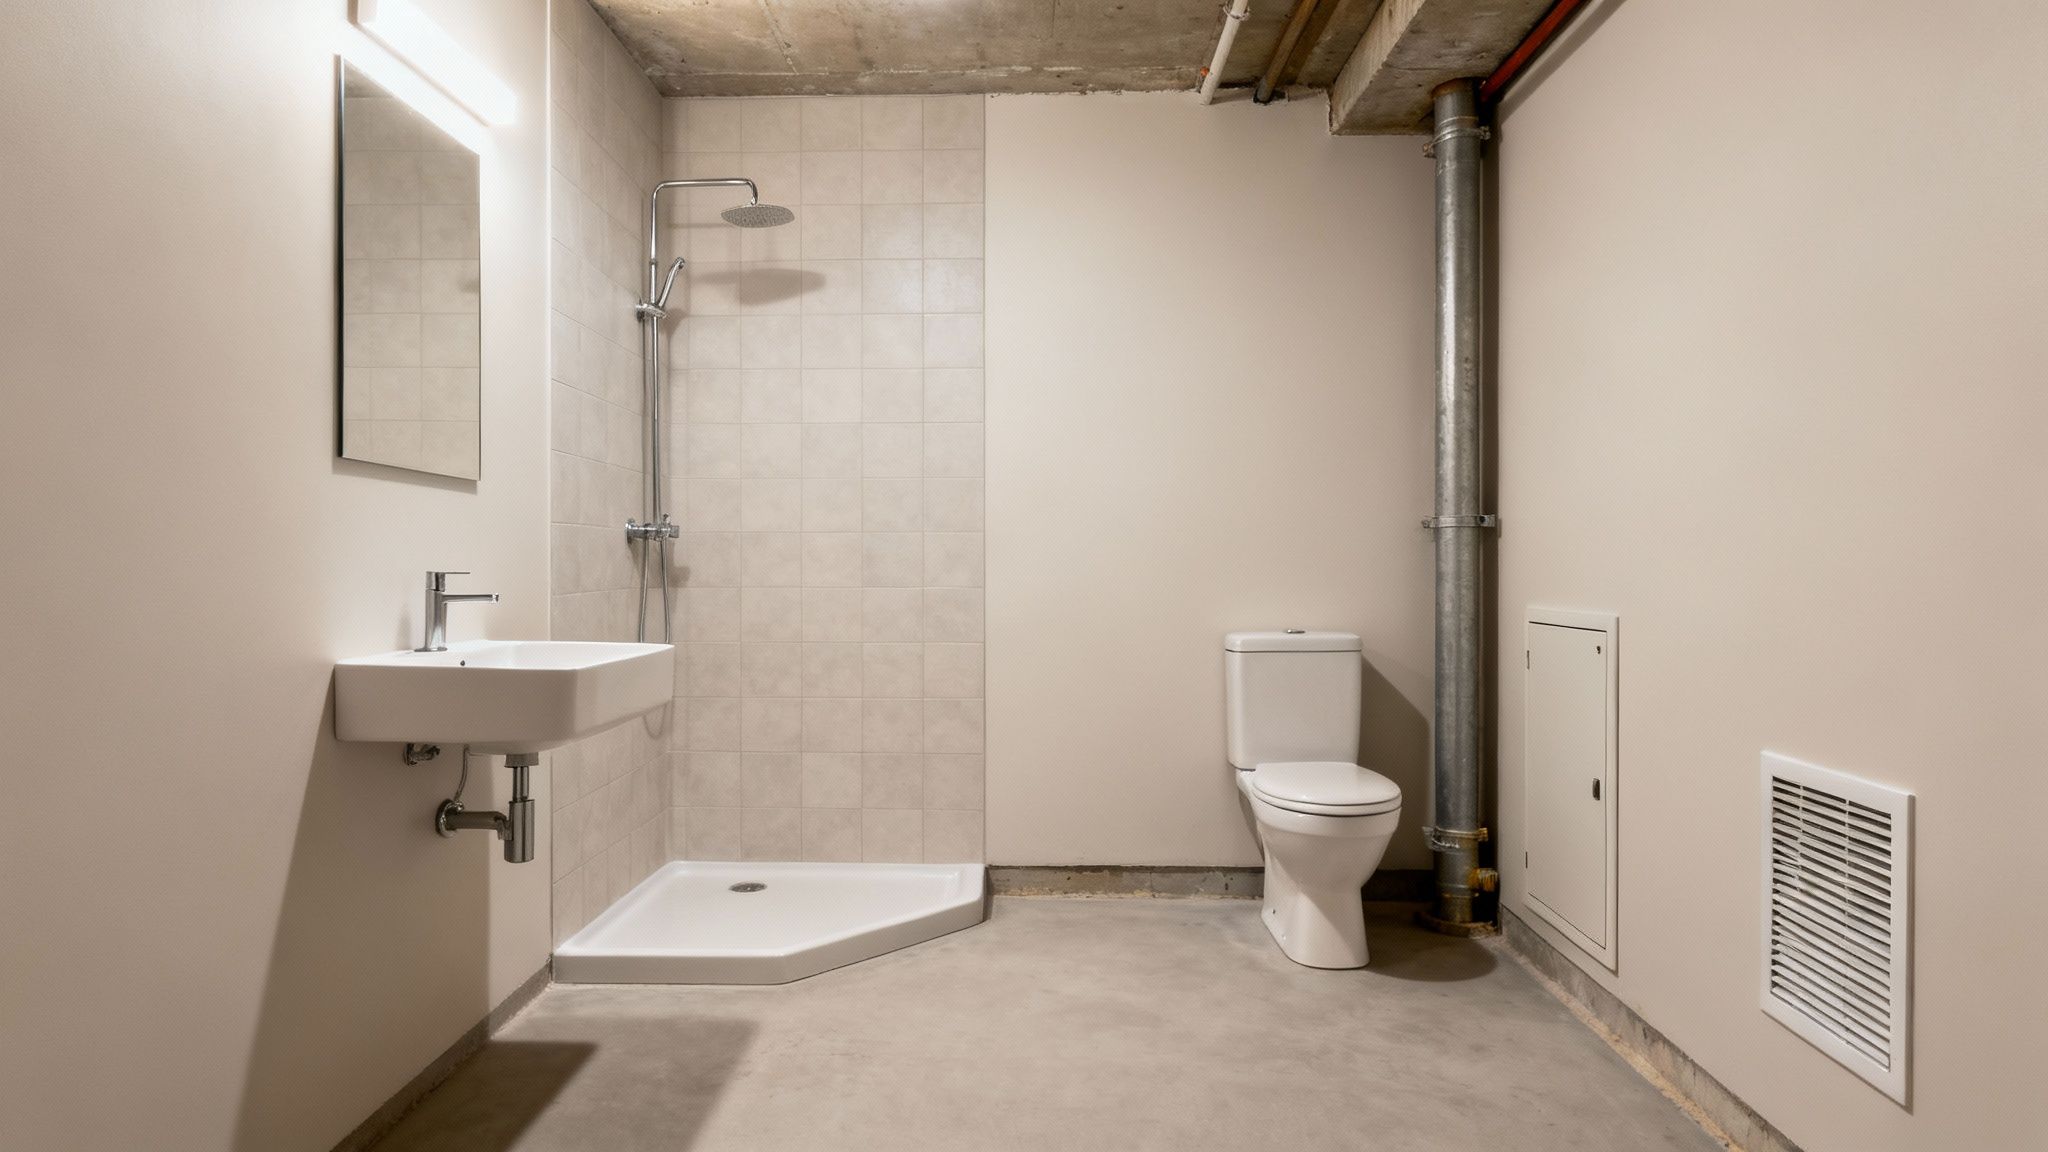
Common Layouts and How Much Room You'll Need
So, how much space are we talking about? It really depends on what you need the bathroom for. Here are a few common footprints I see all the time:
- The Compact Half-Bath: Perfect for a basement that’s mainly a home office or playroom. You can comfortably fit a toilet and a small pedestal sink in about 20-25 square feet.
- The Go-To Three-Quarter Bath: This is the most popular choice by far, giving you a toilet, sink, and a shower. To keep it from feeling cramped, you’ll want to aim for around 35-45 square feet. It's the ideal setup for a guest suite or home gym.
- The Full Bathroom: If you've got the room (50+ square feet), adding a bathtub really increases the bathroom's value and function. This is a great move for families who want a dedicated bathroom for kids or long-term visitors.
Whatever size you choose, focus on a layout that makes sense. Make sure the door can open fully without hitting the vanity and that you have enough comfortable clearance around the toilet. A good layout makes even a small bathroom feel surprisingly spacious and easy to use.
Budgeting for Your Basement Bathroom and What You Get Back
So, let's talk about the big question on everyone's mind: what's this actually going to cost? It’s the first thing homeowners want to know, and for good reason. The answer isn't just about the price of a toilet and some tile; it’s about understanding the whole picture—from the complexities of plumbing and labor to the cost of permits and the finishes you choose.
But just as important is the other side of that coin: what do you get back for your money? A new basement bathroom is more than just an expense. It's a smart investment in your home that seriously boosts its usability, makes your life easier, and can pay you back with a solid return on investment (ROI) when it's time to sell.
Breaking Down the Costs of a Basement Bathroom
The final price tag can swing wildly depending on what you have in mind. A simple half-bath is one thing; a full bathroom with a custom-tiled, walk-in shower is another beast entirely. Your biggest budget drivers will almost always be the plumbing work, the cost of labor, and the quality of the materials you pick out.
To give you a clearer picture, it helps to see how the numbers shake out in the real world. According to 2026 pricing guides from leading contractors, the average cost to add a full bathroom during a basement remodel lands somewhere between $6,000 and $18,000, depending on the level of finish.
A basic half-bath (just a toilet and sink) will typically run you $3,000 to $8,000. The jump in price for a full bath comes from the extensive plumbing and waterproofing needed for a shower or tub. In fact, you can expect plumbing and waterproofing alone to eat up 20-40% of your entire project budget.
Here are the key cost drivers you need to have on your radar:
- Plumbing Complexity: This is the single biggest variable. If your project involves breaking up concrete to install a sewage ejector pump, your costs will be much higher than if you can tie into existing lines or use a simpler up-flush system. Proximity to existing plumbing is your best friend when it comes to keeping costs down.
- Labor: Unless you're a seasoned DIYer with real-deal plumbing and electrical skills, you're hiring pros. Labor can easily account for 40-60% of your total budget.
- Fixtures and Finishes: This is where you have the most control. A basic vanity, toilet, and a standard fiberglass shower stall are very budget-friendly. On the other hand, custom tile work, a high-end vanity, and designer fixtures will send the price climbing fast.
- Permits and Inspections: Don't forget to budget for your local permits. In Utah County, this can cost anywhere from a few hundred to over a thousand dollars, but it’s a non-negotiable step to ensure your project is safe and built to code.
Before we move on, here's a rough look at how a typical mid-range budget might break down. This can help you see where your money is likely to go.
Estimated Cost Breakdown for a Mid-Range Basement Bathroom
| Plumbing & Drainage | $3,000 - $6,000 | 30% |
| Labor (All Trades) | $4,000 - $7,000 | 40% |
| Fixtures & Finishes | $2,000 - $4,000 | 20% |
| Framing & Drywall | $500 - $1,500 | 5% |
| Electrical & Venting | $500 - $1,500 | 5% |
Keep in mind these are just estimates. Your final costs will depend entirely on your specific project, location, and the materials you choose.
Understanding Your Return on Investment
Now for the good news. Adding a bathroom to your basement is one of the smartest upgrades you can make to your home. National remodeling surveys consistently show that homeowners can expect to recoup a significant chunk of their investment—often up to 70%—when they sell.
A basement bathroom does more than just add a line item to a real estate listing. It fundamentally changes how buyers perceive your home's lower level, transforming it from "storage space" into valuable, functional living area.
This is especially true in fast-growing, competitive markets like Lehi and American Fork. In places where families are looking for more livable space, a finished basement with a guest suite and a full bathroom is a massive selling feature that makes your home stand out.
You can really dig into the specifics in our comprehensive guide on the cost to install a bathroom in the basement.
Here’s what that ROI looks like in practical terms:
- Increased Property Value: It directly adds to your home's finished, livable square footage, which is a key metric for appraisals.
- Broader Buyer Appeal: It opens up your home to a wider range of potential buyers, from large families to those looking for multigenerational living options.
- Enhanced Lifestyle: While you're still living there, you get the daily benefit of added convenience. It's a game-changer for a home gym, a kids' play area, or an entertainment space.
At the end of the day, putting together a detailed budget and understanding the long-term financial benefits will help you make smart, confident decisions. It ensures your project not only meets your family’s needs today but also serves as a sound investment for the future.
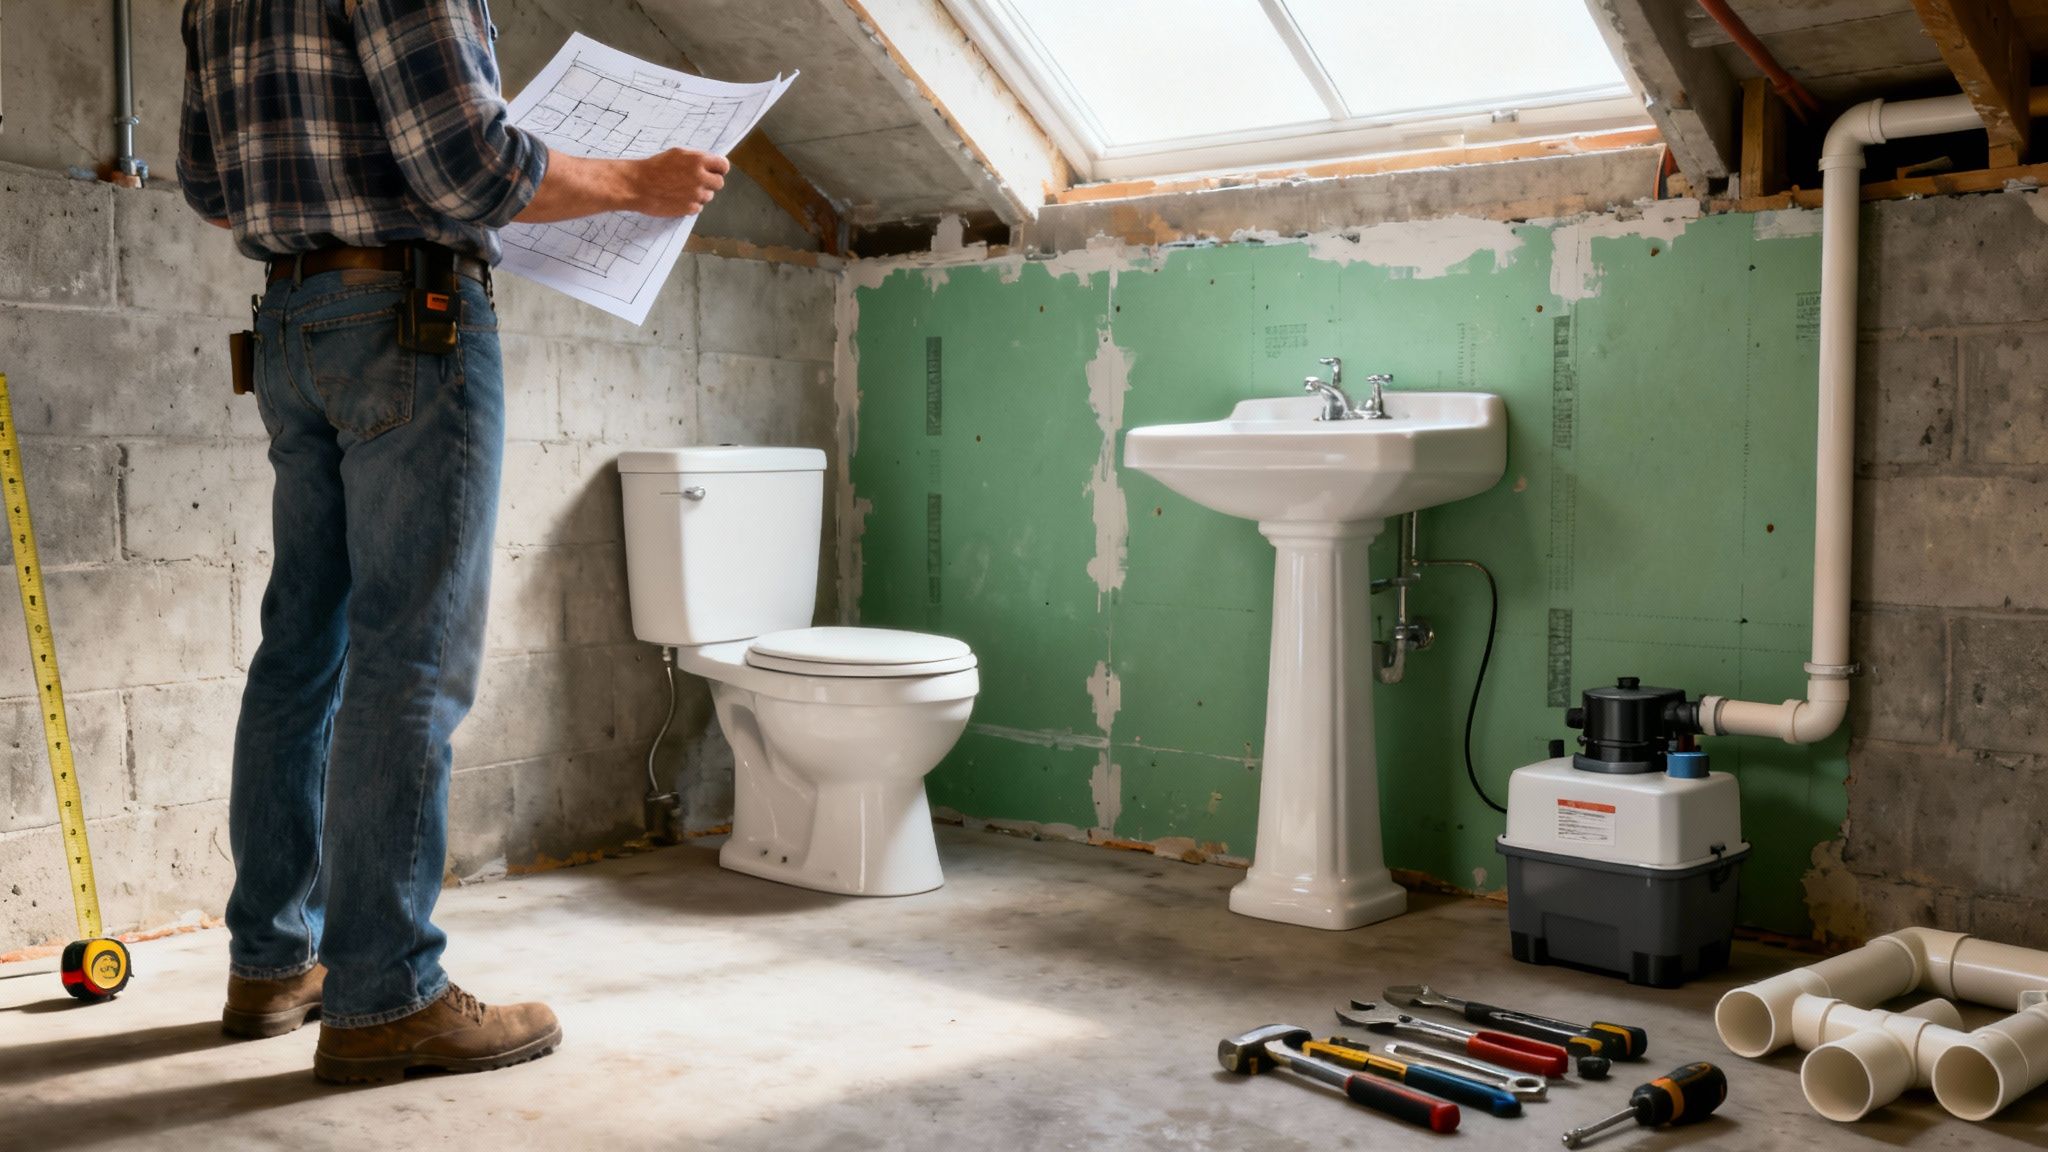
Tackling Basement Plumbing: Drainage and Venting
Let's be honest: plumbing is the single biggest puzzle when you're adding a bathroom to a basement. Everywhere else in your house, gravity is your best friend, pulling waste down and away without a second thought. But downstairs, you're working against the system. Your new bathroom fixtures will almost certainly be below your home's main sewer line, which means you need a way to push everything uphill.
This is the part of the project that tends to intimidate homeowners, but it really boils down to two main approaches. The path you choose will have a direct impact on your budget, how much work is involved, and even how you use the bathroom every day. Getting this decision right from the start is the key to avoiding some seriously costly mistakes.
This decision tree can help you visualize which path might be right for your project goals.
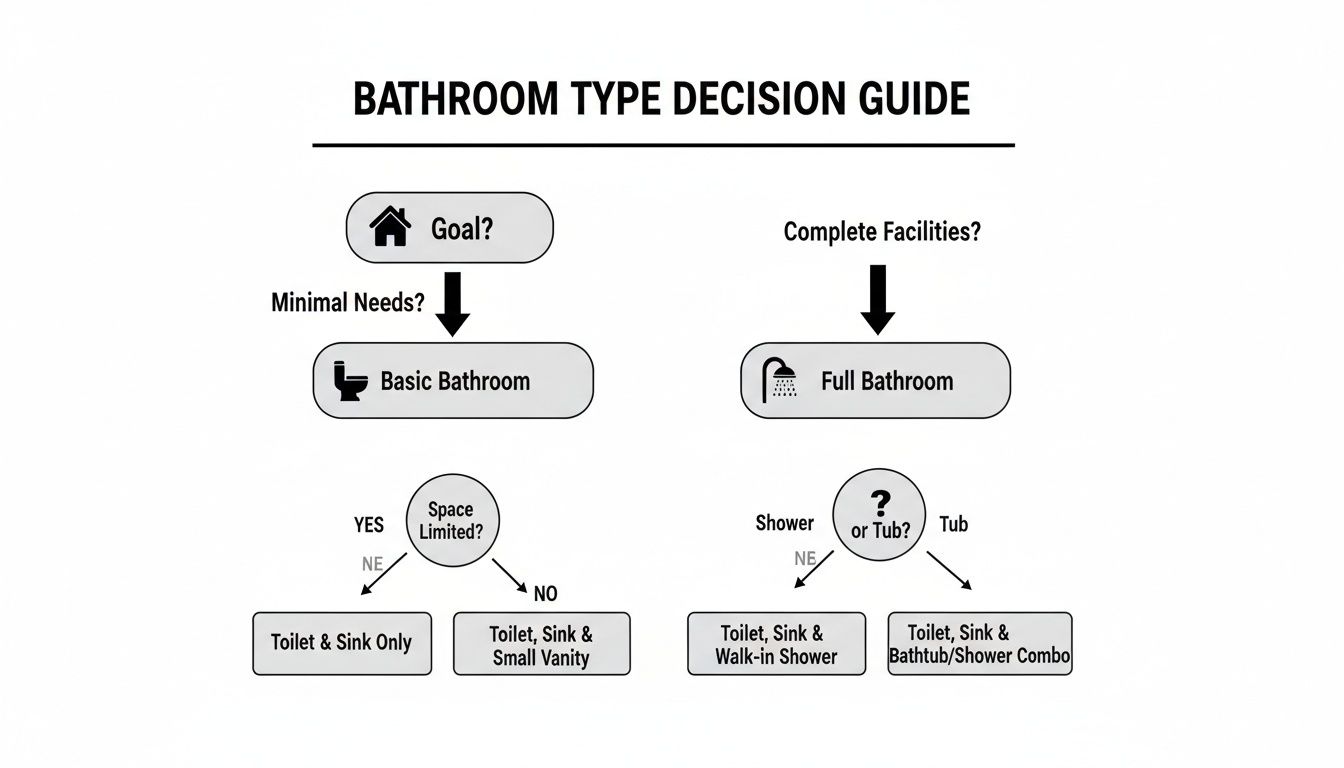
As you can see, the choice between a simple powder room and a full bathroom with a shower often points you toward a specific type of plumbing system.
Sewage Ejector Pumps: The Heavy-Duty Solution
For a full basement bathroom—especially one with a shower or tub that will get regular use—a sewage ejector pump is the gold standard. This is a powerful and robust system, but it does require some serious work. You'll need to break up a section of your concrete floor to dig a pit for a sealed basin, which is usually about two feet deep and two feet across.
All the new drain lines from your toilet, sink, and shower are sloped to run directly into this basin. Inside, a pretty powerful pump sits and waits. Once the water and waste in the basin hit a certain level, a float switch kicks the pump on. It then grinds everything up and forcefully pumps it up to your home's main sewer line.
Why It's a Pro Favorite: Sewage ejector systems are incredibly reliable. They're built to handle solid waste, toilet paper, and large volumes of water without breaking a sweat. If you're building a bathroom that your family will use every day, this is the method that professionals will almost always recommend.
Up-Flush Systems: The Concrete-Saving Option
If the thought of jackhammering your concrete floor gives you a headache, you're not alone. The good news is there's an excellent alternative: an up-flush system, often called a macerating toilet. These are clever, self-contained units that sit right on top of your existing floor. No major concrete surgery required.
Here’s how they work: when you flush, the waste is directed into a macerating unit, which is a box that sits either behind the toilet or inside the wall. Inside that box, high-powered blades instantly liquefy the waste. This slurry is then pumped up and out through a small pipe (usually just one inch in diameter) that can be easily connected to your home's existing plumbing stack.
- Best Use Case: These are fantastic for half-baths or guest bathrooms that won't see constant, heavy use.
- Drain Connections: Most units come with extra ports, so you can easily tie in a sink and even a shower drain.
- Key Consideration: They are generally a bit noisier than a standard toilet and can be more sensitive to what gets flushed. Stick to toilet paper only.
Don't Forget About Venting—It's Critical
No matter which drainage system you go with, you absolutely cannot skimp on proper venting. A drain vent is a pipe that connects to your drain lines and runs up through your roof, letting fresh air into the plumbing system. It does two critical things: first, it allows air to enter the pipes so waste can flow smoothly down the drain. Second, it gives nasty (and potentially harmful) sewer gases a safe escape route out of your home.
Without a proper vent, you'll end up with slow-draining sinks, gurgling toilets, and unpleasant smells. Local building codes, particularly here in the Orem area, are very strict about venting. You'll need to tie the new vent into your home's existing vent stack, which involves careful planning to get the slope and pipe diameter just right. Frankly, this is where a lot of DIY projects fail inspection.
To get ahead of potential issues, it's smart to familiarize yourself with common plumbing problems and solutions before you even begin. Knowing what to watch for can save you a world of hurt. And remember, plumbing is a significant cost. For a full basement bathroom, the plumbing work alone can easily run $1,000 to $5,000, with a good chunk of that going toward routing the vents correctly.
At the end of the day, getting the plumbing right means your new basement bathroom will be just as reliable as any other in your house. And since plumbing and water go hand-in-hand, make sure you protect your entire investment by learning how to waterproof basement walls.
From Skeleton to Sanctuary: Framing, Electrical, and Finishing Your New Bathroom
With your plumbing roughed-in and given the green light, it's time for the fun part. This is where the lines on your floor plan start to look like an actual room—a real, tangible space you can walk into. The process kicks off with framing the walls, flows into the all-important electrical work, and wraps up with the finishing details that bring everything to life.
Building the Bones of the Room
Framing is more than just throwing up some 2x4s. Since we're in a basement, moisture is the enemy from day one. Your very first piece of wood, the bottom plate that makes direct contact with the concrete, must be pressure-treated lumber. This stuff is chemically treated to fight off rot and pests, giving your walls a solid foundation that won’t get eaten away by the dampness that naturally wicks up from a concrete slab.
Once that pressure-treated plate is anchored down, the rest of the walls can be built with standard lumber. You'll be putting together the vertical studs, the top plate, and framing out any doorways. Think of it like a life-sized construction set that will soon hold your drywall, vanity, and shower.
As you build, keep thinking a few steps ahead.
- Plan for Blocking: This is a pro tip that saves major headaches later. Install horizontal wood blocks between the studs wherever you plan to hang something heavy—the vanity, a toilet paper holder, towel bars, or even grab bars in the shower. This gives you something solid to screw into instead of relying on flimsy drywall anchors.
- Frame the Shower Perfectly: The framing around your tub or shower has to be dead-on. This little area supports a lot of weight between backer board, tile, and heavy glass doors, so it needs to be perfectly square and plumb. No exceptions.
Powering Up Your Space Safely
Electrical work in a bathroom has absolutely zero room for error, especially in a basement. Water and electricity are a lethal mix, so unless you have serious experience, this is a job for a qualified electrician.
The single most important safety device is the Ground Fault Circuit Interrupter (GFCI). Every single outlet in a bathroom must be GFCI-protected. This clever device constantly monitors the electrical flow and will instantly kill the power if it detects a fault—like if a hairdryer takes a dive into a wet sink. It's a literal lifesaver.
Crucial Takeaway: All bathroom electrical circuits must be GFCI-protected. This isn't just a good idea; it's a mandatory safety code requirement everywhere, including all across Utah.
Beyond the outlets, you'll need wiring for your lights and, critically, your ventilation fan. A powerful exhaust fan is non-negotiable for battling steam and keeping mold at bay. Plan for a layered lighting approach: general overhead lighting (like recessed cans), focused task lighting over the vanity, and a special wet-rated light for inside the shower itself.
Adding the Finishing Touches
After the framing, electrical, and plumbing rough-ins pass inspection, you're on the home stretch. This is where the construction zone finally transforms into a beautiful, finished room.
For the walls, you’ll want to use moisture-resistant drywall (often called "green board") for most of the bathroom. Inside the shower or tub area, though, you have to step it up to a cement backer board or a similar waterproof underlayment. Standard drywall will simply turn to mush with that kind of constant moisture exposure.
Flooring choice is also key. Luxury Vinyl Tile (LVT) or Luxury Vinyl Plank (LVP) are fantastic options down here. They're 100% waterproof, incredibly durable, and feel much warmer on your feet than cold ceramic tile. They create a seamless look and act as a final barrier against any potential water problems. With the walls painted and floors in, you can finally install the vanity, toilet, and light fixtures.
This is a big project, no doubt, but the payoff is huge. Adding a bathroom to a basement delivers a massive return on investment, especially in hot markets like Utah's Wasatch Front. Industry data often shows that finished basements with a bathroom can boost a home's value by 50-70%. For a deeper dive into the construction process, check out our guide on basement finishing step-by-step.
Let's Talk Utah Permits and Local Building Codes
If you're a homeowner in Orem, Lehi, or anywhere in Utah County, the term "building permit" might make you groan. I get it. But when you’re adding a basement bathroom, that piece of paper is far more than just red tape—it's your project's most critical safety net.
Think of it this way: a permit guarantees the work is inspected and meets legal safety standards. This isn't just for the city's benefit; it's for your family's safety and protects your home's value down the road.
Trying to sneak a project past the city is a gamble you don't want to take. I've seen situations where unpermitted bathrooms had to be completely ripped out before a home could be sold. Worse, your insurance company could deny a claim if a fire or flood is traced back to uninspected, faulty work. A permit is essentially a third-party seal of approval on your investment.
What Utah Inspectors Are Looking For in a Basement Bathroom
Most cities here in Utah, from Provo to Salt Lake, base their rules on the International Residential Code (IRC). While you should always check with your local Orem or Lehi building department for their specific amendments, some requirements are pretty standard across the board.
Here’s a quick rundown of what inspectors will have their eyes on:
- Ceiling Height: You need a finished ceiling height of at least 6 feet 8 inches. This isn't just for the main open area; it applies directly over the toilet, sink, and shower.
- Mechanical Ventilation: A good exhaust fan isn't just a suggestion—it's a requirement. The fan must be rated for a minimum of 50 cubic feet per minute (CFM) and, critically, must vent directly to the exterior of your home. Venting into an attic or between floor joists is a major code violation.
- GFCI Outlets: This is a huge safety point. Every single electrical outlet in the bathroom must have Ground Fault Circuit Interrupter (GFCI) protection. It’s an absolute must-have to prevent electrical shock in a wet environment.
Expect at least two big inspections: a "rough-in" inspection after the plumbing and electrical are installed but before you put up drywall, and a final inspection when the project is 100% complete. This is where a seasoned local contractor really earns their keep. They know what the Utah County inspectors look for and can save you from the headache of a failed inspection and costly rework.
Answering Your Top Basement Bathroom Questions
When you first start thinking about adding a bathroom to your basement, a handful of big questions always seem to pop up. Let's get those out of the way right now, because the answers will really shape your project from the get-go.
Can I Really Put in a Bathroom Without Breaking Concrete?
Yes, you can, and it's a game-changer for many homeowners. If the thought of jackhammering your basement floor gives you a headache, you'll want to look into an up-flush toilet system, sometimes called a macerating toilet.
These units sit right on top of your existing concrete floor. When you flush, a grinder and pump inside the unit liquefy waste and pump it up to your home's main drain line. It's an ingenious way to sidestep a huge, dusty, and expensive part of the job.
But, like anything, there are trade-offs:
- Noise: They're definitely louder than a standard gravity-fed toilet. You'll hear the pump kick on with each flush.
- Cost: The toilet unit itself costs more upfront than a traditional model.
- Careful Flushing: You have to be strict about what goes down—only human waste and toilet paper. Anything else can jam the grinder.
For a full bathroom with a shower and sink, a sewage ejector pump is another fantastic route. It still requires cutting a small pit for the pump, but that's a world away from trenching across your entire basement for drain lines.
How Long Will This Project Actually Take?
The timeline really boils down to the project's complexity and whether you're hiring it out or doing it yourself.
If you bring in a professional crew to build a standard bathroom in an unfinished basement, you can realistically expect it to take two to four weeks. That window usually covers everything from framing and plumbing rough-ins to the final coat of paint and inspections.
On the other hand, if you're a weekend warrior tackling this on your own, be prepared for it to stretch over several months. Unexpected hurdles, like tricky plumbing routes, intricate tile work, or just waiting on your city for permits, can always add to the clock.
The single biggest puzzle to solve with any basement bathroom is drainage. Your new toilet and shower are below your home's main sewer line, so gravity is officially working against you. This makes getting the pump system and plumbing vents installed perfectly non-negotiable for a bathroom that works reliably and doesn't smell.
Right behind drainage in terms of importance is ventilation. You have to get moisture out of that basement air to prevent a constant battle with mold and mildew.