
Planning a Basement: A Practical Guide to Finishing Your Space
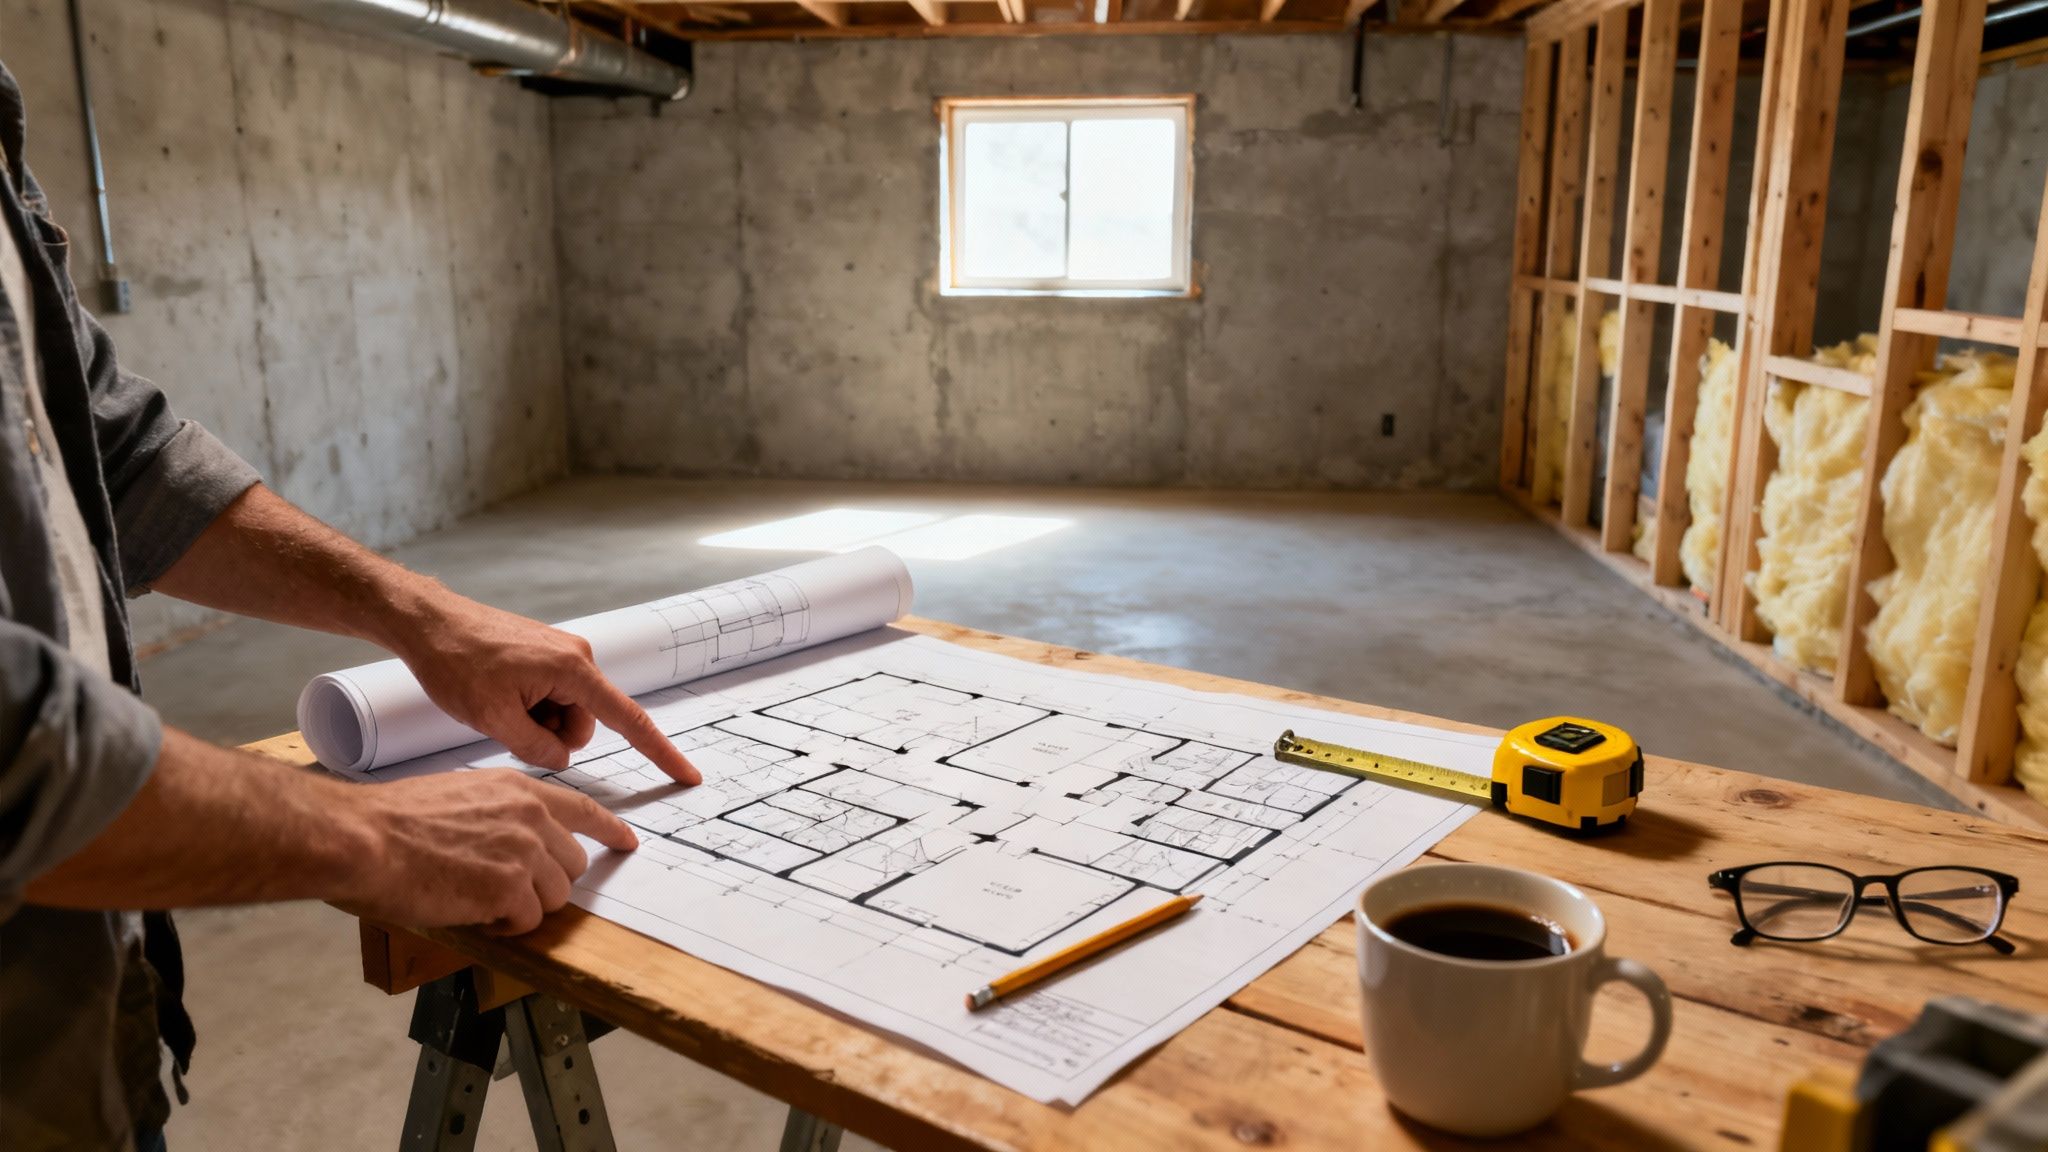
Before you even think about paint colors or flooring, the first move in any basement renovation is to answer two fundamental questions: What is this space for? and What am I working with?
Getting clear on the purpose—whether it’s a family rec room, a quiet home office, or a rental suite—is what steers every single decision you'll make down the line, especially your budget.
Your First Steps in Planning a Basement Transformation
Kicking off a basement project can feel overwhelming, but if you break it down into a few initial, manageable steps, it becomes an exciting process instead of a stressful one. Right now, we're not talking about architectural drawings or picking out light fixtures. We're focused on building a solid foundation for your project by answering the big-picture questions that will guide you, your designer, and your contractor.
This simple flowchart lays out the critical starting points.
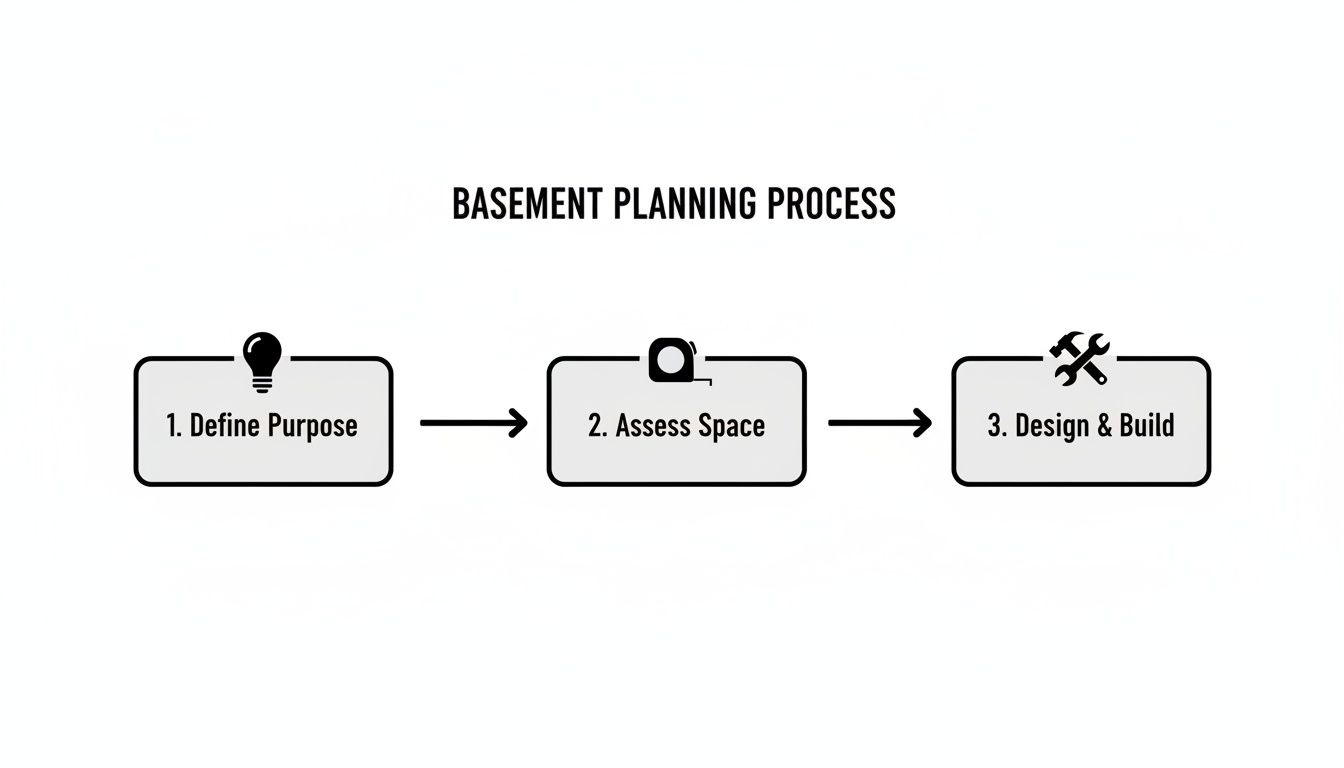
As you can see, defining the purpose and assessing the space you have are the absolute bedrock of a successful basement plan.
To give you a bird's-eye view of the entire journey, here’s a quick look at the major milestones involved in a typical basement finish.
Key Basement Planning Milestones
This table outlines the essential stages you'll move through, from your initial idea to the final sign-off.
| 1. Discovery & Vision | Define the purpose and scope of the project. | Identify needs (e.g., family room, rental), assess existing space, set a preliminary budget. |
| 2. Design & Layout | Create a functional and code-compliant floor plan. | Sketch layouts, determine room placement, address egress and mechanical systems. |
| 3. Bidding & Permitting | Finalize costs and get official approval to build. | Select a contractor, submit plans to the city (Orem/Provo), obtain building permits. |
| 4. Construction | Build out the new space according to the plan. | Framing, rough-in electrical/plumbing, insulation, drywall, finishing touches. |
| 5. Finalization | Complete the project and pass all inspections. | Final inspections, punch list items, homeowner walkthrough and sign-off. |
Understanding this roadmap helps you anticipate what's coming and stay on track throughout the process.
Nail Down Your Basement's Core Purpose
Before a single 2x4 is cut, you have to decide what your basement will be. This is the most critical decision you'll make, as it directly impacts the layout, budget, and the specific building codes you'll need to follow. Are you just adding more living space for your family, or are you hoping to generate rental income?
Here are a few common directions homeowners in our area take:
- Family Entertainment Hub: Think open-concept with a big TV area, maybe some game tables, and a wet bar for hosting get-togethers.
- Guest Suite or In-Law Apartment: A private, self-contained space with its own bedroom, bathroom, and a small kitchenette for visiting family.
- Home Office or Gym: A dedicated quiet zone, separate from the chaos of the main house, designed for productivity or wellness.
- Legal Accessory Dwelling Unit (ADU): This is a full-blown rental apartment. In Orem and Provo, this means meeting much stricter code requirements for things like separate entrances and egress windows.
Your basement’s purpose is the compass for your entire project. A vague idea leads to a confusing layout and surprise costs. A clear vision ensures every choice—from where a wall goes to where an outlet is placed—is made with intention.
Do a Practical Assessment of Your Space
Once you know what you want to build, it's time to get brutally honest about what you have to work with. You don’t need to be an expert for this part. It’s all about gathering basic information so you can have productive conversations with the pros later. Just grab a tape measure, a notepad, and a good flashlight, and take a good look around.
Start by jotting down these key details:
- Ceiling Height: Measure from the concrete floor up to the bottom of the joists. You'll generally need at least 7 feet to be considered a legal, habitable space, but honestly, the more height, the better it will feel.
- Existing Utilities: Find your furnace, water heater, main water shut-off, and electrical panel. These things are expensive to move, so it’s often much smarter to design your layout around them.
- Support Posts and Beams: Map out where all the structural posts are. While they can sometimes be moved or replaced with a heavy-duty beam, it adds major cost and complexity. It’s usually easier to get creative and build them into a wall, a bar, or a decorative column.
- Signs of Moisture: Be a detective. Look for old water stains on the walls or floor, a chalky white powder on the concrete (that's called efflorescence), or a lingering musty smell. Any moisture issues are a hard stop—they must be permanently fixed before any finishing work can even begin.
This initial walkthrough gives you a realistic snapshot of your basement's potential and its limitations. For a deeper dive into all the stages of a project like this, check out our complete guide on how to plan a home renovation. Having this foundational knowledge from day one empowers you to ask the right questions and set a project scope that actually makes sense.
Designing A Functional And Beautiful Basement Layout
With your main goal locked in, it’s time for the fun part: sketching out a floor plan that brings your vision to life. This is where you move from daydreaming to actual design, figuring out how the new space will look, feel, and flow. A great basement plan is about more than just drawing walls; it’s about creating a space that feels like a natural, comfortable extension of your home.
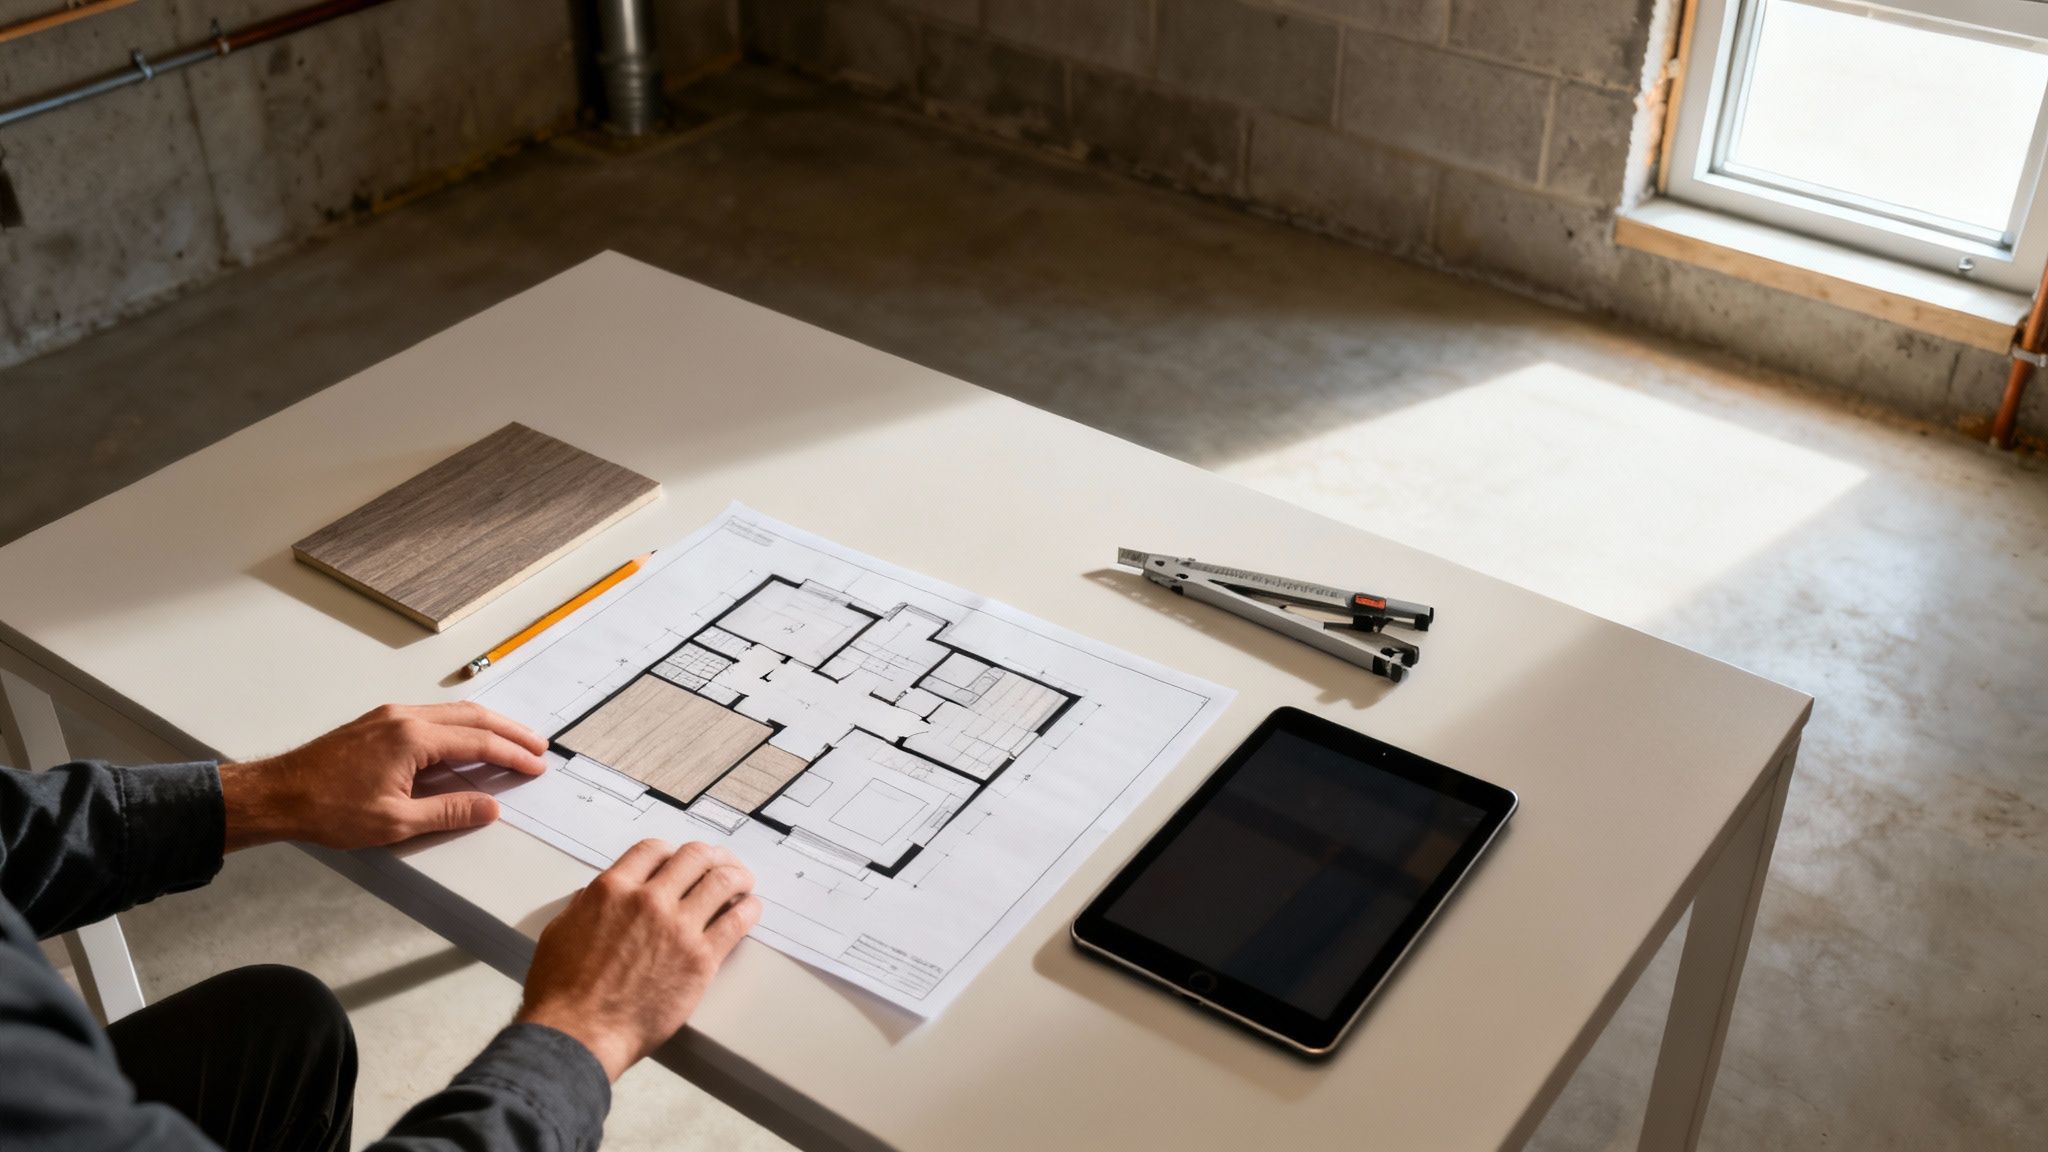
The first thing to think about is flow—how will people move through the space? An open-concept design works wonders for a big family room or entertainment hub, making everything feel connected and social. But if you’re adding a home office or a guest suite, you’ll need to create separate zones with smart wall placement to ensure privacy and quiet.
Master Your Lighting Plan
Lighting is, without a doubt, the single most important element in making a basement feel like a bright, inviting space instead of a cave. The trick is to use a layered lighting strategy, combining different types of light to make the environment feel dynamic and bright.
Your plan should absolutely include these three layers:
- Ambient Lighting: This is your base layer of general light. Recessed can lights are the go-to for basements for a reason—they spread light evenly without eating up precious headroom.
- Task Lighting: This is targeted light for specific activities. Think about a pendant light over a wet bar, under-cabinet strips in a kitchenette, or a sleek floor lamp in a reading corner.
- Accent Lighting: This is the fun stuff. Use it to highlight cool features like a stone wall or a favorite piece of art. Track lighting is perfect for this.
For a deeper dive into placement, this expert recessed lighting layout guide is an incredible resource. Getting the spacing right is what separates a professionally lit room from one with awkward dark spots.
A common mistake I see is homeowners installing a single, lonely light fixture in the middle of the room. It creates harsh shadows and makes the space feel cramped. Layering your lighting is the secret to a high-end look and feel.
And don't forget natural light! Keep those window wells clean and clear. A simple but effective trick is to paint the walls opposite your windows a lighter color to help bounce that daylight deeper into the room.
Work With Your Basement's Quirks
Let's be honest, almost every basement has some awkward features to contend with—support columns right in the middle of everything, low-hanging ductwork, or a furnace in a weird spot. Instead of seeing these as problems, think of them as built-in design opportunities.
That random support post? It can become the anchor for a built-in bookshelf, a half-wall that separates two areas, or even the corner of a custom bar. Suddenly, it looks completely intentional.
The same goes for that bulky ductwork. You can easily hide it within a soffit or a dropped ceiling. You can even get creative and build a tray ceiling, which adds a touch of architectural elegance and can actually make the rest of the ceiling feel higher.
Plan for Furniture and Function
A layout might look perfect on paper, but if your couch doesn't fit, the plan is a failure. Before you even think about framing, measure your must-have furniture—the sectional, the entertainment center, the pool table—and sketch them into your drawings. This simple step ensures you'll have enough space to walk around comfortably.
Think about how each area will actually be used. If you're building a home theater, you need to know your ideal screen size to frame the wall correctly. For a home gym, you have to account not just for the equipment's footprint but also for the space you need to actually move. A little foresight here will save you massive headaches later on.
Getting to the Bones of It: Moisture and Structural Checks
Everyone wants to jump straight to the fun stuff—picking out carpet, designing the home theater, or planning the wet bar. I get it. But before you even think about framing a single wall, we have to talk about the two things that will make or break your entire project: moisture and structure.
Getting this part wrong is a recipe for a very expensive do-over down the road. A dry, solid foundation isn't just a starting point; it's everything.
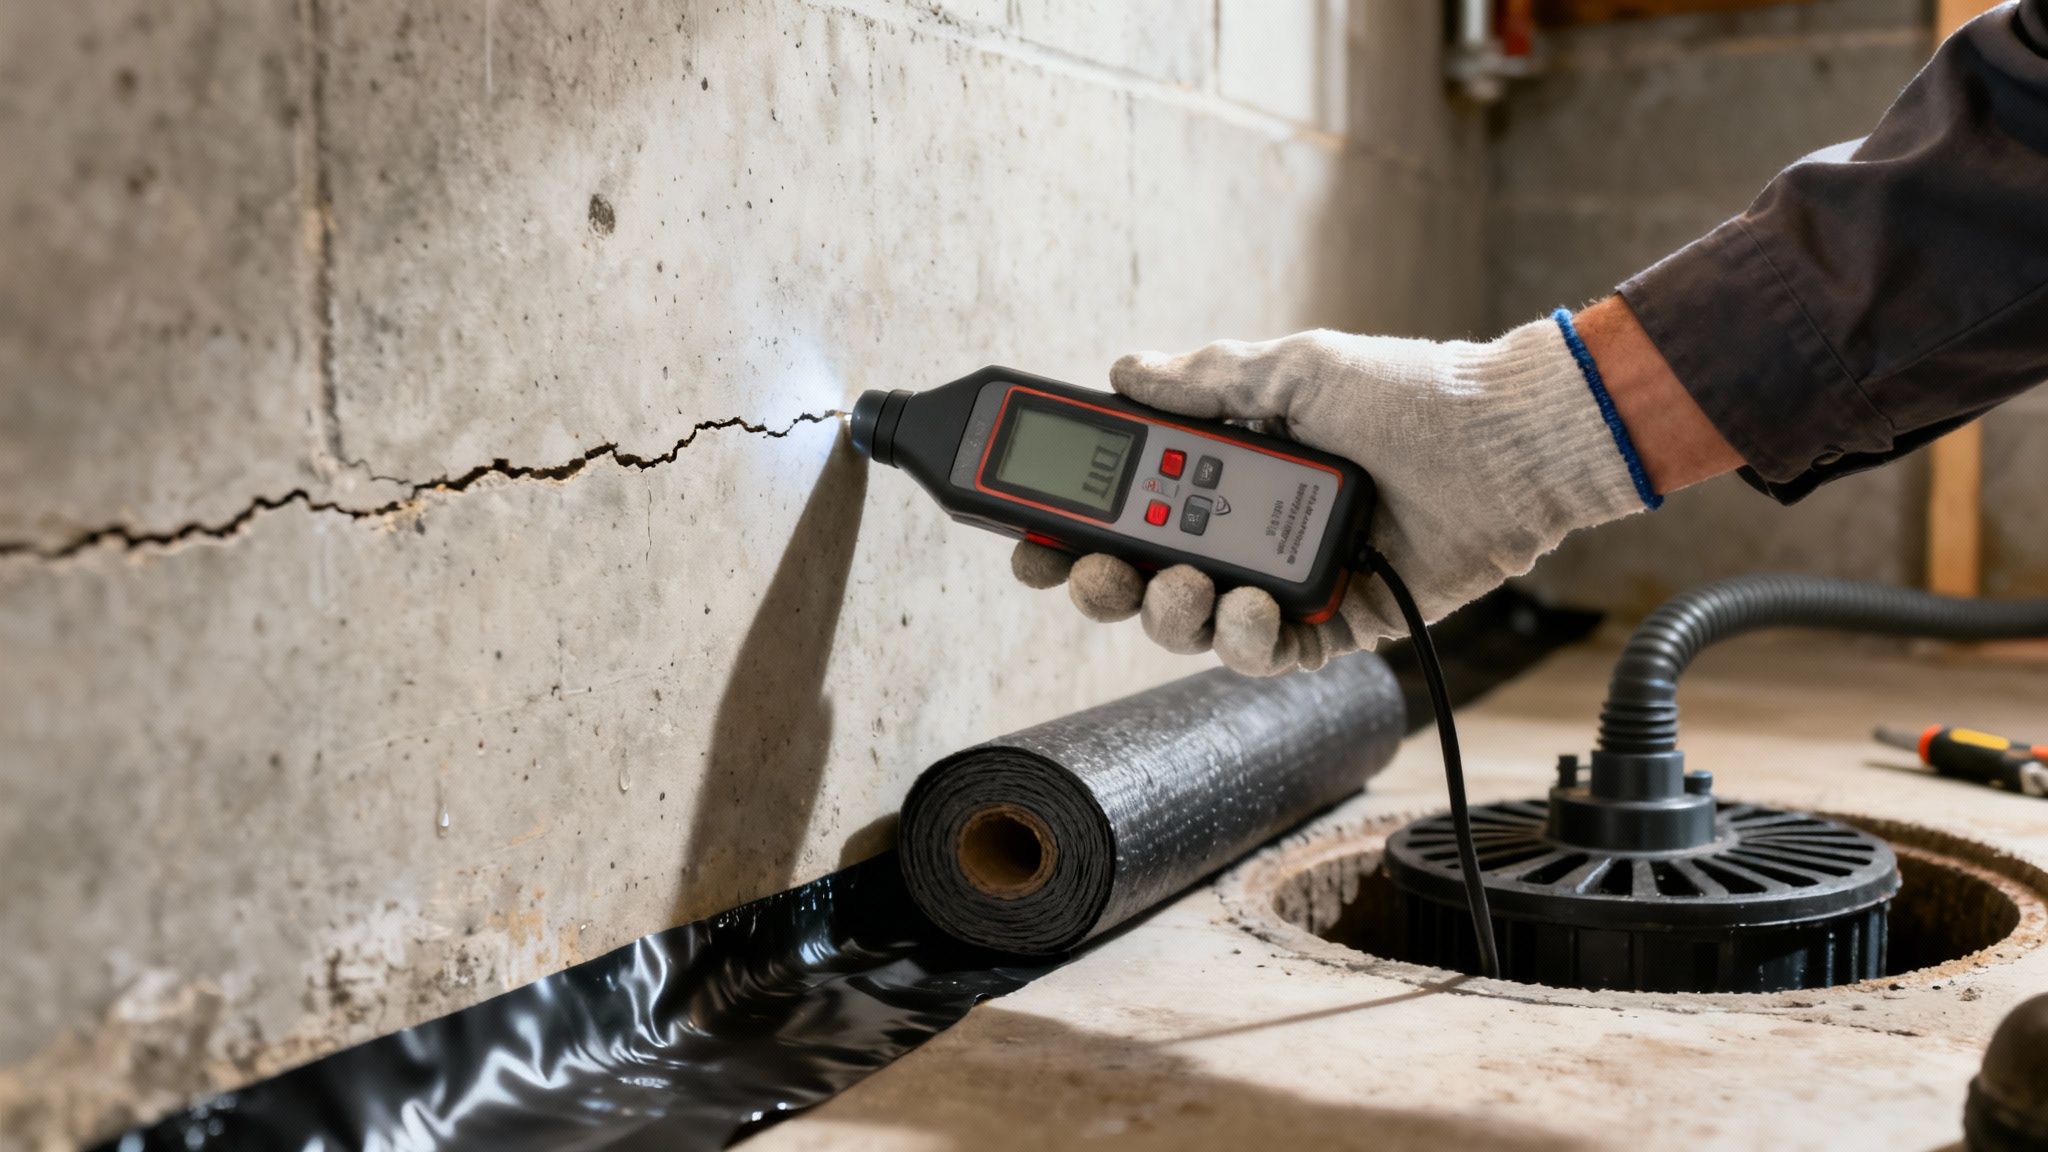
Here in Utah, the soil and weather can be tough on foundations. We often see issues from hydrostatic pressure, which is just the fancy term for groundwater pushing relentlessly against your basement walls. That pressure can force moisture through the smallest cracks, leading to that damp, musty smell, mold growth, and eventually, ruined drywall and flooring.
Tackling Moisture Head-On
Your first job is to play detective. Go down into your basement and really look around. Do you see dark, damp-looking stains on the concrete? Is there a chalky white powder on the walls? That's called efflorescence, and it's a dead giveaway that water is seeping through. And, of course, trust your nose. That classic "basement smell" means moisture.
Any of these signs are a hard stop. You have to fix the water problem before you can build.
The culprits are usually pretty common:
- Bad Grading: The dirt right outside your house needs to slope away from the foundation. If it slopes toward it, you're basically funneling every rainstorm right into your basement.
- Gutters & Downspouts: If your gutters are clogged or your downspouts dump water right next to the foundation, you're asking for trouble.
- Cracks in the Foundation: It doesn't take much. Even tiny hairline cracks are an open invitation for water.
- Leaky Window Wells: A poorly drained window well is like a tiny aquarium against your foundation wall, and that water will find a way in.
Sometimes the fix is easy, like re-grading the yard or adding extensions to your downspouts. But for more stubborn water issues, you might need to look at an interior French drain, a sump pump, or a professional waterproofing membrane on the walls. We have a detailed guide on how to effectively waterproof basement walls if you want to dig deeper into the solutions.
Think of waterproofing not as a cost, but as insurance for your renovation. A dry basement protects your investment—the framing, the drywall, the flooring—from rot and mold, ensuring your new space is healthy and lasts for decades.
Is Your Foundation Up to the Task?
Once you're confident the basement will stay dry, you need to look at its structural integrity. This is absolutely critical if you're planning big changes, like taking out support posts for that wide-open family room you've been dreaming of.
Don't guess on this. Bring in a structural engineer. They can tell you if the foundation can handle your plans. Trying to remove a load-bearing post without properly installing a correctly sized laminated veneer lumber (LVL) beam to redistribute the weight is one of the most dangerous mistakes a homeowner can make. It can compromise the stability of your entire house.
Investing in your home's core structure is becoming more common. The global market for foundation work like basement lowering and underpinning was around $2.5 billion in 2023 and continues to grow. This just shows how many people are realizing that to get the most out of their homes, they have to start with a solid base.
Nailing these two "unseen" essentials is what separates a successful project from a nightmare. Get the foundation right, and everything else will fall into place.
Navigating Codes, Permits, And Inspections In Utah
Let's be honest: just hearing the words "building permits" or "city inspections" is enough to make most people's eyes glaze over. It can feel like a mountain of red tape designed specifically to slow down your basement project. But I want you to reframe that thinking. When you're finishing a basement, think of the permit process not as a hurdle, but as your most important safety net.
These regulations are in place for a very good reason—to make sure the work done in your home is safe, structurally sound, and won't turn into a dangerous liability later. For anyone in Orem, Provo, or anywhere in Utah County, working with the city isn't optional. It’s a crucial step that protects your family and the investment you're making in your home. Trying to skip it can lead to some serious pain, including massive fines, being forced to tear out finished work, and major complications when it's time to sell.
Why Permits Are Actually Your Friend
So, what is a building permit? At its core, it’s an official thumbs-up from your local city office to start construction. It’s their way of verifying that your plans line up with local building codes, zoning rules, and safety standards. For a big job like a basement finish, this is absolutely critical.
The process kicks off when you or your contractor submit detailed plans—everything from framing and electrical layouts to plumbing schematics. Once the city plan-checkers give their approval, you get the permit. From there, a city inspector will pop by at key moments during the project to make sure the actual work matches the approved plans and is being done safely.
A lot of people think permits are just a cash grab for the city. The reality is, they provide an unbiased, third-party check on your contractor's work. It's an invaluable layer of protection that ensures everything is being built to a professional, safe standard.
Key Code Requirements You’ll Definitely Encounter
The full building code is a massive document, but for a basement finish in Utah County, inspectors tend to focus on a few key areas. Unsurprisingly, they are almost all about life safety.
Your contractor should know these inside and out, but it's smart for you to have a handle on the basics, too.
- Egress Windows: This is the big one. Any room you designate as a bedroom in the basement must have a proper egress window. This isn't just any window; it has to be large enough and low enough to the floor to serve as a reliable escape route in a fire. There are specific minimums for the opening size, the height of the sill, and even the size of the window well outside.
- Electrical Safety: All new wiring has to be up to snuff. This means using the right size wire for each circuit, having outlets spaced correctly, and installing Arc-Fault Circuit Interrupter (AFCI) breakers. AFCIs are modern life-savers designed to prevent electrical fires before they can start.
- Stairway Dimensions: The stairs down to your new basement can't be an afterthought. They need to meet strict rules for riser height, tread depth, and headroom to make them safe and prevent falls.
- Smoke and Carbon Monoxide Detectors: You'll need to install hardwired smoke detectors that are all interconnected—when one goes off, they all go off. You’ll need one in each new bedroom and in the main living space, along with carbon monoxide detectors.
Getting a handle on these requirements early on is the key to designing a layout that's not just beautiful and functional, but also legal and safe.
What to Expect During the Inspection Process
Don't expect a single, final inspection at the very end. The process is broken up into phases that follow the flow of construction. This is done so the inspector can see all the critical work before it gets buried behind drywall and flooring.
A typical inspection sequence for a basement project looks something like this:
Framing Inspection: This happens right after the walls are framed but before any wires or pipes go in. The inspector checks the lumber, stud spacing, and overall structural integrity.
Rough-In Inspection: This is often a 3-in-1 visit. With the walls still open, the inspector will look at the electrical wiring, the plumbing lines, and the HVAC ductwork.
Insulation Inspection: Pretty straightforward—right before the drywall goes up, the inspector verifies that the correct type and R-value of insulation has been installed properly.
Final Inspection: The last step! Once all the paint, flooring, light fixtures, and plumbing fixtures are in, the inspector does one final walkthrough to sign off on the whole project.
A great contractor will handle all the scheduling and will be on-site to meet the inspector and answer any questions. Each time you pass one of these inspections, you’re building a documented record that your basement was finished correctly and safely. That official sign-off is a huge asset for your home's value and your own peace of mind.
Creating Your Realistic Basement Budget And Timeline
Alright, you’ve sorted out the big-picture safety and structural stuff. Now it's time to talk about the two things that will dictate everything from here on out: your budget and your schedule. I've seen countless basement projects get started with great intentions, only to fizzle out because the money ran dry or the timeline spiraled out of control.
Getting a handle on your budget is about more than just a single number from a contractor. It's about knowing where every single dollar is going. And a timeline? It's not a finish line. It's a carefully planned sequence of steps where one trade’s work sets the stage for the next.
Breaking Down Basement Finishing Costs
Here in the Orem/Provo area, the cost to finish a basement can be all over the map, but you can generally expect to land somewhere between $35 and over $60 per square foot.
What causes that big swing? It really comes down to what you’re putting in. A wide-open family room with simple finishes will keep you at the lower end of that range. But if you're planning a multi-room layout with a full bathroom, a wet bar with custom cabinets, and maybe a home theater... well, that’s when you start climbing toward that $60+ mark.
To give you a better feel for it, here’s how a typical budget tends to break down:
- Framing & Drywall: This is the skeleton of your new space and usually eats up about 15-20% of the total cost.
- Electrical & HVAC: Plan for 10-15% here. This covers all the wiring, outlets, and can lights, plus extending the ductwork so the space is actually comfortable.
- Plumbing: Adding a bathroom or wet bar? This is a big one. It can easily be 10-20% of your budget, especially if we have to break up concrete to run new drain lines.
- Flooring: This is a wildcard, but often falls in the 10-15% range. We see a lot of Luxury Vinyl Plank (LVP) down here—it looks great and holds up to Utah basement life.
- Finishing Touches: This is the fun stuff—paint, trim, doors, cabinets, and hardware. It’s also the biggest slice, making up the last 20-30% of your budget.
Want to plug in your own numbers? We built a tool to help homeowners get a more specific idea of what their project might cost. You can get a personalized estimate with our detailed basement finishing cost calculator.
The Non-Negotiable Contingency Fund
If you only listen to one piece of advice I give, make it this: build a contingency fund of 10-15% into your budget. This isn't "extra" money. It's a non-negotiable part of your project plan. In all my years of doing this, I can tell you that surprises are the one thing you can always count on, especially in older homes.
Your contingency fund is what keeps the project from grinding to a halt when we open a wall and find some funky old wiring that needs updating, or when you decide you really want those upgraded light fixtures after all.
Think of it this way: on a $50,000 project, a 15% contingency is $7,500. I know it sounds like a lot, but having that buffer is the difference between a project that flows smoothly and one that’s riddled with stress and delays.
Mapping Out a Typical Project Timeline
Understanding the order of operations is key to keeping your sanity during a renovation. While every job has its own quirks, a standard basement finish in our area usually wraps up in about 8 to 12 weeks.
Here’s a rough idea of how those weeks play out:
Weeks 1-2 (Demo & Framing): We start by clearing out the space and then the new walls go up. This is the moment the floor plan on paper suddenly feels real.
Weeks 3-4 (The "Rough-Ins"): With the walls still open, it’s a busy time. The plumbers, electricians, and HVAC guys all come in to run their pipes, wires, and ducts. It all leads up to the critical rough-in inspections from the city.
Weeks 5-6 (Insulation & Drywall): Once we get the green light from the inspector, we insulate. Then the drywall crew comes in to hang, tape, and mud the walls, getting them perfectly smooth for paint.
Weeks 7-9 (The Fun Part: Finishes): This is where you see the biggest transformation. We prime and paint, the flooring goes down, and then we install the trim, doors, and any cabinetry.
Weeks 10-12 (Final Touches & Punch List): We’re in the home stretch! We install light fixtures, faucets, sinks, and all the hardware. Before we call it done, we’ll do a final walkthrough with you to create a "punch list"—a short list of any little tweaks needed before the final inspection.
Finding the Right Contractor for Your Basement
Picking the right partner for your basement project is probably the single most important decision you'll make in this whole process. It's the difference between a project that runs smoothly and one that becomes a source of endless stress and unexpected costs. A great contractor doesn't just build things; they manage the entire process, communicate clearly, and bring your vision to life.
This isn't about finding the cheapest person with a truck and some tools. You're hiring a project manager, a problem-solver, and a guide who knows the ins and outs of local codes here in the Orem and Provo area.
Start your search close to home. Ask friends, coworkers, or neighbors who they used for their renovations and if they’d hire them again. Word-of-mouth is still king. After that, check out online resources like Google, Houzz, and the Utah Valley Home Builders Association to find licensed and insured pros with a solid local reputation. Your goal should be to get a shortlist of three to five contractors to meet with.
How to Vet Your Potential Partners
Think of the initial meetings as interviews—because that’s exactly what they are. You're hiring someone for a major job. A good contractor will be interviewing you, too. They’ll want to know about your goals, your budget, and how you imagine using the finished space.
Come prepared with a few key questions:
- How long have you been working in Utah Valley? A contractor who has been around for a while has a proven track record and understands the local landscape.
- Can I see your license and insurance? This is a deal-breaker. Ask for proof of general liability and workers' compensation. Do not skip this step.
- Do you have recent, local references I can call? A contractor who is proud of their work will happily share contact info for past clients. Make sure you actually call them!
- Who will be my day-to-day contact? You need to know who you’ll be talking to when questions or issues inevitably come up.
The biggest mistake you can make is choosing a contractor based on the lowest bid alone. A price that seems too good to be true almost always is. It often signals cheaper materials, cutting corners, or a vague scope that will balloon with expensive "change orders" down the line.
Comparing Bids and Signing on the Dotted Line
When you get the bids back, don't just skip to the total at the bottom. A real, professional quote is a detailed breakdown, not just a single number scribbled on an invoice. You need to compare them line-by-line to see if you're truly comparing apples to apples. Does one bid include higher-grade carpet padding? Does another leave out the cost of light fixtures?
If a bid feels light on details, ask for a more thorough breakdown. Clarity is everything.
Once you’ve made your choice, the last hurdle is the contract. This document protects both you and your builder, so read it carefully. A proper contract should spell everything out, including:
- The complete scope of work.
- A payment schedule tied to specific project milestones (e.g., framing complete, drywall up).
- A projected start and completion date.
- The process for handling any changes or additions.
Signing that contract means you’ve established a professional relationship built on clear expectations. It sets the stage for a successful project and a beautiful new basement you'll get to enjoy for years to come.
Got Questions About Finishing Your Basement? We've Got Answers.
When you're thinking about finishing your basement, the questions can pile up fast. Here are some straightforward answers to the things we hear most often from homeowners right here in the Orem and Provo areas.
What’s the Real Cost to Finish a Basement in Utah?
It’s a huge range, honestly. Around here, you’re typically looking at anywhere from $35 to over $60 per square foot.
So, what makes the difference? A simple, wide-open family room is going to land on the lower end of that scale. But if you start adding things like a full bathroom with all new plumbing, a custom wet bar, and high-end flooring and lighting, you’ll quickly head toward that $60+ mark. The only way to nail down a firm number is to have a few good, local contractors walk through the space and give you a detailed quote based on exactly what you want.
Is a Permit Really Necessary?
Yes. Absolutely, 100%. If your project involves putting up new walls, running electrical lines, or touching the plumbing, you will need a permit from your city.
Think of permits as a safety net, not just a hassle. They exist to make sure the work is done to code, which protects your family and your home’s value. Skipping the permit can lead to fines, having to tear out finished work, and major headaches when you try to sell your house down the road.
How Long Does a Basement Finish Usually Take?
For a typical basement, once the final plans are locked in, you can expect the work to take about 8 to 12 weeks from start to finish.
Of course, this can change. A more complex design, delays in getting specific materials, or even just how busy the city's inspection schedule is can stretch things out. A good contractor will always give you a realistic project schedule before they even start swinging a hammer.
Ready to stop planning and start building? The team at Northpoint Construction has been doing this for years and can walk you through every single step, from the first sketch to the final coat of paint. Let's create a space your family will actually use and love. Get in touch with us today!