
8 Signs of water damage in walls You Should Know
Water intrusion is one of the most destructive forces a property owner can face, often beginning silently behind the scenes. Unchecked moisture can compromise the structural integrity of your home or commercial building, lead to costly repairs, and create unhealthy living or working environments. Recognizing the early signs of water damage in walls is not just about aesthetics; it’s a critical component of property maintenance that protects your investment and the well-being of its occupants. Small, subtle clues can indicate a much larger, hidden problem, and a delayed response can escalate a minor leak into a major restoration project.
This comprehensive guide is designed to empower you with the knowledge to identify, assess, and act on these warning signs decisively. We will move beyond generic advice and provide a detailed breakdown of the eight most common indicators, from obvious discoloration to the less apparent signs like efflorescence or musty odors. For each sign, we will explain not just what to look for, but also how to perform initial diagnostic checks, what the severity of the sign might imply, and what immediate steps you should take.
You will learn to differentiate between a surface-level issue and one that requires professional intervention. We will cover practical inspection techniques, the use of tools like moisture meters, and provide clear guidance on when it's time to call in experts like Northpoint Construction. By the end of this article, you’ll have a clear, actionable framework for spotting water damage early, mitigating its effects, and making informed decisions to protect your property in the Orem and Provo areas.
1. Discoloration and Staining
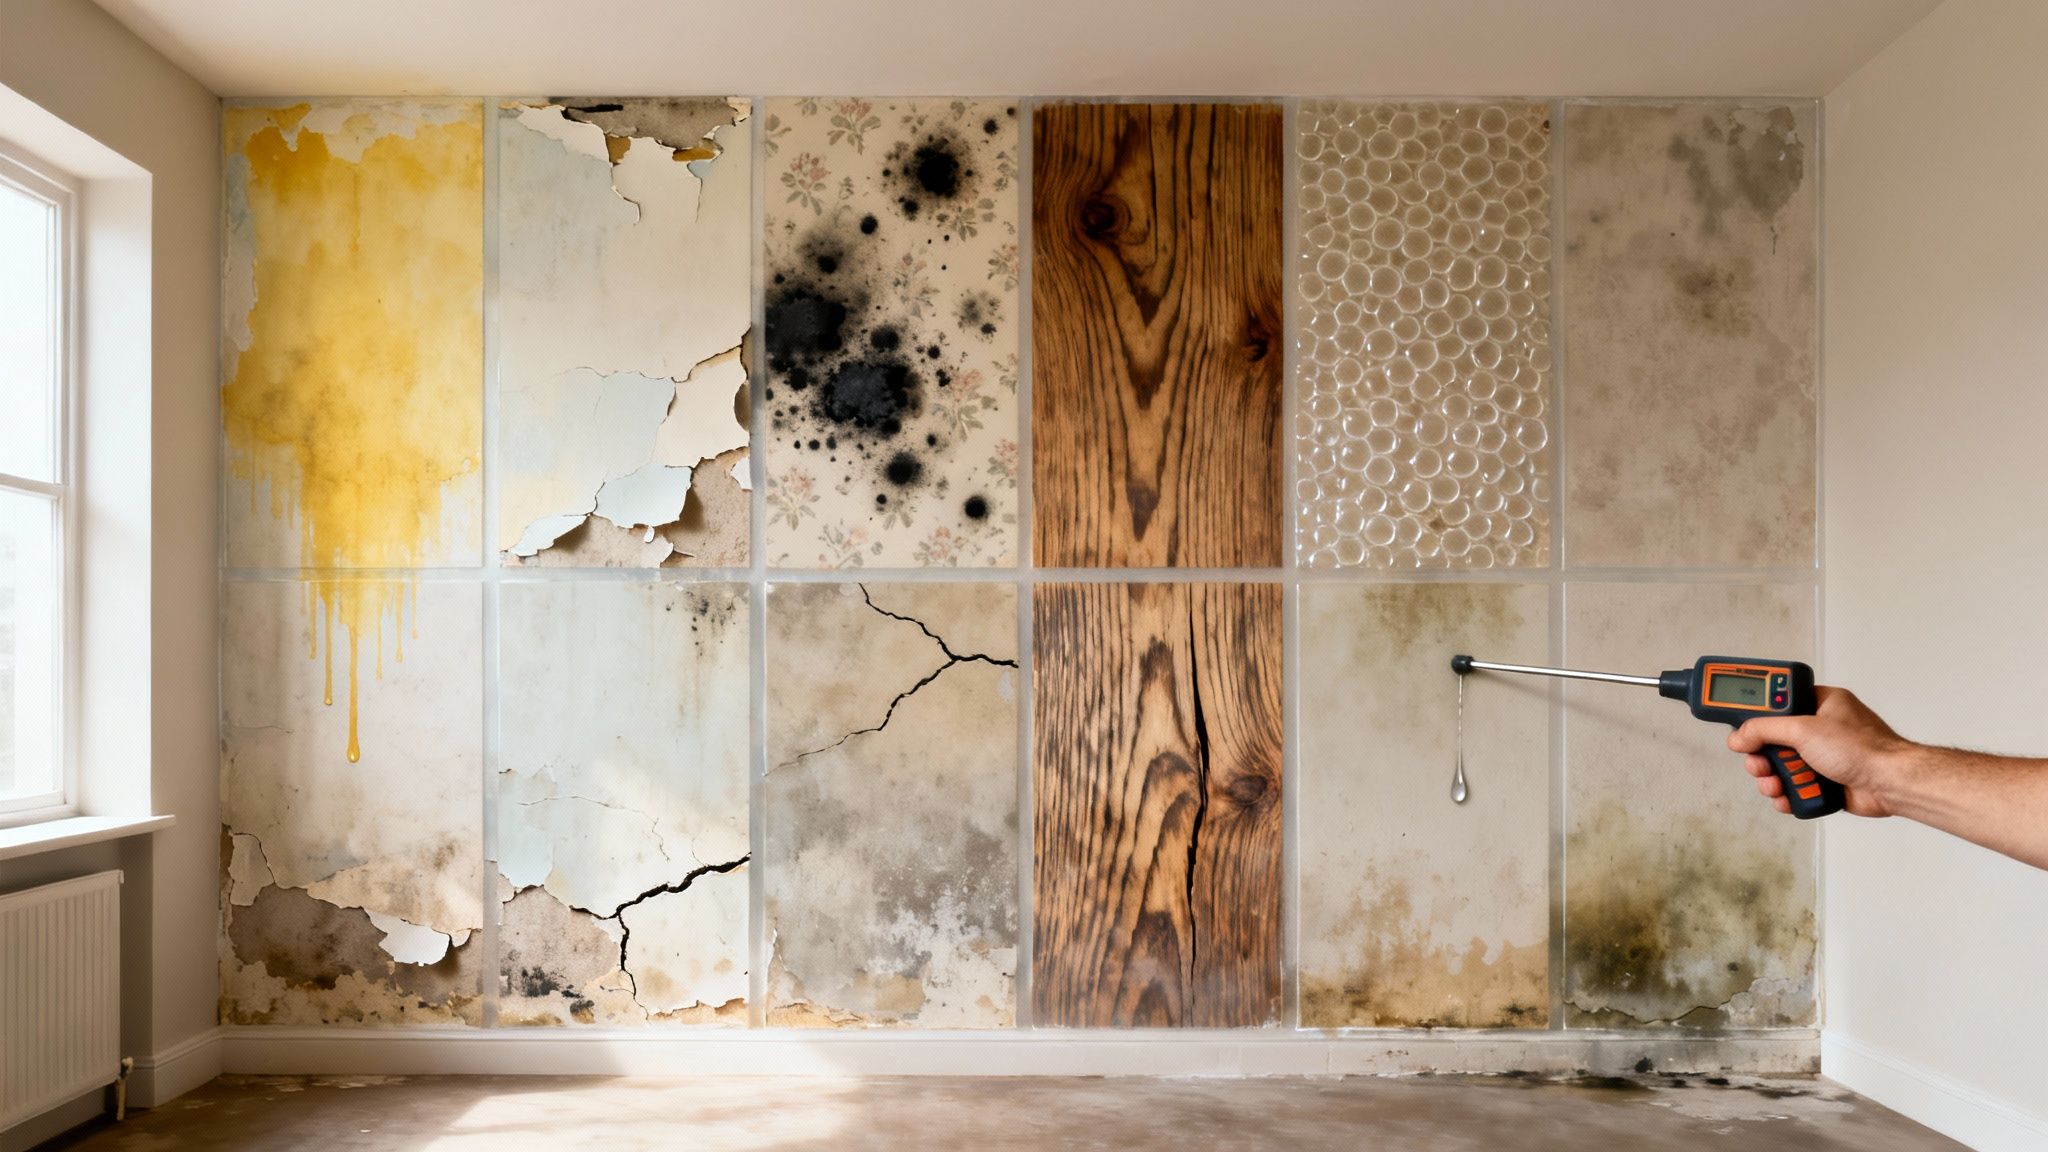
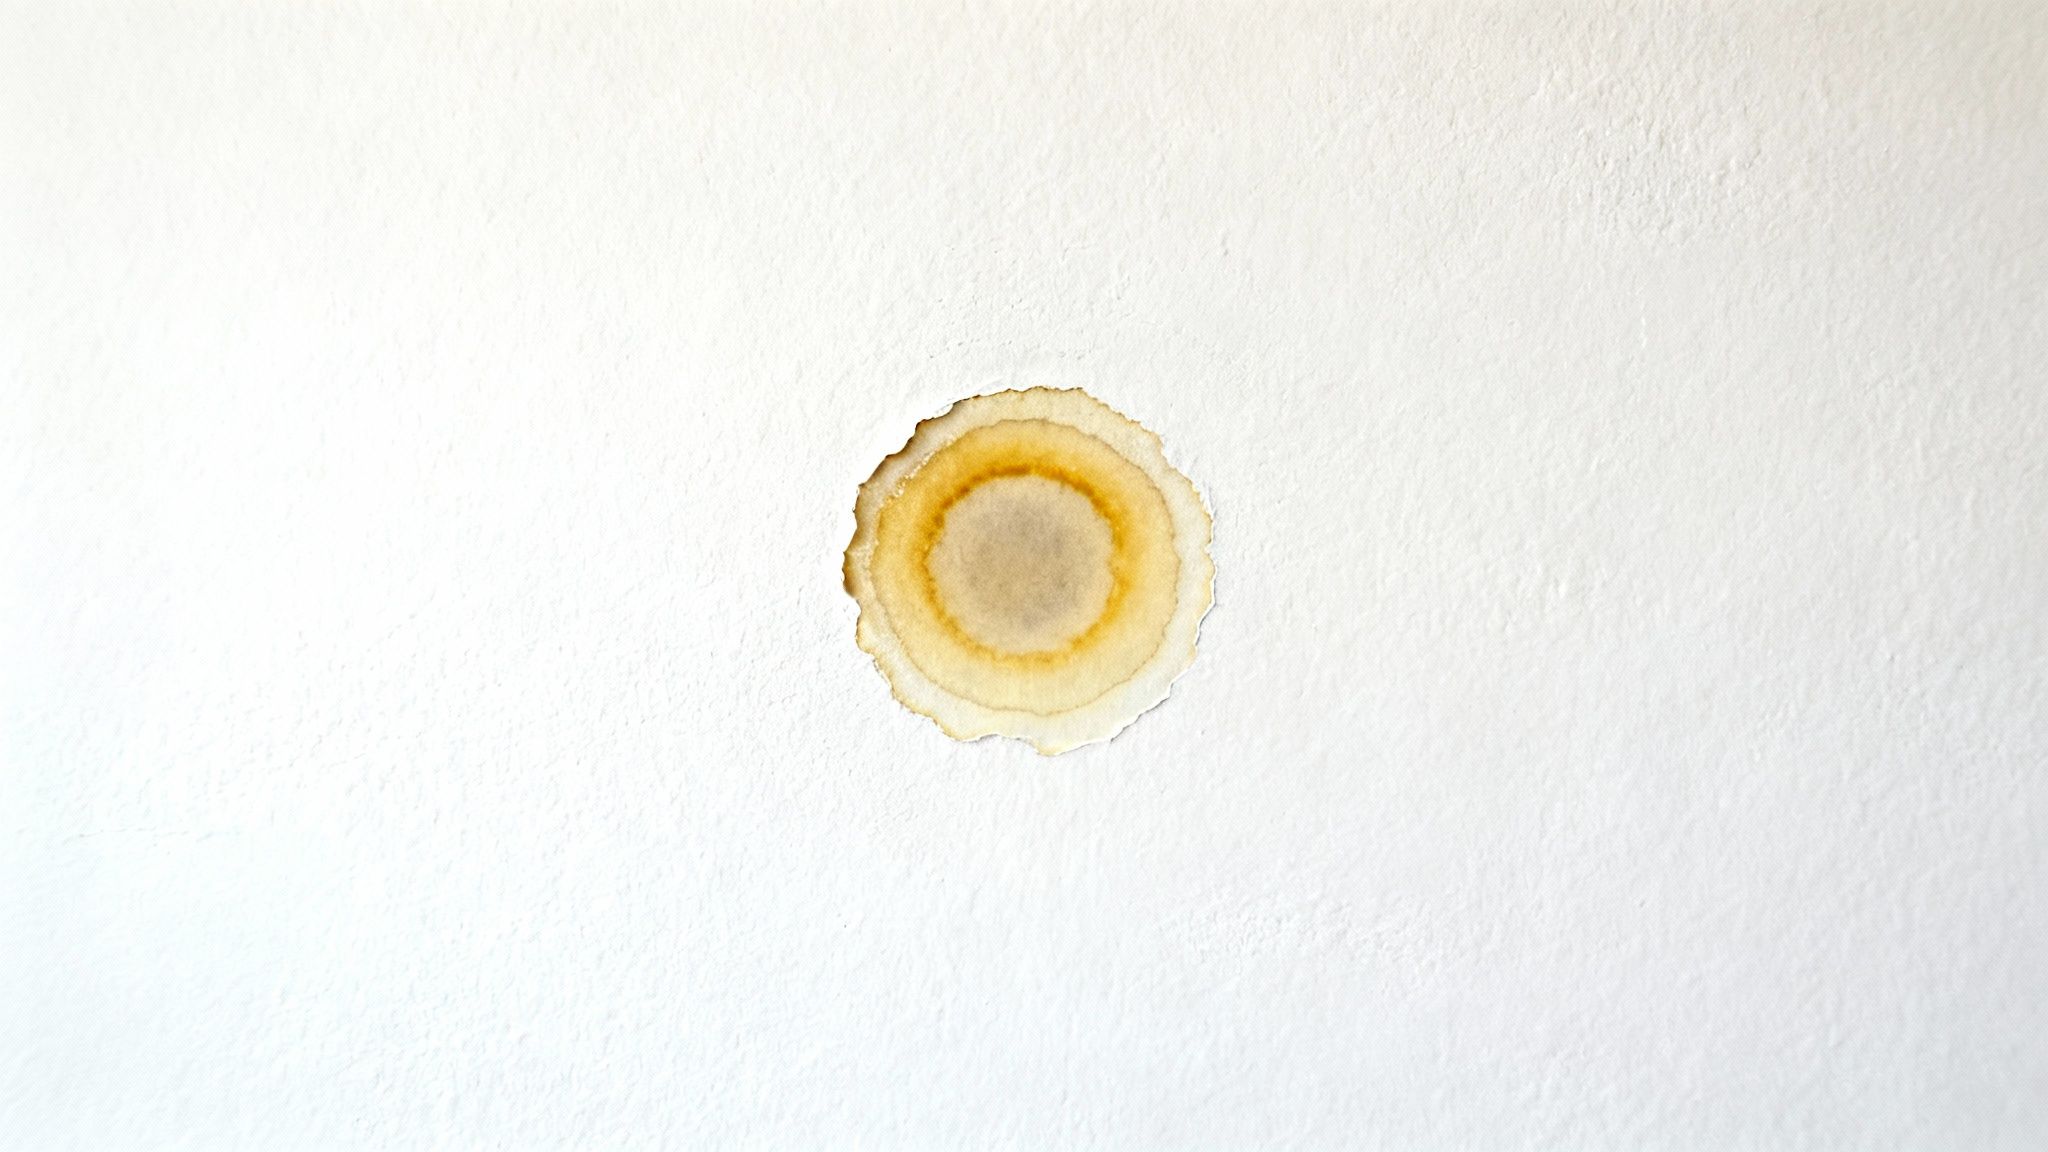
Discoloration is often the most immediate and recognizable sign of water damage in walls. These unwelcome marks appear when water seeps into drywall, plaster, or paint, leaving behind mineral deposits, dirt, and sometimes even fostering mildew growth as it evaporates. The result is unsightly patches that range in color from faint yellow and tan to dark brown or even black, creating a stark contrast with your wall’s original color.
These stains are a direct visual record of a moisture problem. The shape and location of the discoloration can offer valuable clues about the water's source and path. A slow, persistent leak might create a soft-edged, map-like pattern, while a more sudden event could leave a distinct, dark ring. Ignoring these visual cues allows the underlying issue to worsen, leading to more extensive structural damage and potential mold infestations.
How to Inspect for Stains
A thorough inspection is the first step in diagnosing the problem. Don't just rely on a casual glance; be methodical in your approach.
- Use a Bright Flashlight: Shine a powerful flashlight parallel to the wall's surface. This technique, known as "raking light," highlights subtle changes in texture and color that are invisible in normal ambient light.
- Check Common Problem Areas: Systematically inspect walls near windows, under plumbing fixtures in bathrooms and kitchens, and around HVAC vents. Pay close attention to ceilings directly below upstairs bathrooms or attics.
- Look for Patterns: Note the shape of the stain. Long, thin streaks running down from a ceiling or window often indicate a leak from above. Round or irregular splotches on a ceiling can point to a roofing or plumbing issue directly overhead.
Pro-Tip: Take clear photos of any stains you find. Date them and monitor them over a few days or weeks. If the stain darkens, changes shape, or expands, you have an active leak that requires immediate attention.
Simply painting over a water stain is a temporary fix that hides the symptom, not the cause. The moisture will continue to seep through, ruining your new paint job and allowing the underlying damage to escalate. At Northpoint Construction, we specialize in identifying the root cause of water intrusion. Our experts serve the Orem and Provo communities by not just repairing the visible damage but by ensuring the source of the leak is permanently resolved.
2. Soft or Swollen Drywall
Beyond visual cues, one of the most definitive signs of water damage in walls is a change in the wall’s physical texture. When drywall or plaster absorbs a significant amount of moisture, it loses its structural integrity, becoming soft, spongy, or swollen. This happens because the gypsum core of the drywall panel breaks down when saturated, causing it to lose its rigidity and expand.
This physical change indicates an active and often prolonged moisture problem. Swollen or bulging areas are particularly concerning as they signal that the material has absorbed enough water to deform, compromising its strength and creating a prime environment for mold growth within the wall cavity. Ignoring these tactile warnings can lead to structural failure, where sections of the wall or ceiling could eventually collapse under their own weight.
How to Inspect for Softness and Swelling
A hands-on approach is necessary to detect compromised drywall. Your sense of touch can reveal damage that isn't yet visible to the naked eye.
- Perform a Gentle Push Test: Carefully press your palm and fingers against the wall, especially in areas where you suspect a leak. A healthy wall will feel firm and solid. If the surface feels spongy, soft, or gives way under light pressure, you have found saturated drywall.
- Target Vulnerable Zones: Focus your inspection on walls adjacent to bathrooms, especially around tubs and showers. Also check under kitchen and bathroom sinks, behind refrigerators with ice makers, and in basements or crawl spaces where humidity and leaks are common.
- Look for Physical Deformities: Examine the wall from an angle. Look for any subtle bulges, warping, or bowing in the surface. Swelling is often most noticeable near the baseboards, where water tends to pool, or on ceilings below a leaky fixture.
Pro-Tip: When you find a soft spot, use a pencil to lightly mark the outline of the affected area. Check it again a day later. If the soft area has grown, it confirms you are dealing with an ongoing leak that needs immediate professional assessment.
Soft or swollen drywall is not a problem that will resolve itself; it's a clear sign of advanced moisture saturation. The compromised material will need to be removed and the source of the water stopped before new drywall can be installed. At Northpoint Construction, our team is equipped to handle both the leak detection and the necessary structural repairs. We provide comprehensive solutions for homeowners in Orem and Provo, ensuring the problem is fully remediated from the inside out.
3. Mold and Mildew Growth
Where there is persistent moisture, mold and mildew are almost certain to follow. These fungal growths thrive in damp, dark environments and can begin to colonize a wet wall within just 24 to 48 hours. Appearing as fuzzy or slimy patches of black, green, white, or even pink, their presence is one of the most serious signs of water damage in walls due to the significant health risks they pose.
Unlike simple water stains, mold is a living organism that releases spores into the air, which can cause allergic reactions, asthma attacks, and other respiratory issues. The musty, earthy odor often associated with mold is a clear indicator that a colony is actively growing, even if it's hidden behind the wall. Ignoring this sign not only compromises your home’s air quality but also allows the fungus to digest and destroy organic materials like drywall paper and wood framing.
How to Inspect for Mold and Mildew
A careful and safe inspection is crucial when you suspect mold. Your sense of smell is often your first tool, but a visual check is necessary to confirm the problem and its extent.
- Follow Your Nose: A persistent musty smell is a strong clue. Try to pinpoint the area where the scent is strongest; this is likely the source of the moisture and mold.
- Check High-Humidity Areas: Systematically inspect bathrooms, laundry rooms, basements, and kitchens. Look behind toilets, under sinks, around window frames where condensation collects, and in corners with poor air circulation.
- Look Beyond the Surface: Mold often grows behind wallpaper, under baseboards, or inside wall cavities. If you see bubbling paint or peeling wallpaper combined with a musty odor, there's a high probability of hidden mold growth.
Pro-Tip: When inspecting for mold, always wear protective gear, including an N95 mask, goggles, and gloves, to avoid inhaling spores or getting them on your skin. If you discover an area of mold larger than a few square feet, the EPA recommends hiring a professional for safe removal.
Dealing with mold requires a two-step approach: removing the existing growth and eliminating the moisture source. For homeowners looking for guidance on the first step, a comprehensive resource explaining how to get rid of mould in your home can be incredibly helpful. At Northpoint Construction, our team is certified in mold remediation services for the Provo and Orem areas. We don't just clean the mold; we solve the water problem that caused it, ensuring it doesn't return.
4. Peeling Paint and Wallpaper
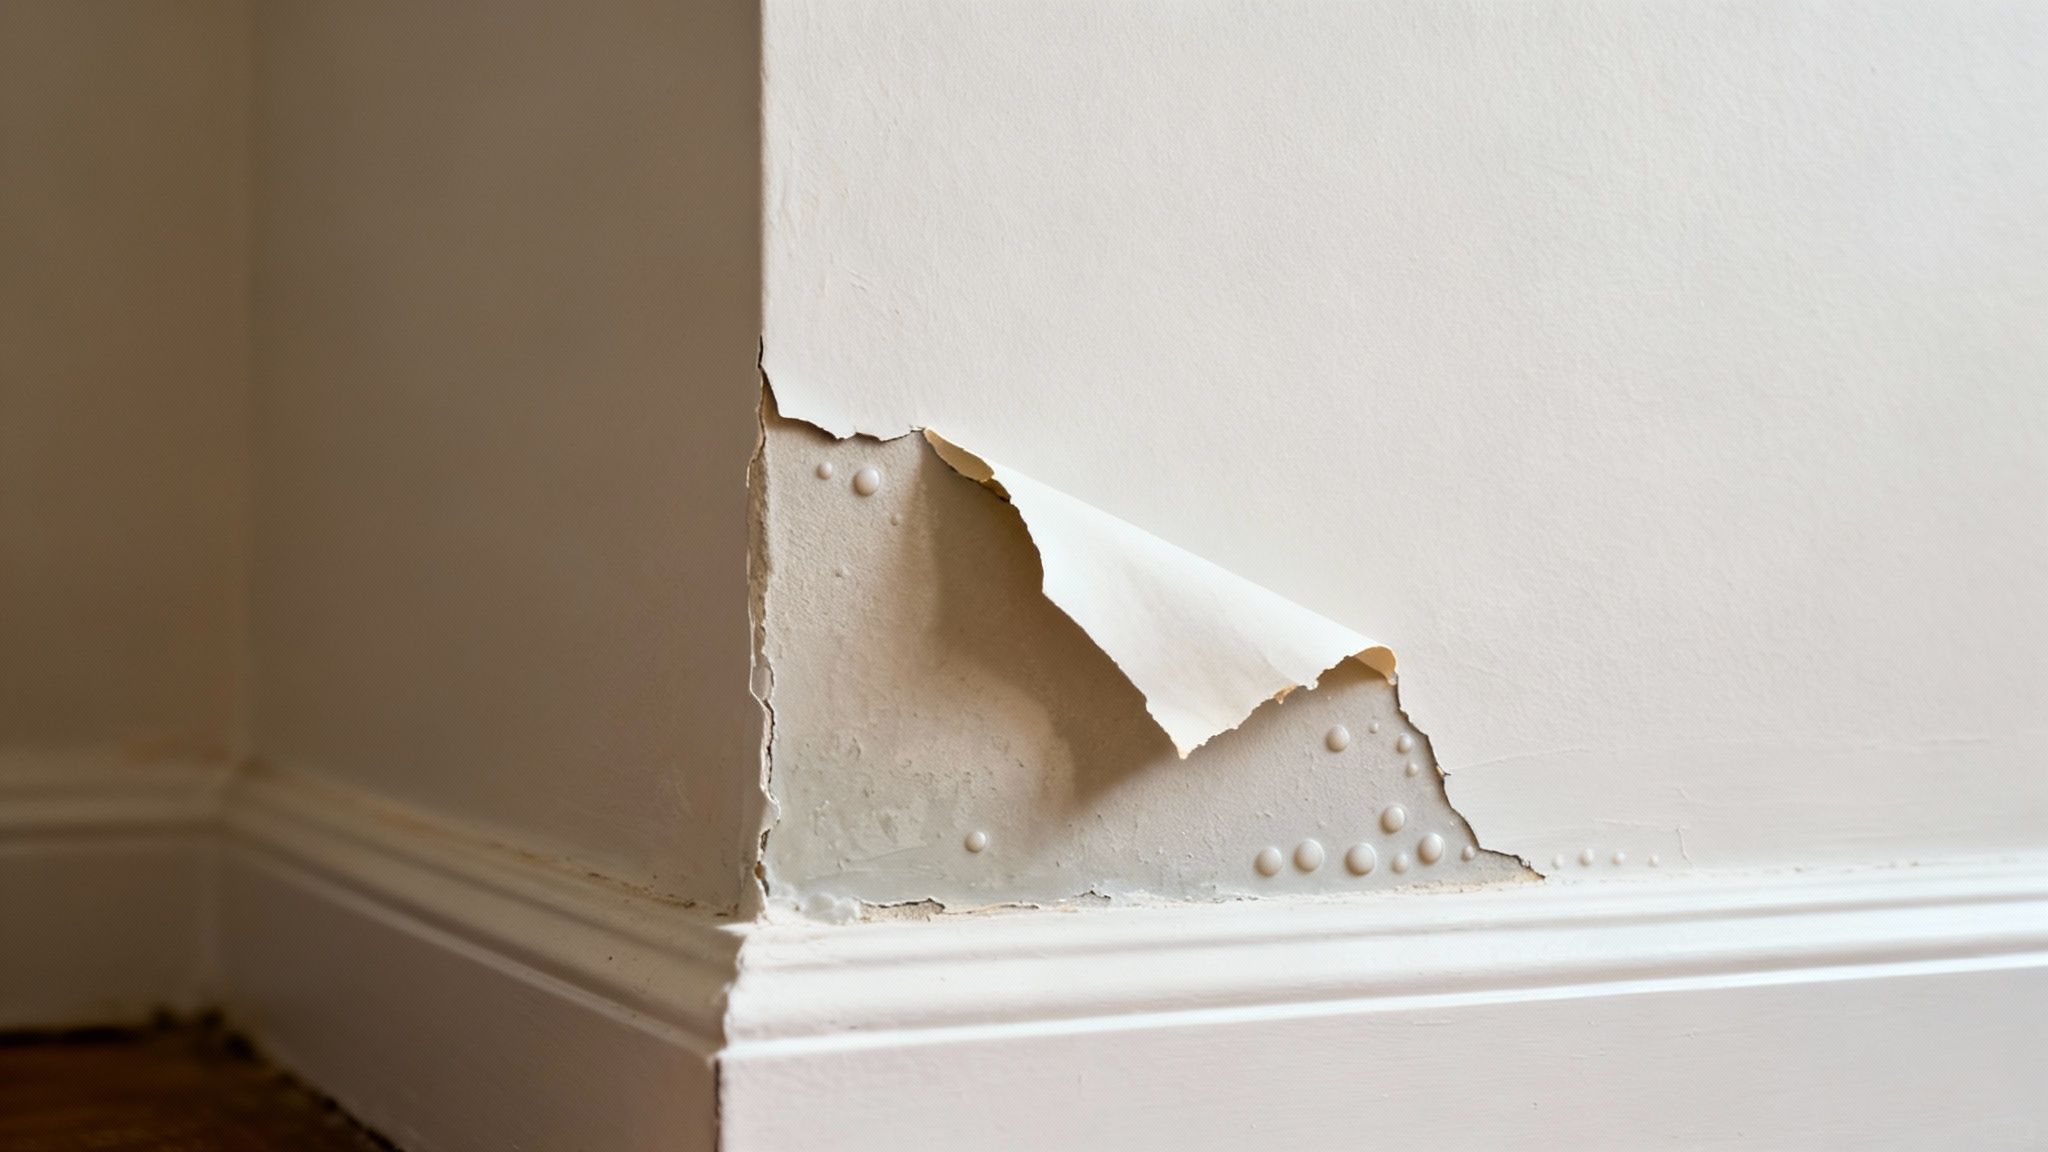
When paint or wallpaper begins to bubble, peel, or flake away from the wall, it's a classic sign of underlying moisture issues. Water that has saturated the drywall or plaster from behind works its way outward, breaking the adhesive bond between the wall's surface and its finish. This separation is a clear indicator that water has not just reached the wall but has thoroughly penetrated the substrate.
This type of damage is often caused by persistent high humidity, condensation, or a direct leak. As moisture accumulates behind the finish, it creates pressure and degrades the materials, forcing the paint or wallpaper to lift and detach. Common examples include paint peeling below a leaky roofline, wallpaper lifting near the seams in a poorly ventilated bathroom, or paint bubbling around a window frame where condensation collects.
How to Inspect for Peeling Finishes
Carefully examining peeling areas can help you assess the severity and potential source of the water intrusion. A targeted inspection is crucial for understanding the scope of the problem.
- Feel the Texture: Gently press on any bubbles or blisters in the paint. If they feel soft or squishy, it's a strong indication of trapped moisture and an active leak. Note if the underlying drywall feels soft as well.
- Check High-Moisture Zones: Focus your inspection on areas prone to moisture, such as bathrooms, laundry rooms, kitchens, and basements. Look closely at wall sections near plumbing lines, vents, and windows.
- Examine the Edges: Look at the edges of the peeling paint or wallpaper. Is the underlying wall surface discolored or showing signs of mold or mildew? This can help determine how long the moisture has been present.
Pro-Tip: Before attempting any cosmetic repairs, use a moisture meter to test the affected wall. Repainting or re-papering a wall that is still damp will fail quickly and trap moisture, leading to rot and mold growth within the wall cavity.
Addressing peeling paint or wallpaper requires more than just scraping and repainting. It's essential to first find and fix the source of the moisture. At Northpoint Construction, our team serves the Orem and Provo areas by performing comprehensive moisture diagnostics to ensure the root cause is eliminated. We then properly dry the structure and restore your walls, guaranteeing a lasting, high-quality finish.
5. Musty Odors
Sometimes, the first indication of water damage in walls isn't visual but olfactory. A persistent musty or moldy smell is a strong sign that moisture has infiltrated a wall cavity, creating the perfect environment for microbial growth. This distinct, earthy odor is caused by volatile organic compounds (VOCs) released by mold and mildew as they digest organic materials like drywall paper and wood framing.
This smell is one of the most critical signs of water damage in walls because it often appears long before physical damage like stains or peeling paint becomes visible. An odor signifies an ongoing moisture problem that is actively fostering biological growth. Ignoring this warning sign allows hidden mold to proliferate, potentially compromising indoor air quality and leading to more significant structural issues over time. It’s common in areas prone to dampness, like basements, crawl spaces, or bathrooms with slow pipe leaks.
How to Investigate Odors
Trusting your sense of smell is the first step, but a methodical investigation is necessary to pinpoint the problem area.
- Pinpoint the Source: Try to identify the room or specific wall where the smell is strongest. Get close to the wall and smell different sections, including near the floor, around outlets, and under windows.
- Confirm with Others: If you're unsure, ask a family member or friend to confirm the odor. Sometimes we become accustomed to smells in our own homes.
- Check for Contributing Factors: Look for signs of high humidity, poor ventilation, or recent water events. Musty smells are especially common in basements, and proper moisture control is key to preventing them. For more on creating a healthy environment in below-grade spaces, explore our tips for basement home office conversions.
- Use a Moisture Meter: If you've narrowed down the location, a non-invasive moisture meter can confirm the presence of elevated moisture levels inside the wall without needing to create a hole.
Pro-Tip: If the musty smell is strongest when the HVAC system turns on, the issue could be within your ductwork or around the air handler. This requires a different type of professional inspection to rule out condensation leaks or mold within the system itself.
A musty odor is your home's early warning system for a hidden moisture problem. It should never be ignored or simply covered up with air fresheners. At Northpoint Construction, we use advanced diagnostic tools, including thermal imaging and moisture meters, to accurately locate the source of hidden water intrusion in Orem and Provo homes. Our team doesn’t just eliminate the mold; we address the root cause of the moisture to ensure the problem is solved for good.
6. Visible Efflorescence (Salt Deposits)
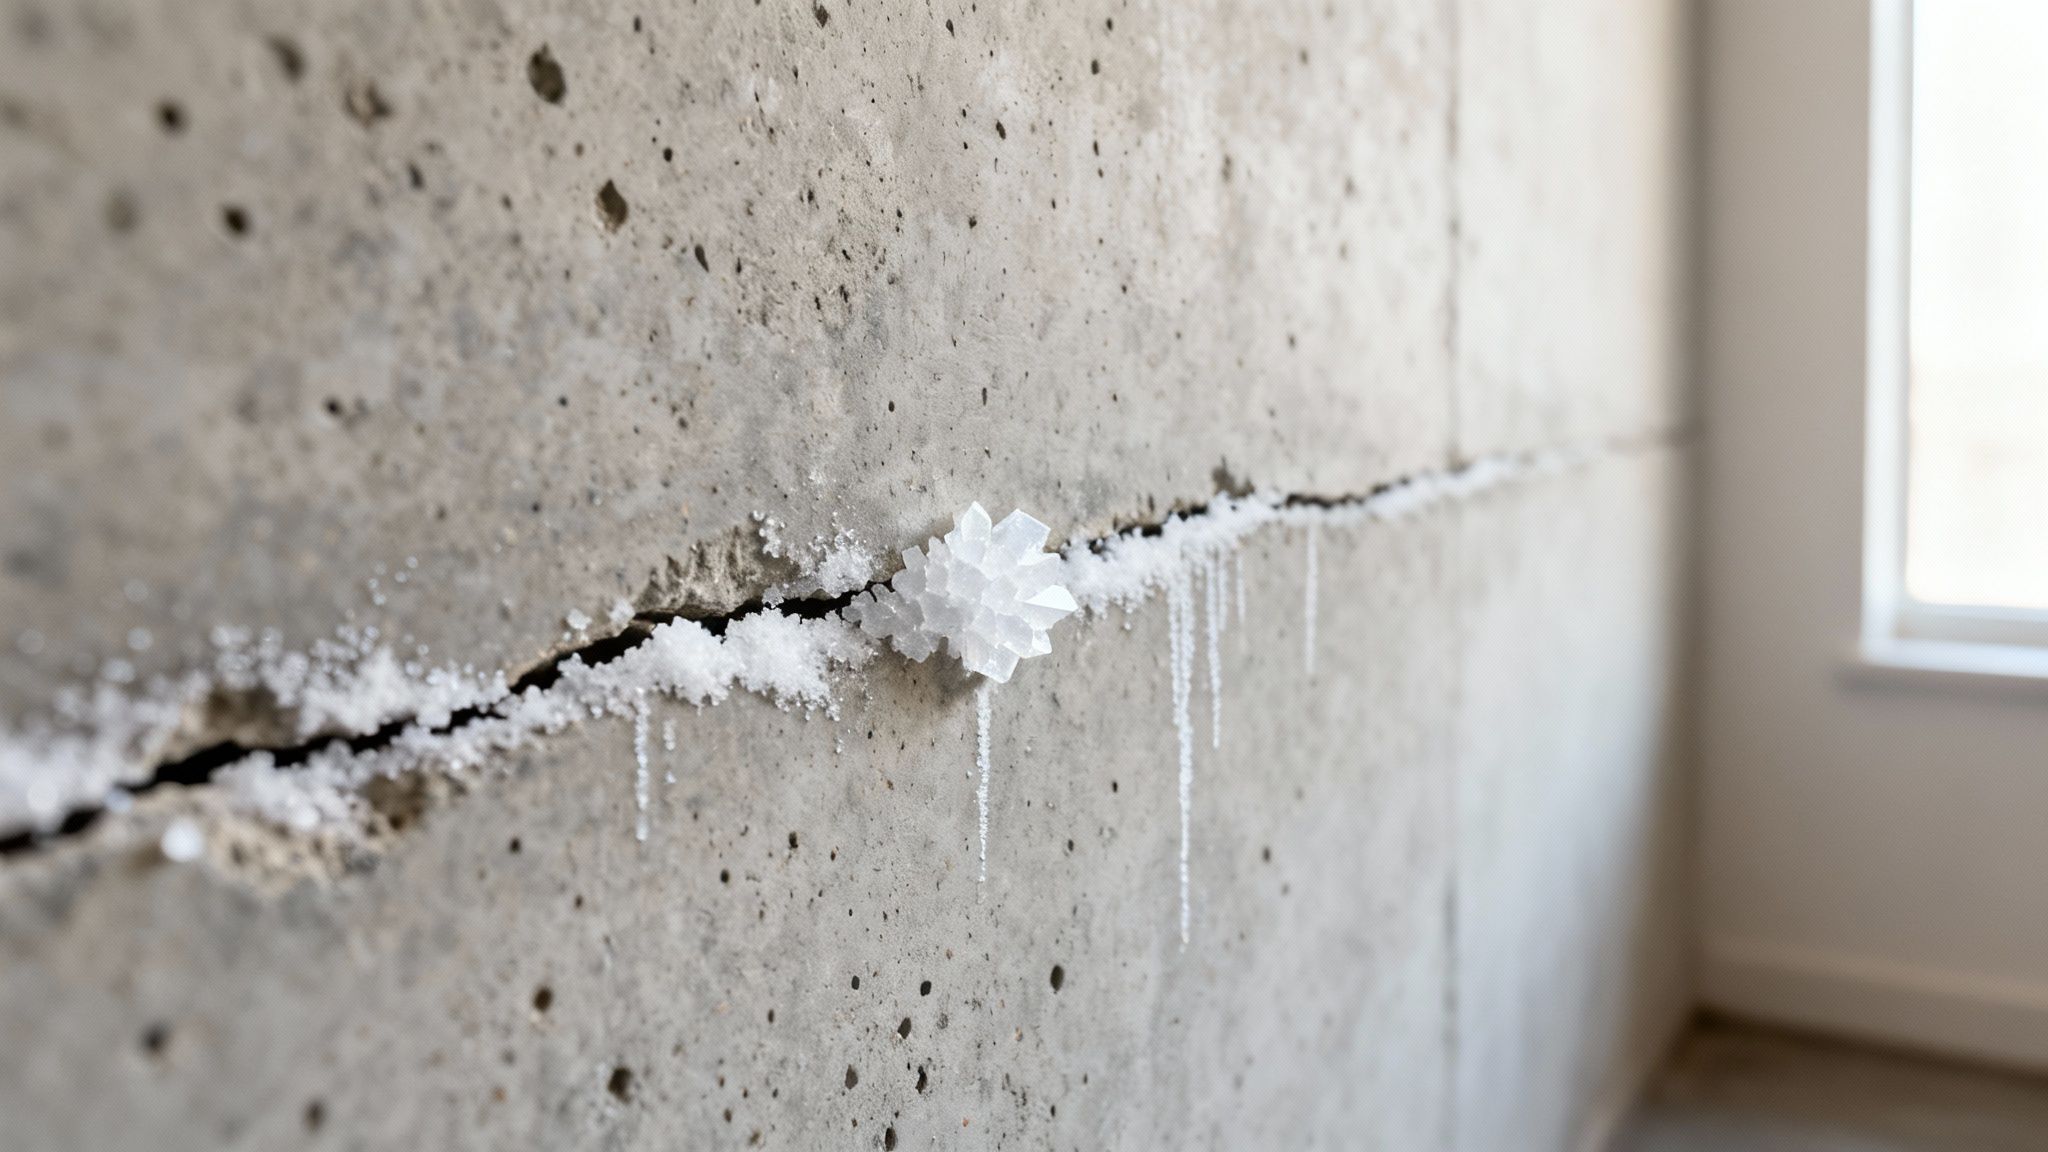
Efflorescence is a white, chalky, or crystalline substance that appears on the surface of porous materials like concrete, brick, or stone. These deposits are the mineral salts left behind when water travels through the wall material and evaporates from the surface. While the salt itself is typically harmless, its presence is a definitive sign of moisture intrusion and one of the clearest signs of water damage in walls, especially in basements and foundation areas.
This powdery residue indicates that water is actively moving through your wall structure, dissolving natural salts within the concrete or masonry, and carrying them to the surface. Ignoring efflorescence means ignoring an ongoing moisture problem that can lead to spalling (flaking of the surface), structural degradation of the masonry, and a persistently damp environment ideal for mold growth. It is a tell-tale sign that your foundation's defenses against groundwater may be compromised.
How to Inspect for Efflorescence
Identifying efflorescence requires careful inspection of masonry and concrete surfaces, particularly in below-grade areas of your home.
- Check Foundation and Basement Walls: Systematically examine interior and exterior foundation walls, especially near the floor, in corners, and around any existing cracks. The deposits often look like a fine white powder or can form larger, crystalline structures.
- Use a Stiff Brush: Gently brush the white substance with your hand or a stiff-bristled brush. Efflorescence will typically crumble into a powder. If it is slimy or soft, you may be dealing with white mold instead, which requires a different remediation approach.
- Feel for Dampness: Place your hand on the wall where the deposits are present. The area will often feel damp or cold to the touch, confirming the presence of moisture within the wall material.
Pro-Tip: Mark an area of efflorescence with chalk after you clean it off. If the white deposits return within a few days or weeks, you have a persistent and active water intrusion problem that needs professional diagnosis.
Simply cleaning the mineral deposits away will not solve the problem; the efflorescence will return as long as the water source remains. Understanding how to properly seal and protect these vulnerable areas is critical. To dive deeper into solutions, you can explore our comprehensive guide on how to waterproof basement walls. At Northpoint Construction, we specialize in diagnosing moisture migration in Orem and Provo homes. We address the root cause, whether it's poor grading, hydrostatic pressure, or foundation cracks, ensuring a permanent solution to protect your home’s structural integrity.
7. Warping and Buckling Drywall
Beyond discoloration, one of the more alarming signs of water damage in walls is physical deformation. When drywall absorbs moisture, its inner gypsum core and outer paper facing swell and expand. This expansion is often uneven, causing the surface to warp, buckle, or develop a wavy texture that permanently alters the flat plane of your wall.
This structural change indicates prolonged or significant water exposure. Unlike a simple stain that might result from a minor, quick leak, warping suggests that moisture has thoroughly saturated the drywall panel, compromising its integrity. You might notice this effect near the base of a bathroom wall, around a persistently leaking kitchen sink, or in basements where ambient humidity and water intrusion are common problems.
How to Inspect for Warping
Detecting and measuring warped drywall requires a keen eye and the right tools. The damage can range from subtle waves to dramatic bulges that are impossible to miss.
- Use a Straightedge: Place a long level or any known straightedge flat against the wall. Move it across the suspicious area and look for gaps between the wall and the tool. This will immediately reveal any bowing or buckling.
- Measure the Deformation: If you find a warp, use a tape measure to quantify the depth of the curve at its deepest point. This measurement helps professionals assess the severity of the damage.
- Check Seams and Joints: Pay close attention to the seams where two pieces of drywall meet. Water damage often causes the joint tape to lift or bubble as the underlying material swells, creating a clear line of failure.
Pro-Tip: Take photos of the warped area with a straightedge held against it to document the extent of the problem. Monitoring these photos over time can help determine if the moisture issue is ongoing and worsening.
Warped or buckled drywall cannot be repaired by simply patching or painting. The structural integrity of the material is compromised, and the affected sections must be cut out and replaced. At Northpoint Construction, our team expertly handles these situations in the Orem and Provo areas. We not only replace the damaged drywall but also identify and resolve the source of the moisture, ensuring your walls are restored to a flat, stable, and lasting condition.
8. Soft or Deteriorated Base Trim and Flooring
When water travels down the inside of a wall, its journey often ends at the floor. This makes your baseboards, trim, and adjacent flooring materials some of the first areas to show severe signs of water damage in walls. The damage manifests as physical changes to the material itself, indicating that moisture has saturated the area and is causing structural breakdown.
As wood trim and baseboards absorb water, the fibers swell and soften, losing their rigidity. Over time, this can lead to rot and decay, making the wood feel spongy or crumble when pressed. For other flooring types, like laminate or vinyl, the moisture causes them to warp, buckle, or separate at the seams. These are not just cosmetic issues; they are clear indicators that water damage has progressed from the wall cavity to the surrounding structures, posing a significant threat to your home's integrity.
How to Inspect for Softness and Deterioration
A hands-on inspection is crucial for detecting this type of damage, as it may not always be visually obvious in its early stages. Be thorough and check all areas where walls meet the floor.
- Perform a Press Test: Gently press your thumb or a blunt object against the baseboards and trim, especially at the bottom edge and corners. Pay attention to any sections that feel soft, spongy, or give way under pressure.
- Check for Physical Changes: Look for visible swelling, warping, or discoloration along the base of the wall. Inspect flooring for buckling, peeling, or separation, particularly near bathrooms, kitchens, and exterior walls.
- Use Your Nose: A persistent musty smell near the floor or baseboards is a strong sign that moisture has been present long enough to encourage microbial growth within the damp materials.
Pro-Tip: If you can safely do so, gently pry back a small section of the baseboard in a suspected area. This can reveal hidden signs of moisture, mold, or decay on the back of the trim and the drywall behind it. Always document any damage with photos before and after.
Addressing soft trim and damaged flooring requires more than just replacing the visible materials. The subfloor must be thoroughly inspected and dried out to prevent mold growth and structural rot. In areas like basements, investing in proper sealing is essential for long-term protection. Understanding the best waterproofing for your basement can prevent future occurrences. At Northpoint Construction, we serve homeowners in Orem and Provo by not only replacing damaged materials but also ensuring the underlying structure is sound and protected from future water intrusion.
8 Signs of Wall Water Damage — Comparison
| Discoloration and Staining | Low — visible by eye | Visual inspection, flashlight, camera, optional moisture meter/thermal camera | Water penetration; mineral deposits or past leaks (may be historic) | Ceilings, below gutters/downspouts, walls near plumbing, basements | Easy to spot and document; helps locate intrusion and track progression |
| Soft or Swollen Drywall | Medium — tactile check needed | Hands/presence check, moisture meter, professional assessment | Active or prolonged moisture absorption; weakened drywall | Around showers/sinks, ceilings, basements, crawl spaces | Indicates current moisture and severity; helps prioritize urgent repairs |
| Mold and Mildew Growth | Low–Medium — visible/odorous | Visual inspection, air/surface sampling, PPE (masks, gloves), HEPA cleaners | Active moisture retention and biological contamination; health risk | Bathrooms, basements, attics, window frames, poorly ventilated spaces | Distinct indicator of active moisture; prompts immediate remediation for health reasons |
| Peeling Paint and Wallpaper | Low — visible surface change | Visual inspection, moisture meter before repair, scraping tools | Surface/substrate moisture causing adhesive failure; surface penetration | Bathrooms, near windows/roofs, below leaks, basements | Obvious visual cue for affected areas; helps identify surfaces needing moisture control |
| Musty Odors | Low — subjective sensory detection | Sense of smell, corroboration by others, moisture meter, odor tracing methods | Hidden moisture and microbial growth in cavities or behind finishes | Basements, attics, wall cavities, crawl spaces | Early warning of hidden problems; requires no special equipment to detect |
| Visible Efflorescence (Salt Deposits) | Low — visible on porous materials | Visual inspection, wire brush, moisture meter, sealing/repair materials | Water movement through masonry/concrete; persistent or repeating moisture paths | Basement/foundation walls, exterior brick, concrete blocks | Clearly shows moisture paths on masonry; signals persistent water intrusion |
| Warping and Buckling Drywall | Medium — visible deformation, measure for extent | Visual inspection, level/straightedge, moisture meter, professional evaluation | Severe or prolonged exposure causing structural deformation | Bathrooms, kitchens, basements, areas near leaks or flooding | Obvious structural indicator that signals urgent, often full replacement repairs |
| Soft or Deteriorated Base Trim and Flooring | Medium — tactile and visual inspection | Hands, moisture meter, floor access, possible subfloor inspection | Water has migrated beyond wall into trim/flooring; advanced damage | Baseboards, flooring near sinks, entryways, basements | Demonstrates extent of penetration and duration; informs scope of replacement and subfloor repair |
Final Thoughts
We've explored the definitive signs of water damage in walls, from the obvious discoloration and peeling paint to the more subtle yet equally destructive musty odors and efflorescence. Understanding these indicators is not just about home maintenance; it's about protecting your property's structural integrity, your family's health, and your financial investment. Ignoring these signals allows a small, manageable issue to escalate into a complex, expensive, and potentially hazardous problem. The key takeaway is that water is a persistent and powerful force, and its hidden impact requires a vigilant and proactive approach from any property owner.
From Identification to Action: Your Proactive Response
Recognizing the problem is only the first step. The real value lies in responding swiftly and intelligently. Your immediate actions can significantly mitigate the extent of the damage. This means not just observing a stain, but also feeling the drywall for softness, using a moisture meter to confirm your suspicions, and tracing the moisture back to its source. Every sign we discussed tells a part of a larger story about your home's health.
- Don't Assume, Investigate: A small, faint stain might seem insignificant, but it could be the tip of the iceberg, hinting at a slow leak within the wall cavity that has been active for months.
- Trust Your Senses: A persistent musty smell is one of the most reliable indicators of hidden moisture and potential mold growth, even when no visible signs are present. Never dismiss an unusual odor.
- Act with Urgency: Time is the most critical factor. The longer materials remain wet, the greater the risk of mold proliferation (often within 24-48 hours) and irreversible structural decay.
Key Insight: The most dangerous signs of water damage in walls are often the ones you can't easily see. A proactive inspection strategy, combining visual checks with tactile and sensory evaluation, is your best defense against long-term, catastrophic damage.
Mastering Your Property's Defense System
Ultimately, mastering the identification of water damage transforms you from a reactive homeowner into a proactive property guardian. This knowledge empowers you to catch issues early, make informed decisions, and engage professionals before a minor leak requires a major renovation. Once you've identified potential water damage, understanding the next steps is crucial, including exploring professional water damage restoration services to ensure the problem is handled correctly from the start. Your home is a complex system, and the walls are its protective skin. Learning to read the signs of distress on that skin is an essential skill for ensuring its longevity and safety for years to come.
Don’t let water damage compromise your Orem or Provo area property. For expert diagnostics, professional repairs, and complete restoration, trust the team at Northpoint Construction. We specialize in identifying the source of water intrusion and restoring your walls to pristine condition, ensuring the safety and value of your home or commercial building. Visit Northpoint Construction to schedule your consultation today.