

So, you're ready to build a bar in your basement. Fantastic idea. The process really boils down to four main phases: planning your layout and budget, handling the heavy-duty construction like framing and wiring, picking the right materials, and finally, adding all the cool stuff like appliances and finishes.
But here’s the secret I’ve learned from countless projects: the real success of your basement bar is decided long before you ever swing a hammer. It’s all in the planning.
Laying the Groundwork for Your Basement Bar
Turning that dark, unused corner of your home into the go-to spot for friends and family is an incredibly rewarding project. But getting it right means starting with a brutally honest look at the space you have. Before you start fantasizing about granite countertops and craft beer on tap, let's get practical.
Assess Your Space and Define Your Vision
First thing's first: moisture. Go downstairs and really look around. Do you see any damp spots on the walls? Is there a musty smell in the air? Any of that chalky white powder on the concrete? If you see any of these red flags, stop right there. You have to address any water issues with proper sealing and a good dehumidifier. Building a gorgeous bar over a damp foundation is just asking for mold, warped wood, and a whole lot of wasted money. It's a non-negotiable first step.
Once you’re confident the space is dry, it’s time for the fun part: defining your vision. What is this bar for?
- Game-Day Hub: Think open sightlines to multiple TVs, durable countertops that can handle spills, and plenty of seating for the whole crew.
- Cocktail Lounge: This is all about atmosphere. You'll want to focus on mood lighting, elegant finishes, and specialized storage for all your cool glassware.
- Family Hangout: Versatility is key here. Think easy-to-clean surfaces, storage for board games, and maybe even a popcorn machine next to the beverage fridge.
Your bar's main purpose will drive every single design decision you make from here on out.
Set a Realistic Budget
With a clear vision, you can start putting some numbers down on paper. And I mean all the numbers, not just the cost of lumber and a mini-fridge. A real-world budget has to account for everything from the hidden costs of plumbing and electrical work to the very last bar stool. For a more in-depth look at where the money goes, it’s worth exploring a detailed breakdown of what a basement remodel costs.
One of the biggest mistakes I see people make is forgetting about the finishing costs. Lighting fixtures, a cool backsplash, cabinet hardware, and seating can add up fast. Seriously, plan on these items taking up 20-30% of your total budget. Factor them in from day one.
Before you start building, it's helpful to run through a checklist to make sure you've covered all your bases. This simple tool can save you from major headaches down the road by forcing you to think through the details upfront.
Initial Basement Bar Planning Checklist
| Moisture Check | Are there any signs of water intrusion or dampness? | Perform a visual inspection and consider a professional assessment if needed. |
| Vision & Purpose | What is the primary function of the bar? (e.g., sports, lounge) | Write a one-sentence "mission statement" for your bar. |
| Layout & Flow | How will people move around the space? Where is existing plumbing? | Sketch a rough floor plan, noting traffic patterns and utility locations. |
| Budgeting | Have you accounted for materials, labor, and finishing touches? | Create a detailed spreadsheet with estimated costs for every line item. |
| Permits & Codes | Does your project require local building permits for electrical or plumbing? | Contact your local building department to understand requirements. |
This checklist isn't exhaustive, but it's the perfect starting point to ensure you're building on a solid foundation, both literally and figuratively.
This kind of home upgrade is more popular than ever. The home remodeling market is a massive industry, and it's projected to keep growing as more people invest in their living spaces. In fact, nearly 18% of larger homes now have finished basements, and you can bet a lot of them feature a custom entertainment space like a bar. What you're doing isn't just building a place to hang out—you're adding a highly desirable feature to your home.
Designing a Bar That Fits Your Space and Style
Okay, with the planning out of the way, we get to dive into the fun part. This is where your vision starts to take shape on paper, translating your ideas into a real-life blueprint. The decisions you make here will define the entire vibe and function of your basement bar for years.
The goal isn't just to plop a bar into an empty corner. It's about creating an experience that feels right for how you plan to use it.
First things first: the layout. This is almost always dictated by the "bones" of your basement—those support columns, low-hanging ductwork, and existing plumbing lines aren't going anywhere. The secret to a great design is working with these quirks, not fighting them. When you embrace the existing structure, the layout feels intentional and integrated, not just shoehorned in.
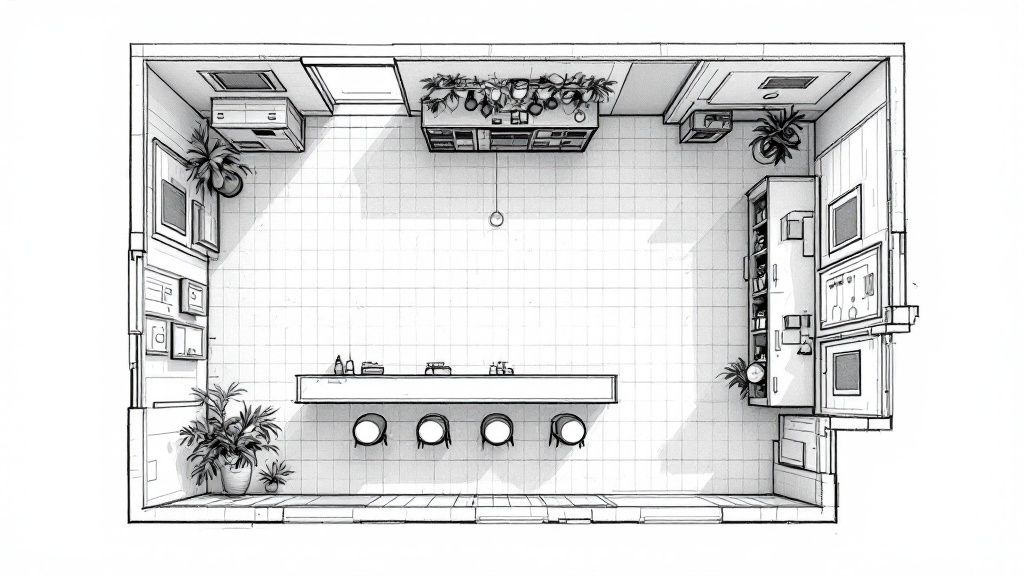
Choosing Your Bar Layout
The actual shape of your bar sets the stage for the whole room. Each design fosters a different kind of social dynamic and changes how you'll work behind it.
- The Straight Bar: This is your classic, no-fuss design. It’s incredibly space-efficient, making it a go-to for long, narrow basements or for placing flush against an empty wall. A straight bar gives you that authentic pub feel, creating a clear line between the "bartender" and the guests.
- The L-Shaped Bar: Got a corner you can claim? The L-shape is a fantastic option. It naturally pulls people together, creating a more social and inclusive atmosphere where guests can face each other. That corner also gives you a ton of extra workspace for mixing drinks.
- The Corner Bar: If you're tight on space, this is your champion. Tucking a bar neatly into a corner frees up the maximum amount of floor space for everything else, whether it’s a pool table, a comfy seating area, or a home theater setup.
Think about your entertaining style. Do you like being in the middle of the action while you're mixing cocktails? An L-shape is probably your best bet. Or is your main goal to fit as many people as possible? A long, straight bar will maximize your seating capacity.
A small detail that makes a huge difference is ergonomics. The standard bar height is 42 inches from the floor to the countertop. This isn't an arbitrary number; it's designed for comfort whether you're standing or sitting on a typical 30-inch bar stool.
You'll also want to leave about 10-12 inches of legroom between the stool's seat and the underside of the bar. Nothing's worse than having your guests knock their knees against the bar all night.
Nailing Down Your Aesthetic
With the layout locked in, you can now focus on the personality of your bar. The materials you choose—from the countertop to the cabinet pulls—are what will bring your vision to life. This is your chance to create a specific mood, whether you’re dreaming of a rustic pub, a sleek modern lounge, or a cozy industrial hideaway.
A great way to get started is by putting together a mood board. Pin images of bars you love, gather paint chips, collect material samples, and find lighting fixtures that catch your eye. Seeing it all together is the best way to ensure your design feels cohesive. For some incredible visual inspiration on how different layouts and materials look in the real world, browsing a gallery of basement kitchen and bar ideas can really get the creative juices flowing.
Common Design Themes to Consider
- Industrial Chic: This style leans into the raw, unfinished feel of many basements. Think exposed brick veneer, a polished concrete countertop, and shelves made from black iron pipes. Top it off with some vintage-style Edison bulbs, and you've got a look that's durable, stylish, and surprisingly budget-friendly.
- Modern and Minimalist: All about clean lines and uncluttered surfaces. Picture a sleek waterfall countertop made of quartz, handle-less flat-panel cabinets, and subtle recessed LED lighting. It’s sophisticated and smooth.
- Rustic Farmhouse: If you want your bar to feel warm and inviting from the moment you walk in, this is the theme for you. A thick butcher block countertop, shiplap on the bar front, and comfy upholstered stools create a space that feels like a big hug.
- Classic Pub: To capture that traditional tavern vibe, go with dark woods for your bar rail and cabinetry. Add a brass foot rail, some leather-upholstered stools, and classic pendant lights to complete the authentic pub experience.
Your theme will be your guide for every choice that follows, right down to the faucet you pick and the art you hang on the walls. By weaving your layout and style together from the start, you're not just building a bar—you're creating your home's new favorite destination.
Tackling Permits and Kicking Off Construction
With your design finalized and a clear vision in mind, it's easy to get excited and want to start swinging a hammer. But hold on for a moment. This is a critical checkpoint where a bit of paperwork and planning can save you a world of hurt down the line. Before you even think about buying lumber, you need to navigate the world of building permits and get the foundational construction right.
Many homeowners ask me, "Do I really need a permit for this?" The answer is almost always yes. If your project involves adding new electrical circuits, running plumbing lines for a wet bar, or even just putting up new walls, you're going to need one. These rules aren't just bureaucratic red tape; they exist to make sure the work is safe. A quick trip to your local building department's website will tell you exactly what you need to do.
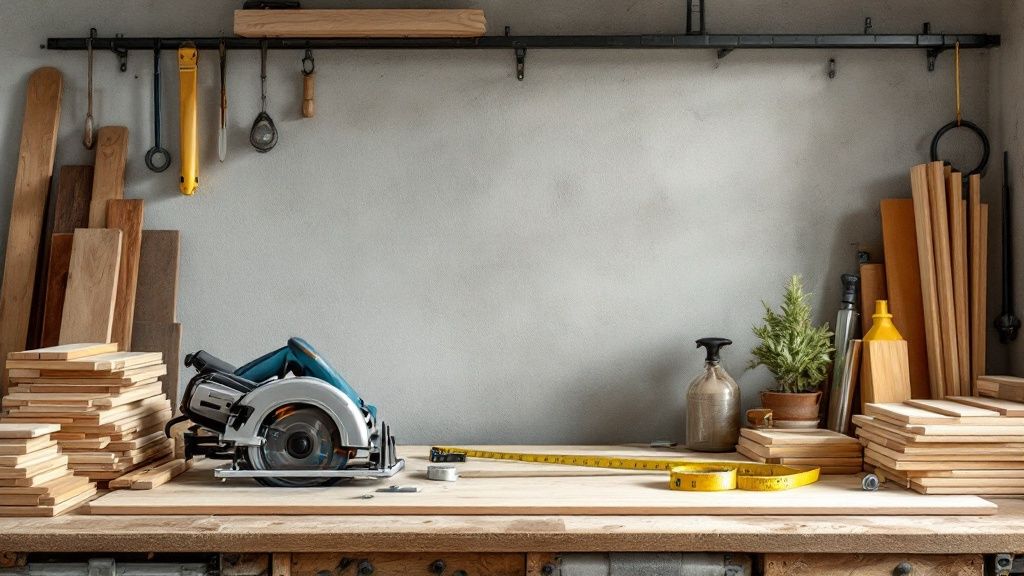
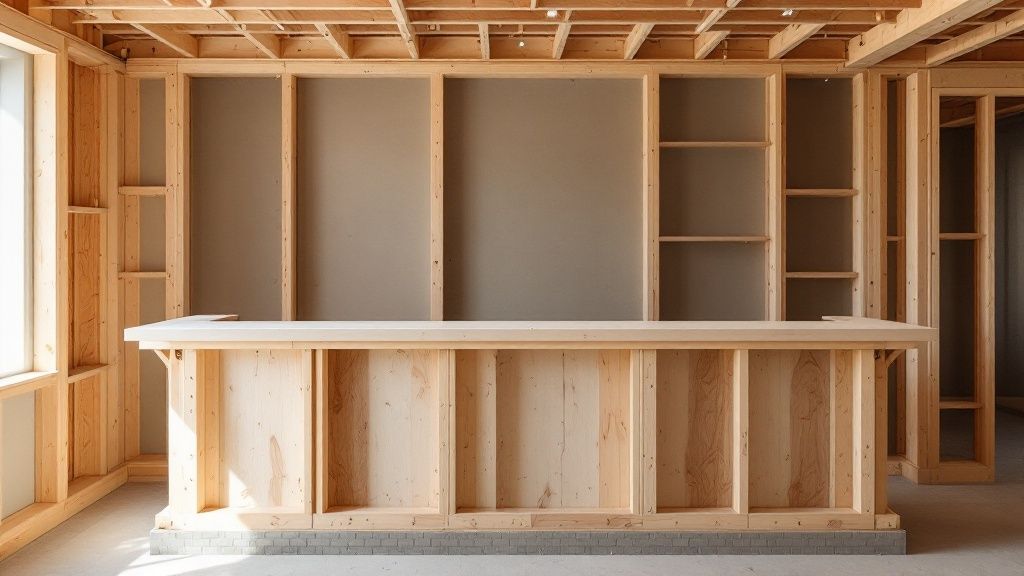
Framing: Bringing Your Bar to Life
Once you have that permit in hand, it's time for the fun to begin. Framing is where the skeleton of your bar really takes shape, and you can finally see your design move from paper to reality. Using standard 2x4s and wood screws, you'll build out the main bar structure, any half-walls, and the back bar where your shelves and appliances will live.
Now, here’s a pro tip that’s absolutely crucial for any basement project: you must create a barrier between your wood framing and the concrete floor.
- Use a Pressure-Treated Sill Plate: The very bottom piece of wood that touches the concrete has to be pressure-treated. This lumber is infused with chemicals that fight off rot and bugs, which is essential since concrete can wick moisture.
- Add a Sill Sealer: Before you even lay down that bottom plate, roll out a thin foam sill sealer. This stuff is cheap, but it provides an invaluable second layer of defense, stopping moisture from creeping up into your framing.
Don't skip these steps. Seriously. They're the key to making sure your bar is built to last.
The Nitty-Gritty: Plumbing and Electrical
This is where things can get tricky, and honestly, it’s where I recommend most DIYers call in a professional plumber and electrician. If you’re building a wet bar, you’ll be running hot and cold water supply lines plus a drain. Tapping into your home's existing plumbing isn't a simple weekend job; it requires a deep understanding of proper drain slopes and venting to work correctly and pass inspection.
Electrical work is even more serious because of the safety risks. Your bar fridge, ice maker, and blender are going to pull a lot more power than a lamp.
A good rule of thumb is to run at least two dedicated 20-amp circuits just for the bar area. One circuit should be exclusively for your refrigerator or kegerator—their compressors can cause voltage drops that trip breakers on a shared circuit. The other can power your outlets, lighting, and smaller appliances.
The time to plan for all of this is while the walls are still open. It's a thousand times easier to run wires and pipes through bare studs than it is to fish them through finished drywall. This is also your chance to add cool features like under-cabinet LED lighting or outlets with built-in USB ports for phone charging.
Finishing Touches: Walls and Insulation
Before you start hanging drywall, think about insulation. Even if your main basement walls are insulated, adding insulation to your new bar walls is a great move for sound dampening. It can help create a more intimate, cozy bar atmosphere, separate from the rest of the basement.
When you're ready for drywall, make sure to grab moisture-resistant drywall (often called "green board") for any wall space near the sink. Spills and splashes are inevitable in a bar, and this extra protection is well worth it.
Basements are a fantastic canvas for projects like this, but they are becoming less common. Only about 16.6% of new homes in the U.S. now include a full or partial basement, mostly in colder regions. Still, the average finished basement offers around 1,113 square feet of potential—plenty of space to build the home bar of your dreams. If you're interested in housing trends, you can read more in this analysis of home foundation types.
Selecting Materials That Look Great and Last
With the framing in place and the plumbing and electrical roughed in, you’ve reached the fun part: choosing the materials that will give your basement bar its signature look. This is where the personality of your space truly comes to life. Your decisions here don't just affect the aesthetics; they determine how your bar will stand up to years of good times.
Remember, a basement has its own unique set of challenges. Spills are inevitable, and moisture is always a consideration. That means your material choices need to be as practical as they are stylish, prioritizing durability and ease of cleaning.
Choosing the Perfect Countertop
The countertop is the undisputed star of the show. It’s the surface where drinks are mixed, stories are told, and friends gather. It needs to be tough enough to handle it all while looking fantastic.
Let's walk through some of the best options I've seen used in basement bars:
- Quartz: If you're looking for a virtually indestructible, zero-maintenance surface, quartz is tough to beat. As an engineered stone, it’s non-porous, meaning you won’t have to panic about red wine spills or citrus juice. It never needs sealing and comes in countless designs that can perfectly mimic high-end marble without the headache.
- Butcher Block: For a cozy, rustic, or even industrial feel, nothing beats the warmth and character of wood. A butcher block top adds instant charm and is often a more budget-friendly choice. Just know it requires a good food-safe sealant to protect it from water rings and stains, and you'll have to reapply it every so often to keep it looking its best.
- Polished Concrete: Want a sleek, modern look that's completely unique? Polished concrete is a fantastic option. You can customize the color, thickness, and even embed objects into it for a one-of-a-kind design. It's incredibly durable, but it is porous by nature, so a high-quality sealer is essential to prevent staining.
- Granite: A timeless classic for a reason. Granite offers a high-end, natural stone look and is incredibly heat-resistant and durable. However, like other natural stones, it’s porous and will need to be sealed every year or so to keep it from absorbing spills. That's a key maintenance step you can't skip in a bar setting.
When choosing, think about how you'll really use the space. If you plan on hosting lively parties and don't want to stress about coasters, the investment in quartz pays for itself in peace of mind. If you appreciate the way natural materials age and don't mind a little upkeep, the evolving beauty of a butcher block might be exactly what you're looking for.
When you're building a bar, the countertop is more than just a surface—it's the centerpiece. Making the right choice involves balancing aesthetics with the practical demands of a basement environment.
Bar Countertop Material Comparison
| Quartz | Non-porous (stain-proof), durable, zero maintenance, huge design variety | Higher upfront cost, can be damaged by extreme heat | $50 - $150 |
| Butcher Block | Warm, natural look, affordable, can be sanded and refinished | Requires regular sealing, susceptible to water damage and scratches | $40 - $100 |
| Polished Concrete | Highly durable, completely customizable, modern industrial aesthetic | Porous and requires sealing, can be prone to hairline cracks, heavy | $65 - $135 |
| Granite | Unique natural patterns, heat and scratch-resistant, adds value | Porous and needs periodic sealing, can be expensive, limited color palette | $40 - $200+ |
Ultimately, the best countertop is one that fits your budget, complements your design, and can handle your hosting style without constant worry.
Finding the Right Flooring for a Basement Bar
Basement flooring has to pull double duty: it needs to look great while standing up to moisture. Between spilled drinks, potential leaks from a sink or ice maker, and the natural humidity of a below-grade space, some materials are just asking for trouble. Solid hardwood, for instance, is a major gamble down here.
Luxury Vinyl Plank (LVP) has become the undisputed champion of basement flooring for good reason. It’s 100% waterproof, tough as nails against dents and scratches, and available in an incredible array of realistic wood and stone looks. Plus, it’s a bit softer underfoot than tile, which your feet will thank you for after a long night of hosting.
Porcelain tile is another fantastic, totally waterproof choice. It's incredibly durable and a breeze to clean, making it ideal for the high-traffic area right around the bar. For a full breakdown of your options, our guide on the best basement flooring options can help you make the perfect choice.
The Impact of Material Costs on Your Budget
Don't underestimate how much material costs can sway your overall project budget. Globally, the market for PC steel bar—a key component for reinforcing concrete foundations—is projected to hit $8.5 billion by 2033. We've also seen major price swings right here in the U.S., with construction material costs jumping nearly 27% one year and another 12.6% the next.
These market forces directly affect what it costs to build your basement bar, which is why having a solid budget from the start is so important. You can dig deeper into these trends in this detailed industry report.
To give you an idea of where the money goes during the initial build-out, take a look at this typical breakdown:
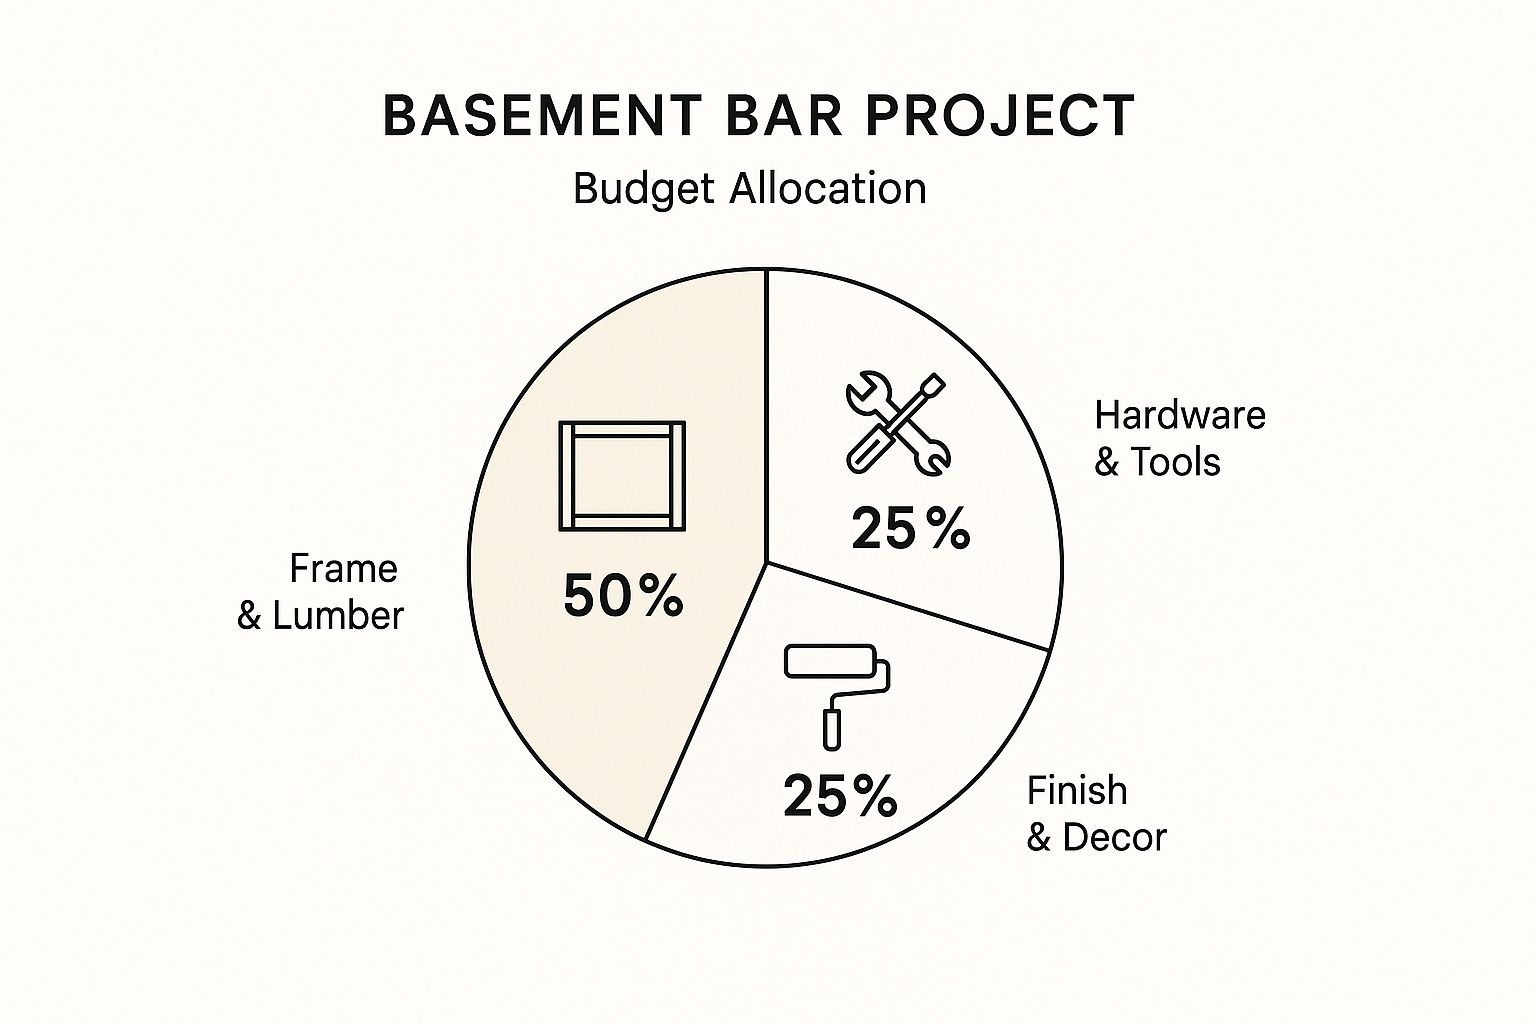
As you can see, the core structure eats up a huge chunk of the budget. This is exactly why making smart, cost-effective choices on your finishing materials—like the countertop and flooring—is critical to keeping your project on track without compromising on quality or style.
Putting in the Appliances and Final Finishes
Alright, the heavy lifting is done. Your bar has bones. Now comes the fun part—transforming it from a construction project into a spot you’ll actually want to hang out in. This is where you bring in the workhorses (your appliances) and all the design details that give the space its personality.
Getting the appliances right is make-or-break for any bar, but it’s especially true in a tight basement space. Mess this up, and you’re looking at overheating, appliances that die an early death, and a whole lot of headaches.
Getting Your Bar Appliances Installed
When you’re picking out a beverage fridge, kegerator, or ice maker, there's one word you have to live by: ventilation. These machines make things cold by pulling heat out, and that heat has to go somewhere. If it's trapped, the appliance will fight a losing battle, your energy bill will spike, and the compressor will burn itself out.
- Front-Venting vs. Rear-Venting: Pay really close attention to this when you're shopping. Front-venting units are your best friend for a built-in look. They breathe through a grille on the bottom front, meaning you can slide them right into a custom cabinet opening and have them sit flush.
- Rear-venting models are often cheaper and easier to find, but they need room to breathe. You absolutely have to plan for at least 3-5 inches of open space around the back and sides. This means cutting some serious holes in the back of your cabinetry to let the air move.
My two cents: Don't just rely on the empty space behind the unit. A small, hidden vent on the side of the cabinet or even cut into the countertop can be a lifesaver for air circulation. It’s a tiny detail that can add years to the life of your appliances.
Setting the Mood with the Right Lighting
Lighting is probably the single most powerful tool you have for creating an atmosphere. One harsh overhead light can make even the most expensive bar look like a sad little storage closet. What you want is a layered approach that creates depth, warmth, and makes the space genuinely usable.
I always think about lighting in three layers:
Ambient Light: This is your big-picture, overall light. Recessed can lights on a dimmer are perfect. You can crank them up when you're cleaning up a spill and then dim them way down for that cozy, late-night vibe.
Task Light: This is your "get stuff done" light. Under-cabinet LED strips are a total game-changer here. They light up your work surface so you can actually see the measurements on your jigger. Plus, they just look slick and professional.
Accent Light: This is where you add the drama. Think about some cool pendant lights hanging over the bar to create a focal point. Or maybe use a few small spotlights to show off that top-shelf whiskey or a piece of art on the wall.
When you combine all three, you have total control. You can go from a bright, energetic party space to a quiet, intimate lounge just by flipping a few switches.
Adding the Last Personal Touches
Now it’s time to pull it all together with the details that scream "you." A backsplash is a great place to start. Sure, it protects the wall from stray splashes of lime juice, but it's also a huge design statement. You could go with classic subway tile for a clean look, pressed tin for a vintage pub feel, or even mirrored tile to make the space feel bigger and a bit more glam.
Floating shelves are another one of my favorite additions. They give you a place for your glassware and bottles without closing the space in like bulky upper cabinets would. Use them to show off your cool coupes, your favorite gins, or other little decorative pieces.
Finally, the bar stools. Let's be honest, if they aren't comfortable, no one will stick around. Look for stools that have decent back support and a place to rest your feet. The height is also non-negotiable—for a standard 42-inch high bar top, you're looking for a seat height right around 30 inches. That gives people enough legroom to settle in for the long haul. Whether you choose swiveling metal stools or plush, upholstered chairs, the right seating is the final piece of the puzzle, welcoming everyone to pull up a seat and stay awhile.
Getting Your Basement Bar Questions Answered
Even the most detailed plan can't cover every little question that pops up when you're building a basement bar. Getting straight answers to these common queries is the best way to keep your project on track and avoid any nasty surprises down the road.
Let's dive into what homeowners ask most often.
What's the Real Cost of a Basement Bar?
This is always the first question, and the honest answer is that the price tag can swing wildly.
If you’re thinking of a simple, DIY dry bar—we're talking stock cabinets, a laminate countertop, and some open shelving—you could pull it off for as little as $1,500 to $3,000. You’re basically doing the assembly yourself with materials from a big-box store.
But the moment you introduce a sink and start talking "custom," the numbers change. A full-blown wet bar with professional plumbing, new electrical, custom cabinetry, and stone countertops will realistically land you in the $8,000 to $20,000+ range. Your biggest budget eaters will always be the custom millwork, countertop material, appliances, and what local contractors charge for labor. A line-item budget is your best defense against scope creep.
Do I Actually Need a Permit for This?
Almost certainly, yes. If your project is more involved than simply plugging in a pre-built bar unit, you’re going to need to talk to your local building department.
Here's a simple way to look at it:
- Probably No Permit: Assembling a furniture-style bar or a basic dry bar that doesn't touch existing walls, wiring, or plumbing.
- Definitely Need a Permit: Adding new electrical outlets, running water and drain lines for a sink, or framing new walls.
Make that call to your local authority before you swing a single hammer. Trying to skip this step is a classic mistake that can lead to fines, serious safety risks, and a massive headache when it comes time to sell your house.
Permits aren't just about bureaucracy. They ensure a licensed professional inspects the work. That inspector is there to verify your new wiring won't be a fire hazard and your plumbing is vented correctly so your basement doesn't smell like a sewer. It’s peace of mind, pure and simple.
What's the Best Flooring for a Basement Bar Area?
Down in a basement, your floor has to be tough. It needs to stand up to moisture, spills, and foot traffic. Choosing the wrong flooring here can be a costly, frustrating mistake.
Hands down, Luxury Vinyl Plank (LVP) is one of the best options out there. It's 100% waterproof, tough as nails, and looks convincingly like real wood or stone. For a basement environment, it’s the perfect marriage of practicality and great aesthetics.
Porcelain tile is another fantastic, totally waterproof choice that's a breeze to clean and can handle just about anything you throw at it. If you're leaning toward an industrial or modern look, you can't beat sealed concrete for its raw durability. Just stay far away from solid hardwood and traditional carpet—both are magnets for moisture damage and mold.
What are the Common Mistakes I Should Avoid?
I've seen a few common missteps turn a dream bar into a dysfunctional space. The top three are definitely bad lighting, ignoring moisture, and a poorly planned layout.
First, basements are naturally dark. You need a layered lighting plan—recessed lights, pendants over the bar, under-cabinet lighting—to make the space feel inviting. A single ceiling light just creates a cave. Second, you have to solve any dampness or humidity issues before you build anything. A brand-new bar can be ruined in months by mold and rot.
Lastly, think about how you'll actually use the bar. Where will the glasses be? Is the fridge easy to get to? Is there enough room to move comfortably behind the counter? Planning for real-world workflow is what makes a bar truly great and ensures you'll want to spend time there for years to come.
Ready to transform your basement without the guesswork? The expert team at Northpoint Construction specializes in creating stunning, functional basement finishes and custom home remodels. Visit us online to start your project today!